Herunterladen Inhalt Inhalt Diese Seite drucken

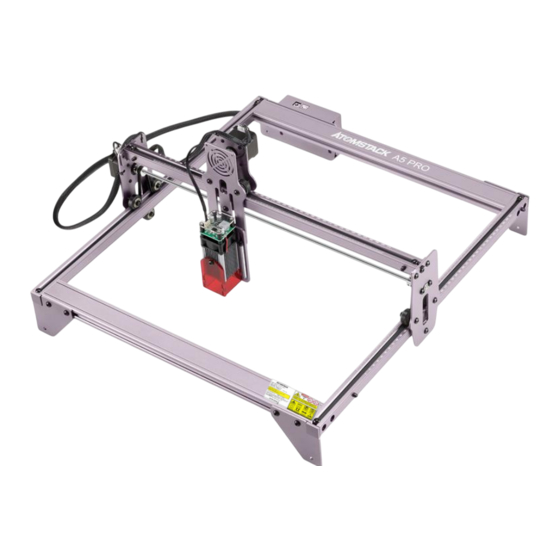
ATOMSTACK A5 Pro Laser Installationsanleitung

Vorschau ausblenden Andere Handbücher für A5 Pro Laser:

Werbung

Verfügbare Sprachen
  • DE

Verfügbare Sprachen

  • DEUTSCH, seite 17
English
Deutsche
Français
Italiano
Español

Werbung

Inhaltsverzeichnis
loading

Inhaltszusammenfassung für ATOMSTACK A5 Pro Laser

  • Seite 1  English Deutsche Français Italiano Español...
  • Seite 2 To update the driver of LightBurnu, log in to the website http://atomstack3d.com/a5 and click to download the ➢1. Atomstack currently supports LaserGRBL and lightburn driver, as shown below. LightBurn software. ➢Windows only supportsLaserGRBL software Here is the download link: http://lasergrbl.com/download/ LightBurn software is only supported on Mac.
  • Seite 3 Part 1: Security statement and warning Before Using the laser engraving, please read this safety guide carefully, it mentions situations that require special attention and includes warnings of unsafe practices that can cause damage to your property or even endanger your personal safety. 1.This product is a laser engraver system components, must be installed in other manufacturers of laser engraver for use.And the product belongs to Class 4 laser products, the laser system itself must meet the requirements of IEC 60825-1 latest version, otherwise the product is prohibited to be used.
  • Seite 4 AtomStack  may  establish. You understand and agree that AtomStack may not be able to provide you with the cause of the damage or accident and provide you with AtomStack's after-sale service unless you provide the original engraving or cutting files, engraving software configuration parameters used, operating system information, video of the engraving or cutting process, and operational steps prior to the occurrence of a problem or failure.
  • Seite 5 P a r t 3 : I n s t a l l a t i o n S t e p s S t e p 1 . I n s t a l l t h e c o n t o u r o f t h e e n g r a v i n g m a c h i n e S t e p 2 .
  • Seite 6 S t e p 1 Step1 Required components: Tick mark font direction Installation Manual: 1. Find the four large profiles in the picture above, place the four profiles as shown, and pay attention to the direction of the profiles. 2. Tighten the M5 screw in the shaft, and judge whether you have installed it correctly Cut side through the enlarged view details.
  • Seite 7 S t e p 2 Step2 Required components: Control box *1 Support gasket M5 screws*8 X-axis components*1 Installation Manual: 1.Push the X-axis component into the base frame in the direction shown in the figure. Adjust The guide rail passes through the eccentric nut appropriately.
  • Seite 8 S t e p 3 Type T Nut Lock Type T Nut *4 Synchronous belt *2 Profile end cover *4 screws*4 Step3 Required components: Installation Manual: Tighten the T nut 1. Install two synchronous belts as shown in the figure. and cut off the First tighten one end with a T-nut, then pass the other excess belt.
  • Seite 9 S t e p 4 Step4 Required components: Front protective Protective covers on both sides Laser head *1 cover *1 M5*14 Flat round head screw*1 M5*8 Countersunk screw Installation Manual: 1. Fix the laser head on the slider board with M5*8 countersunk head screws. The screws must be tightened.
  • Seite 10 S t e p 5 Step5 Required components: M3*14Screw*2 Y-axis limit column *2 Use a wrench to turn the eccentric nut to adjust the tightness of the guide wheel and the guide rail Installation Manual: 1. As shown in the figure, fix the Y-axis limit column with M3*14 screws on the left slide rail.
  • Seite 11 S t e p 6 I n s t a l l a t i o n o f t e r m i n a l b l o c k s a n d c a b l e b u n d l e Installation Manual: 1.
  • Seite 12 Part 4:Cautions L A S E R B E A M C A N D A M A G E E Y E S Laser Light can damage the human eyes and skin. Do not expose the eye or skin to laser light directly.
  • Seite 13 P a r t 5 : M a i n t e n a n c e i n s t r u c t i o n s a n d w a r n i n g T h i s p r o d u c t u s e s a h i g h l y i n t e g r a t e d d e s i g n a n d r e q u i r e s n o m a i n t e n a n c e . H o w e v e r , i f t h e l a s e r s y s t e m i n s t a l l e d w i t h t h i s p r o d u c t n e e d s t o b e r e p a i r e d o r t u n e d , p l e a s e : 1 .
  • Seite 14 P a r t 6 : P r e c a u t i o n s f o r c o m m o n p r o b l e m s o f e n g r a v i n g m a c h i n e F Q A 1 .
  • Seite 15: Customer Service

    Ø For detailed warranty policy,please visit / Barcode scanner our official website at: or any APP with www.atomstack3d.com scanner Ø For Laser Engraver technical support and service,please email: support@atomstack3d.com Manufacturer: Shenzhen AtomStack Technologies Co., Ltd. Address: AB301,New Chabridge Industrial Park,No.3,Baolong 6th Rd.,Longgang Dist,Shenzhen,Guangdong,CHINA 518116...
  • Seite 16 L a s e r g r a v u r m a s c h i n e I n s t a l l a t i o n A n w e i s u n g ...
  • Seite 17 ➢1.Atomstack unterstützt derzeit die Software Um den Treiber von LightBurnu zu aktualisieren, melden Sie LaserGRBL und LightBurn. sich auf der Website http://atomstack3d.com/a5 an und Windows unterstützt nur die LaserGRBL-Software. Hier klicken Sie auf, um den Lightburn-Treiber herunterzuladen ist der Download-Link: http://lasergrbl.com/download/...
  • Seite 18: Teil 1: Sicherheitserklärung Und Warnung

    Teil 1: Sicherheitserklärung und Warnung Bevor Sie die Lasergravur verwenden, lesen Sie diese Sicherheitsanleitung sorgfältig durch. Sie erwähnt Situationen, die besondere Aufmerksamkeit erfordern, und warnt vor unsicheren Praktiken, die Ihr Eigentum beschädigen oder sogar Ihre persönliche Sicherheit gefährden können. 1.Dieses Produkt ist eine Komponente eines Lasergraviersystems und muss zur Verwendung bei anderen Herstellern von Lasergraviergeräten installiert werden.
  • Seite 19: Teil 2: Haftungsausschluss Und Warnung

    Richtlinien zu, die AtomStack möglicherweise festlegt. Sie verstehen und stimmen zu, dass AtomStack Ihnen möglicherweise nicht die Ursache des Schadens oder Unfalls mitteilen und Ihnen den Kundendienst von AtomStack anbieten kann, es sei denn, Sie stellen die Original-Gravur- oder Schnittdateien, die verwendeten Gravur-Softwarekonfigurationsparameter, Betriebssysteminformationen usw.
  • Seite 20 Te i l 3 : I n s t a l l a t i o n s s c h r i t t e S c h r i t t 1 . I n s t a l l i e r e n S i e d i e K o n t u r d e r G r a v i e r m a s c h i n e S c h r i t t 2 .
  • Seite 21: Schritt 1 Erforderliche Komponenten

    S c h r i t t 1 Schritt 1 Erforderliche Komponenten : Achten auf die Schriftrichtung der Häkchen Installationsmethode: 1. Suchen Sie zuerst die vier großen Profile im obigen Bild, platzieren Sie die vier Profile wie gezeigt und achten Sie auf die Richtung der Profile.
  • Seite 22 S c h r i t t 2 Schritt 2 Erforderliche Komponenten : Kontrollkasten*1 M5-Schrauben*8 Stützfüße X-Achsen-Komponent *1 Installationsanleitung: 1. Schieben Sie die X-Achsen-Komponent in Die Führungsschiene verläuft durch die Mitte der 3 Rollen. Wenn der in der Abbildung gezeigten Richtung in den sie während des Einbaus zu fest ist, lösen Sie den Abstand Rahmen der Basis.
  • Seite 23 S c h r i t t 3 Konterschraube Profilendkappe*4 mit T-Mutter T-Muttern*4 Synchronriemen*2 Step3 Komponent: Installationsanleitung: T-Muttern festziehen, die 1. Installieren Sie zwei Synchronriemen wie in der Abbildung überschüssige Riemen gezeigt (ziehen Sie zuerst ein Ende mit einer T-Mutter fest, abschneiden führen Sie dann das andere Ende durch die Rolle an der X- Achsen-Komponent und ziehen Sie schließlich das andere...
  • Seite 24 Schritt 4 Erforderliche Komponenten: S c h r i t t 4 Vordere Beidseitige Schutzabdeckung Laserkopf Schutzabdeckung *2 M5*14 Flache Rundkopfschraube* M5*8 Senkschrauben Installationsanleitung: 1. Befestigen Sie den Laserkopf mit den Senkkopfschrauben M5 * 8 auf der Gleitplatte. Die Schrauben müssen festgezogen werden. 2.
  • Seite 25 S c h r i t t 5 Schritt 5 Erforderliche Komponenten: Y-Achsen- M3*14Schrauben*2 Begrenzungssäule*2 Ziehen Sie die Exzentermutter mit einem Schraubenschlüssel an, um die Dichtheit des Führungsrads und der Führungsschiene einzustellen. Installationsanleitung: 1. Befestigen Sie die Y-Achsen-Begrenzungssäule wie in der Abbildung gezeigt mit M3 * 14-Schrauben an der linken Gleitschiene.
  • Seite 26 S c h r i t t 6 I n s t a l l i e r e n S i e d i e K l e m m e n b l ö c k e u n d b ü n d e l n S i e d i e K a b e l Installationsanleitung: 1.
  • Seite 27: Teil 4: Vorsichtsmaßnahmen

    Teil 4: Vorsichtsmaßnahmen LASERSTRAHL KANN AUGEN BESCHÄDIGEN Laserlicht kann die menschlichen Augen und die Haut schädigen. Setzen Sie das Auge oder die Haut nicht direkt Laserlicht aus. Dieses Laserprodukt hat eine optische Linse und sendet einen kollimierten Laserstrahl aus. Das direkte und reflektierte Licht dieses Produkts ist sehr schädlich, da es sich über eine lange Strecke ausbreiten kann und gleichzeitig eine hohe optische Dichte beibehält.
  • Seite 28 Te i l 5 : Wa r t u n g s a n w e i s u n g e n u n d Wa r n u n g D i e s e s P r o d u k t v e r f ü g t ü b e r e i n h o c h i n t e g r i e r t e s D e s i g n u n d i s t w a r t u n g s f r e i . W e n n d a s m i t d i e s e m P r o d u k t i n s t a l l i e r t e L a s e r s y s t e m j e d o c h r e p a r i e r t o d e r e i n g e s t e l l t w e r d e n m u s s , g e h e n S i e b i t t e w i e f o l g t v o r : 1 .
  • Seite 29 Te i l 6 : V o r s i c h t s m a ß n a h m e n b e i h ä u f i g e n P r o b l e m e n d e r G r a v u r m a s c h i n e F Q A 1 .
  • Seite 30: Kundendienst

    /Barcodelesegerät oder eine beliebige APP unter: mit Scanner www.atomstack3d.com Ø Für technischen Support und Service von Laser Engraver senden Sie bitte eine E-Mail an: support@atomstack3d.com Hersteller: Shenzhen AtomStack Technologies Co., Ltd. AdressE: AB301,New Chabridge Industrial Park,No.3,Baolong 6th Rd.,Longgang Dist,Shenzhen,Guangdong,CHINA 518116...
  • Seite 31  English Deutsche Français Italiano Español...
  • Seite 32 ➢Atomstack prend actuellement en charge les logiciels Pour mettre à jour le pilote LightBurnu, connectez-vous au LaserGRBL et LightBurn. site Web http://atomstack3d.com/a5 et cliquez pour ➢Windows ne prend en charge que le logiciel LaserGRBL télécharger le pilote Lightburn comme indiqué ci-dessous Voici le lien de téléchargement:...
  • Seite 33 Partie 1 : Déclaration de sécurité et avertissement Avant d'utiliser la gravure laser, veuillez lire attentivement ce guide de sécurité, il mentionne les situations qui nécessitent une attention particulière et inclut des avertissements de pratiques dangereuses qui peuvent endommager votre propriété ou même mettre en danger votre sécurité...
  • Seite 34 établir. Vous comprenez et acceptez qu'AtomStack peut ne pas être en mesure de vous fournir la cause du dommage ou de l'accident et de vous fournir le service après-vente d'AtomStack à...
  • Seite 35 P a r t i e 3 : É t a p e s d ' i n s t a l l a t i o n É t a p e 1 : i n s t a l l e z l e c o n t o u r d e l a m a c h i n e à g r a v e r É...
  • Seite 36 É t a p e 1 Étape 1 Composants requis: Cochez la direction de la police Installation Manuel: 1. Trouvez les quatre grands profils dans l'image ci-dessus, placez les quatre profils comme indiqué et faites attention à la direction des profils. 2.
  • Seite 37 É t a p e 2 Étape 2 Composants requis: Joint de Boîtier de Vis M5 * 8 support * 3 commande *1 Composants de l'axe X * 1 Le rail de guidage passe par le milieu Installation Manuel: des 3 rouleaux. Relâchez la distance 1.Poussez le composant de l'axe X dans le cadre entre les roues de guidage supérieure de base dans la direction indiquée sur la figure.
  • Seite 38 É t a p e 3 Couvercle Écrou de type Vis de blocage Courroie synchrone * d'écrou de type T*4 d'extrémité de profil T *4 Étape 3 Composants requis: Installation Manuel: Serrez l'écrou en T 1. Installez deux courroies synchrones comme indiqué sur la et coupez figure.
  • Seite 39 É t a p e 4 Étape 4 Composants requis: Capot de protection Housses de protection Tête laser*1 avant*1 des deux côtés * 2 M5 * 14 Vis à tête ronde plate * 1 Vis à tête fraisée M5 * 8 * Installation Manuel: 1.
  • Seite 40 É t a p e 5 Étape 5 Composants requis: Colonne de limite M3*14 Vis*2 de l'axe Y*2 Utilisez une clé pour tourner l'écrou excentrique pour régler le serrage de la roue de guidage et du rail de guidage. Installation Manual: 1.
  • Seite 41 É t a p e 6 I n s t a l l a t i o n d e s b o r n i e r s e t d u f a i s c e a u d e c â...
  • Seite 42 Partie 4 : Précautions LE FAISCEAU LASER PEUT ENDOMMAGER LES YEUX La lumière laser peut endommager les yeux et la peau humains. N'exposez pas les yeux ou la peau directement à la lumière laser. Ce produit laser a une lentille optique et émet un faisceau laser collimaté.
  • Seite 43 P a r t i e 5 : I n s t r u c t i o n s d ' e n t r e t i e n e t a v e r t i s s e m e n t C e p r o d u i t u t i l i s e u n e c o n c e p t i o n h a u t e m e n t i n t é...
  • Seite 44 P a r t i e 6 : P r é c a u t i o n s p o u r l e s p r o b l è m e s c o u r a n t s a v e c l a m a c h i n e d e g r a v u r e F Q A 1 .
  • Seite 45: Service Clients

    Ø Pour le support technique et le service de machine de gravure laser, veuillez envoyer un courriel à: support@atomstack3d.com Fabricant: Shenzhen AtomStack Technologies Co., Ltd. Adresse: AB301, nouveau parc industriel de Chabridge, n ° 3, Baolong 6th Rd., Longgang Dist, Shenzhen, Guangdong, CHINE 518116...
  • Seite 46  English Deutsche Français Italiano Español...
  • Seite 47 ➢Atomstack attualmente supporta i software Per aggiornare il driver LightBurnu, collegarsi al sito Web LaserGRBL e LightBurn. http://atomstack3d.com/a5 e fare clic per scaricare il ➢Windows supporta solo il software LaserGRBL driver Lightburn come mostrato di seguito Ecco il link per il download: http://lasergrbl.com/download/...
  • Seite 48 Parte 1: statement Dichiarazione di sicurezza e avvertenza Prima di utilizzare l'incisione laser, leggere attentamente questa guida alla sicurezza, menziona situazioni che richiedono un'attenzione speciale e include avvertenze di pratiche non sicure che possono causare danni alla proprietà o addirittura mettere in pericolo la sicurezza personale.
  • Seite 49 Comprendi e accetti che AtomStack potrebbe non essere in grado di fornirti la causa del danno o dell'incidente e fornirti il ​ ​ s ervizio post-vendita di AtomStack a meno che tu non fornisca i file di incisione o taglio originali, i parametri di configurazione del software di incisione utilizzati, le informazioni sul sistema operativo, video del processo di incisione o taglio e passaggi operativi prima del verificarsi di un problema o guasto.
  • Seite 50 P a r t e 3 : F a s i d i i n s t a l l a z i o n e S t e p 1 . I n s t a l l i l c o n t o r n o d e l l a m a c c h i n a p e r i n c i s i o n e S t e p 2 .
  • Seite 51 P a s s o 1 Componenti necessari: Presta attenzione alla direzione dei segni di spunta. Metodo di installazione: 1. Posizionare i quattro profili come mostrato in figura e prestare attenzione alla direzione dei profili. 2. Posizionare i profili ingrandendo i dettagli del disegno.
  • Seite 52 P a s s o 2 Componenti necessari: Piedi di Scatola di Bulloni M5*8 sostegno controllo*1 Far passare il binario di guida Montaggio su albero X*1 attraverso il centro dei 3 rulli. Se non è Metodo di installazione: possibile farlo passare agevolmente 1.
  • Seite 53 P a s s o 3 Vite di sicurezza Tappo terminale T dado*4 dado a T.*4 Cinghia di del profilo*4 distribuzione*2 Componenti necessari: Metodo di installazione: Stringere il T dado e 1. Installare le cinghie di distribuzione: serrare prima tagliare la cinghia in eccesso.
  • Seite 54 P a s s o 4 Componenti necessari: Cover protettiva Copertina di Testa laser*1 frontale*1 protezione laterale*2 M5*14 Vite a testa tonda piatta *1 M5*8 Vite a testa svasata*2 Metodo di installazione: 1. Fissare saldamente la testa del laser sulla piastra scorrevole con viti a testa svasata M5 * 8.
  • Seite 55: Metodo Di Installazione

    P a s s o 5 Componenti necessari: Colonna limite asse M3*14 Bulloni *2 Stringere il dado eccentrico con una chiave per regolare la tensione del rullo e della guida. Metodo di installazione: 1. Fissare la colonna limite dell'asse Y con viti M3 * 14 sulla guida di scorrimento sinistra.
  • Seite 56 P a s o 6 : I n s t a l l a z i o n e d i m o r s e t t i e r e e f a s c i d i c a v i Metodo di installazione: 1.
  • Seite 57 Parte 4 : Precauzioni IL RAGGIO LASER PU DANNEGGIARE GLI OCCHI La luce laser può danneggiare la pelle e gli occhi umani. Non esporre direttamente gli occhi o la pelle alla luce laser. Questo prodotto laser ha una lente ottica ed emette un raggio laser collimato. La luce di questo prodotto, sia diretta che riflessa, è...
  • Seite 58 P a r t e 5 : I s t r u z i o n i e a v v e r t e n z e p e r l a m a n u t e n z i o n e Q u e s t o p r o d o t t o u t i l i z z a u n d e s i g n a l t a m e n t e i n t e g r a t o e n o n r i c h i e d e m a n u t e n z i o n e .
  • Seite 59 P a r t e 6 : P r e c a u z i o n i p e r p r o b l e m i c o m u n i c o n l a m a c c h i n a p e r i n c i s i o n e F Q A 1 .
  • Seite 60: Assistenza Clienti

    /Scanner di codici a barre O qualsiasi APP con scanner Ø Per ampliare e conoscere in dettaglio i termini della garanzia, consultare il nostro sito web: www.atomstack3d.com Creatore: Shenzhen AtomStack Technologies Co., Ltd. Indirizzo: AB301,New Chabridge Industrial Park,No.3,Baolong 6th Rd., Longgang Dist,Shenzhen,Guangdong,CHINA 518116...
  • Seite 61  English Deutsche Français Italiano Español...
  • Seite 62 ➢Atomstack actualmente es compatible con el software Para actualizar el controlador LightBurnu, conéctese al sitio web LaserGRBL y LightBurn. http://atomstack3d.com/a5 y haga clic para descargar el ➢Windows solo es compatible con el software controlador Lightburn, como se muestra a continuación.
  • Seite 63 Parte 1: declaración de seguridad y advertencia Antes de utilizar el grabado láser, lea atentamente esta guía de seguridad, menciona situaciones que requieren atención especial e incluye advertencias de prácticas inseguras que pueden causar daños a su propiedad o incluso poner en peligro su seguridad personal. 1.Este producto es un componente del sistema de grabado láser, debe instalarse en otros fabricantes de grabadores láser para su uso.Y el producto pertenece a productos láser de Clase 4, el sistema láser en sí...
  • Seite 64 AtomStack no se hace responsable de ninguna y todas las pérdidas que surjan del hecho de que el usuario no utilice el producto de acuerdo con este manual.
  • Seite 65 P a r t e 3 : P a s o s d e i n s t a l a c i ó n P a s o 1 . I n s t a l a r e l c o n t o r n o d e l a m á q u i n a d e g r a b a d o . P a s o 2 .
  • Seite 66 P a s o 1 Componentes necesarios: Preste atención a la dirección de las marcas graduación. Método de instalacion: 1. Coloque los cuatro perfiles como se muestra en la figura y preste atención a la dirección de los perfiles. 2. Coloque los perfiles haciendo zoom en los detalles del dibujo.
  • Seite 67 P a s o 2 Componenti necessari: Pies de Caja de Tornillos control*1 M5*8 apoyo Montaje del eje X*1 Pase el riel guía a través del centro de los 3 rodillos. Si no puede pasarlo Notas de instalación: suavemente durante la instalación, 1.
  • Seite 68 P a s o 3 Tornillo de Tapa de seguridad con extremo de Tuerca en T*4 Correa de tuerca en T*4 perfil*4 distribución*2 Componentes necesarios: Notas de instalación: Apriete la tuerca en T 1. Instale correas de distribución: primero apriete un y corte el exceso de extremo con una tuerca en T, luego pase el otro correa.
  • Seite 69 P a s o 4 Componentes necesarios: Cubierta protectora Cubierta de Cabezal laser*1 frontal*1 protección lateral*2 M5*14 Tornillo de cabeza redonda plana *1 M5*8 Tornillo de cabeza avellanada*2 Notas de instalación: 1. Fije firmemente el cabezal láser en la placa deslizante con M5*8 tornillos avellanados.
  • Seite 70 P a s o 5 Componentes necesarios: Columna de límite M3*14 Tornillos*2 del eje Y*2 Apriete la tuerca excéntrica con una llave para ajustar la tensión del rodillo y el riel guía. Instrucciones de instalación: 1. Fije la columna de límite del eje Y con tornillos M3 * 14 en el riel deslizante izquierdo.
  • Seite 71 P a s o 6 : I n s t a l a c i ó n d e b l o q u e s d e t e r m i n a l e s y p a q u e t e s d e c a b l e s Instrucciones de instalación: 1.
  • Seite 72 Parte 4: Precauciones EL RAYO LÁSER PUEDE DAÑAR LOS OJOS La luz láser puede dañar la piel y los ojos humanos. No exponga los ojos o la piel directamente a la luz láser. Este producto láser tiene una lente óptica y emite un rayo láser colimado.
  • Seite 73 P a r t e 5 : i n s t r u c c i o n e s d e m a n t e n i m i e n t o y a d v e r t e n c i a E s t e p r o d u c t o u t i l i z a u n d i s e ñ...
  • Seite 74 P a r t e 6 : P r e c a u c i o n e s p a r a p r o b l e m a s c o m u n e s c o n l a m á q u i n a d e g r a b a d o F Q A 1 .
  • Seite 75: Servicio Al Cliente

    Ø Para ampliar y conocer en detalle los términos de la garantía consulte nuestra página web: www.atomstack3d.com Fabricante: Shenzhen AtomStack Technologies Co., Ltd. Dirección: AB301, New Chabridge Industrial Park, No. 3, Baolong 6th Rd., Longgang Dist, Shenzhen, Guangdong, CHINA 518116...

Inhaltsverzeichnis