Herunterladen Inhalt Inhalt Diese Seite drucken
reer 5006 SCOPI Bedienungsanleitung

reer 5006 SCOPI Bedienungsanleitung

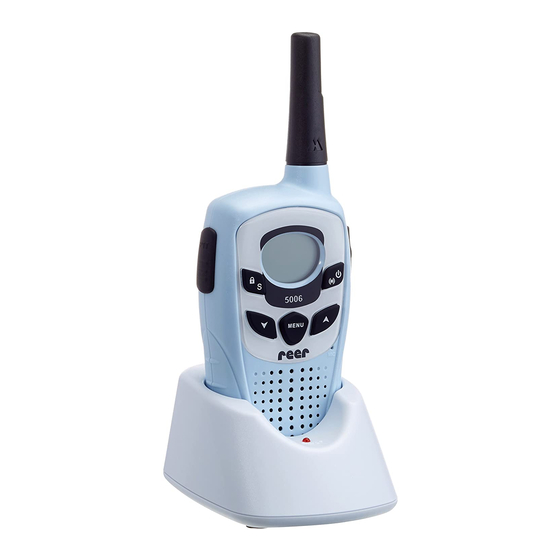
Zuverlässiges und störungsfreies babyphone und walkie-talkie in einem. sendet sofort durch sensibles mikrofon bei geräuschen des kindes
Vorschau ausblenden Andere Handbücher für 5006 SCOPI:

Werbung

Verfügbare Sprachen
  • DE

Verfügbare Sprachen

  • DEUTSCH, seite 1
reer 5006 SCOPI
Bedienungsanleitung
Deutsch / English / Français / Espanol / Italiano / Nederlands

Werbung

Inhaltsverzeichnis
loading

Inhaltszusammenfassung für reer 5006 SCOPI

  • Seite 1 5006 SCOPI Bedienungsanleitung Deutsch / English / Français / Espanol / Italiano / Nederlands...
  • Seite 2 Einleitung Die Anleitung zu diesem Gerät besteht aus zwei Teilen. Im ersten Teil finden Sie eine Kurzanleitung, wie Sie Ihre Geräte schnell für die Babyüberwachung einrichten können, im zweiten Teil finden Sie Informationen über die weiteren Funktionen Ihrer Geräte als normale PMR 446 Handfunkgeräte, die Sie oder Ihre Kinder vielleicht später benutzen möchten.
  • Seite 3 Das Display und seine Symbole Bedeutung der Symbole und Begriffe Empfang: Wiedergabe aus Lautsprecher Senden: Sendetaste gedrückt oder Gerät sendet über Sprach- oder Geräuschsteuerung SCAN Suchlauf: Gerät sucht alle Kanäle nacheinander ab Sprach- und Geräuscherkennung: Gerät sendet nur nach Erkennung von Geräuschen, ohne Drücken der Sprechtaste Tasten-Bestätigungstöne sind eingeschaltet...
  • Seite 4 Kapitel 1: Babyüberwachung Gerät komplettieren - Akku einsetzen Zuerst nehmen Sie bitte den Gürtelclip ab (an der Feder ziehen und Clip nach oben schieben) und öffnen Sie den Batteriedeckel (Klammer nach unten ausrasten lassen und Deckel abnehmen). Setzen Sie in jedes Gerät je einen der mitgelieferten Akkublocks oder jeweils 4 einzelne Akkuzellen ein...
  • Seite 5 Schäden, bis zum Brand oder Explodieren einzelner Zellen führen! Mischen Sie bitte auch niemals aufladbare mit nicht aufladbaren Batterien! Bitte öffnen Sie auch niemals einen Akkublock! Die richtige Polung für Einzelbatterien finden Sie an den Markierungen im Batteriefach. Einrichten zur Babyüberwachung Hatten Sie Ihre Geräte zwischenzeitlich als Funkhandy genutzt, dann folgen Sie diesen Schritten, um die Geräte wieder für die Babyüberwachung einzurichten.
  • Seite 6 Bedeutung der Kanalnummer Die Nummer des Übertragungskanals muss bei beiden Geräten gleich eingestellt sein. Es gibt 9 mögliche Einstellungen, beim Babygerät und beim Eltern- Gerät Hinter den Ziffern 1 bis 9 verbergen sich ab Werk programmierte Kombinationen zwischen PMR 446 Funkkanal und einer Codierung (CTCSS). Die Ziffern gelten nur für diesen Gerätetyp- mit anderen Typen von Babymonitoren ist keine Verbindung möglich und auch nicht gewünscht, denn Sie wollen ja möglichst nur mit Ihrem Babygerät Kontakt haben!
  • Seite 7 Solange das Baby ruhig ist, können Sie übrigens jederzeit vom Elterngerät zu Ihrem Baby sprechen (sofern die Lautstärke beim Babygerät nicht auf 00 eingestellt wurde) Automatische Reichweitenüberwachung automatische Reichweitenüberwachung nach Einrichten Babyüberwachung schon aktiviert und funktioniert ohne weitere Bedienschritte! Die Reichweitenüberwachung überprüft automatisch etwa alle 60 Sekunden, ob Baby- und Elterngerät noch in Verbindung stehen.
  • Seite 8 muss die automatische Kontrolle entweder auf oder stehen (steht das Elterngerät auf OF, kann man auch keinen manuellen Test auslösen) Drücken Sie auf die Kontrolltaste und warten Sie einige Sekunden. Hat das Babygerät Ihre Anfrage bekommen, antwortet es Ihrem Elterngerät und dieses spielt dann eine Melodie ab.
  • Seite 9 Kapitel 2 : Erweiterte Funktionen und Verwendung als PMR 446 Funkhandy Im Lieferzustand sind beide Geräte als Baby- und Elterngerät vorprogrammiert. Um sie als Funkhandy zu nutzen drücken Sie 2x die Menü Taste und wählen dann of. Sie können als Funksprechgeräte für die verschiedensten Zwecke benutzt werden: Als Sprechanlage für ältere Kinder, bei Wanderungen, Ausflügen, Veranstaltungen, bei Arbeiten im und am Haus, wo eine Verständigung notwendig ist, und bei vielen anderen Einsatzmöglichkeiten.
  • Seite 10 Beispiel bedeutet: Kanal 5 und CTCSS Subcode 10 sind eingestellt. Damit die Bedienung mit Kanälen und Subcodes etwas einfacher wird, haben wir bei Ihrem Gerät noch zusätzliche Kanalkombinationen gleich vorprogrammiert:. Das sind die Kanalnummern 9 bis 48. Dies sind alles Kombinationen aus einem der 8 erlaubten PMR Kanäle mit verschiedenen CTCSS Codes, sodass Sie sich als Benutzer keine Gedanken über Codes und Kanäle machen müssen, wenn Sie die Nummern 9 bis 48 benutzen.
  • Seite 11 Hintergrundbeleuchtung Die Hintergrundbeleuchtung schaltet sich automatisch ein, sobald eine Taste betätigt wird und schaltet sich nach ca. 5 Sekunden automatisch wieder aus. Auch bei Empfang (Geräuschübertragung) schaltet sich die Hintergrundbeleuchtung ein! CTCSS-Codes einstellen Die zusätzlich möglichen CTCSS Codes dienen dazu, in einem Funknetz verhindern, dass Sie auch fremde Stationen, die zufällig auf dem gleichen Kanal arbeiten, mithören müssen.
  • Seite 12 Menüpunkt VOX - Freisprechen Dies ist die Einstellung für die Empfindlichkeit beim Freisprechen. Hier erkennt das Gerät, wenn Sie sprechen- Sie brauchen keine Sendetaste mehr zu drücken. Praktisch, wenn Sie keine Hand frei haben, aber möglicherweise problematisch, wenn Sie Motorradfahren oder das Gerät in einer lauten Umgebung benutzen. Die Freisprecheinrichtung könnte dann auch auf Nebengeräusche ansprechen, und Ihr Gerät sendet und stört möglicherweise den Funkkanal, ohne dass Sie es merken., Stufen 1 bis 4 entsprechen der Ansprechempfindlichkeit bei der Babyüberwachung:...
  • Seite 13 Reichweitenkontrolle bei PMR 446 Die Reichweitenkontrolle funktioniert auch beim PMR 446 Mode: Die Auswahl besteht zwischen AU (Automatik ein), Pb (nur manueller Reichweitentest) oder OF für abgeschaltete Reichweitenkontrolle. Ob die Reichweitenkontrolle aktiviert ist oder nicht, entscheidet ausschließlich das Gerät, welches die Reichweite kontrollieren möchte. Hat ein entferntes Gerät keine Reichweitenkontrolle aktiviert, dann können Sie trotzdem von Ihrem Gerät aus die Reichweitenkontrolle aktivieren.
  • Seite 14 Tipp zur Fehlerbehebung - Vielleicht ist nur eine Einstellung verstellt? Nehmen Sie zuerst eine der Batterien oder den Akku aus dem Gerät und warten Sie ca. 2 Minuten. Dann setzen Sie die Batterien wieder ein. Das Gerät müsste nun wieder mit der Werkseinstellung starten und Kanal 1 im PMR 446 Mode anzeigen.
  • Seite 15 Technische Daten  Frequenzbereich: 446.00625 – 446.09375 MHz (PMR 446)  Kanalraster 12,5 KHz  8 Kanäle  Je 9 voreingestellte Babyüberwachungs- und Elternkanalkombinationen  38 CTCSS Kodierungstöne  Sendeleistung: 500 mW ERP  Reichweite bis zu 5 km unter Freifeldbedingungen ...
  • Seite 16 Technische Daten können ohne weitere Vorankündigung geändert werden © August 2015 Alan Electronics GmbH Deutsch...
  • Seite 17 5006 SCOPI Manual English...
  • Seite 18 Introduction The User Manual for this unit consists of two parts. The first part contains a Quick Start Manual for use as a baby monitor; the second part informs about advanced functions as normal PMR 446 transceiver for you or your children to enjoy at a later stage.
  • Seite 19 Display and Icons Icons and Terms Reception: listen via the speaker Transmission: PTT button is pressed or unit transmits in VOX mode SCAN Auto scan: unit scans channels one by one Active VOX mode: unit transmits automatically (without pressing PTT) when detecting sounds Key tones are activated Out-of-range function is activated (automatically AU, manually Pb, or both)
  • Seite 20 Chapter 1: Baby Monitor Function Prepare Unit – Insert Battery Remove the belt clip (pull spring and remove to top) and open the battery compartment. Insert one of the supplied battery packs (or 4 x AAA single NiMH cells) in each unit (packed separately). Carefully pay attention to insert the single cells in the direction indicated inside the battery housing.
  • Seite 21 Prepare As Baby Monitor In case you have used the radio in PMR 446 mode please follow these steps in order to setup the devices for baby monitoring.  Turn one unit on (press the On/Off button for 3 sec). ...
  • Seite 22: Channel Number

    Channel Number The channel number must be the same for both units. There are 9 possible settings, for the baby unit and for the parent unit 1 to 9 stands for channel combinations programmed ex factory between PMR 446 radio channels and CTCSS encoding.
  • Seite 23 Automatic Out-Of-Range Function The automatic out-of-range function is automatically activated in babysitter mode and needs no further settings! The automatic out-of-range function automatically checks every 60 seconds if baby and parent units are communicating. The parent unit sends a “search pulse”, which is answered by the baby unit.
  • Seite 24: External Microphone

    External Microphone For the baby monitor function we supply an external microphone (type BM 1). We recommend it to use always in case of baby monitoring. This has the following advantages:  It is more sensitive than the build-in microphone and it responds to a greater distance.
  • Seite 25: Select Channel

    Toggle Between Baby Monitor And Transceiver Modes You can easily switch to transceiver mode in case your radios were set to baby monitor mode:  Turn the units on.  Press the MENU button twice.  b or P (according to previous setting) flashes on the display. ...
  • Seite 26: Channel Scan

    Channel Scan Briefly press the button to automatically scan all channels for activity.  Press the button to start scanning; press again to stop scanning.  Scanning stops after a signal is detected and you listen to the channel for 8 seconds. Press the PTT button to stop scanning and to respond.
  • Seite 27 Cycle Through Other Menu Items In Sequence Access all menu items the same way.  Press the MENU button once or several times.  Each time the setting flashes (until now we introduced channel setting, baby mode parent PMR446 setting and CTCSS setting). ...
  • Seite 28 Roger Beep On/Off The radio sends a tone sequence as confirmation after releasing the PTT button (as in space travel this is called the “roger beep”). The menu item is displayed; select Key Tones On/Off A short beep tone is audible after pressing a button. Deactivate the key tones with this menu item.
  • Seite 29 Important Information We are legally bound to include disposal and warranty information as well as EU declaration of conformity with the use instructions in different countries for every unit. Please find this information on the following pages. 2-Year Warranty from Date of Purchase The manufacturer/retailer guarantees this product for two years from date of purchase.
  • Seite 30 Troubleshooting - Reset Remove the batteries and wait 2 minutes before inserting them again. The unit is reset to default settings and displays channel 1 in PMR 446 mode. If this is not the case, please check if the batteries are exhausted. Sometimes weak batteries can cause problems, such as being able to receive but not to transmit.
  • Seite 31 CTCSS Code Table Freq. Freq. Freq. Freq. 67.0 97.4 136.5 192.8 71.9 100.0 141.3 203.5 74.4 103.5 146.2 210.7 77.0 107.2 151.4 218.1 79.7 110.9 156.7 225.7 82.5 114.8 162.2 233.6 85.4 118.8 167.9 241.8 88.5 123.0 173.8 250.3 91.5 127.3 179.9 94.8...
  • Seite 32 Technical data can be subject of changes without prior announcement. © Alan Electronics GmbH, August 2015 English...
  • Seite 33 5006 SCOPI Manuel de l'utilisateur Français...
  • Seite 34 Introduction Le manuel de l'utilisateur est composé de deux parties. La première partie comporte un guide de mise en route rapide qui décrit son utilisation comme appareil pour surveillance de bébé ; la seconde partie donne des informations sur les fonctions avancées et décrit son utilisation comme PMR 446, un émetteur-récepteur radio normal (talkie-walkie) avec lequel vos enfants vont s'amuser dans un âge plus avancé.
  • Seite 35 Ecran et icônes Signification des icônes Réception : écoute via le haut-parleur Transmission : touche PTT appuyée ou l'unité transmet en mode VOX SCAN Recherche auto : l'unité recherche les canaux un par un Active le mode VOX : l'unité transmet automatiquement lorsqu'elle détecte une voix (sans appuyer sur PTT) Tonalité...
  • Seite 36 Chapitre 1 : Fonction surveillance bébé Préparation – installation des piles Retirez la pince pour ceinture (tirez le ressort et dégagez vers le haut) et ouvrez le compartiment de piles. Installez un bloc d'alimentation fourni (ou 4 x pile AAA NiMH) dans chaque unité (emballé séparément).
  • Seite 37 Préparer l'unité pour surveillance de bébé Si vous avez utilisé votre émetteur/récepteur en mode PMR 446, exécutez les instructions suivantes pour configurer les unités en mode surveillance bébé.  Allumez une unité (appuyez sur la touche On/Off pendant 3 sec). ...
  • Seite 38 Numéro de canal Le numéro de canal doit être le même sur les deux unités. Il y a 9 numéros possibles, pour l'unité bébé de à et pour l'unité parents de à 1 à 9 se réfère aux combinaisons programmées à la sortie d'usine entre les canaux radio du PMR 446 et le codage CTCSS.
  • Seite 39 Fonction hors portée automatique La Fonction hors portée automatique est activée automatiquement dans le mode babysitter et n'a pas besoin d'autres réglages ! La Fonction hors portée automatique contrôle automatiquement chaque 60 secondes si les unités bébé et parents sont en train de communiquer. L'unité parents envoie une “Recherche d'impulsion”, à...
  • Seite 40: Microphone Externe

    Microphone externe Nous avons fourni un microphone externe pour la surveillance bébé (type BM 1). Ce dernier offre les avantages suivants :  Il est plus sensible que le microphone intégré et répond à une distance plus grande.  Il permet de prolonger la distance entre l'émetteur-récepteur et le lit du bébé – le rayonnement HF et grandement réduit ! ...
  • Seite 41 Touche PTT pour appeler  Appuyez deux fois brièvement sur la touche PTT dans une succession rapide.  L'unité transmet une mélodie d'appel à toutes les autres unités sur ce canal qui sont à portée. Basculer entre le mode surveillance bébé et émetteur-récepteur Vous pouvez facilement passer en mode émetteur-récepteur si vos radios sont réglées sur le mode surveillance bébé...
  • Seite 42  Appuyez brièvement sur la touche MENU. Le numéro de canal réglé se met à clignoter.  Utilisez pour sélectionner un autre numéro.  Appuyez brièvement sur la touche PTT pour confirmer, ou simplement patientez quelques secondes. Recherche de canaux Appuyez brièvement sur la touche pour effectuer une recherche automatique de tous les canaux en activité.
  • Seite 43 des tonalités à basses fréquences inaudibles mixées avec le signal du microphone. A la réception l'unité vérifie si de telles tonalités existent et n'active le haut-parleur qu'après avoir détecté la tonalité correcte. Pour les canaux 1 à 8 les codes CTCSS peuvent être réglés manuellement : ...
  • Seite 44 Activer/désactiver le RX - Squelch (silencieux) Vous pouvez désactiver le silencieux automatique et régler l'unité de manière à recevoir continuellement tout signal sur le canal. Ceci est utile à la limite de la portée, si la communication est interrompue ou si vous voulez juste écouter ce qui se passe sur le canal.
  • Seite 45 Elément du menu mode bébé Ces éléments du menu sont affichés tels qu'ils sont décrits dans le chapitre “mode bébé”. En mode bébé l'icône est affiché, sélectionnez Contrôle de hors de portée en mode PMR 446 Le contrôle de hors de portée est valable également en mode PMR 446 Choisissez AU (activé...
  • Seite 46 Information importante Nous sommes légalement tenus d'inclure les dispositions et les informations de garantie et la déclaration de conformité de l'UE avec le mode d'emploi de chaque unité, et ce dans la langue de chaque pays. Veuillez trouvez ces informations dans les pages suivantes. Deux ans de garantie à...
  • Seite 47 Tableau des fréquences PMR 446 Canal Fréquence (MHz) Canal Fréquence (MHz) 446,00625 446,05625 446,01875 446,06875 Canal Canal 446,03125 446,08125 446,04375 446,09375 Tableau des codes CTCSS N° Fréq. N° Fréq. N° Fréq. N° Fréq. 67,0 97,4 136,5 192,8 71,9 100,0 141,3 203,5 74,4 103,5...
  • Seite 48 © August 2015, Alan Electronics GmbH Français...
  • Seite 49 5006 SCOPI Manual del usuario Español...
  • Seite 50 Introducción El manual de instrucciones de esta unidad consta de dos partes. La primera parte contiene un Manual de Inicio Rápido para su uso como intercomunicador de vigilancia de bebés; la segunda parte le informa de las funciones avanzadas como transceptor PMR 446 normal para que sus hijos jueguen con él cuando crezcan.
  • Seite 51 Pantalla e Iconos Iconos y significado Recepción: se escucha a través del altavoz Transmisión: se está pulsando el botón PTT o la unidad transmite en modo VOX SCAN Búsqueda Auto: la unida busca los canales de uno en uno Modo activado por voz: la unidad transmite automáticamente (sin pulsar PTT) cuando detecta sonidos Tonos de tecla activados Función fuera de alcance activada (AU automáticamente, Pb...
  • Seite 52 Capítulo 1: Función de vigilancia de bebés Preparar la unidad – Colocar la batería Retire la fijación del cinturón (tire del muelle y retire la parte superior) y abra el compartimento de las pilas. Inserte uno de los packs de pilas que se adjuntan (o 4 pilas individuales AAA NiMH) en cada unidad (se envasan por separado).
  • Seite 53 Prepararlo como vigilancia de bebés En caso de que haya usado la radio en modo PMR 446, por favor, siga estos pasos para configurar los dispositivos para la monitorización infantil.  Encienda la unidad (pulse el botón de encendido durante 3 seg). ...
  • Seite 54 Número de canal El número del canal debe ser el mismo en las dos unidades. b1 a b9 Hay 9 opciones posibles, de para la unidad del bebé y de en la de los padres. Los número 1-9 indican las combinaciones de canal programada en fábrica entre los canales radio PMR 446 y las codificaciones CTCSS.
  • Seite 55 Función Fuera-de-alcance automático La función fuera-de-alcance automático se activa automáticamente en la configuración de vigilancia de bebés, y ¡no necesita más ajustes! La función fuera-de-alcance automático comprueba automáticamente cada 60 segundos si la unidad del bebé y la de los padres tienen comunicación. La unidad de los padres envía un ‘pulso de búsqueda’, que es respondido por la unidad del bebé.
  • Seite 56 Prueba manual de fuera-de-alcance Independientemente de que el control de fuera-de-alcance de la otra unidad esté en modo automático, también puede realizar una prueba de fuera-de-alcance manualmente. ¡Esta prueba es también posible con la función fuera-de-alcance desactivada en la unidad del bebé! Pulsando un botón usted puede determinar si ambas unidades están dentro de alcance de intercomunicación.
  • Seite 57 Capítulo 2: Funciones avanzadas y uso como transceptor PMR 446 Por defecto, las unidades están preprogramadas como el sistema de monitorización infantil. Para cambiar al modo de transmisor receptor, pulse Menú dos veces y seleccione “of”. Se pueden usar para diversos propósitos; como walkie-talkies para niños mayores, durante excursiones y para más propósitos.
  • Seite 58: Seleccionar El Canal

    Seleccionar el canal En Europa usted puede usar uno de 8 canales PMR 446. Además, puede establecer el código individualmente a través de tonos CTCSS para los canales del 1 al 8 entre 38 códigos posibles. Este código aparece a la derecha del número del canal (1 - 8) como un número pequeño de dos dígitos entre 00 y 38.
  • Seite 59 Bloquear las teclas:  Mantenga pulsado el botón unos 3 segundos aprox. hasta que el icono del candado ( ) aparezca en pantalla.  Mantenga pulsado el botón otra vez unos 3 segundos aprox. hasta que el icono del candado desaparezca. Establecer los códigos CTCSS Los códigos CTCSS adicionales sirven para evitar oír otras estaciones en el mismo canal.
  • Seite 60 Elemento del menú VOX – Función manos-libres Este es el ajuste de la sensibilidad para el funcionamiento manos-libres. La unidad detecta su voz y no es necesario pulsar el botón PTT para hablar. Esto es muy útil cuando no tenga una mano libre para pulsar el botón PTT; pero puede ser un problema en una motocicleta o en ambientes ruidosos.
  • Seite 61 Activar/desactivar el tono de tecla Se oye un ‘bip’ corto al pulsar un botón. Desactive el tono de tecla con esta opción del menú. On (activo) OF (inactivo) El elemento del menú es ; seleccione Modo Bebé – Elementos del menú Estos elementos del menú...
  • Seite 62 garantía. El vendedor reparará o cambiará el producto, o lo enviará a un centro de reparaciones autorizado. Usted también puede contactar directamente con nuestro servicio de reparaciones asociado. Por favor, incluya la prueba de compra con el producto y describa la avería lo más claramente posible.
  • Seite 63 Tabla de frecuencias PMR 446 Canal Frecuencia (MHz) Canal Frecuencia (MHz) 446.00625 446.05625 446.01875 446.06875 Canal Canal 446.03125 446.08125 446.04375 446.09375 Tabla de códigos CTCSS Frec Frec. Frec. Frec. 67.0 97.4 136.5 192.8 71.9 100.0 141.3 203.5 74.4 103.5 146.2 210.7 77.0 107.2...
  • Seite 64 Datos técnicos  Margen de Frecuencias: 446.00625 – 446.09375 MHz (PMR 446)  Separación entre canales 12,5 KHz  8 canales  9 combinaciones de canales pre-programadas Bebé - Padres  38 tonos de sub-código CTCSS  Potencia máx. de transmisión: 500 mW ERP ...
  • Seite 65 5006 SCOPI Manuale dell’Utente Italiano...
  • Seite 66 Introduzione Il Manuale dell’Utente di questa unità consiste di due parti. La prima parte contiene una Guida Rapida per l’uso come monitor per bambino; la seconda parte informa riguardo alle funzioni avanzate come normale ricetrasmittente PMR 446 per se o i propri figli che potranno divertirsi in futuro.
  • Seite 67 Display e Icone Icone e Termini Ricezione: ascoltare tramite l’altoparlante Trasmissione: bottone PTT viene premuto o l’unità trasmette in modo VOX (voce) SCAN Auto scansione: unità scansiona i canali uno ad uno Modo VOX (voce) attivo: unità trasmette automaticamente (senza premere PTT) quando rileva un suono Toni tasti sono attivati Funzione fuori portata è...
  • Seite 68 Capitolo 1: Funzione Monitor Bambino Preparare l’unità – Inserire la batteria Rimuovere il gancio per la cintura (tirare la molla e rimuovere la parte superiore) e aprire il vano batterie. Inserire uno dei pacchi batteria forniti in dotazione (oppure 4 pile NiMH AAA) in ciascuna unità (confezionate separatamente).
  • Seite 69 Preparare come Monitor Bambino Nel caso in cui la radio è usata in modalità PMR 446, seguire questi passaggi per configurare i dispositivi per monitoraggio neonato..  Accendere un’unità (premere il bottone On/Off per 3 sec).  Premere il bottone MENÙ due volte. Il display mostra l’icona bambino ...
  • Seite 70 Numero Canale Il numero del canale deve essere lo stesso per entrambe le unità. Ci sono 9 impostazioni possibili, per l’unità bambino da per l’unità genitore Da 1 a 9 sono le combinazioni di canali programmate in fabbrica tra I canali radio PMR 446 e la codifica CTCSS.
  • Seite 71  Usare questi 10 secondi per parlare al bambino e calmarlo.  Premere semplicemente il bottone PTT sull’unità genitore e parlare al proprio bambino. Finché il bambino è tranquillo si può parlare dall’unità genitore in qualsiasi momento (se il volume dell’unità bambino non è impostato su 00). Funzione Fuori Portata Automatica La funzione fuori portata automatica viene attivata automaticamente nel modo babysitter e non necessita di ulteriori impostazioni!
  • Seite 72: Microfono Esterno

    Premendo un bottone si può determinare se l’altra unità è entro la portata. Il controllo automatico dell’unità genitore deve essere impostato su  e attendere alcuni secondi. L’unità bambino risponde alla Premere il bottone richiesta e l’unità genitore riproduce una melodia. Microfono Esterno Per la funzione monitor bambino forniamo un microfono esterno (tipo BM 1).
  • Seite 73 Bottone PTT Per Parlare  Premere e tenere il bottone PTT per trasmettere; rilasciare per ricevere. Bottone PTT Per Chiamare  Premere brevemente il bottone PTT due volte in rapida successione.  L’unità trasmette una melodia di chiamata a tutte le altre unità su questo canale entro la portata.
  • Seite 74 stessi numeri sul display. Se comunicare con utenti dell’altra ricetrasmittente permette di usare solo i canali da 1 a 8 e impostare i sottocodici manualmente, questi stanno seguendo gli standard internazionali. Impostare il Canale  Premere il bottone MENÙ una volta. Il canale attualmente impostato lampeggia. ...
  • Seite 75: Blocco Tasti

    Blocco Tasti Tutti i tasti (eccetto il bottone PTT e On/Off) possono essere bloccati per evitare di premerli accidentalmente. Blocco tasti:  per circa 3 secondi, finché l’icona blocco ( ) Premere e tenere il bottone viene mostrata.  Premere e tenere il bottone di nuovo per circa 3 secondi, finché l’icona blocco si spegne.
  • Seite 76  Premere brevemente il bottone PTT per confermare – o attendere semplicemente alcuni secondi finché l’impostazione viene salvata. Voce Menù VOX – Funzione Vivavoce Questa è l’impostazione di sensibilità per l’uso in vivavoce. L’unità rileva la voce e non è necessario premere il bottone PTT. Ciò è molto utile se non si hanno mani libere per premere il bottone PTT;...
  • Seite 77 Toni Tasto On/Off Un breve tono bip è udibile premendo un bottone. Disattivare i toni tasto con questa voce del menù. La voce del menù viene mostrata; selezionare oppure Modo Bambino – Voce del Menù Queste voci del menu vengono mostrate come descritto nel capitolo “Modo Bambino”. Nel modo bambino viene mostrato, selezionare oppure...
  • Seite 78 Si prega di contattare il rivenditore locale per reclami in garanzia. Il rivenditore riparerà o sostituirà il prodotto o lo inoltrerà ad un centro di assistenza autorizzato. Si può anche contattare direttamente il nostro partner di assistenza. Si prega di includere una prova dell’acquisto con il prodotto e descrivere il malfunzionamento il più...
  • Seite 79 Tavola delle Frequenze PMR 446 Canale Frequenza (MHz) Canale Frequenza(MHz) 446.00625 446.05625 446.01875 446.06875 Canale Canale 446.03125 446.08125 446.04375 446.09375 Tavola Codici CTCSS Freq. Freq. Freq. Freq. 67.0 97.4 136.5 192.8 71.9 100.0 141.3 203.5 74.4 103.5 146.2 210.7 77.0 107.2 151.4 218.1...
  • Seite 80 Italiano...
  • Seite 81 5006 SCOPI Gebruikshandleiding Nederlands...
  • Seite 82 Inleiding De Gebruikshandleiding voor dit apparaat bestaat uit twee delen. Het eerst deel bevat een Korte Starthandleiding voor gebruik als baby monitor; het tweede deel beschrijft de geavanceerde functies voor normaal gebruik als PMR 446 zendontvanger voor u en later ook voor uw kinderen. U vindt in deze documentatie tevens de Veiligheidsvoorschriften en andere wettelijk bindende informatie.
  • Seite 83 Display en Icoontjes Icoontjes en Termen Ontvangst: luisteren via de luidspreker Transmissie: PTT toets is ingedrukt of het apparaat zendt in VOX modus SCAN Auto scan: apparaat één voor één alle kanalen Actieve VOX mode: apparaat zendt automatisch (zonder op PTT te drukken) wanneer het geluiden waarneemt Toetstonen zijn geactiveerd Buiten-bereik functie is geactiveerd (automatisch AU, handmatig...
  • Seite 84 Hoofdstuk 1: Baby Monitor Functie Apparaat Voorbereiden – Batterij Installeren Verwijderen de riemklem (trek aan de veer en trek de klem naar boven toe uit) en open het batterijvak. Plaats in ieder toestel (apart verpakt) een van de meegeleverde batterijpakketten (of 4 x enkele AAA NiMH batterijen).
  • Seite 85 Voorbereiden als Baby Monitor Als u de radio in de PMR 446-modus hebt gebruikt, volgt u deze stappen om de apparatuur in te stellen voor babybewaking.  Schakel één apparaat in (houd de Aan/Uittoets 3 seconden ingedrukt).  Druk tweemaal op de MENU toets. De display toont het babyicoontje ...
  • Seite 86 radiokanalen en CTCSS codering. De nummers gelden alleen voor dit type zendontvanger en er is geen communicatie mogelijk met andere babymonitors! Kanaalinstelling  Druk eenmaal kort op de MENU toets en het ingestelde kanaal zal knipperen.  Gebruik om andere instellingen te selecteren. ...
  • Seite 87 Automatische Buiten-Bereik Functie De automatische buiten-bereik functie wordt in babysittermodus automatisch geactiveerd en vereist geen verdere instellingen! De automatische buiten-bereik functie controleert elke 60 seconden of de ouders- en babyeenheid communiceren. De oudereenheid stuurt een “zoekpuls” die beantwoord wordt door de babyeenheid. In het geval dat er langer dan 2 minuten geen reactie is, dan is de communicatie tussen de twee apparaten verbroken.
  • Seite 88: Externe Microfoon

    beantwoorden en de oudereenheid speelt een melodietje af. U bent er op deze manier zeker van dat uw op uw huidige positie exact binnen het communicatiebereik bent! Externe Microfoon Wij leveren voor de babymonitorfunctie een externe microfoon (type BM 1). Wij raden aan deze altijd te gebruiken als u de apparatuur als babymonitor gebruikt.
  • Seite 89: Kanaal Selecteren

    PTT Toets om Op Te Roepen  Druk tweemaal snel achtereenvolgend op de PTT toets.  Het apparaat zendt een oproepmelodie naar alle andere apparaten op dit kanaal binnen uw bereik. Wisselen Tussen Babymonitor- en Zendontvangermodi U kunt eenvoudig omschakelen naar zendontvangermodus in het geval dat uw radio’s ingesteld waren op babymonitormodus: ...
  • Seite 90: Kanaal Instellen

    Kanaal Instellen  Druk eenmaal op de MENU toets en het huidig ingestelde kanaal knippert.  Druk op om een andere instelling te selecteren.  Druk ter bevestiging op de PTT toets of wacht gewoon enkele seconden. Kanaalscan Druk kort op de toets om automatisch naar activiteit op alle kanalen te scannen.
  • Seite 91 Verwar dit a.u.b. niet met bescherming tegen interceptie: het is altijd mogelijk analoge radiogesprekken zonder encryptie op te vangen; dit vereist slechts een willekeurige PMR 446 zendontvanger of een scanner. De CTCSS (continuous tone coded squelch signal/continu toongecodeerd ruisonderdrukkingssignaal) tonen zijn onhoorbare tonen op lage frequentie die in het microfoonsignaal zijn gemixt.
  • Seite 92 medium gevoeligheid lage gevoeligheid zoals 1, maar met een 10-seconden onderbreking om terug te kunnen spreken na 20 seconden transmissie Niveau 4 is ook goed voor radiodiscipline: als uw apparaat continu uitzendt, zal het na 20 seconden worden onderbroken. Tijdens deze pauze kunnen andere partijen antwoorden en u wijzen op uw onafgebroken transmissie.
  • Seite 93 gedeactiveerde buiten-bereik controle. Activering of deactivering van buiten-bereik controle wordt ingesteld op het apparaat dat het bereik moet controleren. Zelfs als het afstandsapparaat geen buiten-bereik controle actief heeft, kunt u het bereik vanaf uw apparaat controleren. Selecteer AU (automatische controle om de minuut) of Pb (handmatige controle). Op radionetwerken die uit meer dan 2 gelijke eenheden bestaan, heeft de buiten-bereik controle eigenlijk weinig zin, omdat u niet kunt weten welk apparaat reageert.
  • Seite 94 Frequentietabel PMR 446 Kanaal Frequentie (MHz) Kanaal Frequentie (MHz) 446.00625 446.05625 446.01875 446.06875 Channel Channel 446.03125 446.08125 446.04375 446.09375 CTCSS Codetabel Freq Freq. Freq. Freq. 67.0 97.4 136.5 192.8 71.9 100.0 141.3 203.5 74.4 103.5 146.2 210.7 77.0 107.2 151.4 218.1 79.7 110.9...
  • Seite 95 Technische Gegevens  Frequentiebereik: 446.00625 – 446.09375 MHz (PMR 446)  Kanaalscheiding 12,5 KHz  8 Kanalen  9 voorgeprogrammeerde Baby- en 9 Ouders-kanaalcombinaties  38 CTCSS subcode tonen  Max. zendvermogen: 500 mW ERP  Communicatiebereik tot op 5 km (zonder obstructies) ...
  • Seite 96 Nederlands...

Inhaltsverzeichnis