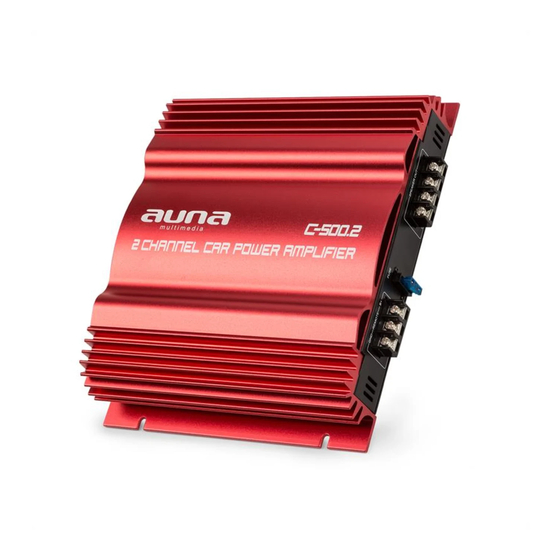
auna C500 Bedienungsanleitung
Auto-endstufe
Vorschau ausblenden
Andere Handbücher für C500:
- Anschluss- und anwendungshinweise (29 Seiten) ,
- Bedienungsanleitung (29 Seiten)
Inhaltsverzeichnis
Verfügbare Sprachen
Verfügbare Sprachen
Quicklinks
Inhaltsverzeichnis
Fehlerbehebung

Verwandte Anleitungen für auna C500


Inhaltszusammenfassung für auna C500
-
Seite 3: Inhaltsverzeichnis
Sehr geehrter Kunde, wir gratulieren Ihnen zum Erwerb Ihres Gerätes. Lesen Sie die folgenden Hinweise sorgfältig durch und befolgen Sie diese, um möglichen Schäden vorzubeugen. Für Schäden, die durch Missachtung der Hinweise und unsachgemäßen Gebrauch entstehen, übernehmen wir keine Haftung. Scannen Sie den folgenden QR-Code, um Zugriff auf die aktuellste Bedienungsanleitung und weitere Informationen rund um das Produkt zu erhalten:... -
Seite 4: Technische Daten
TECHNISCHE DATEN Artikelnummer 10032117 10032118 100321119 Ausgänge 2 Kanäle 4 Kanäle 6 Kanäle Max. Ausgangsleistung 1000 W 2000 W 3000 W Hochpass 50 Hz - 500 Hz Tiefpass 50 Hz - 250 Hz Signal-Rausch-Abstand 90 dB Frequenzgang 10 Hz - 30 kHz Eingangsempfindlichkeit 120 mV - 1.0 V Impedanz... -
Seite 5: Allgemeine Sicherheitshinweise
Allgemeine Sicherheitshinweise • Dieses Gerät ist ausschließlich für den Anschluss an eine 12 V Stromversorgung geeignet. • Verwenden Sie Lautsprecher mit einer geeigneten Impedanz (2-16 Ohm, Stereo). • Schließen Sie keine Aktiv-Lautsprecher (mit eingebautem Verstärker) an. • Montieren Sie den Verstärker nicht in Bereichen, wo er •... -
Seite 6: Anschlüsse
ANSCHLÜSSE Vor dem Anschließen Folgendes beachten • Nehmen Sie vor dem Anschluss die Masse von der Autobatterie, um Kurzschlüsse zu vermeiden. • Achten Sie darauf, dass die Lautsprecher eine entsprechende Leistung aufweisen. Wenn Sie Lautsprecher mit einer zu geringen Belastbarkeit anschließen, können sie beschädigt werden. -
Seite 7: Schaltkreis
SCHALTKREIS... -
Seite 8: Autoradioanschluss Und Lautsprecheranschluss
AUTORADIOANSCHLUSS UND LAUTSPRECHERANSCHLUSS Bei 3-Kanal-Anschluss Line-Ausgang rechter Kanal Line-Ausgang linker Kanal Autoradio zu einem Metall des Autos... - Seite 9 Bei 2/4/6-Kanal-Anschluss Hinterer R/L-Kanal Autoradio Line-Ausgang Line-Ausgang rechter Kanal Line-Ausgang linker Kanal Autoradio zu einem Metall des Autos...
-
Seite 10: Lautsprecheranschluss
LAUTSPRECHERANSCHLUSS 4-Kanal-Anschluss Lautsprecher Lautsprecher Lautsprecher Lautsprecher 3-Kanal-Anschluss Subwoofer... - Seite 11 Hinweis: In dieser Konfiguration wird die Lautstärke des Subwoofers durch den Fader des Autoradios geregelt. Das Ausgangssignal an den Subwoofer ist eine Kombination aus den Eingängen REAR L und R oder dem High-Level-Eingang REAR. 2-Kanal-Anschluss Bezüglich Einzelheiten zu Einstellungen der Schalter und Bedienelemente sehen Sie unter „Funktionen“...
- Seite 12 6-Kanal-Anschluss Subwoofer Breitband- Breitband-Lautsprecher Lautsprecher Breitband-Lautsprecher Breitband-Lautsprecher Subwoofer Breitband-Lautsprecher Breitband-Lautsprecher Breitband- Lautsprecher Breitband-Lautsprecher Breitband-Lautsprecher Breitband-Lautsprecher...
-
Seite 13: Stromversorgung
Hinweis: In dieser Konfiguration wird die Lautstärke des Subwoofers durch den Fader des Autoradios geregelt. STROMVERSORGUNG +12 V Autoradio Autobatterie Sicherung MONTAGE Vor der Montage • Montieren Sie das Gerät entweder im Kofferraum oder unter einem Sitz. • Wählen Sie den Montageort sorgfältig aus, so dass das Gerät die alltäglichen Bewegungen des Fahrers nicht behindert und nicht der direkten Sonneneinstrahlung oder der heißen Luft der Heizung ausgesetzt ist. -
Seite 14: Funktionen
Montage Halten Sie den Kasten dort an, wo Sie ihn montieren wollen und zeichnen Sie die vier Bohrlöcher auf dem Montagebrett (nicht im Lieferumfang enthalten) an. Bohren Sie Löcher mit ca. 3 mm Durchmesser. Schrauben Sie das Gerät mit den beiliegenden Schrauben (15 mm) an. Darauf achten, dass das Brett mindestens 15 mm dick ist. - Seite 15 Frequenzweichen-Trennungs-Regler Regelt die Frequenzweichentrennung für den Niedrigpassfilter. Low Boost Regler Um die Frequenzen von 50 Hz auf ein Maximum von 12 dB zu erhöhen. Level-Regler Das Eingangslevel kann hiermit geregelt werden, wenn Die Eingangsquellen anderer Hersteller verwendet werden. Frequenzweichen-Trennungs-Regler Regelt die Frequenzweichentrennung für den Hochpassfilter...
-
Seite 16: Fehlerbehebung
FEHLERBEHEBUNG Problem Mögliche Ursache und Lösungsansatz Die Betriebsanzeige Die Sicherung ist lose oder durchgebrannt. leuchtet nicht. Ziehen Sie die Sicherung fest oder ersetzen Sie die Sicherung durch eine neue. Die Massezuführung ist nicht richtig angeschlossen. Befestigen Sie sie an einem Metallpunkt im Auto. -
Seite 17: Spezielle Entsorgungshinweise Für Verbraucher In Deutschland
SPEZIELLE ENTSORGUNGSHINWEISE FÜR VERBRAUCHER IN DEUTSCHLAND Entsorgen Sie Ihre Altgeräte fachgerecht. Dadurch wird gewährleistet, dass die Altgeräte umweltgerecht verwertet und negative Auswirkungen auf die Umwelt und menschliche Gesundheit vermieden werden. Bei der Entsorgung sind folgende Regeln zu beachten: • Jeder Verbraucher ist gesetzlich verpflichtet, Elektro- und Elektronikaltgeräte (Altgeräte) sowie Batterien und Akkus getrennt vom Hausmüll zu entsorgen. - Seite 18 • Bei einem Vertrieb unter Verwendung von Fernkommunikationsmitteln ist die unentgeltliche Abholung am Ort der Abgabe auf Elektro- und Elektronikgeräte der Kategorien 1, 2 und 4 gemäß § 2 Abs. 1 ElektroG, nämlich „Wärmeüberträger“, „Bildschirmgeräte“ (Oberfläche von mehr als 100 cm²) oder „Großgeräte“ (letztere mit mindestens einer äußeren Abmessung über 50 Zentimeter) beschränkt.
-
Seite 19: Hinweise Zur Entsorgung
HINWEISE ZUR ENTSORGUNG Wenn es in Ihrem Land eine gesetzliche Regelung zur Entsorgung von elektrischen und elektronischen Geräten gibt, weist dieses Symbol auf dem Produkt oder auf der Verpackung darauf hin, dass dieses Produkt nicht im Hausmüll entsorgt werden darf. Stattdessen muss es zu einer Sammelstelle für das Recycling von elektrischen und elektronischen Geräten gebracht werden.