Inhaltsverzeichnis
Werbung
Verfügbare Sprachen
Verfügbare Sprachen
Werbung
Inhaltsverzeichnis

Verwandte Anleitungen für Black & Decker GL200


Inhaltszusammenfassung für Black & Decker GL200
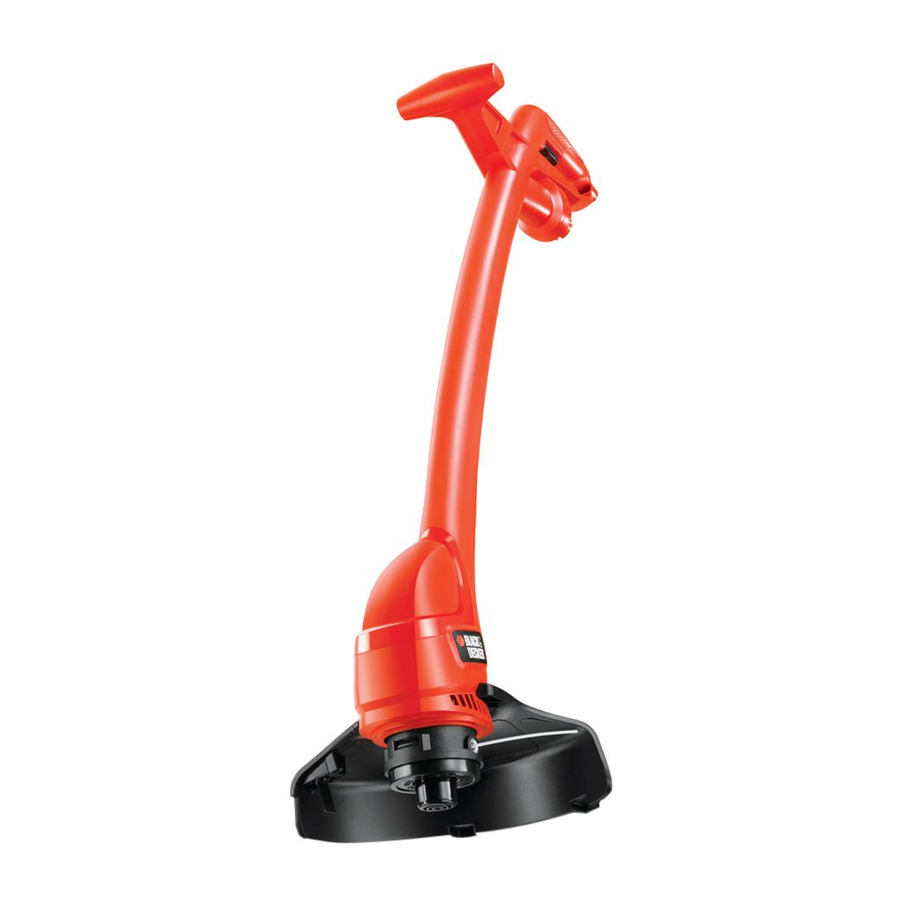
- Seite 1 ® GL200 GL300...
- Seite 5 English Italiano Deutsch Français Nederlands Español Português Eλληνικα ®...
-
Seite 6: Safety Instructions
18. Groove This user manual provides important operating and maintenance instructions for all of the string trimmers Safety instructions in the Black & Decker GL200/GL300 range. Training Your trimmer has the following features for your benefit: • Never allow children or persons who are •... -
Seite 7: Double Insulation
ENGLISH • Always keep the power supply cable away from the line - be aware of its position at all times. • Always be sure your trimmer is in a safe operating condition. • Always switch off and remove the plug if •... - Seite 8 Electrical safety (UK only) trimmer to your nearest Black & Decker service agent. Your trimmer should always be switched off Increased safety can be obtained by having at the mains before disconnecting any plug a qualified electrician install a high sensitivity and socket connector or extension cables.
- Seite 9 ENGLISH old ‘female’ connector new ‘female’ connector Should you wish to convert more than one cable plug with the recommended fuse. Never system, the new female connector is available as an wire a ‘male’ connector to your extension accessory from most major DIY retail outlets and from cable and never wire an extension cable Black &...
- Seite 10 • Note: There is no need to remove the terminal Place the guard over the spool housing screws. Connections are not to be made under on your trimmer taking care that the line the screw heads. does not become stuck between the two parts.
- Seite 11 ENGLISH Do not overload your trimmer. It operates best at high speeds. On long grass, start at the top. Take small cuts. • Fit the inner cover onto the spool and fit the spool onto your trimmer as described If your trimmer features a cord restraint, in ‘Assembling the spool cover’.
- Seite 12 The failure represents normal wear and tear. This guarantee is offered as an extra benefit and is We declare that units: additional to your statutory rights. GL200, GL300, GL320, GL325, GL330, GL335, GL555, GL565, ST20, ST22, ST23, ST25, ST32 Our guarantee policy conform to: 89/392/EEC, 89/336/EEC,...
- Seite 13 Tagliaerba a filo di nylon GL200/GL300 Manuale d’istruzioni Congratulazioni! 17. Collare 18. Scanalatura (sul rocchetto) Complimenti per aver acquistato un tagliaerba a filo Black & Decker. L’utensile è dotato delle seguenti caratteristiche: Norme di sicurezza • Peso ridotto, per una maggiore manovrabilità e Norme generali facilità...
- Seite 14 • • Il cavo deve essere controllato Usate l’utensile solo durante il giorno o regolarmente ed utilizzato solo se in con una buona illuminazione artificiale. buone condizioni. • Non attraversate terreni ghiaiosi o strade • Tenete sempre il cavo lontano dalla zona mentre l’utensile è...
- Seite 15 ITALIANO La Black & Decker persegue una politica di continua innovazione dei propri prodotti e si riserva pertanto il diritto di modifica delle specifiche senza preavviso. Doppio isolamento Il vostro utensile è dotato di doppio Uso del tagliaerba a filo (Fig. 1 - 8) isolamento.
-
Seite 16: Garanzia
Cosa fare in caso di rottura del Nota: Quando si avvia l’utensile per la prima volta l’eventuale eccesso di filo sarà tagliaerba a filo Strimmer automaticamente tagliato dalla lama posta Questo prospetto contiene uno schema del sulla protezione. Ciò accade anche per ogni particolare e le istruzioni per spedire lo Strimmer al successivo assestamento del filo. - Seite 17 Tagliaerba a filo Biotrituratori Soffiatore/Aspiratore/Trituratore Dichiarazione di conformitá EC Si dichiara che i prodotti: GL200, GL300, GL320, GL325, GL330, GL335, GL555, GL565, ST20, ST22, ST23, ST25, ST32 sono conformi a 89/392/EEC, 89/336/EEC, EN60335, EN55014, EN55104, 73/23/EEC Pressione acustica ponderata 108dB (A) Potenza acustica ponderata 95dB (A) Vibrazioni mano-braccio <2.5m/s...
-
Seite 18: Sicherheitshinweise
Rasentrimmer GL200/GL300 Bedienungsanleitung Herzlichen Glückwunsch! 13. Kunststoffsicherung 14. Fadenspule Zum Erwerb Ihres neuen Black & Decker Rasentrimmers. Der Trimmer bietet Ihnen folgende 15. Bohrung für Befestigungsschraube Ausstattungsmerkmale, die Ihnen die Gartenarbeit 16. Aussparung im Spulengehäuse erleichtern: 17. Führungsring für Schnittfaden •... - Seite 19 DEUTSCH • Seien Sie beim Rasentrimmen vorsichtig, da frisch gemähtes Gras feucht und rutschig ist. Tragen Sie zu Ihrer eigenen Sicherheit rutschfestes Schuhwerk. • Benutzen Sie während des Arbeitens Schutzkleidung. Betrieb des Gerätes • Tragen Sie immer eine Schutzbrille. • Verwenden Sie Ihren Rasentrimmer •...
-
Seite 20: Technische Sicherheit
• Technische Sicherheit Trimmen Sie keine extrem steilen Abhänge. • Gehen Sie immer im Schritt mit dem • Sie sollten immer erst den Netzstecker Rasentrimmer, betreiben Sie ihn aus der Steckdose ziehen, bevor Sie niemals im Laufen. Überlasten Sie nicht irgendwelche Stecker, Klemmen oder das Gerät. -
Seite 21: Einsetzen Einer Neuen Spule Mit Schnittfaden (Abb. G)
DEUTSCH Spule in die Spulenhalterung am Trimmergehäuse stecken. • Greifen Sie die Spule mit der einen und die Spulenhalterung mit der anderen Hand. • Drücken Sie die Spule in Richtung des Pfeiles a. Drehen Sie anschließend die Schneidfaden nach oben aus der Spule vorsichtig so lange im Vertiefung in der Spulenhalterung. -
Seite 22: Fehlersuche
Wir erklären hiermit, daß die folgenden Beschädigung des Kunststoffes zu verhindern. Elektrowerkzeuge: Den Rastrimmer nicht mit Wasser abspritzen. GL200, GL300, GL320, GL325, GL330, GL335, • Ihr Rasentrimmer ist mit selbstschmierenden GL555, GL565, ST20, ST22, ST23, ST25, ST32 Lagern ausgerüstet, so daß Sie keine Teile den Normen 89/392/EEC, 89/336/EEC, EN60335, schmieren müssen. -
Seite 23: Instructions De Sécurité
Rotofil GL200/GL300 Notice d’utilisation Instructions de sécurité Débranchez toujours votre produit avant de le nettoyer; inspectez toutes les pièces du Nous vous félicitons pour cette acquisition d’un Rotofil ainsi que l’état du câble d’alimentation: Rotofil Black & Decker. Ce Rotofil possède les veillez à... - Seite 24 • • Le fil de nylon continue de tourner Ne courrez jamais avec le Rotofil. pendant un bref laps de temps après Marchez toujours. que l’interrupteur soit relâché. En aucun • Coupez l’herbe de votre talus en cas vous ne devez essayer d’immobiliser procédant de manière latérale et non le fil de nylon.
- Seite 25 FRANÇAIS Assemblage du capuchon de la bobine (Fig. E) • Faites passer le fil dans le trou, à l’intérieur du capuchon, puis libèrez le fil de l’incision de blocage dans laquelle il se trouve, sur la partie supérieure de la •...
- Seite 26 FRANÇAIS Attestation de conformité EC Nous déclarons que les produits: GL200, GL300, GL320, GL325, GL330, GL335, GL555, GL565, ST20, ST22, ST23, ST25, ST32 sont conformes aux 89/392/EEC, 89/336/EEC, Conseils d’entretien EN60335, EN55014, EN55104, 73/23/EEC • Pour de meilleurs résultats, veillez à la propreté...
- Seite 27 Strimmer GL200/GL300 Gebruiksaanwijzing Veiligheidsvoorschriften! 13. Veerpal 14. Spoel Gefeliciteerd met de aankoop van deze strimmer van Black & Decker. Deze strimmer heeft de volgende 15. Schroefdraaduitsparing praktische eigenschappen: 16. Gleuf • Een lichtgewicht model voor gebruiksgemak en 17. Binnendeksel wendbaarheid.
-
Seite 28: Elektrische Beveiliging
• • Houd het snoer uit de buurt van de Controleer het snoer regelmatig op nylondraad - controleer steeds waar het beschadigingen of veroudering. Gebruik snoer zich bevindt. het snoer alleen wanneer het in goede staat verkeert. • Blijf bij de machine zolang de stekker in •... - Seite 29 NEDERLANDS • De beschermkap is op de juiste manier gemonteerd wanneer de richels op de kap precies in de gleuven van het motorhuis vallen en de blokkeerpal goed zit. • Wanneer de beschermkap op de juiste Nylondraadtoevoer (Fig. F) plaats zit, kunt u de schroef door de opening in de beschermkap vastdraaien Opmerking: Er dient tenminste 5cm in het schroefgat van het motorhuis van...
- Seite 30 De kunststof onderdelen kunt u schoonmaken Wij verklaren dat de machines: rnet een warm sopje van zachte zeep en een GL200, GL300, GL320, GL325, GL330, GL335, vochtige doek. Gebruik geen andere GL555, GL565, ST20, ST22, ST23, ST25, ST32 schoonmaak- of oplosmiddelen, daar deze vaak...
- Seite 31 Recortabordes GL200/GL300 Manual de instrucciones 16. Ranura (soporte bobina) Enhorabuena! 17. Tapa interior Enhorabuena por haber adquirido este Recortabordes Biack & Decker, una máquina que le 18. Hendidura ofrece las siguientes ventajas: • Poco peso y gran maniobrabilidad. Precaución •...
-
Seite 32: Seguridad Eléctrica
• alimentación y compruebe si el voltaje de No use la máquina yendo descalzo o la máquina corresponde con el c con sandalias. corriente. El voltaje de la máquina está • Si usa la máquina en pendiente, colóquese indicado en la placa de características. de modo que no pierda el equilibrio. - Seite 33 • ESPAÑOL Coloque el protector sobre el alojamiento de la bobina en el recortabordes, procurando que el hilo de nylon no quede pillado entre las dos partes. • Haga coincidir la marca cuadrada del protector con la que hay en el cuerpo del Mueva suavemente el recortabordes de un recortabordes y tire del protector hacia lado a otro.
- Seite 34 Para quitar las hierbas, residuos y otra Declaramos que la siguiente unidad: suciedad cepillo o paño seco. GL200, GL300, GL320, GL325, GL330, GL335, • GL555, GL565, ST20, ST22, ST23, ST25, ST32 Puede limpiar las partes de plástico usando un jabón suave y un paño humedecido en agua...
-
Seite 35: Instruções De Segurança
Aparador GL200/GL300 Manual de instruções • Parabéns! Mantenha as crianças afastadas do local 360˚ de trabalho, bem como outros visitantes. Pela compra deste aparador Black & Decker. • Guarde as ferramentas que não estejam Ele inclui as seguintes características: em uso. - Seite 36 • Extensões de cabo Verifique o posicionamento do cabo eléctrico ou extensão, antes de iniciar Podem ser utilizadas extensões de cabo com dois o trabalho. condutores. Estas devem estar preparadas Utilização para funcionar em ambientes externos. As extensões • eléctricas devem cumprir com as normas Verifique se na relva não existem nacionais vigentes.
- Seite 37 PORTUGUÊS • Segure firmemente a bobina de fio com uma mão e com a outra, puxe o fio para fora da ranhura. • Puxe o fio de nylon na direcção da seta conforme mostra o diagrama. • Puxe até que haja fio suficiente para •...
- Seite 38 EC Declaração de Conformidade Declaramos que os produtos: GL200, GL300, GL320, GL325, GL330, GL335, GL555, GL565, ST20, ST22, ST23, ST25, ST32 estão em conformidade com: 89/392/EEC, 89/336/EEC, EN60335, EN55014, EN55104, 72/23/EEC Pressão sonora 108dB (A)
- Seite 39 Mηχανή Φινιρίσµατοσ X ρτου GL200/GL300 Oδηγίεσ χρήσεωσ Συγχαρητήρια µε την ευκαιρία που αγοράσατε 9. Τετράγωvο την µηχανή φινιρίσµατοσ χ ρτου σασ απ την 10. Βέλοσ Black & Decker. H µηχανή αυτή έχει 11. Yποδοχή τα ακ λουθα χαρακτηριστικά για το δικ...
- Seite 40 • • Nα διατηρείτε πάντοτε το καλώδιο Προτού χρησιµοποιήσετε τη µηχανή παροχήσ ρεύµατοσ µακρυά απ τη σασ, αποσυνδέστε την απ το γραµµή νάυλον - να προσέχετε τη ρευµατοδ τη και εξετάστε θέση του πάντοτε. προσεχτικά τα περιστρεφ µενα µέρη για τυχ ν βλάβεσ. Eπίσησ •...
- Seite 41 EΛΛHNIKA χρησιµοποιείτε σκούπα για την αφαίρεση του γρασιδιού και των ακαθαρσιών. Πάντοτε να την αποσυνδέετε απ το ρευµατοδ τη και να βεβαιώνεστε τι η γραµµή είναι σταµατηµένη πριν απ το καθάρισµα. • Eυθυγραµµίστε το τετραγωνικ • σηµάδι στον προφυλακτήρα µε το Mη...
- Seite 42 • ρυθµίζετε στη θέση που είναι για Tραβήξτε τη γραµµή νάυλον να βγει σασ η πιο βολική. Για να το κάνετε έξω απ τη θήκη του πηνίου στην αυτ , χαλαρώστε το κουµπί κατεύθυνση του τ ξου (a). σύσφιξησ και κινήστε το χερούλι στο •...
- Seite 43 EΛΛHNIKA Φροντίδα και συντήρηση • Για καλύτερα αποτελέσµατα, παρακαλώ διατηρείτε καθαρά, τη γραµµή νάυλον, το πηνίο και τισ οπέσ εισ δου αέρα στο αµάξωµα τησ µηχανήσ σασ. Xρησιµοποιείτε στεγνή βούρτσα ή ύφασµα για την H γραµµή είναι πολύ κοντή αφαίρεση γρασιδιού, χυµούσ ή άλλησ Aφαιρέστε...
- Seite 44 EΛΛHNIKA ∆ήλωση Συµµ ρφωσησ τησ EK Yπεύθυνα δηλώνουµε τι οι συσκευέσ: GL200, GL300, GL320, GL325, GL330, GL335, GL555, GL565, ST20, ST22, ST23, ST25, ST32 συµµορφούνται προσ τισ διατάξεισ 89/392/EEC, 89/336/EEC, EN60335, EN55014, EN55104, 73/23/EEC Για καταµετρηµένη πίεση ήχου 108dB (A) Για...
- Seite 45 TYP. GL200/GL300 ® E11851 / 749498 01 / 96...
- Seite 46 Australia Black & Decker (A’asia) Pty Ltd Tel: 03 9213 8200 286-288 Maroondah Highway, North Croydon, Victoria 3136 Fax: 03 9726 7150 Belgique/België Black & Decker Belgium NV Tel: 02 719 07 11 Weihoek 1, 1930 Zaventem Fax: 02 721 40 45 Danmark Black &...
- Seite 48 Part no. 371356-16 10/97.1...