Respekta HS2000-26 Bedienungs- & Installationsanleitung

Verwandte Anleitungen für Respekta HS2000-26


Inhaltszusammenfassung für Respekta HS2000-26
- Seite 1 Bedienungs- & Installationsanleitung HS2000-26 Mod.-Nr. Installation & User Instructions HS2000-26 ˃ HS2000-26 NEG-Novex Großhandelsgesellschaft für Elektro- und Haustechnik GmbH, Chenover Str. 5, D-67117 Limburgerhof 040821_001_NEG...
-
Seite 2: Inhaltsverzeichnis
Inhalt 1 : ALLGEMEINE INFORMATIONEN ............de-3 Lesen der Bedienungsanleitung ..........de-3 2 : ALLGEMEINE SICHERHEITSVORSCHRIFTEN ........de-7 Wichtige Hinweise ..............de-7 Hinweise zum Umweltschutz ..........de-14 3 : TECHNISCHE DATEN UND EIGENSCHAFTEN ........de-15 Technische Daten..............de-15 Elektrischer Schaltplan............de-20 4 : NUTZUNGSBESTIMMUNGEN ............ - Seite 3 de-2...
-
Seite 4: Allgemeine Informationen
Telefon/Fax: 00 49 6236. 46 32 0 E-Mail info@neg-novex.de WebSite www.respekta.de 1.1.3 Kundendienst Bei technischen Fragen zu Ihrem Gerät wenden Sie sich bitte an dem Kundendienst Ihres Händlers. Bevor Sie den Kundendienst anrufen, notieren Sie sich bitte: - Modellnummer de-3... -
Seite 5: Einleitung Und Sicherheit
1.1.4 Einleitung und Sicherheit Bevor Sie die das Gerät installieren und/oder benutzen, lesen Sie bitte sorgfältig die Anweisungen in dieser Anleitung. So können Sie sich mit Ihrem neuen Gerät vertraut machen. Bewahren Sie diese Unterlage griffbereit auf, damit Sie sie jederzeit nachschlagen und sie an eventuelle Nachbesitzer weitergeben können. -
Seite 6: Identifikation Des Geräts
1.1.5 Identifikation des Geräts Keramik / Ceramic Kochfeld Mod. HS2000-26 220-240V~/380-415V~ 50Hz TOTAL 6000 W kg 7.8 Serien Nr. MAR YYYYMMDD00001 NEG-Novex Großhandelsgesellschaft für Elektro- und Haustechnik GmbH, Chenover Str. 5,D-67117 Limburgerhof Abb. 1.1 Eff. Class Einbau-Backofen Mod. HS2000-26 220-240V~/380 -415 ~ 50 Hz TOTAL 2.1-2.5 kW... -
Seite 7: Ce-Konformitätserklärung
HINWEIS: Es wird empfohlen, die Daten und Seriennummern des Geräts zu notieren, um sie bei Bedarf schneller zur Hand zu haben. HINWEIS: Für einen effizienten Kundendienst und Ersatzteilservice geben Sie bitte immer die auf diesem Schild aufgeführten Daten an. Platzierung des Typenschildes Das Typenschild der Geräte ist im unteren Bereich angebracht. -
Seite 8: Allgemeine Sicherheitsvorschriften
2 : ALLGEMEINE SICHERHEITSVORSCHRIFTEN Wichtige Hinweise GEFAHR: Es besteht Brandgefahr, wenn die Reinigung nicht gemäß den Anweisungen in diesem Handbuch durchgeführt wird. GEFAHR: Brandgefahr durch Selbstentzündung von Öl- und Fettdämpfen Vermeiden Sie die Wiederverwendung von Öl, da gebrauchtes Öl organische Rückstände enthalten kann, die eine Selbstentzündung wahrscheinlicher machen Werden beim Garen von Speisen alkoholische Getränke (z. - Seite 9 GEFAHR: Setzen Sie die Geräte nicht den Witterungseinflüssen wie Regen oder Sonnenlicht aus. GEFAHR: Verwenden Sie das Gerät (Backofen/Kochfeld) nicht zur Aufwärmen oder Garen von Lebensmitteln in Dosen oder hermetisch dichten Behältern. Der Druck, der sich in solchen Behältern entwickelt, kann zu einer Explosion führen, wodurch das Gerät beschädigt werden kann.
- Seite 10 ACHTUNG: Verwenden Gerätehersteller vorgesehenen Kochfeldschutzvorrichtungen oder die im Gerät eingebauten Kochfeldschutzvorrichtungen. Die Verwendung ungeeigneter Schutzvorrichtungen kann zu Unfällen führen. ACHTUNG: Die elektrische Anlage muss eine Trennvorrichtung haben, durch die das Gerät allpolig von der Stromversorgung getrennt werden kann. Die Trennvorrichtung muss mit Kontakten mit einem Querschnitt von mindestens 3 mm ausgestattet sein.
- Seite 11 ACHTUNG: Halten Sie Kinder und Haustiere während des Betriebs oder während des Abkühlens von den Geräten fern. Die zugänglichen Teile sind heiß. ACHTUNG: Die Scharniere der Backofentür können beschädigt werden, wenn zu viel Gewicht auf ihnen lastet. Stellen Sie keine schweren Behälter auf die geöffnete Backofentür und stützen Sie sich nicht auf derselben ab, wenn Sie das Innere des Backofens reinigen.
- Seite 12 ACHTUNG: Bedienen Sie die Geräte nicht mit nassen oder feuchten Händen oder wenn Sie mit Wasser in Berührung gekommen sind. Bedienen Sie die Geräte niemals mit bloßen Füßen. ACHTUNG: Geschmolzener Kunststoff, Kunststofffolien müssen sofort vom Kochfeld entfernt werden. ACHTUNG: Achten Sie darauf, dass zwischen der Arbeitsplatte und dem darunter befindlichen Backofen ein Abstand von mindestens 30 mm für die Luftzirkulation eingehalten wird.
- Seite 13 WICHTIGER HINWEIS: Nachdem Sie die Geräte aus der Verpackung genommen haben, überprüfen Sie sie auf Unversehrtheit. Wenn das Produkt (Backofen/Kochfeld) beschädigt ist, verwenden Sie sie nicht und wenden Sie sich an das RESPEKTA-Service- Netz. Kochen Sie nicht auf einem zerbrochenen oder gesprungenen Kochfeld. Trennen Sie das Gerät sofort von der Stromversorgung (Wandschalter) und wenden Sie sich an einen...
- Seite 14 WICHTIGER HINWEIS: Trennen Sie das Gerät (Backofen/Kochfeld) vom Netz, bevor Wartungsarbeiten ausgeführt werden. WICHTIGER HINWEIS: Ziehen Sie den Netzstecker und schalten Sie den Hauptschalter aus, wenn das Gerät (Backofen/Kochfeld) längere Zeit nicht benutzt wird. WICHTIGER HINWEIS: Verwenden Sie keinen Dampfreiniger zur Reinigung des Backofeninnenraums oder des Kochfelds.
-
Seite 15: Hinweise Zum Umweltschutz
Hinweise zum Umweltschutz 2.2.1 Verpackung Das Verpackungsmaterial ist zu 100 % wiederverwertbar. Beachten Sie bei der Entsorgung die örtlichen Vorschriften. WICHTIGER HINWEIS: Das Verpackungsmaterial (Plastikbeutel, Teile aus Polystyrol usw.) stellt eine Gefahrenquelle für Kinder dar. Bewahren Sie das Verpackungsmaterial deshalb außerhalb der Reichweite von Kindern auf. 2.2.2 Entsorgung WICHTIGER HINWEIS: Entsorgen Sie Ihr Altgerät gemäß... -
Seite 16: Technische Daten Und Eigenschaften
3 : TECHNISCHE DATEN UND EIGENSCHAFTEN Technische Daten 3.1.1 Modell HS2000-26 - Kochfeld 590.00 mm Abb. 3.1 Modell Nr. HS2000-26 Identifikation des Produkts/Marke respekta Produktfamilie Einbau-Kochfeld für SET Produktbeschreibung Elektrisches Kochfeld, 60 cm Kochfeldtyp (Elektro/Gas/Kombiniert) elektrisch Heizart (Massivplatten/Strahlung/Induktion) Wärmestrahlplatten Kochfeldausführung (Edelstahl/Glas/Glaskeramik) -
Seite 17: Eigenschaften
Eigenschaften Modell Nr. HS2000-26 Spannung/Frequenz V/Hz 220-240V~/380V-415V~ 50 Hz Nennleistung Watt 6000 Netzkabel (mit/ohne) Stecker Kabel nicht vorhanden, ohne Stecker Breite des Kochfelds Anzahl der Heizzonen Anzahl Drehknöpfe Vordere Heizzone (links) Watt 1800W Hintere Heizzone (links) Watt 1200W Hintere Heizzone (rechts) -
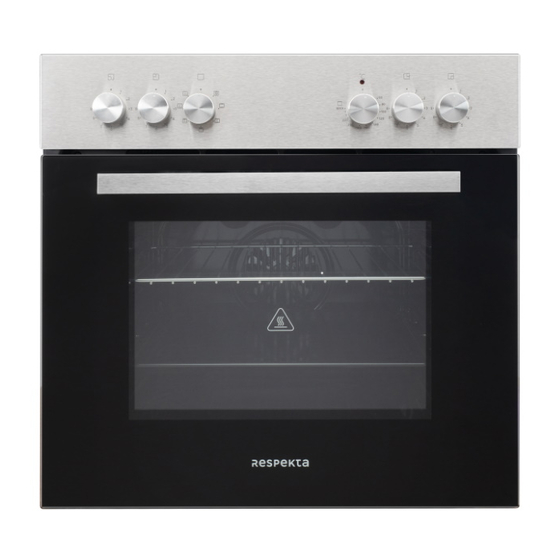
Seite 18: Modell Hs2000-26 - Einbau-Backofen
3.1.2 Modell HS2000-26 - Einbau-Backofen 593.00 mm Abb. 3.2 Modell Nr. HS2000-26 Identifikation des Produkts/Marke respekta Produktfamilie Einbau-Backofen für SET Produktbeschreibung Elektrischer Einbaubackofen, 60 cm Backofentyp (Elektro/Gas) elektrisch Nutzbare Kapazität des Ofeninnenraums Liter de-17... - Seite 19 Eigenschaften Modell Nr. HS2000-26 Spannung/Frequenz V/Hz 220-240V~/380V-415V~ 50 Hz Nennleistung Watt 2300 Energieeffizienzklasse Energieverbrauch während des normalen Betriebs kWh/Zyklus 0,83 Energieverbrauch während des Umluftbetriebs kWh/Zyklus 0,71 Elektrische Gesamtleistung 2,1-2,5 Netzkabel (mit/ohne) Stecker Kabel nicht vorhanden, ohne Stecker Ofenbedienung mechanisch (mechanisch/analog/digital/Full-Touch) Garmodus thermobelüftet...
- Seite 20 Ofenfunktionen Modell Nr. HS2000-26 Anzahl Garfunktionen n°. Licht Statisch, Oberhitze und Unterhitze per Konvektion Ofenfunktionen (Symbol Umluft, Oberhitze und Unterhitze, schnelles Garen Beschreibung) Grill Umluftgrill Umluft-Unterhitze, langsames Garen Auftauen Weitere Funktionen Modell Nr. HS2000-26 Garzeit-Timer Ja/Nein Nein Minutenzählerdrehknopf Ja/Nein Nein Kühllüfter...
-
Seite 21: Elektrischer Schaltplan
Elektrischer Schaltplan Elektrischer Schaltplan des Kochfelds Abb. 3.3 Elektrischer Schaltplan des Backofens Light Heat dissipation fan Lamp Top Grill Boltom Grill Thermostat switch Abb. 3.4 de-20... -
Seite 22: Nutzungsbestimmungen
4 : NUTZUNGSBESTIMMUNGEN Nützliche Ratschläge GEFAHR: Brandgefahr durch Selbstentzündung von Öl- und Fettdämpfen Vermeiden Sie die Wiederverwendung von Öl, da gebrauchtes Öl organische Rückstände enthalten kann, die eine Selbstentzündung wahrscheinlicher machen Werden beim Garen von Speisen alkoholische Getränke (z. B. Rum, Cognac, Wein) zugegeben, ist zu beachten, dass Alkohol bei hohen Temperaturen verdampft. -
Seite 23: Verwendung Des Elektrischen Kochfeldes
Verwendung des elektrischen Kochfeldes 4.2.1 Betrieb der Elektrokochplatte Das Glaskeramikkochfeld ist mit einem Mikrocomputer ausgestattet, der verschiedene Arten von Kochanforderungen erfüllen kann, und verfügt über ein Heizelement mit mikroautomatischer Steuerung und Multi-Leistungswahl. Das Glaskeramikkochfeld basiert auf einer Infrarot-Heiztechnologie, die Wärme zum Garen der Speisen abstrahlt. - Seite 24 Abb. 4.2 HINWEIS: Heben Sie die Töpfe immer an und stellen Sie sie vorsichtig auf das Glaskeramikkochfeld. Lassen Sie sie nicht verrutschen, sonst könnten sie das Glas zerkratzen. Abb. 4.3 4.2.3 Energieersparnis Befolgen Sie diese praktischen Tipps, um beim Kochen Energie zu sparen. WICHTIGER HINWEIS: WARNUNG! Achten Sie bei der Zubereitung von Gerichten mit langer Garzeit im Schnellkochtopf darauf, dass sich immer genügend Flüssigkeit im Topf befindet, ein leerer Topf könnte sowohl die Platte als auch den Kochtopf selbst...
-
Seite 25: Anordnung Der Kochzonen
4.2.4 Anordnung der Kochzonen HS2000-26 Abb. 4.4 1 - Kochzone vorne links (1800W) 2 - Kochzone hinten links (1200W) 3 - Kochzone hinten rechts (1800W) 4 - Kochzone vorne rechts (1200W) de-24... - Seite 26 4.2.5 Bedienfeld (Drehknöpfe des Kochfelds) Drehknöpfe Einschalten/Ausschalten Kochzone 1 - Drehknopf zur Auswahl der Kochzone vorne links 2 - Drehknopf zur Auswahl der Kochzone hinten links 3 - Drehknopf zur Auswahl der Kochzone hinten rechts 4 - Drehknopf zur Auswahl der Kochzone vorne rechts °C °C Abb.
-
Seite 27: Nach Dem Kochen
HINWEIS: Durch Drehen der entsprechenden Knöpfe können mehrere Kochzonen gleichzeitig verwendet werden. 4.2.7 Nach dem Kochen Drehen Sie den Drehknopf gegen den Uhrzeigersinn in die Position "0" (OFF), um die gewünschte Kochzone auszuschalten Abb. 4.8 HINWEIS: Wird das Kochfeld mit dem elektrischen Hauptschalter ausgeschaltet oder kommt es zu einem Stromausfall, während das Gerät in Betrieb ist (Drehknopf 1 bis 9), muss bei der nächsten Inbetriebnahme zuerst der Drehknopf auf die Position "0"... -
Seite 28: Automatisches Ausschalten
4.2.8 Automatisches Ausschalten Die Abschaltautomatik ist eine Sicherheitsschutzfunktion für das Kochfeld. Wenn Sie vergessen, das Gerät nach dem Kochen auszuschalten, schaltet es sich automatisch aus. Die vordefinierten Abschaltzeiten für die verschiedenen Leistungsstufen sind in der folgenden Tabelle aufgeführt: Leistungsstufe Standard-Garzeittimer (Stunden) 4.2.9 Garanleitungen Ratschläge für das Kochen... -
Seite 29: Gebrauch Des Backofens
Gebrauch des Backofens 4.3.1 Vor dem ersten Gebrauch Dieser Multifunktionsbackofen vereint die Vorteile traditioneller Backöfen mit natürlicher Konvektion mit denen modernster Umluftmodelle in einem einzigen Gerät. Es ist ein äußerst vielseitiges Gerät, bei dem Sie einfach und sicher verschiedene Garmodi wählen können. WICHTIGER HINWEIS: Vor dem Gebrauch müssen alle Zubehörteile mit lauwarmem Wasser und handelsüblichem Reinigungsmittel gereinigt werden. - Seite 30 4.3.3 Backofenelemente HS2000-26 Abb. 4.10 A - Bedienfeld B - Drehknopf zur Auswahl des Garmodus C - Drehknopf zur Auswahl der Gartemperatur D - Backofenlampe E - Fettpfanne F - Grillrost G - Kontrollleuchte Backofen eingeschaltet de-29...
- Seite 31 4.3.4 Bedienfeld (Drehknöpfe des Backofens) Drehknopf zum Ein- und Ausschalten des Backofens und Drehknopf zur Auswahl des Kochmodus B - Drehknopf zur Auswahl des Garmodus C - Drehknopf zur Auswahl der Gartemperatur °C Abb. 4.11 4.3.5 Garfunktionen Drehknopf zur Auswahl des Garmodus Drehen Sie den Bedienknopf (B), um die Garfunktion auszuwählen.
- Seite 32 HINWEIS: Die Einstellungen können auch während des Betriebs geändert werden. HINWEIS: Bei den Knöpfen handelt es sich um Drehknöpfe. Funktion Beschreibung Vorgeschlagene Temperatur (°C) Drehknopf Drehknopf (C) Beleuchtung Stellen Sie den Drehknopf (B) auf das entsprechende Symbol, um die Beleuchtung einzuschalten. Das Licht beleuchtet den Ofen und bleibt eingeschaltet, wenn eines der Heizelemente des Ofens eingeschaltet ist.
- Seite 33 Umluftgrill zwischen 60°C und 200°C Die oberen Heizwiderstände schalten sich zusammen mit dem Lüfter ein. Diese Kombination von Eigenschaften erhöht die Wirksamkeit der unidirektionalen Wärmestrahlung der Heizelemente mittels der Zwangs-Luftzirkulation im gesamten Ofen. So wird verhindert, dass die Speisen an der Oberfläche verbrennen, und die Hitze kann direkt in die Lebensmittel eindringen.
- Seite 34 4.3.7 Garanleitungen Der Backofen bietet eine große Auswahl an Garmodi, mit denen Sie jede Art von Gerichten optimal zubereiten können. Die folgenden Angaben sind nur allgemeine Richtlinien, die je nach persönlicher Erfahrung variieren können. Vorheizen Wenn der Backofen vorgeheizt werden muss (in der Regel beim Garen von Hefegerichten), kann der Modus „Umluft“...
- Seite 35 HINWEIS: Im Allgemeinen werden bei der Verwendung des „Umluftgrill“-Modus die besten Ergebnisse erzielt, wenn der Grillrost in die unteren Einschübe geschoben wird. Um zu verhindern, dass Fett und Öl auf den Boden des Backofens tropfen, platzieren Sie eine Fettpfanne im ersten Einschub (von unten) des Backofens. HINWEIS: Um zu verhindern, dass sich während des Garvorgangs zu viel Rauch im Ofen bildet, geben Sie Wasser in die Fettpfanne.
- Seite 36 4.3.8 „Richtwerttabelle der Garzeiten“ HINWEIS: Die Werte in dieser Tabelle sind Richtwerte und können je nach Geschmack und persönlicher Erfahrung variieren. Ente 65-75 Natürliche Konvektion Kalbs- oder 70-75 Rinderbraten Schweinebraten 70-80 Plätzchen 15-20 (Mürbeteig) Mürbeteigtorten 30-35 Seezungen und 8-10 Sepia Grill Kalmar- und Scampi-Spieße...
- Seite 37 Grillhähnchen 55-60 Umluftgrill Sepien 30-35 Mit Drehspieß (wo vorgesehen) Kalbsspieß 70-80 Brathähnchen vom 70-80 Spieß Brathähnchen vom 70-75 Spieß + geröstete Kartoffeln Lamm vom Spieß 70-80 de-36...
- Seite 38 Tiefkühlkost Umluft Pizza Tarte mit Zucchini und Krebsen Spinat-Tarte 30-35 Hacksteak Lasagne Rouladen 20-25 Hähnchenstückchen 15-20 Kalbs- oder 25-30 Rinderbraten Hähnchen 60-70 Vorgegarte Lebensmittel Chicken Wings 20-25 Frische Lebensmittel Plätzchen 15-18 (Mürbeteig) Obsttorte Käsewindbeutel 10-12 Pizza 15-20 Unterhitze mit Umluft HINWEIS: Im Allgemeinen werden bei der Verwendung des „Umluftgrill“-Modus die besten Ergebnisse erzielt, wenn der Grillrost in die unteren Einschübe geschoben wird.
-
Seite 39: Installation
5 : INSTALLATION Zubehörliste Artikel Abbildung Befestigungsbügel (Beutel Lieferumfang enthalten- die Form des Bügels kann je nach Modell variieren). Dichtungsband (vormontiert). Vorbereitende Arbeiten 5.2.1 Sicherheitsanweisungen für die Installation Vor dem Einbau des Kochfelds und des Backofens: ACHTUNG: Vor der Durchführung jeglicher Wartungs-, Reinigungs- und Einstellarbeiten muss das Gerät von der Stromversorgung getrennt werden. - Seite 40 WICHTIGER HINWEIS: Wenden Sie sich im Zweifelsfall an die Baubehörde, um sich über die örtlichen Vorschriften zu informieren. WICHTIGER HINWEIS: Verwenden Sie hitzebeständige, leicht zu reinigende Oberflächen (z. B. Keramikfliesen) für die Wandflächen um das Kochfeld herum. WICHTIGER HINWEIS: Stellen Sie sicher, dass das Netzkabel nicht durch Küchenschranktüren oder Schubladen verläuft.
-
Seite 41: Anleitung Für Die Installation Des Kochfelds
D (mm) A (mm) B (mm) X (mm) HS2000-26 mindestens WICHTIGER HINWEIS: Stellen Sie sicher, dass das Kochfeld gut belüftet ist und der Luftein- und -austritt nicht behindert wird. Achten Sie darauf, dass das Kochfeld immer in einwandfreiem Zustand ist. - Seite 42 5.3.2 Montageanleitung Wichtig: Der Abstand zwischen dem Boden des Kochfelds und der Oberseite eines sich darunter befindenden Möbelstücks oder Geräts (3) muss mindestens 50 mm betragen. WICHTIGER HINWEIS: Wenn das Kochfeld über einem Backofen installiert ist, stellen Sie sicher, dass der Backofen über eine Belüftung verfügt. Abb.
- Seite 43 Die Haltebügel befinden sich in einem mitgelieferten Beutel. Passen Sie die Position der Bügel an die unterschiedlichen Dicken der Arbeitsplatte an. a) a) b) b) Abb. 5.3 a) - Version 1 b) - Version 2 HINWEIS: Die Abmessungen des Arbeitsplattenausschnitts finden Sie im vorherigen Abschnitt „Abmessungen des Arbeitsflächenausschnitts“.
- Seite 44 WICHTIGER HINWEIS: Stellen Sie sicher, dass das Kochfeld gut belüftet ist und der Luftein- und -austritt nicht behindert wird. Achten Sie darauf, dass das Kochfeld immer in einwandfreiem Zustand ist. WICHTIGER HINWEIS: Der Sicherheitsabstand zwischen dem Kochfeld und eventuell darüber platzierten Möbelstücken muss mindestens 760 mm betragen. WICHTIGER HINWEIS: Der Sicherheitsabstand zwischen dem Kochfeld und einer Dunstabzugshaube muss mindestens 650 mm betragen.
-
Seite 45: Anleitung Für Die Installation Des Backofens
Damit das Einbaugerät einwandfrei funktioniert, muss der Schrank, in den es eingebaut wird, geeignet sein. Die folgende Abbildung zeigt die Abmessungen Öffnung für den Einbau unter der Arbeitsplatte oder in einem Hängeschrank. HS2000-26 A) - 594 mm B) - 594 mm... - Seite 46 WICHTIGER HINWEIS: Zur Gewährleistung einer ausreichenden Belüftung muss die Rückwand des Schranks entfernt werden. Es ist besser, den Backofen so zu installieren, dass er auf zwei Holzleisten ruht. Steht der Backofen auf einer durchgehenden, ebenen Fläche, muss eine rückseitige Öffnung von mindestens 45×560 mm vorhanden sein. Abb.
-
Seite 47: Anschluss Des Geräts An Das Stromnetz
Anschluss des Geräts an das Stromnetz Prüfen Sie vor dem Anschluss des Geräts (Backofen/Kochfeld) an das Stromnetz, dass: GEFAHR: Verwenden Sie keine Adapter, Reduzierstücke oder Abzweigungen, um das Gerät an das Stromnetz anzuschließen, da dies zu Überhitzung und Feuer führen kann. - Seite 48 WICHTIGER HINWEIS: Das Kabel darf keine Biegungen oder Quetschungen aufweisen. WICHTIGER HINWEIS: Stecker und Steckdose müssen leicht zugänglich sein. WICHTIGER HINWEIS: Backöfen, die mit einem dreipoligen Netzkabel ausgestattet sind, sind für den Betrieb mit Wechselstrom ausgelegt. Der Leiter für die Erdung des Geräts ist gelb-grün.
- Seite 49 Zweiphasiger Anschluss A) - Phase B) - Neutral C) - Erdung Abb. 5.9 Dreiphasiger Anschluss A) - Phase B) - Neutral C) - Erdung Abb. 5.10 de-48...
- Seite 50 WICHTIGER HINWEIS: Der Anschluss des Stromkabels muss gemäß den Anweisungen in der nachstehenden Tabelle erfolgen. Leitungsquerschnitt (mm²) Anschlussweise 1N~ (einphasig) Min 6 Min 6 Min 6 2N~ (zweiphasig) Min 2.5 Min 2.5 Min 6 Min 6 3N~ (dreiphasig) Min 2.5 Min 1.5 Min 1.5 Min 6...
-
Seite 51: Wartung
6 : WARTUNG Reinigung und Pflege des Kochfelds Vergewissern Sie sich vor der Durchführung von Wartungs- oder Reinigungsarbeiten, dass das Kochfeld ausgeschaltet ist. Bei: Art des Eingriffs: WICHTIGE HINWEISE Tägliche 1. Schalten Sie die Stromversorgung • Wenn das Kochfeld ausgeschaltet Verschmutzung des Kochfelds aus. - Seite 52 Bei: Art des Eingriffs: WICHTIGE HINWEISE Überlaufen von Entfernen Sie diese Spritzer immer • Entfernen Sie Flecken, die durch kochenden sofort mit einem Fischmesser, Spatel aufgelöste und zuckerhaltige Flüssigkeiten oder für Glaskeramik-Kochfelder Speisen oder übergekochte und verschütten geeigneten Schaber, aber seien Speisen verursacht wurden, von aufgelöstem Sie vorsichtig, wenn die Kochzonen...
-
Seite 53: Reinigung Und Pflege Des Backsofens
Reinigung und Pflege des Backsofens WICHTIGER HINWEIS: Vergewissern Sie sich vor der Durchführung von Wartungs- oder Reinigungsarbeiten, dass das Gerät ausgeschaltet ist. Für eine längere Lebensdauer des Ofens ist eine häufige Reinigung erforderlich. Im Einzelnen: - Teile aus emailliertem oder rostfreiem Stahl müssen mit lauwarmem Wasser gereinigt werden, ohne Scheuermittel oder korrodierende Stoffe zu verwenden, da diese sie beschädigen könnten;... - Seite 54 Öffnen Sie den Hebel (A) an den linken und rechten Scharnieren vollständig. Abb. 6.2 Halten Sie die Tür wie in der Abbildung gezeigt und schließen Sie sie vorsichtig, bis die Hebel (A) der linken und rechten Scharniere in den Teil (B) der Tür einrasten. Abb.
- Seite 55 Entfernen der Doppelverglasung an der Innenseite der Backofentür Entfernen Sie die Dichtung (D), indem Sie die beiden in der Abbildung markierten Schrauben abschrauben. Abb. 6.5 Ziehen Sie die innere Doppelverglasung vorsichtig heraus. Abb. 6.6 Legen Sie die Doppelverglasung auf eine weiche Unterlage. Reinigen Sie das Glas mit einem geeigneten Reinigungsmittel.
-
Seite 56: Störungssuche
7 : STÖRUNGSSUCHE Behebung von Problemen des Kochfelds Störung Mögliche Ursachen Abhilfe Das Kochfeld schaltet Keine Stromversorgung. Stellen Sie sicher, dass das Kochfeld sich nicht ein. an das Stromnetz angeschlossen und eingeschaltet ist. Überprüfen Sie den Hauptstromschalter in Ihrer Wohnung. Wenn Sie alles überprüft haben und das Problem weiterhin besteht, wenden Sie sich an einen qualifizierten Techniker. - Seite 57 de-56...
- Seite 113 Mod. HS2000-26 Serien Nr. MAR-YYYYMMDD00001...