Herunterladen Inhalt Inhalt Diese Seite drucken
Klarstein Big Daddy L Bedienungsanleitung

Klarstein Big Daddy L Bedienungsanleitung

Kühl-gefrierkombination

Werbung

Verfügbare Sprachen
  • DE

Verfügbare Sprachen

  • DEUTSCH, seite 1
Big Daddy L
Kühl-Gefrierkombination
Freezer Refrigerator
Frigorífico combi
Combiné réfrigérateur congélateur
Combinazione frigo e freezer
10033038 10035586

Werbung

Inhaltsverzeichnis
loading

Inhaltszusammenfassung für Klarstein Big Daddy L

  • Seite 1 Big Daddy L Kühl-Gefrierkombination Freezer Refrigerator Frigorífico combi Combiné réfrigérateur congélateur Combinazione frigo e freezer 10033038 10035586...
  • Seite 3: Inhaltsverzeichnis

    Sehr geehrter Kunde, wir gratulieren Ihnen zum Erwerb Ihres Gerätes. Lesen Sie die folgenden Hinweise sorgfältig durch und befolgen Sie diese, um möglichen Schäden vorzubeugen. Für Schäden, die durch Missachtung der Hinweise und unsachgemäßen Gebrauch entstehen, übernehmen wir keine Haftung. Scannen Sie den folgenden QR-Code, um Zugriff auf die aktuellste Bedienungsanleitung und weitere Informationen rund um das Produkt zu erhalten:...
  • Seite 4: Sicherheitshinweise

    SICHERHEITSHINWEISE Hinweise zur Sicherheit von Kindern und gefährdeten Personen • Dieses Gerät kann von Kindern ab 8 Jahren und Personen mit eingeschränkten körperlichen, sensorischen oder geistigen Fähigkeiten oder fehlender Erfahrung und Kenntnissen verwendet werden, wenn sie bei der Benutzung beaufsichtigt werden oder eine Einweisung in die sichere Handhabung des Geräts erhalten haben und die damit verbundenen Gefahren verstehen.
  • Seite 5 • Vermeiden Sie in der Nähe des Geräts offene Flammen und Zündquellen. • Lüften Sie den Raum, in dem sich das Gerät befindet, gründlich und regelmäßig. • Es ist gefährlich dieses Produkt in irgendeiner Weise zu modifizieren. Jede Beschädigung des Kabels kann einen Kurzschluss, Brand oder elektrischen Schlag verursachen.
  • Seite 6 Hinweise zum täglichen Gebrauch • Legen Sie keine heißen Lebensmittel in das Gerät. • Legen Sie die Lebensmittel nicht direkt an die Rückwand. • Tiefgefrorene Lebensmittel dürfen nach dem Auftauen nicht wieder eingefroren werden. • Lagern Sie verpackte Tiefkühlkost entsprechend den Anweisungen der Tiefkühlkosthersteller.
  • Seite 7 Hinweise zu Reinigung und Wartung • Schalten das Gerät vor der Reinigung und Wartung aus und ziehen Sie den Netzstecker aus der Steckdose. • Reinigen Sie das Gerät nicht mit Metallgegenständen. Verwenden Sie keine scharfen Gegenstände, um den Frost aus dem Gerät zu entfernen. Verwenden Sie einen Kunststoffschaber.
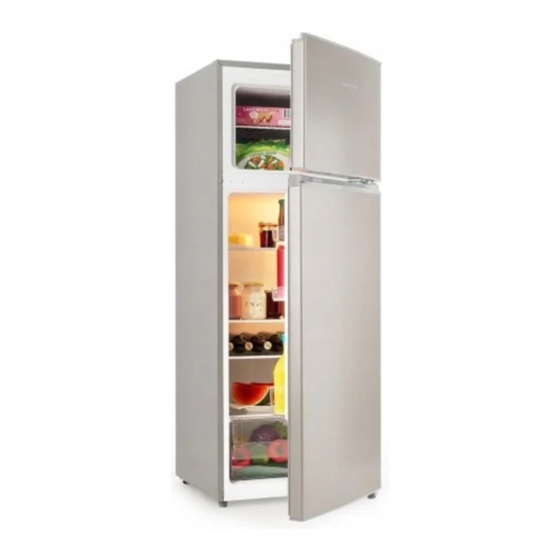
  • Seite 8: Geräteübesicht

    GERÄTEÜBESICHT Regal Thermostat Türfach Regal Abdeckung Gemüsefach Verstellbare Füße...
  • Seite 9: Türanschlag Wechseln

    TÜRANSCHLAG WECHSELN 1. Entfenen Sie die beiden oberen Abdeckungen und schrauben Sie die drei Schrauben der oberen Aufhängung (rechts) ab. 2. Entfernen Sie den Pin von der Aufhängung und befestigen Sie ihn am hinteren Loch der Aufhängung. 3. Entfernen Sie den Türanschlag auf der rechten Seite. 4.
  • Seite 10 5. Entfernen Sie die Schrauben der unteren Türaufhängung mit einem Schraubenzieher. Neigen Sie den Kühlschrank dabei nicht mehr als 45°. Untere Aufhängung 6. Entfernen Sie den Türanschlag auf der rechten Seite. Installieren Sie den Türanschlag auf der linken Seite. Befestigen Sie die untere Aufhängung mit Schrauben an der gegenüberliegenden Seite.
  • Seite 11 8. Setzen Sie die untere Tür auf die untere Aufhängung. Befestigen Sie dann die mittlere Aufhängung an der gegenüberliegenden Seite. 9. Setzen Sie die obere Tür auf die mittlere Aufhängung und befestigen Sie dann die obere Aufhängung. Befestigen Sie zum Schluss die Schraubenkappen und setzen Sie die Abdeckungen wieder auf.
  • Seite 12: Befestigung Des Türgriffs

    BEFESTIGUNG DES TÜRGRIFFS Nehmen Sie die zwei Schrauben Sie den Griff Setzen Sie die zwei Kappen ab. fest. Kappen wieder auf. VOR DEM ERSTEN BETRIEB • Entfernen Sie vor der Benutzung zuerst alle Packmaterialien, einschließlich der Bodenpolsterung, Schaumstoffkissen und Klebstreifen im Inneren des Kühlschranks. •...
  • Seite 13: Bedienung

    Positionierung der Regale und Türfächer Der Kühlschrank ist mit mehreren Regalen ausgestattet, die beliebig positioniert werden können. Um die Lagerung von Lebensmittelverpackungen unterschiedlicher Größe zu ermöglichen, können die Türfächer in verschiedenen Höhen angebracht werden. Ziehen Sie den Balkon dafür in Richtung der Pfeile, bis er sich löst und positionieren Sie ihn dann nach Bedarf.
  • Seite 14: Reinigung Und Pflege

    REINIGUNG UND PFLEGE Abtauen • An der Innenseite des Gerätes kann sich Frost ansammeln, der während des Kompressorzyklus automatisch abtaut. • Das Wasser wird über die Ablauföffnung in die Auffangwanne oberhalb des Kompressors geleitet, wo es verdampft. • Stellen Sie sicher, dass das Ablaufloch regelmäßig gereinigt wird, damit das Wasser aus dem Staufach austreten kann.
  • Seite 15: Fehlerbehebung

    FEHLERBEHEBUNG Problem Mögliche Ursache und Lösungsansatz Kühlschrank läuft nicht mehr Vergewissern Sie sich, ob das Gerät am Strom ist oder ob der Stecker fest in der Steckdose steckt. Stellen Sie fest, ob die Netzspannung zu niedrig ist. Stellen Sie fest, ob es einen Stromausfall oder Kurzschluss gibt.
  • Seite 16: Hinweise Zur Entsorgung

    Problem Mögliche Ursache und Lösungsansatz Die Wasserwanne läuft über Es befindet sich zu viel Essen im Kühlschrank oder das Essen enthält zu viel Wasser, was in starker Abtauung resultiert. Die Türen sind nicht korrekt geschlossen, was zu Frostbildung führt durch die Zufuhr von Luft und mehr und mehr Wasser durch das Abtauen.
  • Seite 17 Dear Customer, Congratulations on purchasing this device. Please read the following instructions carefully and follow them to prevent possible damages. We assume no liability for damage caused by disregard of the instructions and improper use. Scan the QR code to get access to the latest user manual and more product information.
  • Seite 18: Safety Instructions

    SAFETY INSTRUCTIONS Information on the safety of children and persons at risk • This appliance may be used by children over 8 years of age and persons with reduced physical, sensory or mental capabilities or lack of experience and knowledge, provided they are supervised during use or have received instruction in the safe use of the appliance and understand the risks involved.
  • Seite 19 • Avoid naked flames and sources of ignition near the unit. • Thoroughly and regularly ventilate the room in which the unit is located. • It is dangerous to modify this product in any way. Any damage to the cable may cause a short circuit, fire or electric shock.
  • Seite 20 Notes on daily use • Do not put hot food in the machine. • Do not place food directly against the rear panel. • Frozen food must not be refrozen after defrosting. • Store packaged frozen food according to the instructions of the frozen food manufacturer.
  • Seite 21 Notes on cleaning and maintenance • Before cleaning and maintenance, switch the machine off and unplug the power cord from the wall outlet. • Do not clean the machine with metal objects. Do not use sharp objects to remove frost from the machine. Use a plastic scraper. •...
  • Seite 22: Product Overview

    PRODUCT OVERVIEW Shelf Thermostat Balcony Shelves Cover Crisper Adjustable foot...
  • Seite 23: Reversing The Door Swing

    REVERSING THE DOOR SWING 1. Remove the top hinge cover. Remove the screws fixed the top-hinge with cross-slot screwdriver. 2. Replace the top-hinge and the top-door limit block and the door bearing bush to the other side. Remove the nut with sleeve.Take off the washer then remove the axes to the other side and fixed.
  • Seite 24 5. Use a screwdriver to remove the screws from the lower door suspension. Do not tilt the refrigerator more than 45°. Lower hinge 6. Replace the bottom door bearing bush and the limit block. Replace the bottom hinge to the other side then fix it with screws.
  • Seite 25 8. Place the lower door on the lower hinge. Then attach the middle hinge to the opposite side. 9. Place the upper door on the middle hinge and then attach the upper suspension. Finally, fasten the screw caps and replace the covers. Level out small unevenness in the floor with the adjustable feet.
  • Seite 26: Door Handle Installation

    DOOR HANDLE INSTALLATION Take out two plug pins Install the door handle Cover screw caps of the from the door. to the door and fasten it handle into screw holes. with screws. BEFORE FIRST USE • Before use, remove all packing materials, including bottom cushions, foam pads and tapes inside of the refrigerator;...
  • Seite 27: Operation

    Positioning of shelves and door compartments The refrigerator is equipped with several shelves that can be positioned as required. To enable the storage of food packaging of different sizes, the door compartments can be mounted at different heights. To do this, pull the balcony towards the arrows until it detaches and then position it as required.
  • Seite 28: Care And Maintenance

    CARE AND MAINTENANCE Defrosting • Frost can accumulate on the inside of the unit and defrost automatically during the compressor cycle. • The water is led through the outlet opening into the collecting tray above the compressor, where it evaporates. •...
  • Seite 29: Troubleshooting

    TROUBLESHOOTING Problem Possible cause and suggested solution Failed operation. Check whether the appliance is connected to power or whether the plug is in well contact. Check whether the voltage is too low. Check whether there is a power failure or partial circuits have tripped.
  • Seite 30: Hints On Disposal

    Problem Possible cause and suggested solution Water pan overflows. There is too much food in the chamber or food stored contains too much water,resulting in heavy defrosting. The doors are not closed properly, resulting in frosting due to entry of air and increased water due to defrosting.
  • Seite 31: Datos Técnicos

    Estimado cliente: Le felicitamos por la adquisición de este producto. Lea atentamente el siguiente manual y siga cuidadosamente las instrucciones de uso con el fin de evitar posibles daños. La empresa no se responsabiliza de los daños ocasionados por un uso indebido del producto o por haber desatendido las indicaciones de seguridad.
  • Seite 32: Indicaciones De Seguridad

    INDICACIONES DE SEGURIDAD Indicaciones para la seguridad de los niños y personas desvalidas • Los niños mayores de 8 años y las personas con discapacidades físicas, psíquicas o sensoriales o carentes de la experiencia y conocimiento necesarios no podrán utilizar el aparato salvo que estén bajo supervisión o hayan sido previamente instruidas sobre su utilización y las indicaciones de seguridad y se hayan familiarizado con sus funciones y con los riesgos relacionados.
  • Seite 33 • Evite las llamas abiertas y las fuentes de ignición cerca del aparato. • Ventile la estancia donde se encuentre el aparato a fondo y periódicamente. • Es peligroso modificar este producto de cualquier modo. Cualquier daño del cable puede provocar un cortocircuito, un incendio o una descarga eléctrica. •...
  • Seite 34 Indicaciones para el uso diario • No introduzca alimentos calientes dentro del aparato. • No coloque los alimentos directamente pegados a la pared trasera. • Los alimentos congelados no deben volver a congelarse después de su descongelación. • Conserve los alimentos congelados envasados siguiendo las instrucciones del productor del alimento.
  • Seite 35 Indicaciones de limpieza y mantenimiento • Apague el aparato antes de la limpieza y mantenimiento y desconecte el enchufe de la toma de corriente. • No limpie el aparato con objetos metálicos. No utilice objetos afi lados para retirar la escarcha del aparato. Utilice una rasqueta. •...
  • Seite 36: Vista General Del Aparato

    VISTA GENERAL DEL APARATO Balda Termostato Comparti- mento de la puerta Balda Cubierta Compartimento para las verduras Patas ajustables...
  • Seite 37: Girar La Bisagra De La Puerta

    GIRAR LA BISAGRA DE LA PUERTA 1. Retire ambas cubiertas y desatornille los tres tornillos de la bisagra superior (derecha). 2. Retire el pin de la bisagra y fíjelo en el orificio trasero de la misma. 3. Retire el tope de la puerta de la parte derecha. 4.
  • Seite 38 5. Desatornille los tornillos de la bisagra inferior con un destornillador. No incline el aparato más de 45º. Bisagra inferior 6. Retire el tope de la puerta de la parte derecha. Instale el tope en la parte izquierda. Fije la bisagra inferior con tornillos en el lado opuesto.
  • Seite 39 8. Coloque la puerta inferior sobre la bisagra inferior. Fije a continuación la bisagra central en el lado opuesto. 9. Coloque la puerta superior sobre la bisagra intermedia y fije a continuación la bisagra superior. Por último, coloque las tapas de los tornillos y las cubiertas decorativas.
  • Seite 40: Fijación Del Asa De La Puerta

    FIJACIÓN DEL ASA DE LA PUERTA Desmonte las dos tapas. Atornille el asa. Monte de nuevo las dos tapas. ANTES DEL PRIMER USO • Antes de utilizar el aparato, retire todo el material de embalaje, incluida la espuma de soporte, las almohadillas de espuma y las tiras adhesivas del interior del frigorífico. •...
  • Seite 41: Utilización

    Colocación de los estantes y de los compartimentos de las puertas La nevera está equipada con varios estantes que se pueden colocar según las necesidades. Para permitir el almacenamiento de envases de alimentos de diferentes tamaños, los compartimentos de las puertas pueden montarse a diferentes alturas. Para ello, tire del balcón hacia las flechas hasta que se suelte y, a continuación, colóquelo según sea necesario.
  • Seite 42: Limpieza Y Cuidado

    LIMPIEZA Y CUIDADO Descongelación • Las heladas pueden acumularse en el interior de la unidad y descongelarse automáticamente durante el ciclo del compresor. • El agua es conducida a través de la abertura de salida a la bandeja colectora situada encima del compresor, donde se evapora. •...
  • Seite 43: Resolución De Problemas

    RESOLUCIÓN DE PROBLEMAS Problema Posible causa y solución El frigorífico no funciona. Asegúrese de que el enchufe esté conectado correctamente o que el aparato disponga de un suministro eléctrico. Asegúrese de que la tensión de red no sea demasiado baja. Asegúrese de que no exista un corte de luz o un cortocircuito.
  • Seite 44: Retirada Del Aparato

    Problema Posible causa y solución La bandeja colectora rebosa Ha almacenado demasiados alimentos en el frigorífico o los alimentos contienen demasiada agua, algo que provoca una descongelación intensa. Las puertas no se han cerrado correctamente, lo que lleva a la formación de escarcha y el flujo de aire y cada vez más agua por la descongelación.
  • Seite 45 Cher client, Toutes nos félicitations pour l’acquisition de ce nouvel appareil. Veuillez lire attentivement les instructions suivantes de branchement et d’utilisation afin d’éviter d’éventuels dommages. Le fabricant ne saurait être tenu pour responsable des dommages dus au non-respect des consignes de sécurité et à la mauvaise utilisation de l’appareil.
  • Seite 46: Consignes De Sécurité

    CONSIGNES DE SÉCURITÉ Consignes pour la sécurité des enfants et des personnes vulnérables • Cet appareil peut être utilisé par des enfants à partir de 8 ans et des personnes ayant des capacités physiques, sensorielles ou mentales limitées ou dénuées d‘expérience et de connaissances, à...
  • Seite 47 • Évitez les flammes nues et les sources d‘inflammation à proximité de l‘appareil. • Aérez soigneusement et régulièrement la pièce dans laquelle se trouve l‘appareil. • Il est dangereux de modifier ce produit de quelque manière que ce soit. Tout dommage au câble peut entraîner un court-circuit, un incendie ou un choc électrique.
  • Seite 48 Consignes d‘utilisation quotidienne • Ne mettez pas d‘aliments chauds dans l‘appareil. • Ne placez pas les aliments directement contre la paroi arrière. • Les aliments surgelés ne doivent pas être recongelés après décongélation. • Conservez les aliments surgelés emballés conformément aux instructions de leur fabricant.
  • Seite 49 Consignes de nettoyage et d‘entretien • Avant de nettoyer et de réparer l‘appareil, éteignez-le et débranchez la fi che de la prise. • Ne nettoyez pas l‘appareil avec des objets métalliques. N‘utilisez pas d‘objets pointus pour éliminer le givre de l‘appareil. Utilisez un grattoir en plastique. •...
  • Seite 50: Aperçu De L'appareil

    APERÇU DE L‘APPAREIL Clayette Thermostat Compartiment de porte Clayette Cache Compartiment à légumes Pieds réglables...
  • Seite 51: Modification Du Sens D'ouverture De La Porte

    MODIFICATION DU SENS D‘OUVERTURE DE LA PORTE 1. Retirez les deux caches supérieurs et dévissez les trois vis de la suspension supérieure (à droite). Retirez la goupille du support de la charnière et fixez-la au trou arrière du support. 3. Retirez la charnière de la porte du côté droit. 4.
  • Seite 52 5. Retirez les vis du support inférieur de porte à l’aide d’un tournevis. Ne pas incliner le réfrigérateur à plus de 45°. Support inférieur 6. Retirez la charnière de la porte du côté droit. Installez la charnière de la porte sur le côté...
  • Seite 53 8. Placez la porte inférieure sur le support inférieur. Fixez ensuite le support central du côté opposé. 9. Placez la porte supérieure sur le support central et fixez le support supérieur. Enfin, fixez les capuchons des vis et remplacez les caches. Compensez les petites inégalités du sol avec les pieds réglables.
  • Seite 54: Fixation De La Poignée De Porte

    FIXATION DE LA POIGNÉE DE PORTE Retirez deux capuchons. Vissez la poignée. Replacez les deux capuchons. AVANT LA PREMIÈRE UTILISATION • Avant l‘utilisation, retirez tous les matériaux d‘emballage, y compris le fond rembourré les coussins de mousse et les bandes autocollantes à l‘intérieur du réfrigérateur.
  • Seite 55: Opération

    Positionnement des étagères et des compartiments de porte Le réfrigérateur est équipé de plusieurs étagères qui peuvent être positionnées selon les besoins. Pour permettre le stockage d‘emballages alimentaires de différentes tailles, les compartiments de porte peuvent être montés à différentes hauteurs. Pour ce faire, tirez le balcon vers les flèches jusqu‘à...
  • Seite 56: Nettoyage Et Entretien

    NETTOYAGE ET ENTRETIEN Décongélation • Le givre peut s‘accumuler à l‘intérieur de l‘appareil et dégivrer automatiquement pendant le cycle du compresseur. • L‘eau est conduite par l‘ouverture de sortie dans le bac collecteur au-dessus du compresseur, où elle s‘évapore. • Veillez à ce que le trou de vidange soit nettoyé régulièrement afin que l‘eau puisse s‘échapper du compartiment de stockage.
  • Seite 57: Résolution Des Problèmes

    RÉSOLUTION DES PROBLÈMES Problème Cause possible et solution Le réfrigérateur ne fonctionne Vérifiez que l'appareil est bien branché ou que la plus fiche est fermement insérée dans la prise. Vérifiez que la tension utilisée est suffisante. Vérifiez qu'il n'y a pas de panne de courant ou de court-circuit.
  • Seite 58: Conseils Pour Le Recyclage

    Problème Cause possible et solution Le bac à eau déborde Il y a trop d'aliments dans le réfrigérateur ou il y a trop d'eau dans les aliments, ce qui entraîne une décongélation importante. Les portes ne sont pas fermées correctement, ce qui entraîne la formation de givre à...
  • Seite 59 Gentile cliente, La ringraziamo per aver acquistato il dispositivo. La preghiamo di leggere attentamente le seguenti istruzioni per l’uso e di seguirle per evitare possibili danni tecnici. Non ci assumiamo alcuna responsabilità per danni scaturiti da una mancata osservazione delle avvertenze di sicurezza e da un uso improprio del dispositivo.
  • Seite 60: Avvertenze Di Sicurezza

    AVVERTENZE DI SICUREZZA Avvertenze per la sicurezza di bambini e persone che necessitano di tutela • Bambini a partire da 8 anni e persone con limitate capacità fisiche e psichiche possono utilizzare il dispositivo solo se sono stati istruiti in modo esaustivo da una persona responsabile del loro controllo sulle funzioni e sulle procedure di sicurezza e hanno compreso i rischi connessi.
  • Seite 61 • Evitare fiamme libere e fonti di ignizione nelle vicinanze del dispositivo. • Areare per bene e con regolarità la stanza in cui si trova il dispositivo. • Modificare in qualunque modo il dispositivo può essere pericoloso. Ogni danno al cavo può...
  • Seite 62: Informazioni Sull'installazione

    Informazioni sull’uso quotidiano • Non mettere alimenti bollenti nel dispositivo. • Non poggiare gli alimenti alla parete posteriore interna. • Alimenti che sono stati scongelati non possono essere surgelati nuovamente. • Conservare gli alimenti surgelati imballati seguendo le indicazioni del produttore. •...
  • Seite 63 Avvertenze su pulizia e manutenzione • Spegnere il dispositivo e staccare la spina prima di pulizia e manutenzione. • Non pulire il dispositivo con oggetti in metallo. Non utilizzare oggetti affi lati per rimuovere il ghiaccio dal dispositivo. Utilizzare raschietti di plastica. •...
  • Seite 64: Descrizione Del Dispositivo

    DESCRIZIONE DEL DISPOSITIVO Ripiano Termostato Vano sullo sportello Ripiano Copertura Vano per le verdure Piedi regolabili...
  • Seite 65: Cambiare La Cerniera Della Porta

    CAMBIARE LA CERNIERA DELLA PORTA 1. Rimuovere le due coperture superiori e svitare le tre viti della sospensione superiore (a destra). 2. Rimuovere il perno dal gancio e collegarlo al foro posteriore del gancio. 3. Rimuovere la cerniera della porta sul lato destro. 4.
  • Seite 66 5. Rimuovere le viti del gancio della porta inferiore con un cacciavite. Non inclinare il frigorifero più di 45°. gancio della porta inferiore 6. Rimuovere la cerniera della porta sul lato destro. Installare la cerniera della porta sul lato sinistro. Attaccare la sospensione inferiore con le viti sul lato opposto.
  • Seite 67 8. Posizionare la porta inferiore sulla sospensione inferiore. Quindi collegare la sospensione centrale sul lato opposto. 9. Posizionare la porta superiore sulla sospensione centrale e poi collegare la sospensione superiore. Infine, attaccare i tappi a vite e sostituire i coperchi. Bilanciare le piccole irregolarità...
  • Seite 68: Fissaggio Della Maniglia Della Porta

    FISSAGGIO DELLA MANIGLIA DELLA PORTA Togliere i due tappini. Avvitare la maniglia. Posizionare nuovamente i due tappini. AVVERTENZE PER IL PRIMO UTILIZZO • Prima dell´uso rimuovere completamente il materiale di imballaggio, inclusa l´imbottitura, il cuscino in materiale espanso e il nastro adesivo all‘interno del frigorifero.
  • Seite 69: Funzionamento

    Posizionamento di ripiani e vani porta Il frigorifero è dotato di diversi ripiani che possono essere posizionati a piacere. Per consentire lo stoccaggio di confezioni di alimenti di diverse dimensioni, i vani porta possono essere montati a diverse altezze. Per fare ciò, tirare il balcone verso le frecce fino a quando non si stacca e poi posizionarlo come desiderato.
  • Seite 70: Pulizia E Manutenzione

    PULIZIA E MANUTENZIONE Scongelamento • Il gelo può accumularsi all‘interno dell‘unità e sbrinarsi automaticamente durante il ciclo del compressore. • L‘acqua viene convogliata attraverso l‘apertura di uscita nel vassoio di raccolta sopra il compressore, dove evapora. • Assicurarsi che il foro di scarico venga pulito regolarmente, in modo che l‘acqua possa fuoriuscire dal vano di stivaggio.
  • Seite 71: Correzione Degli Errori

    CORREZIONE DEGLI ERRORI Problema Possibile causa e soluzioni Il frigorifero non funziona più. Assicurarsi che il dispositivo sia collegato correttamente a una presa funzionante. Controllare se la tensione nominale è troppo bassa. Controllare se c’è un blackout o un cortocircuito. Odore spiacevole.
  • Seite 72: Smaltimento

    Problema Possibile causa e soluzioni La vaschetta di raccolta Ci sono troppi alimenti nel frigorifero o gli alimenti trabocca. contengono troppa acqua, che risulta in un elevato sbrinamento. Gli sportelli non sono ben chiusi e questo causa la formazione di condensa a causa dell’accesso d’aria e alla formazione d’acqua nel processo di sbrinamento.

Diese Anleitung auch für:

1003303810035586

Inhaltsverzeichnis