Herunterladen Inhalt Inhalt Diese Seite drucken
Inhaltsverzeichnis

Werbung

Verfügbare Sprachen

Verfügbare Sprachen

Bedienungsanleitung
Instruction manual
Notice d'utilisation
5RE64361
Kochfeld autark
Stand-alone hob
Table de cuisson autonome

Werbung

Inhaltsverzeichnis
loading

Inhaltszusammenfassung für Blaupunkt 5RE64361

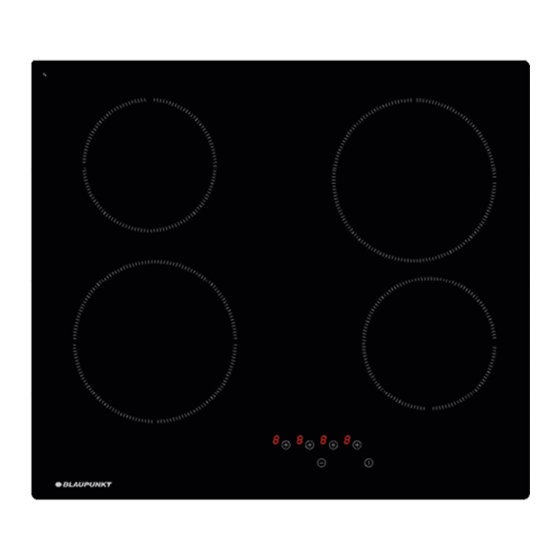
  • Seite 1 Bedienungsanleitung Instruction manual Notice d’utilisation 5RE64361 Kochfeld autark Stand-alone hob Table de cuisson autonome...
  • Seite 2: Inhaltsverzeichnis

    INHALTSVERZEICHNIS SICHERHEITSHINWEISE Vorsichtsmaßnahmen vor der Verwendung Inbetriebnahme Vorsichtsmaßnahmen, um das Gerät nicht zu beschädigen Vorsichtsmaßnahmen für den Fall eines Gerätefehlers Weitere Schutzmaßnahmen BESCHREIBUNG DES GERÄTES Technische Merkmale Bedienfeld VERWENDUNG DES GERÄTES Display INBETRIEBNAHME UND BEDIENUNG Vor der ersten Benutzung Einschalten Restwärmeanzeige Automatisches Kochen Bedienfeld sperren...
  • Seite 3: Sicherheitshinweise

    SICHERHEITSHINWEISE VORSICHTSMASSNAHMEN VOR DER VERWENDUNG • Packen Sie alle Materialien aus. • Die Installation und der Anschluss des Gerätes müssen von zugelassenen Fachleuten durchgeführt werden. Der Hersteller kann nicht für Schäden verantwortlich gemacht werden, die durch Installations- oder Anschlussfehler entstehen. •...
  • Seite 4: Vorsichtsmaßnahmen, Um Das Gerät Nicht Zu Beschädigen

    • Es sollten keine magnetischen Gegenstände (Kreditkarten, Disketten, Taschenrechner) in die Nähe des eingeschalteten Geräts gebracht werden. • Stellen Sie im Allgemeinen keine metallischen Gegenstände außer Kochgeschirr auf die Glasoberfläche. Bei vorzeitigem Einschalten oder Restwärme kann sich dieses erhitzen, schmelzen oder sogar verbrennen. •...
  • Seite 5: Vorsichtsmaßnahmen Für Den Fall Eines Gerätefehlers

    VORSICHTSMASSNAHMEN FÜR DEN FALL EINES GERÄTEFEHLERS • Wenn ein Defekt festgestellt wird, schalten Sie das Gerät und die Hauptstromversorgung aus. • Wenn das Keramikglas Risse oder Sprünge aufweist, müssen Sie das Gerät vom Netz trennen und sich an den Kundendienst wenden. •...
  • Seite 6: Beschreibung Des Gerätes

    BESCHREIBUNG DES GERÄTES TECHNISCHE MERKMALE 5RE64361 Gesamtleistung 6000 W Energieverbrauch des Kochfelds EChob* 180,7 Wh/kg Vordere linke Kochzone Ø 190 mm Nennleistung 1800 W Kategorie mit standardisiertem Kochgeschirr* Energieverbrauch des Kochfelds EChob* 183,9 Wh/kg Hintere linke Kochzone Ø 155 mm...
  • Seite 7: Bedienfeld

    BEDIENFELD Zonenauswahl [ + ] Ein/Aus-Taste Taste [ - ] VERWENDUNG DES GERÄTES DISPLAY Display Bezeichnung Beschreibung Null Die Kochzone ist aktiviert 1…9 Leistungsstufe Auswahl der Kochstufe Wärmebeschleuniger Automatisches Kochen Fehlermeldung Elektronik-Fehler Restwärme Die Kochzone ist heiß Sperre Das Kochfeld ist gesperrt...
  • Seite 8: Inbetriebnahme Und Bedienung

    INBETRIEBNAHME UND BEDIENUNG VOR DER ERSTEN BENUTZUNG Reinigen Sie das Kochfeld mit einem feuchten Tuch und trocknen Sie die Oberfläche anschließend gründlich ab. Verwenden Sie keine Reinigungsmittel, die auf der Glasoberfläche eine bläuliche Färbung verursachen könnten. EINSCHALTEN Ein-/Ausschalten des Kochfelds: Aktion Bedienfeld Display...
  • Seite 9: Automatisches Kochen

    AUTOMATISCHES KOCHEN Alle Kochzonen sind mit einer automatischen Kochfunktion ausgestattet. Die Kochzone startet während einer bestimmten Zeit mit voller Leistung und reduziert dann automatisch ihre Leistung auf die vorgewählte Stufe. Einschalten: Aktion Bedienfeld Display Zone auswählen Tippen Sie auf [ + ] [ 0 ] Volle Leistung Tippen Sie auf [ + ]...
  • Seite 10: Betriebszeitbegrenzung

    BETRIEBSZEITBEGRENZUNG Jede Kochzone ist mit einer Betriebszeitbegrenzung ausgestattet: Die Kochzone wird nach einer bestimmten Zeit automatisch abgeschaltet, ohne dass die Einstellungen geändert werden. Diese Zeit variiert je nach der gewählten Leistungsstufe, wie in der nachstehenden Tabelle beschrieben. Leistungsstufe Betriebszeit (Stunden) HINWEISE ZUM KOCHEN BEISPIELE FÜR KOCHEINSTELLUNGEN (Die nachstehenden Werte sind Richtwerte)
  • Seite 11: Wartung Und Reinigung

    WARTUNG UND REINIGUNG Schalten Sie das Gerät vor dem Reinigen aus. Reinigen Sie das Kochfeld nicht, wenn das Glas zu heiß ist: Verbrennungsgefahr. • Entfernen Sie leichte Flecken mit einem feuchten Tuch mit in etwas Wasser verdünntem Spülmittel. Anschließend mit kaltem Wasser abspülen und die Oberfläche gründlich abtrocknen. •...
  • Seite 12: Umweltschutz

    Eine oder alle Kochzonen sind ausgeschaltet: • Die Sicherheitsabschaltung ist aktiviert. • Sie haben über längere Zeit vergessen, die Kochzone auszuschalten. • Eine oder mehrere Touch-Tasten sind abgedeckt. Das Symbol [ Er03 ] wird angezeigt: • Ein Gegenstand oder eine Flüssigkeit bedeckt die Bedientasten. Das Symbol verschwindet, sobald die Taste nicht bedeckt ist oder gereinigt wird.
  • Seite 13: Installationshinweise

    Kleben Sie die Dichtung (2) zwei Millimeter vom äußeren Rand des Glases entfernt, nachdem Sie die Schutzfolie entfernt haben (3). Einbauen – Installieren Die Schnittgrößen sind: 5RE64361 590 mm 520 mm 560 mm 490 mm 57 mm •...
  • Seite 14 • Das Möbelstück oder die Unterlage, in die das Kochfeld eingebaut werden soll, sowie die Möbelkanten, die Laminatbeschichtungen und der Klebstoff, mit dem sie befestigt werden, müssen Temperaturen bis zu 100 °C standhalten. • Die Wandstäbe der Kante müssen hitzebeständig sein. •...
  • Seite 15: Elektrischer Anschluss

    ELEKTRISCHER ANSCHLUSS • Die Installation dieses Geräts und der Anschluss an das elektrische System sollte nur von einem qualifizierten Elektriker durchgeführt werden. • Der Schutz gegen die unter Spannung stehenden Teile muss nach der Installation gewährleistet sein. • Die erforderlichen Anschlussdaten befinden sich auf den Aufklebern auf dem Kochfeldgehäuse in der Nähe des Anschlusskastens.
  • Seite 16: Anschluss Des Kochfeldes

    Anschluss des Kochfeldes Einrichten der Konfigurationen: Verwenden Sie für die verschiedenen Anschlussarten die Messingbrücken im Kasten neben der Klemme. Einphasig 230V~1P+N: Legen Sie eine Brücke zwischen Klemme 1 und 2. Verbinden Sie die Erde mit dem Erdanschluss, den Neutralleiter N mit Klemme 4 und die Phase L mit einer der Klemmen 1 oder 2.
  • Seite 17 TABLE OF CONTENTS SAFETY INFORMATION Precautions before use Start-up Precautions to avoid damage to the appliance Precautions in the event of an appliance fault Further protective measures DESCRIPTION OF THE APPLIANCE Technical features Operating panel USING THE APPLIANCE Display START-UP AND OPERATION Before using for the first time Switching on Residual heat display...
  • Seite 18: Safety Instructions

    SAFETY INSTRUCTIONS PRECAUTIONS BEFORE USE • Unpack all materials. • The appliance must be installed and connected by approved professionals. The manufacturer cannot be held responsible for damage caused by installation or connection errors. • To use the appliance, it must be well equipped and installed in a kitchenette and a suitable and approved work surface.
  • Seite 19: Precautions To Avoid Damage To The Appliance

    • Never cover the appliance with a cloth or protective film. They can become very hot and catch fire. • This appliance may be used by children over 8 years of age and by persons with reduced physical, sensory or mental abilities or lack of experience and knowledge provided that they have been instructed in the use of the appliance by a person responsible for them and that they understand and appreciate the risks and dangers involved.
  • Seite 20: Precautions In The Event Of An Appliance Fault

    PRECAUTIONS IN THE EVENT OF AN APPLIANCE FAULT • If a defect is detected, switch off the appliance and the main power supply. • If the ceramic glass has cracks or fissures, disconnect the appliance from the power supply and contact customer service.
  • Seite 21: Description Of The Appliance

    DESCRIPTION OF THE APPLIANCE TECHNICAL FEATURES Type 5RE64361 Total output 6000 W Energy consumption of the EChob hob* 180.7 Wh/kg Front left cooking zone Ø 190 mm Rated output 1800 W Category with standardised cookware* Energy consumption of the EChob hob* 183.9 Wh/kg...
  • Seite 22: Operating Panel

    OPERATING PANEL Zone selection [ + ] ON/OFF button Button [ - ] USING THE APPLIANCE DISPLAY Display Designation Description Zero The hub is activated 1…9 Power level Selection of cooking level Heat accelerator Automatic cooking Error message Electronics error Residual heat The cooking zone is hot Lock...
  • Seite 23: Start-Up And Operation

    START-UP AND OPERATION BEFORE USING FOR THE FIRST TIME Clean the hob with a damp cloth and then dry the surface thoroughly. Do not use any cleaning agents, which could result in a bluish tint on the glass surface. SWITCHING ON Switching the hob on/off: Action Operating panel...
  • Seite 24: Automatic Cooking

    AUTOMATIC COOKING All cooking zones are equipped with an automatic cooking function. The cooking zone starts at full power for a certain time and then automatically reduces its power to the pre-selected level. Switching on: Action Operating panel Display Select zone Tap [ + ] [ 0 ] Full power...
  • Seite 25: Operating Time Limit

    OPERATING TIME LIMIT Each cooking zone is equipped with an operating time limit: The cooking zone is automatically switched off after a certain time without changing the settings. This time varies depending on the power level selected as described in the table below. Power level Operating time (hours) NOTES ON COOKING...
  • Seite 26: Maintenance And Cleaning

    MAINTENANCE AND CLEANING Switch off the appliance before cleaning. Do not clean the hob if the glass is too hot: Risk of burns. • Remove light stains with a damp cloth with detergent diluted in a little water. Then rinse with cold water and dry the surface thoroughly.
  • Seite 27: Environmental Protection

    One or all of the cooking zones are switched off: • The safety switch-off is activated. • You have forgotten to switch off the cooking zone for a long period of time. • One or more touch buttons are covered. The [ Er03 ] symbol is displayed: •...
  • Seite 28: Installation Instructions

    Glue the seal (2) two millimetres from the outer edge of the glass after removing the protective film (3). Mounting – Installing The cut sizes are: 5RE64361 590 mm 520 mm 560 mm 490 mm 57 mm •...
  • Seite 29 • The furniture item or base in which the hob is to be installed, as well as the furniture edges, the laminate coatings and the adhesive used to fix them, must be able to withstand temperatures up to 100 °C. •...
  • Seite 30: Electrical Connection

    ELECTRICAL CONNECTION • This appliance should only be installed and connected to the electrical system by a qualified electrician. • Protection against live parts must be ensured after installation. • The required connection data can be found on the labels on the hob casing near the connection box.
  • Seite 31 Connecting the hob Setting up the configurations: For the different connection types, use the brass bridges in the box next to the terminal. Single-phase 230V~1P+N: Place a bridge between terminals 1 and 2. Connect the earth to the earth connection, the neutral conductor N to terminal 4 and phase L to one of the terminals 1 or 2.
  • Seite 32 TABLE DES MATIÈRES CONSIGNES DE SÉCURITÉ Mesures de précaution avant l’utilisation Mise en service Mesures de précaution pour ne pas endommager l’appareil Mesures de précaution en cas de défaillance de l’équipement Autres mesures de protection DESCRIPTION DE L’APPAREIL Caractéristiques techniques Bandeau de commande UTILISATION DE L’APPAREIL Affichage...
  • Seite 33: Consignes De Sécurité

    CONSIGNES DE SÉCURITÉ MESURES DE PRÉCAUTION AVANT L’UTILISATION • Déballez tout le matériel. • L’installation et le raccordement de l’appareil doivent être effectués par des spécialistes agréés. Le fabricant ne peut être tenu responsable des dommages causés par des erreurs d’installation ou de raccordement.
  • Seite 34: Mesures De Précaution Pour Ne Pas Endommager L'appareil

    • De manière générale, ne placez pas d’objets métalliques autres que des casseroles sur la surface en verre. En cas de mise en marche prématurée ou de chaleur résiduelle, celle-ci peut s’échauffer, fondre ou même brûler. • Ne recouvrez jamais l’appareil d’un tissu ou d’un film de protection. Ils peuvent devenir très chauds et prendre feu.
  • Seite 35: Mesures De Précaution En Cas De Défaillance De L'équipement

    MESURES DE PRÉCAUTION EN CAS DE DÉFAILLANCE DE L’ÉQUIPEMENT • Si un défaut est détecté, éteignez l’appareil et coupez l’alimentation électrique principale. • Si le verre céramique présente des fissures, vous devez débrancher l’appareil de l’alimentation électrique et contacter le service clientèle. •...
  • Seite 36: Description De L'appareil

    DESCRIPTION DE L’APPAREIL CARACTÉRISTIQUES TECHNIQUES Type 5RE64361 Puissance totale 6000 W Consommation d’énergie de la plaque de cuisson EChob* 180,7 Wh/kg Zone de cuisson avant gauche Ø 190 mm Puissance nominale 1800 W Catégorie avec casseroles standardisées* Consommation d’énergie de la plaque de cuisson EChob* 183,9 Wh/kg Zone de cuisson arrière gauche...
  • Seite 37: Bandeau De Commande

    BANDEAU DE COMMANDE Sélection de la zone [ + ] Touche [ - ] Bouton ON/OFF (marche/arrêt) UTILISATION DE L’APPAREIL AFFICHAGE Affichage Désignation Description Zéro La zone de cuisson est activée 1…9 Niveau de puissance Sélection du niveau de cuisson Accélérateur de chaleur Cuisson automatique Message d’erreur...
  • Seite 38: Mise En Marche Et Commande

    MISE EN MARCHE ET COMMANDE AVANT LA PREMIÈRE UTILISATION Nettoyez la plaque de cuisson avec un chiffon humide, puis séchez soigneusement la surface. N’utilisez pas de produits de nettoyage qui pourraient provoquer une teinte bleutée sur la surface du verre. MISE EN MARCHE Allumer / éteindre la plaque de cuisson : Action...
  • Seite 39: Cuisson Automatique

    CUISSON AUTOMATIQUE Toutes les zones de cuisson sont équipées d’un système de cuisson automatique. La zone de cuisson démarre à pleine puissance pendant un certain temps, puis réduit automatiquement sa puissance au niveau présélectionné. Activer : Action Bandeau de commande Affichage Sélectionner une zone Appuyez sur [ + ]...
  • Seite 40: Limiteur De Durée De Fonctionnement

    LIMITEUR DE DURÉE DE FONCTIONNEMENT Chaque zone de cuisson est équipée d’un limiteur de durée de fonctionnement : la zone de cuisson est automatiquement désactivée après un certain temps sans modification des paramètres. Ce temps varie en fonction du niveau de puissance choisi, comme le décrit le tableau ci-dessous. Niveau de puissance Durée de fonctionnement (heures) REMARQUES SUR LA CUISSON...
  • Seite 41: Entretien Et Nettoyage

    ENTRETIEN ET NETTOYAGE Veuillez éteindre l’appareil avant le nettoyage. Ne nettoyez pas la plaque de cuisson si le verre est trop chaud : Risque de brûlures. • Enlevez les taches légères avec un chiffon humide avec du produit vaisselle dilué dans un peu d’eau.
  • Seite 42: Protection De L'environnement

    Une ou toutes les zones de cuisson sont désactivées : • Le dispositif de coupure de sécurité est activé. • Vous avez oublié depuis longtemps d’éteindre la zone de cuisson. • Une ou plusieurs touches tactiles sont recouvertes. Le symbole [ Er03 ] est affiché : •...
  • Seite 43: Remarques Sur L'installation

    Collez le joint (2) à deux millimètres du bord extérieur du verre après avoir retiré le film de protection (3). Montage – Installation Les dimensions de coupe sont : 5RE64361 590 mm 520 mm 560 mm 490 mm 57 mm •...
  • Seite 44 • Le meuble ou le socle dans lequel la plaque de cuisson doit être encastrée, ainsi que les bords du meuble, les revêtements stratifiés et la colle avec laquelle ils sont fixés, doivent pouvoir résister à des températures allant jusqu’à 100 °C. •...
  • Seite 45: Connexion Électrique

    CONNEXION ÉLECTRIQUE • L’installation de cet appareil et la connexion au système électrique ne doivent être effectuées que par un électricien qualifié. • La protection contre les pièces sous tension doit être assurée après l’installation. • Les données de connexion requises se trouvent sur les étiquettes apposées sur le boîtier de la plaque de cuisson, près du boîtier de connexion.
  • Seite 46: Connexion De La Table De Cuisson

    Connexion de la table de cuisson Mise en place des configurations : Utilisez les ponts en laiton dans la boîte à côté de la borne pour les différents types de connexion. Monophasé 230V~1P+N : Placez un pont entre les bornes 1 et 2. Reliez la terre à...
  • Seite 48 Service 00 800 32 289 000 www.blaupunkt-einbaugeraete.com Deutschland/Germany Luxemburg/Luxembourg service.DE@blaupunkt-einbaugeraete.com service.LU@blaupunkt-einbaugeraete.com Österreich/Austria Schweiz/Switzerland service.AT@blaupunkt-einbaugeraete.com service.CH@blaupunkt-einbaugeraete.com Niederlande/Netherlands Italien/Italy service.NL@blaupunkt-einbaugeraete.com service.IT@blaupunkt-einbaugeraete.com Belgien/Belgium Spanien/Spain service.BE@blaupunkt-einbaugeraete.com service.ES@blaupunkt-einbaugeraete.com Schweden/Sweden Großbritannien/Grat Britain service.SE@blaupunkt-einbaugeraete.com service.GB@blaupunkt-einbaugeraete.com Frankreich/France Malta/Malta service.FR@blaupunkt-einbaugeraete.com service.MT@blaupunkt-einbaugeraete.com Dänemark/Denmark service.DK@blaupunkt-einbaugeraete.com 1800 252 878 658 1800 209 2096...

Inhaltsverzeichnis