Blaupunkt 5RG64361 Bedienungsanleitung
Kochfeld autark
Vorschau ausblenden
Andere Handbücher für 5RG64361:
- Bedienungsanleitung (121 Seiten) ,
- Bedienungsanleitung (56 Seiten)

Verwandte Anleitungen für Blaupunkt 5RG64361


Inhaltszusammenfassung für Blaupunkt 5RG64361
- Seite 1 Bedienungsanleitung Instruction manual Notice d’utilisation 5RG64361 5RG74351 Kochfeld autark Stand-alone hob Table de cuisson autonome...
-
Seite 2: Inhaltsverzeichnis
INHALTSVERZEICHNIS SICHERHEITSHINWEISE Vorsichtsmaßnahmen vor der Verwendung Inbetriebnahme Vorsichtsmaßnahmen, um das Gerät nicht zu beschädigen Vorsichtsmaßnahmen für den Fall eines Gerätefehlers Weitere Schutzmaßnahmen BESCHREIBUNG DES GERÄTES Technische Merkmale Bedienfeld VERWENDUNG DES GERÄTES Display INBETRIEBNAHME UND BEDIENUNG Vor der ersten Benutzung Touch-Bedienung Einschalten Restwärmeanzeige Erweiterungszone... -
Seite 3: Sicherheitshinweise
SICHERHEITSHINWEISE VORSICHTSMASSNAHMEN VOR DER VERWENDUNG • Packen Sie alle Materialien aus. • Die Installation und der Anschluss des Gerätes müssen von zugelassenen Fachleuten durchgeführt werden. Der Hersteller kann nicht für Schäden verantwortlich gemacht werden, die durch Installations- oder Anschlussfehler entstehen. •... -
Seite 4: Vorsichtsmaßnahmen, Um Das Gerät Nicht Zu Beschädigen
• Legen Sie keine metallischen Gegenstände auf das Kochfeld, mit Ausnahme von Pfannen oder Kochutensilien. Bei vorzeitigem Einschalten oder Restwärme kann sich dieses erhitzen, schmelzen oder sogar verbrennen. • Decken Sie das Gerät niemals mit einem Tuch oder einer Schutzfolie ab. Sie könnten sehr heiß werden und Feuer fangen. -
Seite 5: Vorsichtsmaßnahmen Für Den Fall Eines Gerätefehlers
VORSICHTSMASSNAHMEN FÜR DEN FALL EINES GERÄTEFEHLERS • Wenn ein Defekt festgestellt wird, schalten Sie das Gerät und die Hauptstromversorgung aus. • Wenn das Keramikglas Risse oder Sprünge aufweist, müssen Sie das Gerät vom Netz trennen und sich an den Kundendienst wenden. •... -
Seite 6: Beschreibung Des Gerätes
BESCHREIBUNG DES GERÄTES TECHNISCHE MERKMALE 5RG64361 5RG74351 Gesamtleistung 7000 W Energieverbrauch des Kochfelds EChob* 175,4 Wh/kg Vordere linke Kochzone Ø 145/220 mm Nennleistung* 1000 W/2200 W Kategorie mit standardisiertem Kochgeschirr* Energieverbrauch des Kochfelds ECcw* 172,7 Wh/kg Hintere linke Kochzone Ø 155 mm... -
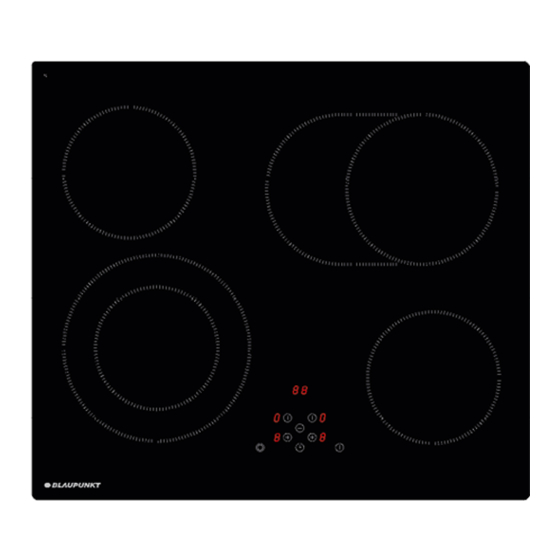
Seite 7: Bedienfeld
BEDIENFELD Taste [ + ] Timer-Anzeige Leistungsanzeige Taste [ - ] für alle 4 Kochzonen Taste für Erweiterung der Zone Timer-Taste Ein/Aus-Taste VERWENDUNG DES GERÄTES DISPLAY Display Bezeichnung Beschreibung Null Die Kochzone ist aktiviert 1…9 Leistungsstufe Auswahl der Kochstufe Wärmebeschleuniger Automatisches Kochen Fehlermeldung Elektronik-Fehler... -
Seite 8: Inbetriebnahme Und Bedienung
INBETRIEBNAHME UND BEDIENUNG VOR DER ERSTEN BENUTZUNG Reinigen Sie das Kochfeld mit einem feuchten Tuch und trocknen Sie die Oberfläche anschließend gründlich ab. Verwenden Sie keine Reinigungsmittel, die auf der Glasoberfläche eine bläuliche Färbung verursachen könnten. TOUCH-BEDIENUNG Ihr Cerankochfeld ist mit einer elektronischen Steuerung zur Touch-Bedienung ausgestattet. Wenn Ihr Finger die Taste berührt, wird der entsprechende Befehl aktiviert. -
Seite 9: Restwärmeanzeige
RESTWÄRMEANZEIGE Nach dem Ausschalten des Kochfeldes sind die Kochzonen noch heiß und auf dem Display wird [ H ] angezeigt. Das Symbol [ H ] verschwindet, wenn die Kochzonen gefahrlos berührt werden können. Berühren Sie die Kochzonen nicht und legen Sie keine wärmeempfindlichen Gegenstände darauf, solange die Restwärmeanzeige leuchtet. -
Seite 10: Automatisches Kochen „Stop & Go
AUTOMATISCHES KOCHEN „STOP & GO“ Alle Kochzonen sind mit einer automatischen „Stop & Go“-Kochfunktion ausgestattet. Die Kochzone startet während einer bestimmten Zeit mit voller Leistung und reduziert dann automatisch ihre Leistung auf die vorgewählte Stufe. Einschalten: Aktion Bedienfeld Display Zone auswählen Tippen Sie auf [ + ] [ 0 ] und Kontrollleuchte an Volle Leistung... - Seite 11 Kochzeit stoppen: Aktion Bedienfeld Display Zone auswählen Tippen Sie auf [ + ] von der Zone [ 0 ] Die verbleibende Zeit bis Timer auswählen Tippen Sie auf [ zum Ablauf des Timers wird angezeigt Tippen Sie auf [ - ] und [ Timer stoppen Timer zeigt [ 00 ] und stoppt gleichzeitig...
-
Seite 12: Hinweise Zum Kochen
HINWEISE ZUM KOCHEN BEISPIELE FÜR KOCHEINSTELLUNGEN (Die nachstehenden Werte sind Richtwerte) Saucen, Butter, Schokolade, Gelatine, 1 bis 2 Schmelzen, Erwärmen vorgekochte Gerichte Reis, Pudding, Zuckersirup, getrocknetes 2 bis 3 Quellen, Auftauen, Warmhalten Gemüse, Fisch, Tiefkühlprodukte 3 bis 4 Dünsten Gemüse, Fisch, Fleisch Dampfkartoffeln, Suppen, Teigwaren, 4 bis 5 Dünsten, Quellen, Auftauen... -
Seite 13: Problemlösung
PROBLEMLÖSUNG Das Kochfeld oder die Kochzone lassen sich nicht einschalten: • Das Kochfeld ist nicht an das Stromnetz angeschlossen. • Die Schutzsicherung schaltet das Kochfeld. • Die Sperre ist aktiviert • Die Touch-Tasten sind mit Fett oder Wasser bedeckt. • Ein Gegenstand befindet sich auf den Tasten. -
Seite 14: Umweltschutz
Das Symbol [ Er03 ] wird angezeigt: • Ein Gegenstand oder eine Flüssigkeit bedeckt die Bedientasten. Das Symbol verschwindet, sobald die Taste nicht bedeckt ist oder gereinigt wird. Das Symbol [ ER21 ] wird angezeigt: • Das Kochfeld ist überhitzt. Lassen Sie es abkühlen und schalten Sie es dann wieder ein. Das Symbol [ U400 ], [ Er25 ] oder [ U4 ] wird angezeigt: •... -
Seite 15: Installationshinweise
INSTALLATIONSHINWEISE Die Installation fällt unter die ausschließliche Verantwortung von Spezialisten. Der Installateur muss die lokalen Gesetze und geltenden Normen einhalten. Dichtung anbringen Die mit dem Kochfeld mitgelieferte Dichtung verhindert das Eindringen von Flüssigkeiten in den Schrank. Die mit dem Gerät mitgelieferte Dichtung hält das Gerät auch in Position. Es ist nicht notwendig, ein anderes Befestigungssystem zu verwenden. -
Seite 16: Einbauen - Installieren
Einbauen – Installieren Die Schnittgrößen sind: 5RG64361 590 mm 520 mm 560 mm 490 mm 57 mm 5RG74351 780 mm 520 mm 750 mm 490 mm 57 mm • Achten Sie darauf, dass zwischen dem Kochfeld und der Wand oder den Seiten ein Abstand von 50 mm besteht. -
Seite 17: Elektrischer Anschluss
• Der Sicherheitsabstand zwischen dem Kochfeld und der darüber angebrachten Dunstabzugshaube muss den Angaben des Haubenherstellers entsprechen. Bei fehlenden Angaben ist ein Mindestabstand von 650 mm einzuhalten. • Das Anschlusskabel darf nach der Installation nicht mechanisch beansprucht werden. • WARNUNG: Verwenden Sie nur Kochfeldabdeckungen, die vom Hersteller des Kochgeräts entworfen bzw. -
Seite 18: Anschluss
Achtung! Dieses Gerät darf nur an ein Netz mit 230 V/400 V ~ 50/60 Hz angeschlossen werden. Schließen Sie immer das Erdungskabel an. Beachten Sie das Anschlussdiagramm. Der Anschlusskasten befindet sich unten an der Rückseite des Kochfeldgehäuses. Verwenden Sie zum Öffnen des Deckels einen mittelgroßen Schraubendreher. Stecken Sie ihn in die Schlitze und öffnen Sie die Abdeckung. - Seite 19 Achtung! Häufiges Lösen und Festziehen der Schrauben am Anschlusskasten birgt die Gefahr, dass die Dichtigkeit beeinträchtigt wird. Es ist daher ratsam, das Ein- und Ausschrauben auf ein Minimum zu beschränken. Stellen Sie sicher, dass die Kabel korrekt eingeführt und fest verschraubt sind. Wir können nicht für Unfälle verantwortlich gemacht werden, die auf einen falschen Anschluss zurückzuführen sind oder die durch die Verwendung eines Geräts entstehen könnten, das nicht geerdet ist oder mit einer fehlerhaften Erdung ausgestattet ist.
- Seite 56 Service 00 800 32 289 000 www.blaupunkt-einbaugeraete.com Deutschland/Germany Luxemburg/Luxembourg service.DE@blaupunkt-einbaugeraete.com service.LU@blaupunkt-einbaugeraete.com Österreich/Austria Schweiz/Switzerland service.AT@blaupunkt-einbaugeraete.com service.CH@blaupunkt-einbaugeraete.com Niederlande/Netherlands Italien/Italy service.NL@blaupunkt-einbaugeraete.com service.IT@blaupunkt-einbaugeraete.com Belgien/Belgium Spanien/Spain service.BE@blaupunkt-einbaugeraete.com service.ES@blaupunkt-einbaugeraete.com Schweden/Sweden Großbritannien/Grat Britain service.SE@blaupunkt-einbaugeraete.com service.GB@blaupunkt-einbaugeraete.com Frankreich/France Malta/Malta service.FR@blaupunkt-einbaugeraete.com service.MT@blaupunkt-einbaugeraete.com Dänemark/Denmark service.DK@blaupunkt-einbaugeraete.com 1800 252 878 658 1800 209 2096...