Inhaltsverzeichnis
Werbung
Verfügbare Sprachen
Verfügbare Sprachen
Quicklinks
Werbung
Inhaltsverzeichnis

Inhaltszusammenfassung für K&H NC-7206
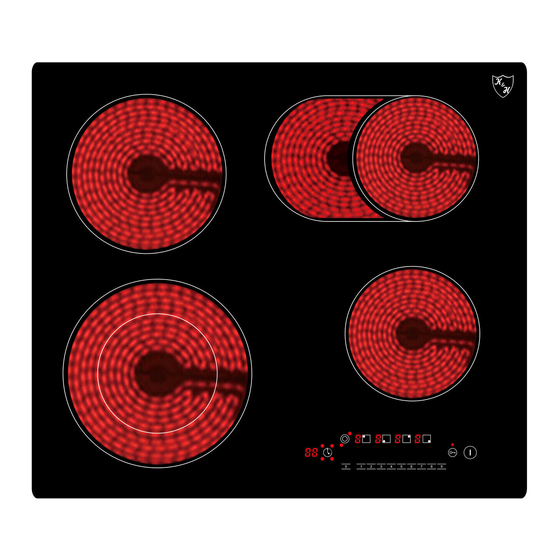
- Seite 1 All manuals and user guides at all-guides.com Cerankochfeld NC-7206 Gebrauchsanweisung Instruction Manual Technische Daten, Specification: Maße, Dimensions: 590 x 520 x 56mm Spannung, Voltage: 220-240V, 50/60Hz Max. Leistung, Power: 7200W...
-
Seite 2: Einbaueinleitung
All manuals and user guides at all-guides.com Einbaueinleitung: Schneiden Sie ein Loch in der Arbeitsplatte der Dimension in der Abbildung unten gezeigt. Mindestens 50mm Raum sollte um das Loch gelassen werden. Die Arbeitsplatte sollte mindestens 30mm dick und besteht aus hitzebeständigem Material. Instructions for built-in: Cut a hole in the worktop of the dimension shown in the diagram below. -
Seite 3: Allgemeine Sicherheitsbestimmungen
All manuals and user guides at all-guides.com Gebrauchsanweisung Allgemeine Sicherheitsbestimmungen Das Produkt, das Sie gekauft haben, entspricht dem neuesten Stand der Technologie und den geltenden Sicherheits- Regelungen, dennoch bestehen mögliche Gefahren. Lassen Sie das Kochfeld nur in einem tadellosen Zustand laufen und beachten Sie diese Bedienungsanleitung! Benutzen Sie das Kochfeld nur in dem dafür vorgesehenen Gebrauch. -
Seite 4: Bedienung Des Geräts
All manuals and user guides at all-guides.com Bedienung des Geräts Platzieren Sie das geeignete Kochgeschirr auf der jeweiligen Kochzone. Schließen Sie das Gerät an. Achtung! Stellen Sie bitte keine heißen Töpfe oder Pfannen auf das Tastenfeld Bereitschaftsbetrieb (Stand-By-Modus) Drücken Sie die An/Aus Taste . -
Seite 5: Sicherheitsabschaltung
All manuals and user guides at all-guides.com Timer Sie haben die Leistung gewählt. Drücken Sie die Timer Taste bis die LED für die gewünschte Kochzone aufleuchtet. Das Display zeigt „00“ an. Mit den Tasten „1-9“ können Sie die Zeit in 1-Minuten-Schritten einstellen (max. 99 Min.). Während des Betriebes ist es immer noch möglich die Zeit zu verändern, indem 1 Minute zu der Restzeit zugeben oder abgezogen wird. -
Seite 6: Benutzung Von Dem Geschirr
All manuals and user guides at all-guides.com Benutzung von dem Geschirr Das meiste Geschirr aus Edelstahl, Emaille, Eisen, Keramik und Kupfer kann verwendet werden. Empfohlen wird das Geschirr mit Sandwich- / Kapselboden. Die Kochfelder sollte man nicht ohne Geschirr benutzen. Der Boden des Geschirrs sollte flach und trocken sein. -
Seite 7: Reinigung Und Wartung
All manuals and user guides at all-guides.com Reinigung und Wartung • Ziehen Sie den Netzstecker vor dem Säubern des Geräts. Benutzen Sie keine ätzenden Reinigungsmittel und achten Sie darauf dass kein Wasser in das Gerät eindringt. • Um sich vom Stromschlag zu schützen, setzten Sie nie das Gerät, seine Kabel und den Stecker in Wasser oder anderen Flüssigkeiten unter. - Seite 8 All manuals and user guides at all-guides.com Gewährleistungsbedingungen für dem privaten Endverbraucher Gewährleistungszeit: Die Gewährleistungszeit beginnt mit dem Kaufdatum des Gerätes und endet nach 24 Monaten. Berücksichtigt werden alle Ansprüche, die innerhalb des Gewährleistungszeitraums bei uns geltend gemacht werden. Abwicklung der Gewährleistung: Wird eine Serviceleistung notwendig, bitten wir Sie, uns das Produkt einzusenden.
-
Seite 9: General Safety Regulations
All manuals and user guides at all-guides.com Instruction Manual General safety regulations The product you have purchased corresponds to the latest state of technology and the accepted safety regulations, still there are potential risks. Only operate the hotplate in an immaculate condition and observe these operating instructions! Use the appliance for its intended purpose only. -
Seite 10: Installing The Device
All manuals and user guides at all-guides.com Installing the device • The ceramic cooker hob must be installed by qualified personnel. • Do not block the ventilation slots of the device. This may overheat the device. Keep a Min. distance of 10 cm to walls or other items. •... -
Seite 11: Operating The Device
All manuals and user guides at all-guides.com Operating the device Place suitable cookware onto the cooker plate, and connect the plug to suitable socket. The operation of both zones is the same. Caution! Make no hot pots or pans on the keypad! Stand-By-Modus Press the On / Off button. -
Seite 12: Safety Systems
All manuals and user guides at all-guides.com Safety systems In order to protect the electronics from overheating if the control unit detects excessive heat it will switch off the hotplate closest to the sensors and the letter H will appear on the display. This hotplate can be activated when the temperature of the electronic unit returns to normal. -
Seite 13: Cleaning And Maintenance
All manuals and user guides at all-guides.com Cleaning and maintenance • Disconnect plug and wait until the unit is cooled down completely. Clean after every use. • If the pots/pans are used without being cleaned, discoloration or cooked on stains may occur. •... - Seite 14 All manuals and user guides at all-guides.com Use of Cookware Most stainless steel, enamel, iron, ceramic and copper pans can be used on radiant cooktops. Recommended is cookware with Sandwich / capsulated bottom. Hotplates should not be switched on without a pan on top. The base of the pan should be flat and dry.


