Philips Provapor GC6259 Bedienungsanleitung
Vorschau ausblenden
Andere Handbücher für Provapor GC6259:
- Bedienungsanleitung (82 Seiten) ,
- Bedienungsanleitung (32 Seiten) ,
- Bedienungsanleitung (70 Seiten)

Verwandte Anleitungen für Philips Provapor GC6259


Inhaltszusammenfassung für Philips Provapor GC6259
- Seite 1 All manuals and user guides at all-guides.com Provapor GC6268, GC6265, GC6263, GC6259, GC6257, GC6068, GC6065, GC6063, GC6059, GC6057, GC6029, GC6021, GC6018...
- Seite 2 All manuals and user guides at all-guides.com...
- Seite 3 All manuals and user guides at all-guides.com...
- Seite 4 All manuals and user guides at all-guides.com...
- Seite 5 All manuals and user guides at all-guides.com ENGLISH 6 DEUTSCH 15 FRANÇAIS 25 NEDERLANDS 34 ESPAÑOL 43 ITALIANO 52 PORTUGUÊS 61...
-
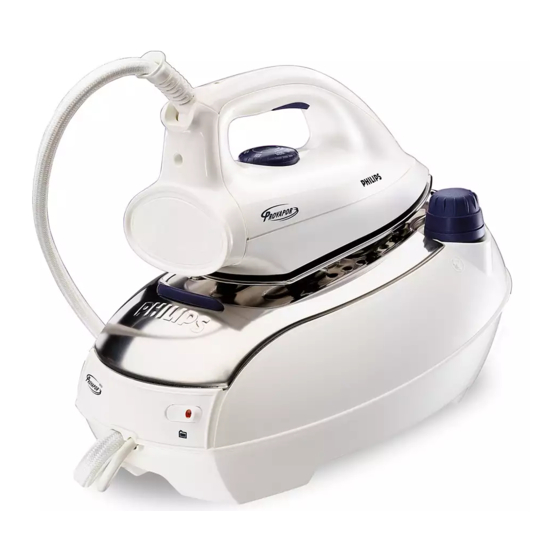
Seite 6: General Description
- Never use the appliance if it is damaged in any way. Regularly check if the mains cord and the supply hose are still undamaged and safe. - If the mains cord is damaged, it must be replaced by Philips, a service centre authorised by Philips or similarly qualified persons in order to avoid a hazard. -
Seite 7: Preparing The Appliance For Use
- If steam escapes from under the steam tank cap when the appliance is heating up, switch the appliance off and contact a service centre authorised by Philips. - Do not remove the cap from the steam tank when the steam tank is under pressure. - Seite 8 All manuals and user guides at all-guides.com ENGLISH Pour water into the steam tank (max. 1 litre). Use tap water to fill the tank up to the maximum level. If the tap water in your area is very hard, we advise you to mix tap water with an equal portion of distilled water, or to use distilled water only.
-
Seite 9: Setting The Temperature
All manuals and user guides at all-guides.com ENGLISH Setting the temperature Always place the steam tank on a stable, level and horizontal surface Do not put the steam tank on the soft part of the ironing board. Always place the iron on the iron stand. Do not put the hot iron on the supply hose or the mains cord. -
Seite 10: Ironing Without Steam
All manuals and user guides at all-guides.com ENGLISH Do not use steam when you are ironing coloured silk.This could cause stains. Steam ironing Make sure that there is enough water in the steam tank. Steam ironing is only possible at higher ironing temperatures (temperature settings 2 to MAX). -
Seite 11: Other Features
All manuals and user guides at all-guides.com ENGLISH If you have been ironing at a high temperature and subsequently set the temperature dial (I) to a lower setting, wait until the temperature pilot light (G) goes on again before you continue ironing.This will prevent damage to your fabrics. -
Seite 12: After Ironing
All manuals and user guides at all-guides.com ENGLISH Anti-calc funnel (types GC6268/GC6068/GC6029 only) To ensure a longer lifetime of the iron. Use the anti-calc funnel (M) when you fill the steam tank with water. After ironing Switch the appliance off by setting the on/off switch (D) to 'off'. Depressurise the steam tank by pressing the steam activator button until you no longer hear any steam escaping from the appliance. -
Seite 13: Guarantee & Service
Guarantee & service If you need information or if you have a problem, please visit the Philips Web site at www.philips.com or contact the Philips Customer Care Centre in your country (you will find its phone number in the worldwide guarantee leaflet). - Seite 14 All manuals and user guides at all-guides.com ENGLISH Problem Possible cause(s) Solution Some smoke comes out of the This is normal. Some parts of the iron This phenomenon will cease after a appliance after you have switched the have been greased lightly in the short while.
-
Seite 15: Allgemeine Beschreibung
Verbindungsschlauch und das Netzkabel auf Unversehrtheit und Sicherheit. - Wenn das Netzkabel defekt oder beschädigt ist, darf es nur von einem Philips Service-Center oder einer von Philips autorisierten Werkstatt ausgetauscht werden, um ein Sicherheitsrisiko zu vermeiden. - Verwenden Sie zum Verschließen des Wassertanks ausschließlich den mitgelieferten Schraubverschluss. -
Seite 16: Vorbereitung Zum Gebrauch
- Sollte während des Aufheizens aus der Einfüllöffnung Dampf entweichen, schalten Sie das Gerät aus und setzen Sie sich mit einem Philips Service Center in Verbindung. - Nehmen Sie den Verschluss keinesfalls vom Wassertank, während dieser unter Druck steht. Befolgen Sie die Anweisungen im Abschnitt 'Schnell-Nachfüllung', bevor Sie den Verschluss öffnen. - Seite 17 All manuals and user guides at all-guides.com DEUTSCH Schrauben Sie den Verschluss (A) des Wassertanks langsam auf. Möglicherweise hören Sie beim Lösen des Verschlusses ein Zischen Das ist absolut normal. Ursache ist das Vakuum im kalten Wassertank. Gießen Sie maximal 1 Liter Wasser in den Wassertank. Füllen Sie den Tank mit Leitungswasser bis zur Höchststandsmarkierung.
-
Seite 18: Einstellen Der Bügeltemperatur
All manuals and user guides at all-guides.com DEUTSCH Bügelvorschriften Gewebeart Temperaturregler Dampfregler Synthetics, z. B. Azetat, Akryl,Viskose, Polyamid, Polyester und Seide Wolle Baumwolle, Leinen Wichtig: Das Zeichen Z in der Tabelle bedeutet, dass dieser Artikel nicht gebügelt werden darf. Einstellen der Bügeltemperatur Stellen Sie den Wassertank stets auf eine feste, ebene und waagerechte Arbeitsfläche. -
Seite 19: Dampfbügeln
All manuals and user guides at all-guides.com DEUTSCH Kaltstart: Der Wassertank und die Bügelsohle werden aufgeheizt. Dies dauert bei der Bügelsohle ca. 2 Minuten und beim Wassertank ca. 8 Minuten. Nachheizen:Wenn Sie den Tank während des Bügelns nachfüllen, dauert es ca. 6 Minuten, bis das Wasser im Wassertank aufgeheizt ist. -
Seite 20: Trockenbügeln
All manuals and user guides at all-guides.com DEUTSCH die richtige Temperatur und den erforderlichen Druck gebracht werden. Sie können das Bügeln ohne Unterbrechung fortsetzen. Wenn Sie das Gerät längere Zeit nicht zum Dampfbügeln benutzt haben, kann sich im Verbindungsschlauch Kondenswasser gebildet haben. -
Seite 21: Nach Dem Bügeln
All manuals and user guides at all-guides.com DEUTSCH Dampfstoß: Stellen Sie den Dampfregler (F) auf Position R (große Wolke) und den Temperaturregler (I) auf Position 3 oder MAX. Drücken Sie die Taste für die Dampfzufuhr (H) und die Dampfstoßtaste (N). Variodampf (nur Typen GC6268/GC6265/GC6068/GC62065/ GC6029) Stellen Sie den Dampfregler (F) auf q, wenn wenig Dampf erzeugt... -
Seite 22: Reinigung Und Wartung
All manuals and user guides at all-guides.com DEUTSCH Reinigung und Wartung Ziehen Sie den Netzstecker aus der Steckdose und lassen Sie das Bügeleisen abkühlen, bevor Sie es reinigen.Führen Sie zum Reinigen des Wassertanks die ersten 4 Schritte im Abschnitt "Schnell-Nachfüllung" durch. Das Bügeleisen Reinigen Sie das Bügeleisen mit einem feuchten Tuch. -
Seite 23: Garantie Und Kundendienst
Abschnitten. Können Sie ein Problem nicht lösen, setzen Sie sich mit einem Philips Service Center in Verbindung (die Telefonnummer finden Sie in der internationalen Garantieschrift). Gibt es in Ihrem Land kein Philips Service Center, wenden Sie sich an Ihren Philips Händler. - Seite 24 All manuals and user guides at all-guides.com DEUTSCH Problem Vermutliche Ursache(n) Abhilfe Aus dem Gerät tritt nach dem ersten Das ist normal. Einige Teile des Das tritt nach kurzer Zeit nicht mehr Einschalten etwas Rauch aus. Bügeleisens sind in der Fabrik leicht auf.
-
Seite 25: Description Générale
- Si le cordon d'alimentation est endommagé, il ne doit être remplacé que par un Centre Service Agréé Philips car des outils et/ou composants spéciaux sont nécessaires. - N'utilisez pas d'autre bouchon pour la chaudière que celui fourni avec l'appareil, car ce bouchon fonctionne également comme... -
Seite 26: Préparation À L'emploi
- Si de la vapeur s'échappe par le bouchon de chaudière lorsque l'appareil chauffe, arrêtez l'appareil et contactez un centre service agréé Philips. - Ne dévissez pas le bouchon de chaudière quand celle-ci est sous pression. Avant de retirer le bouchon, suivez les instructions du chapitre "Remplissage rapide". - Seite 27 All manuals and user guides at all-guides.com FRANÇAIS Versez de l'eau dans la chaudière (max. 1 litre). Remplissez le réservoir avec de l'eau du robinet jusqu'au niveau maximum. Si l'eau du robinet de votre région est très calcaire, il est conseillé de la mélanger avec de l'eau déminéralisée.
-
Seite 28: Réglage De La Température
All manuals and user guides at all-guides.com FRANÇAIS Réglage de la température Placez toujours la chaudière sur une surface stable et horizontale. Ne placez pas la chaudière à vapeur sur une planche à repasser. Placez toujours le fer sur son support. Ne placez jamais le fer à repasser sur le cordon d'alimentation ou sur le cordon secteur. -
Seite 29: Repassage Sans Vapeur
All manuals and user guides at all-guides.com FRANÇAIS Lorsque vous repassez des articles en laine, le fer peut lustrer. Pour éviter de lustrer les tissus, utilisez un chiffon sec ou repassez l'article sur l'envers. Le velours et tissus qui ont tendance lustrer, doivent être repassés dans une seule direction en exerçant une faible pression. -
Seite 30: Autres Caractéristiques
All manuals and user guides at all-guides.com FRANÇAIS De la vapeur peut s'échapper si vous appuyez sur le bouton de vapeur accidentellement pendant le repassage. Si la chaudière est vide ou pas encore chauffée, vous entendrez un cliquetis dû à l'ouverture de la vanne vapeur. -
Seite 31: Après Le Repassage
All manuals and user guides at all-guides.com FRANÇAIS Vapeur réglable (modèles GC6268/GC6265/GC6068/GC6065/GC6029 uniquement) Vous pouvez régler le bouton vapeur (F) sur q pour vapeur modérée ou sur R pour vapeur maximum. Entonnoir anti-calc (modèles GC6268/GC6068/GC6029 uniquement) Pour assurer une plus grande longévité à votre fer à repasser. Utilisez l'entonnoir anti-calc (M) (modèle GC6268 uniquement) orsque vous remplissez la chaudière avec de l'eau. -
Seite 32: Garantie Et Service
Pour plus d'informations, visitez notre Philips Web site: www.philips.com ou veuillez contacter le Service Consommateurs Philips de votre pays (vous trouverez le numéro de téléphone dans le dépliant sur la garantie internationale). S'il n'y a aucun Service Consommateurs Philips dans votre pays, contactez votre distributeur ou le Service Department of Philips Domestic Appliances and Personal Care BV. - Seite 33 All manuals and user guides at all-guides.com FRANÇAIS S'il n'y a aucun Service Consommateurs Philips dans votre pays contactez votre revendeur ou un Centre Service Agréé Philips. Problème Cause(s) possible (s) Solution De la fumée sort du fer après avoir C'est normal.
-
Seite 34: Algemene Beschrijving
- Indien het netsnoer beschadigd is, moet het vervangen worden door Philips, een door Philips geautoriseerd servicecentrum of personen met vergelijkbare kwalificaties om gevaar te voorkomen. - Gebruik alleen de bijgeleverde dop op de stoomtank, aangezien deze ook als veiligheidsventiel dient. -
Seite 35: Klaarmaken Voor Gebruik
- Als er stoom vanonder de dop van de stoomtank ontsnapt, schakel dan het apparaat uit en neem contact op met een door Philips geautoriseerd servicecentrum. - Verwijder nooit de dop van de stoomtank wanneer die onder druk staat.Volg de instructies onder het kopje 'Snel bijvullen' wanneer u... - Seite 36 All manuals and user guides at all-guides.com NEDERLANDS Vul de stoomtank met water (maximaal 1 liter). Vul de tank met kraanwater tot aan het maximumniveau. Als het kraanwater in uw woongebied erg hard is, raden wij u aan het water te mengen met een gelijke hoeveelheid gedistilleerd water, of alleen gedistilleerd water te gebruiken.
-
Seite 37: Temperatuur Instellen
All manuals and user guides at all-guides.com NEDERLANDS Temperatuur instellen Plaats de stoomtank op een stabiele, vlakke en horizontale ondergrond Plaats de stoomtank nooit op het zachte gedeelte van de strijkplank. Plaats het hete strijkijzer altijd op de strijkmat. Plaats het hete strijkijzer nooit op de toevoerslang of het netsnoer.Voorkom dat het snoer in aanraking komt met de hete zoolplaat. -
Seite 38: Strijken Zonder Stoom
All manuals and user guides at all-guides.com NEDERLANDS Bij het stoomstrijken van wollen materialen kunnen glimmende plekken ontstaan. Dit kunt u voorkomen door een droge persdoek te gebruiken of door het kledingstuk binnenstebuiten te keren en de binnenkant te strijken. Fluweel en andere stoffen die snel glimmende plekken krijgen moeten in één richting gestreken worden (met de vleug mee) zonder te veel druk uit te oefenen. -
Seite 39: Overige Functies
All manuals and user guides at all-guides.com NEDERLANDS Er kan wat stoom ontsnappen wanneer de stoomtoevoerknop per ongeluk ingedrukt wordt tijdens het strijken.Als de stoomtank leeg of niet opgewarmd is, hoort u een klikkend geluid binnenin de tank. Dit wordt veroorzaakt door het openen van het stoomventiel en is niet schadelijk. -
Seite 40: Na Het Strijken
All manuals and user guides at all-guides.com NEDERLANDS Anti-kalktrechter (alleen types GC6268/GC6068/GC6029) Garandeert een langere levensduur voor uw strijkijzer. Gebruik de anti-kalktrechter (M) om de stoomtank te vullen met water. Na het strijken Zet het apparaat uit door de aan/uit schakelaar (D) op 'uit' te zetten. -
Seite 41: Garantie & Service
Customer Care Centre in uw land (u vindt het telefoonnummer in het 'worldwide guarantee' vouwblad). Als er geen Customer Care Centre in uw land is, ga dan naar uw Philips dealer of neem contact op met de afdeling Service van Philips Domestic Appliances and Personal Care BV. - Seite 42 All manuals and user guides at all-guides.com NEDERLANDS Probleem Mogelijke oorzaak/oorzaken Oplossing Er komt rook uit het strijkijzer Dit is gebruikelijk. Bepaalde delen van Dit houdt na enige tijd op. wanneer u het apparaat voor de het strijkijzer zijn in de fabriek licht eerste keer aanzet.
-
Seite 43: Descripción General
Compruebe regularmente que el cable de red y la manguera conductora no están deteriorados, y por lo tanto, son seguros. - Si el cable de red estuviera dañado, deberá ser sustituido por Philips o por un centro de servicio autorizado por Philips para evitar situaciones de peligro. - Seite 44 Servicio de Asistencia Técnica de Philips. - No quite el tapón del depósito de vapor cuando el depósito de vapor esté bajo presión. Siga las instrucciones de la sección "Rellenado rápido"...
- Seite 45 All manuals and user guides at all-guides.com ESPAÑOL Desenrosque lentamente el tapón (A) del depósito de vapor. Puede que oiga un sonido al quitar el tapón. La causa de este sonido es el vacío que se ha creado en el depósito de vapor al enfriarse. Este fenómeno es perfectamente normal.
- Seite 46 All manuals and user guides at all-guides.com ESPAÑOL Etiqueta con instruc- Tipo de tejido Mando de la Control ciones de planchado temperatura del vapor Tejidos sintéticos (Como, por ejemplo, acetato, viscosa, poliamida, poliester) y seda. Lana Algodón, lino Nota : Z en la tabla significa que el artículo no puede ser planchado.
- Seite 47 All manuals and user guides at all-guides.com ESPAÑOL Recalentamiento rápido: en caso de que rellene el depósito de agua durante el proceso de planchado, ésta tarda en calentarse aproximadamente 6 minutos. Sólo en modelos GC6268, GC6265 GC 068, GC6065 y GC6029: en cuanto el depósito del vapor esté...
-
Seite 48: Otras Funciones
All manuals and user guides at all-guides.com ESPAÑOL puede que se produzca un chisporroteo en el aparato y que salgan algunas gotitas de agua de la suela. Para evitar que las gotitas caigan sobre la ropa, antes de empezar a planchar sostenga la plancha sobre un paño viejo y presione el botón activador de vapor (H) hasta que se haya normalizado la producción de vapor. -
Seite 49: Después Del Planchado
All manuals and user guides at all-guides.com ESPAÑOL Presione a la vez el botón activador de vapor (H) y el botón de supervapor (N). Vapor variable (sólo en modelos GC6268/GC6265/GC6068/ GC6065 y GC6029) Puede colocar el control del vapor (F) en q para lograr un vapor moderado o en R para un vapor máximo. -
Seite 50: Garantía Y Servicio
Si necesita información o si tiene algún problema, visite la página Web de Philips en www.philips.com o póngase en contacto con el Servicio Philips de Atención al Cliente de su país (hallará el número de teléfono en el folleto de la Garantía Mundial). Si en su país no hay Servicio Philips de Atención al Cliente, diríjase a su distribuidor local Philips o... -
Seite 51: Guía De Problemas
Servicio Philips de Atención al Cliente de su país (hallará el número de teléfono en el folleto de la Garantía Mundial). Si en su país no hay Servicio Philips de Atención al Cliente, diríjase a su distribuidor local Philips o al Servicio de Asistencia Técnica de Philips más cercano. -
Seite 52: Descrizione Generale
- Nel caso il cavo di alimentazione fosse danneggiato, dovrà essere sostituito da Philips, presso un Centro Autorizzato Philips o personale comunque qualificato, per evitare situazioni a rischio. - Per il serbatoio di vapore, utilizzate esclusivamente il tappo fornito con l'apparecchio, che funziona anche da valvola di sicurezza. - Seite 53 - Nel caso di fuoriuscita di vapore dal tappo del serbatoio durante la fase di riscaldamento dell'apparecchio, spegnete subito il ferro e rivolgetevi ad un Centro Autorizzato Philips. - Non togliete il tappo quando il serbatoio del vapore è sotto pressione.
- Seite 54 All manuals and user guides at all-guides.com ITALIANO Svitate lentamente il tappo (A) del serbatoio vapore. Svitando il tappo potreste sentire uno strano rumore, dovuto al fatto che il serbatoio freddo è sotto vuoto. Si tratta di un fenomeno del tutto normale.
- Seite 55 All manuals and user guides at all-guides.com ITALIANO Etichetta con le Tipo di tessuto Termostato Regolatore istruzioni per la stiratura. vapore Tessuti sintetici, ad es. acetato, acrilico, viscosa, poliammide, poliestere e seta. Lana Cotone, lino Nota: Z nella tabella indica che il capo non può...
-
Seite 56: Stiratura A Vapore
All manuals and user guides at all-guides.com ITALIANO Solo mod. GC6268/GC6265/GC6068/GC6065/GC6029: non appena l'acqua contenuta nel serbatoio vapore è sufficientemente calda per la stiratura a vapore, la spia (E) si spegnerà.A questo punto potete iniziare a stirare. Consigli Nel caso di tessuti composti da fibre diverse, scegliete sempre la temperatura richiesta per la fibra più... -
Seite 57: Altre Caratteristiche
All manuals and user guides at all-guides.com ITALIANO fino a quando la produzione di vapore non si sarà normalizzata. A questo punto, potete iniziare a stirare normalmente. Stiratura senza vapore. Mettete il termostato nella posizione consigliata Vedere la sezione "Come impostare la temperatura". Non premete il pulsante dell'attivatore di vapore (H). -
Seite 58: Pulizia E Manutenzione
All manuals and user guides at all-guides.com ITALIANO Premente contemporaneamente il pulsanto attivatore vapore (H) e il pulsante getto di vapore (N). Vapore variabile (solo mod. GC6268/GC6265/GC6068/ GC6065/GC6029) Impostate il regolatore di vapore (F) in posizione q per un vapore moderato oppure in posizione R per ottenere il massimo del vapore. -
Seite 59: Garanzia E Assistenza
Garanzia e assistenza Se avete bisogno di assistenza o di ulteriori informazioni, vi preghiamo di visitare il nostro sito web: www.philips.com oppure di contattare il Centro Assistenza Clienti Philips del vostro Paese (per conoscere il numero di telefono, vedere l'opuscolo della garanzia). Qualora nel... -
Seite 60: Localizzazione Guasti
Per ulteriori informazioni, vi preghiamo di leggere i diversi capitoli. Nel caso non riusciste a risolvere il problema, vi preghiamo di contattare il Centro Assistenza Clienti Philips del vostro paese (per conoscere il numero di telefono, vedere l'opuscolo della garanzia). -
Seite 61: Descrição Geral
- Se o fio se estragar, deverá ser substituído pela Philips, por um concessionário autorizado pela Philips ou por pessoal devidamente qualificado para se evitarem situações gravosas para o utilizador. -
Seite 62: Preparação Do Aparelho
- Se sair vapor por debaixo da tampa do reservatório quando o aparelho estiver em aquecimento, desligue o aparelho e contacte um centro de assistência autorizado pela Philips. - Não retire a tampa do reservatório do vapor se este estiver sob pressão. - Seite 63 All manuals and user guides at all-guides.com PORTUGUÊS Deite água para dentro do reservatório do vapor (máx. 1 litro). Use água da torneira para encher o reservatório até ao nível máximo. Se a água da torneira da sua zona for muito dura, aconselha-se que misture a água da torneira com água destilada, em proporcões iguais, ou que use apenas água destilada.
-
Seite 64: Selecção Da Temperatura
All manuals and user guides at all-guides.com PORTUGUÊS Selecção da temperatura Coloque sempre o reservatório do vapor sobre uma superfície estável plana e horizontal. Não ponha o reservatório de vapor sobre a parte macia da tábua de engomar. Coloque sempre o ferro em posição de descanso. Não ponha o ferro quente sobre a mangueira ou sobre o cabo de alimentação. - Seite 65 All manuals and user guides at all-guides.com PORTUGUÊS Sugestões Se o tecido for constituído por vários tipos de fibras, seleccione sempre a temperatura para as fibras mais delicadas, isto é, a temperatura mais baixa. Por exemplo: se um artigo tiver 60% de poliester e 40% de algodão, deverá...
-
Seite 66: Outras Características
All manuals and user guides at all-guides.com PORTUGUÊS Passar sem vapor Regule o selector da temperatura para a posição recomendada. Consulte o capítulo 'Selecção da temperatura'. Não prima o botão activador do vapor (H). Poderá escapar-se algum vapor se, involuntariamente, premir o botão activador do vapor enquanto estiver a passar. -
Seite 67: Limpeza E Manutenção
All manuals and user guides at all-guides.com PORTUGUÊS Vapor variável (somente mod. GC6268/GC6265/GC6068/ GC6065 e GC6029) Pode regular o controlo do vapor (F) para q se quiser um vapor moderado ou para R se quiser o vapor no máximo. Funil anti-calcário (apenas mod. GC6268/GC6068/GC6029) Para prolongar a vida do ferro. -
Seite 68: Garantia E Assistência
Garantia e assistência Se necessitar de informações ou se tiver qualquer problema, por favor visite a página Philips na Internet em www.philips.pt ou contacte o Centro de Informação ao Consumidor Philips do seu país (o número de telefone encontra-se no folheto da garantia mundial). Se não existir um Centro de Informação ao Consumidor no seu país, dirija-se a um... - Seite 69 Centro de Informação ao Consumidor Philips do seu país (encontrará o número do telefone no folheto da garantia mundial). Se não existir um Centro de Informação ao Consumidor no seu país, dirija-se a um agente Philips local ou ao concessionário Philips mais próximo. Problema Causa(s) provável(eis)
- Seite 70 All manuals and user guides at all-guides.com www.philips.com 4239 000 52874...