Inhaltsverzeichnis
Werbung
Werbung
Inhaltsverzeichnis

Verwandte Anleitungen für AEG NM 1714


Inhaltszusammenfassung für AEG NM 1714
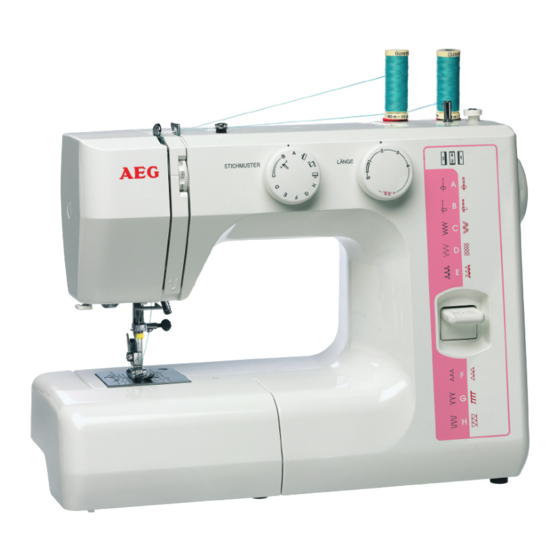
- Seite 1 Instruction book Manuel d’Instructions Bedienungsanleitung NM 1714...
-
Seite 2: Important Safety Instructions
IMPORTANT SAFETY INSTRUCTIONS This sewing machine is not a toy. Do not allow children to play with this machine. The machine is not intended for use by children or mentally infirm persons without proper supervision. This sewing machine is designed and manufactured for household use only. Read all instructions before using this sewing machine. -
Seite 3: Consignes De Sécurité Importantes
CONSIGNES DE SÉCURITÉ IMPORTANTES Pour utiliser un appareil électrique, il faut toujours respecter les consignes de sécurité fondamentales, notamment les consignes suivantes : Avant d’utiliser cet appareil, lisez toutes ces instructions. DANGER : Pour réduire les risques d’électrocution. 1. Il ne faut jamais laisser un appareil sans surveillance lorsqu’il est branché. Il faut toujours débrancher cette machine à... -
Seite 4: Wichtige Sicherheitshinweise
WICHTIGE SICHERHEITSHINWEISE Bei der Benutzung eines elektrischen Geräts sind immer grundlegende Sicherheitsanweisungen einzuhalten, einschließlich Folgendes: Lesen Sie alle Anweisungen, bevor Sie diese Maschine in Gebrauch nehmen. GEFAHR – Vermeidung eines Stromschlags: Lassen Sie die Maschine niemals unbeaufsichtigt, wenn sie an das Stromnetz angeschlossen ist. Ziehen Sie unmittelbar nach dem Gebrauch und vor der Durchführung von Reinigungen immer den Netzstecker dieser Nähmaschine ab. -
Seite 5: Inhaltsverzeichnis
TABLE OF CONENTS SECTION 1. ESSENTIAL PARTS Name of Parts ......................... 4 SECTION 2. GETTING READY TO SEW Extension Table ....................... 6 Free Arm Sewing ......................6 Standard Accessories ..................... 6 Accessories Storage Box ....................6 Connecting the Machine to the Power Supply ..............8 Presser Foot Lifter ...................... - Seite 6 TABLE DES MATIÈRES SECTION 1. PIÈCES PRINCIPALES Noms des Pièces ......................5 SECTION 2. SE PRÉPARER À COUDRE Table d’extension ......................7 Couture avec le bras libre ....................7 Accessoires standard ...................... 7 Rangement des accessoires ................... 7 Raccordement de la machine au secteur ............... 9 Relevage et abaissement du pied-de-biche ..............
- Seite 7 INHALTSVERZEICHNIS TEIL 1. WICHTIGE TEILE DER MASCHINE Bezeichnungen der Teile ....................5 TEIL 2. VORBEREITUNGEN FÜR DAS NÄHEN Anstecktisch (Zubehörfach) .................... 7 Freiarmnähen ........................7 Serienmäßiges Zubehör ....................7 Zubehörfach ........................7 Anschluss an den Netzstrom ..................9 Heben und Senken des Nähfußes .................. 9 Auswechseln des Nähfußes ....................
-
Seite 8: Section 1. Essential Parts Name Of Parts
SECTION 1. ESSENTIAL PARTS Name of Parts q Reverse stitch button w Pattern selector dial e Stitch length dial r Bobbin winder stopper t Bobbin winder spindle y Spool pins u Bobbin winder thread guide i Thread guide o Thread take-up lever !0 Thread tension dial !1 Face plate !2 Needle plate... -
Seite 9: Section 1. Pièces Principales Noms Des Pièces
SECTION 1. PIÈCES PRINCIPALES TEIL 1. WICHTIGE TEILE DER MASCHINE Noms des Pièces Bezeichnungen der Teile q Bouton de marche arrière q Rückwärtstaste w Sélecteur des motifs w Stichprogrammwähler e Contrôle de la longueur du point e Knopf für Stichlänge r Butée d’arrêt du dévidoir r Spuleranschlag t Axe de dévidoir... -
Seite 10: Section 2. Getting Ready To Sew
SECTION 2. GETTING READY TO SEW Extension Table The extension table provides added sewing surface and can be easily removed for free arm sewing. Detaching the table: Pull the table away from the machine. Free Arm Sewing Avoid fabric bunching around the needle when bartacking to reinforce pockets, plackets and waistlines. -
Seite 11: Section 2. Se Préparer À Coudre
SECTION 2. SE PRÉPARER À COUDRE TEIL 2. VORBEREITUNGEN FÜR DAS NÄHEN Table d’extension Anschiebetisch (Zubehörfach) La table d’extension ajoute de la surface pour coudre et Der Anstecktisch vergrößert die Nähfläche, er läßt sich peut être facilement enlevée. für das Freiarmnähen leicht abnehmen. Pour remettre la table: Anbringen des Anschiebetisches: Poussez la table d’extension jusqu’à... -
Seite 12: Connecting The Machine To The Power Supply
Connecting the Machine to the Power Supply z Turn off the power switch. x Insert the machine plug into the machine socket. c Insert the power supply plug into the outlet . v Turn on the power switch to turn on the power and sewing light. -
Seite 13: Raccordement De La Machine Au Secteur
Anschluss an den Netzstrom Raccordement de la machine au secteur z Schalten Sie den Netzschalter aus. z Mettez l’interrupteur d’alimentation en position d’arrêt. x Stecken Sie den Maschinenstecker in die x Introduisez la fiche de la machine dans la prise de Maschinensteckdose. -
Seite 14: Changing Needle
Changing Needle Raise the needle by turning the handwheel toward you and lower the presser foot. z Loosen the needle clamp screw by turning it counterclockwise. Remove the needle from the clamp. x Insert the new needle into the clamp with the flat side away from you. -
Seite 15: Changer L'aiguille
Changer l‘aiguille Nadel austauschen Levez l’aiguille en tournant le volant vers vous et Drehen Sie das Handrad, um die Nadel anzuheben, abaissez le pied-de-biche. und senken Sie den Nähfuß. Mettez l’interrupteur d’alimentation en position d’arrêt. Schalten Sie den Netzschalter aus. z Desserrez la vis du pince-aiguille en la tournant z Lösen Sie die Nadelklemmschraube, indem Sie dans le sens inverse des aiguilles d’une montre. -
Seite 16: Setting Spool Pins
Setting Spool Pins The spool pins are used for holding the spool of thread in order to feed thread to the machine. To use, pull up the spool pin. Place the felt on the spool pin. Push down for storage. Removing or Inserting the Bobbin Case Open the hook cover. -
Seite 17: Fixer Les Portes-Bobines
Fixer les portes-Bobines Verwendung der Garnrollenstifte Les portes-bobines sont utilisés pour placer les Die Garnrollenstifte dienen dazu, die Garnrolle so zu bobines nécessaire à l’enfilage de la machine. halten, daß der Faden der Maschine richtig zugeführt Placer le feutre enfeutre sur la broche porte-bobine. werden kann. -
Seite 18: Winding The Bobbin
Winding the Bobbin z Pull the handwheel out. x Draw the thread from spool. Guide the thread around the bobbin winder thread guide. c Insert the thread through the hole in the bobbin from the inside to the outside. Align the notch q of bobbin to the bobbin winder spindle rib w. -
Seite 19: Remplissage De La Canette
Remplissage de la canette Aufspulen z Tirez le volant vers l’extérieur pour dégager z Ziehen Sie das Handrad heraus, um die Kupplung l’embrayage. auszulösen. x Tirez le fil de la bobine. Guidez le fil autour du x Ziehen Sie Faden von der Garnrolle. Führen Sie guide-fil du dévidoir. -
Seite 20: Threading The Machine
Threading the Machine Raise the take-up lever to its highest position by turning the handwheel toward you. Raise the presser foot. Place a spool on the spool pin as shown, with thread coming from back of the spool. z Draw the thread into thread guide using both hands. -
Seite 21: Enfilage De La Machine
Enfilage de la Machine Einfädeln der Maschine Levez le releveur de fil à la plus haute position en Drehen Sie das Handrad zu sich hin, bis der tournant le volant vers vous. Fadenheber in seiner höchsten Stellung ist. Levez le pied presseur. Heben Sie den Nähfuß... -
Seite 22: Thread Tension Dial
Thread Tension Dial z Correct tension The thread tension is adjusted depending on the sewing materials, layers of fabric and sewing method. For an ideal zigzag stitch, the bobbin thread does not show on the right side (top side) of the fabric, and the needle thread shows slightly on the wrong side (bottomside) of the fabric. -
Seite 23: Oberfadenspannung
Oberfadenspannung Molette tension du fil z Ober- und Unterfaden sollten sich beim Geradstich z Le fil de l’aiguille et le fil de la canette doivent genau in der Mitte beider Stofflagen kreuzen. s‘entrelacer au centre des deux couches du tissu Drehen Sie den Fadenspannungs-Regler so, daß... -
Seite 24: Stitch Length Dial
Stitch Length Dial Turn the stitch length dial to set the desired stitch length at the setting mark. The higher the number, the longer the stitch length q Setting mark • “ ” is the recommended setting for buttonhole stitching. •... -
Seite 25: Contrôle De La Longueur De Point
Contrôle de la longueur de point Regler für die Stichlänge Plus le numéro est élevé, plus le point est long. Je höher die Zahl, umso größer die Stichlänge. Stellen Choisir la longueur de point voulue en tournant le Sie den Knopf für die Stichlängen so ein, dass seine bouton de la longueur de point. -
Seite 26: Section 3. Basic Sewing Straight Stitch Sewing
SECTION 3. BASIC SEWING Straight Stitch Sewing q Pattern selector: A or B w Presser foot: Zigzag foot e Thread tension: 2–6 r Stitch length: 1.5–4 z Raise the presser foot and position the fabric with its edge lining up with a seam guide line on the needle plate. -
Seite 27: Section 3. Bases De La Couture Point Droit
SECTION 3. BASES DE LA COUTURE TEIL 3. EINFACHES NÄHEN Point Droit Nähen mit Geradstichen q Sélecteur de point q Stichprogramm A ou B A oder B w Pied de biche Pied zigzag w Fuß Zick-Zack-Fuß e Tension du fil e Oberfadenspannung 2 - 6 2 - 6... -
Seite 28: Seam Guide Line
Seam Guide Line The numbers on the needle plate indicate the distance between the center needle position and the guideline. The numbers in front are centimeters. The numbers in back are fractions of an inch. Number Distance (cm) q Center needle position w Guide lines e Numbers Turn a Square Corner... -
Seite 29: Guides De Couture
Guides de couture Benutzen der Markierungslinien Les guides de couture tracés sur la semelle de piqûre et Die Markierungslinien auf der Stichplatte und dem le couvercle à crochet vous facilitent la tâche pour mesurer Greiferdeckel erleichtern Ihnen das Messen der les rentrées de couture. -
Seite 30: Twin Needle Hem
Twin Needle Hem q Pattern selector: w Presser foot: Zigzag foot e Thread tension: 2–6 r Stitch length: 1.5–4 t Twin needle A twin needle hem is quick and easy. It is especially useful for very stretchy fabrics. Be sure to use a stretch twin needle for knit fabrics. -
Seite 31: Ourlet À Aiguille Jumelée
Ourlet à aiguille jumelée Saum mit Zwillingsnadel q Sélecteur de point q Stichprogramm w Pied de biche w Fuß Pied zigzag Zick-Zack-Fuß e Tension du fil e Oberfadenspannung 2 - 6 2 - 6 r Longueur de point r Stichlänge 1.5 - 4 1.5 - 4 r Aiguille jumelée... -
Seite 32: Tricot Stitch
Tricot Stitch q Pattern selector: w Presser foot: Zigzag foot e Thread tension: 1–4 r Stitch length: 0.5–4 Place the fabric under the presser foot so that the edge is just inside the right edge of the presser foot. Guide the work so the right hand stitches fall off the edge of the fabric. -
Seite 33: Point Pour Tissu Tricot (Point Zigzag Multiple)
Point pour tissu tricot (point zigzag multiple) Trikotstich (Mehrfach-Zick-Zack-Stich) q Sélecteur de point q Stichprogramm w Pied de biche w Fuß Pied zigzag Zick-Zack-Fuß e Tension du fil e Oberfadenspannung r Longueur de point 0.5-4 r Stichlänge 0.5-4 Dieser Stich wird zum Bearbeiten einer Stoffkante aus Ce point sert à... -
Seite 34: Sewing Buttons
Sewing Buttons q Pattern selector: w Presser foot: Zigzag foot e Thread tension: 3–7 r Stitch length: t Feed dog: Dropped Set the Pattern Selector at B (left needle position). Mark the button placements on the fabric. Drop the feed dog.(see page 20) Place fabric under the foot. -
Seite 35: Couture Des Boutons
Couture des boutons Annähen von Knöpfen q Motif de point: q Stichmuster: Zick-Zack-Fuß w Pied de biche: w Fuß: Pied zigzag e Tension du fil: 3 – 7 e Oberdenspannung: 3 – 7 r Longueur de point: r Stichlänge: Tous Beliebig t Griffe d’entraînement: t Stoffschieber:... -
Seite 36: Buttonhole
Buttonhole q Pattern selector: w Presser foot: Sliding buttonhole foot e Thread tension: 1–5 r Stitch length: To adjust buttonhole stitch density: Set the stitch length dial between “ “to adjust the buttonhole stitch density. z Carefully mark buttonhole length on fabric. Place the fabric under the foot with the buttonhole marking running toward you. -
Seite 37: Boutonnière En 4 Phases
Boutonnière en 4 phases Knopflochnähen in 4 Schritten q Motif de point: q Stichmuster: w Pied de biche: Pied de biche pour w Fuß: Gleitnähfuß für Knopflöcher e Oberdenspannung: boutonnière 1 – 5 e Tension du fil: r Stichlänge: 1 – 5 r Longueur de point: Einstellen der Knopflochstichdichte: Pour ajuster la densité... -
Seite 38: Corded Buttonhole
Corded Buttonhole q Pattern selector: w Presser foot: Sliding buttonhole foot e Thread tension: 1 – 5 r Stitch length: z With the buttonhole foot raised, hook the cord on the cord spur at the back of the buttonhole foot. q Spur x Bring the ends toward you under the buttonhole foot until they clear the front end. -
Seite 39: Boutonnière En Relief Avec Cordon
Kordelknopfloch Boutonnière en relief avec cordon q Stichmuster: q Motif de point: w Fuß: Gleitnähfuß für Knopflöcher w Pied de biche: Pied de biche pour e Oberdenspannung: 1 – 5 boutonnière r Stichlänge: e Tension du fil: 1 – 5 r Longueur de point: z Avec le pied de biche pour boutonnières en relief, z Bei angehobenem Knopflochnähfuß... -
Seite 40: Blind Hem Stitch
Blind Hem Stitch q Pattern selector: E or F w Presser foot: Blin hem foot e Thread tension: 1–3 r Stitch length: 2–3 z On heavyweight fabrics that ravel, the raw edge should be overcast first. Then fold the hem, as illustrated, leaving 1/4˝ (0.7 cm) of the hem edge showing. -
Seite 41: Ourlet Invisible
Ourlet invisible Blindsaum q Sélecteur de point: E ou F q Stichprogramm: E oder F w Pied de biche: Pied pour ourlet invisible w Fuß: Nähfuss für Rollsaum e Tension du fil: 1 – 3 e Oberdenspannung: 1 – 3 r Longueur de point: 2 –... -
Seite 42: Box Stitch
Box Stitch q Pattern selector: w Presser foot: Zigzag foot e Thread tension: 1–4 r Stitch length: 0.5–2 Choose the box stitch to attach elastic directly onto fabric without making an elastic casing. Mark the elastic into quarters and match these to the center front, center back and side seams. -
Seite 43: Point Carré
Point carré Kästchenstich q Sélecteur de point: q Stichprogramm: w Pied de biche : w Fuß: Pied Zigzag Zick-Zack-Fuß e Tension du fil : 1 – 4 e Obrfadenspannung: 1 – 4 r Longueur de point : r Stichlänge: 0.5–2 0.5–2 Sélectionner le point carré... -
Seite 44: Smocking
Smocking q Pattern selector: w Presser foot: Zigzag foot e Thread tension: 1–4 r Stitch length: S.S. With the stitch length at “4”, sew straight stitching lines 1 cm (3/8˝) apart, across the area to be smocked. Knot the threads along one edge. Pull the bobbin threads and distribute the gathers evenly. -
Seite 45: Smocks
Smoken / Einkräuseln mit Gummifaden Smocks q Motif de point: q Stichprogramm: w Pied-de-biche: w Fuß: Pied zigzag Zick-Zack-Fuß e Tension du fil: e Oberfadenspannung: 1 – 4 1 – 4 r Longueur de point: r Stichlänge: S.S. S.S. Choisissez un tissu doux et léger, comme la batiste, le Diese Art des Kräuselns ist hervorragend geeignet für vichy ou le challis. -
Seite 46: Cleaning The Bobbin Case And Hook
SECTION 4. TAKING CARE OF YOUR MACHINE Cleaning the Bobbin Case and the Hook Note :Turn off the power switch and/or unplug the machine. To dismantle shuttle race unit: Raise the needle to its highest position and open the hook cover. Open the hinged latch of bobbin case and take it out of the machine. -
Seite 47: Reinigung Von Spulenkapsel Und Greifer
SECTION 4. TEIL 4. ENTRETIEN DE VOTRE MACHINE WARTUNG DER MASCHINE Démontage et Remontage du Crochet de la Reinigung von Spulenkapsel und Greifer Navette Hinweis: Schalten Sie den Hauptschalter aus, Note: Mettez le commutateur sur arrêt et/ou und/oder ziehen Sie den Netzstecker. débranchez la prise de la machine. -
Seite 48: Sewing Light
Sewing Light The sewing light is located behind the face plate. To change the bulb, take the face plate off the sewing machine by removing the setscrew. Unplug the power supply before changing the bulb. Do not dismantle the machine other than explained in this manual. -
Seite 49: Lumière Pour La Couture
Nählicht Lumière pour la Couture Das Nählicht sitzt hinter dem Kopfdeckel. L’ampoule lumineuse pour la couture est placée à Ziehen Sie den Stecker aus der Netzsteckdose, bevor l’arrière du capot frontal. Sie die Glühlampe auswechseln. Coupez la machine avant de changer l’ampoule. Zerlegen Sie die Maschine grundsätzlich nie anders Ne démontez pas la machine selon une méthode autre oder weiter als in der Bedienungsanleitung... -
Seite 50: Troubleshooting
Troubleshooting Cause Condition Reference The needle thread 1. The needle thread is not threaded properly. See Page 16 breaks. 2. The needle thread tension is too tight. See Page 18 3. The needle is bent or blunt. See Page 10 4. -
Seite 51: En Cas De Difficulté
En cas de difficulté Condition Cause Référence Le fil de 1. Le fil de l’aiguille n‘est pas enfilé correctement Voir Page 17 l’aiguille se 2. La tension du fil de l’aiguille est trop forte. Voir Page 19 rompt 3. L’aiguille est émoussée ou tordue. Voir Page 11 4. -
Seite 52: Störungsbeseitigung
Störungsbeseitigung Ursache Abhilfe Störung 1. Der Oberfaden ist nicht korrekt eingefädelt. Siehe Seite 17 Der Oberfaden reißt. 2. Die Spannung des Oberfadens ist zu hoch. Siehe Seite 19 3. Die Nadel ist verbogen oder stumpf. Siehe Seite 11 4. Die Nadel ist nicht korrekt eingesetzt. Siehe Seite 11 5. - Seite 53 Printed in Thailand 743-XXX-XXX...