Herunterladen Inhalt Inhalt Diese Seite drucken
ONKRON G140 Benutzerhandbuch

ONKRON G140 Benutzerhandbuch

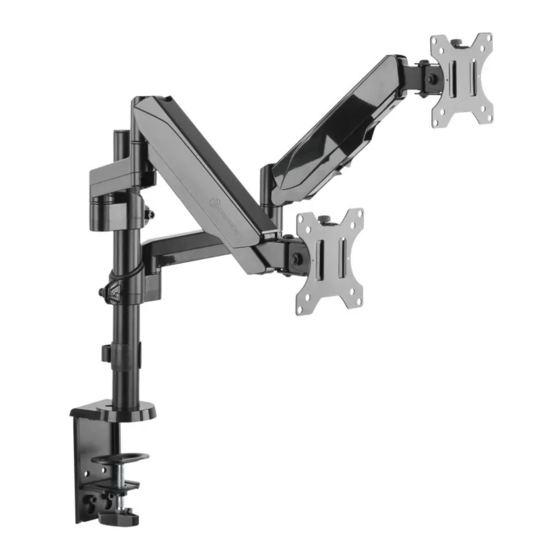
Tischhalterung für zwei monitore mit gasliſt-system
Inhaltsverzeichnis

Werbung

Verfügbare Sprachen
  • DE

Verfügbare Sprachen

  • DEUTSCH, seite 10
Soporte de escritorio con resorte de gas para dos monitores
Настольный кронштейн для двух мониторов с системой газлифт
Газлифт жүйесі бар екі мониторларға арналған үстел кронштейні
Max weight
2 x (1 - 8 kg)
2 x (2.2 - 17.6 lbs)
VESA
75 x 75
100 x 100 mm
Tilt
-35° ~ +35°
EN
USER GUIDE
DE
BENUTZERHANDBUCH
FR
MODE D'EMPLOI
IT
GUIDA UTENTE
ES
GUÍA DEL USUARIO
RU
РУКОВОДСТВО ПОЛЬЗОВАТЕЛЯ
KZ
ПАЙДАЛАНУШЫ НҰСҚАУЛЫҒЫ
Dual monitor desk mount with gas liſt system
Tischhalterung für zwei Monitore mit Gasliſt-System
Support de bureau à ressort à gaz pour deux écrans
Supporto per due monitor da scrivania con molla a gas
Orientation
360°
Height adjustment
0 - 690 mm
0" - 27.2"
G140
Screen size
13"- 32"
Arm extends
0 - 534 mm
0 - 21"
Swivel
180°

Werbung

Inhaltsverzeichnis
loading

Inhaltszusammenfassung für ONKRON G140

  • Seite 1 G140 Dual monitor desk mount with gas liſt system Tischhalterung für zwei Monitore mit Gasliſt-System Support de bureau à ressort à gaz pour deux écrans Supporto per due monitor da scrivania con molla a gas Soporte de escritorio con resorte de gas para dos monitores Настольный...
  • Seite 2 If you have any questions or issues, contact us anytime and we will help you as soon as possible: USA: sale@onkron.us / +13159682278 Europe: sale@onkron.de / +494029996807 Russia: support@onkron.ru / +78007772176 Read the entire manual before you start assembly and installation. If you have any questions about the assembly and operation of the bracket, please contact our service department.
  • Seite 3: Assembly Kit

    Assembly Kit Firstly unpack all components and make sure that you have all necessary parts. If you miss any parts, please contact our support team. Check the list: (x1) (x2) (x1) (x1) (x2) (x1) (x1) (x1) (2x) (x3) 4mm (x1) 6mm (x1) MOUNTING KIT FOR SCREEN: M4x12 (x8)
  • Seite 4: Choose How You Want To Install The Desk Mount

    1. Choose how you want to install the desk mount: a) C-Clamp installation on the edge of the desk: • Take the C-Clamp (B), it consists of two details connected with two screws. If your desk thickness is 1.3" – 3.1" (35~80 mm) use two lower holes, if 0.4" – 1.77"...
  • Seite 5: Installation With A Grommet Hole In The Desk

    b) Installation with a grommet hole in the desk: • Firstly disassemble C-Clamp (B) as shown on the picture. Attach part (J) to the tube (E) using one screw (H). Plastic cover (C) must be installed too. Put the clamp screw (from disassembled part B) through part (I) and through the hole in the desk, and then twist it in the tube (E), by spinning the knob.
  • Seite 6: Mounting Arm Assembly

    2. Mounting arm assembly • Put cable holder (F) on the tube (E). Install mounting arm (A) on the tube (E) at the desired height and tighten screws using key (L). VESA panel installation • Attach VESA-panels (D) to your screens, by using suitable screws (M-A), (M-C) and washers (M-E).
  • Seite 7: Screen Mounting

    • Other screws (M-B), (M-D), washers (M-E) and spacers (M-F) can be used as required. You may use the key (L). Make sure VESA panels are securely fixed. Look carefully at the picture below: 4. Screen mounting • Hang your screen onto the mounting arm (A). Fix VESA plate (D) with screw (G).
  • Seite 8: Cable Management

    5. Cable management 5.1 Take off plastic panels from the lower part of the arm by sliding them away from the tube (E). 5.2 Lay cables through the top parts of the arm (A). 5.3 Install plastic panels back on their places by sliding them towards the tube (E).
  • Seite 9: Key Holder Installation

    6.2 Adjust tilt angle if necessary. You may use key (L). DO NOT OVERTIGHTEN! Overtightening may cause damage to your screens and/or the mount. 7. Key holder installation • You can use plastic key-holder (F) on the tube (E) to keep keys (L), (K).
  • Seite 10: Bedienung

    Sie bitte Ihr Feedback. Wenn Sie irgendwelche Fragen oder Probleme haben, dann können Sie uns jederzeit kontaktieren und wir werden Ihnen helfen: USA: sale@onkron.us / +13159682278 Europa: info@onkron.de / +494029996807 Russland: support@onkron.ru / +78007772176 Lesen Sie diese vollständige Anleitung, bevor Sie mit der Montage und Installation beginnen.
  • Seite 11: Bausatz

    BAUSATZ Entpacken Sie zuerst alle Komponenten und stellen Sie sicher, dass Sie alle notwendigen Teile haben. Wenn die Details nicht ausreichen, kontaktieren Sie uns bitte und wir senden Sie Ihnen zu. Überprüfen Sie bitte die Stückliste: (x1) (x2) (x1) (x1) (x2) (x1) (x1)
  • Seite 12: Wählen Sie Die Installationsmethode Für Die Halterung

    1. Wählen Sie die Installationsmethode für die Halterung: a) Installation an der Tischkante mit einer Klammer: • Nehmen Sie die Klammer (B), sie besteht aus zwei Teilen, die mit zwei Schrauben befestigt sind. Wenn die Dicke Ihres Tisches 35-80 mm (1.3" – 3.1") ist, verwenden Sie die beiden unteren Löcher, wenn 10-45 mm (0.4"...
  • Seite 13: Installation Durch Loch In Den Tisch

    b) Installation durch Loch in den Tisch: Demontieren Sie zuerst die Klammer (B) wie in der Abbildung gezeigt ist. Befestigen Sie das Teil (J) mit einer Schraube (E) am Rohr der Halterung (H). Montieren Sie die Kunststoffabdeckung (C). Stecken Sie die Klemmschraube (aus der zerlegten Klammer B) durch die Platte (I) hinein und durch das Loch im Tisch und schrauben Sie dann die Klemmschraube in das Rohr der Halterung (E).
  • Seite 14: Montage Den Halterungsarm

    2. Montage den Halterungsarm • Setzen Sie den Kabelhalter (F) auf das Rohr der Halterung (E) auf. Am Rohr (E) den Arm des Halters (A) auf die gewünschte Höhe bringen und die Schrauben mit dem Schlüssel (L) festziehen. 3. Installation die VESA-Platte auf den Bildschirm •...
  • Seite 15: Die Montage Von Monitoren

    • Bei Bedarf können andere Schrauben (M-B) und (M-D), die Unterlegscheiben (M-E) und Kunststoffdichtungen (M-F) verwendet werden. Sie können die Schlüssel (L) verwenden. Betrachten Sie die folgenden Abbildung sorgfältig: 4. Die Montage von Monitoren • Hängen Sie die Monitore an den Halterungsarm (А). Fixieren Sie die VESA- Panels (D) mit den Schrauben (G) an.
  • Seite 16: Verlerung Von Drähten

    5. Verlegen von Drähten 5.1 Schieben Sie die Tretlagerstopfen (A) vom Rohr (E) weg. 5.2 Verlegen Sie die Drähten in die Kabelführung des unteren und mittleren Teils des Halterungsarms (A). 5.3 Installieren Sie die Verschlussstopfen wieder ein, indem Sie sie mit der Bewegung zum Rohr (E) fixieren.
  • Seite 17: Die Befestigung Für Schlüsselslagerung

    • Sie können die Schlüssel (L) verwenden. Heben und senken die Monitore, um die Spannung zu überprüfen. Die Monitore sollten sicher an einer der von Ihnen ausgewählten Position fixiert. 6.2 Passen Sie die Kippschraube bei Bedarf an. Sie können die Schlüssel (L) verwenden.
  • Seite 18 Nous espérons que vous êtes satisfait de votre achat. Si vous avez aimé notre produit, veuillez laisser vos commentaires. Si vous avez des questions ou des difficultés, n'hésitez pas à nous contacter: Etats-Unis: sale@onkron.us / +13159682278 Europe: sale@onkron.de / +494029996807 Russie: support@onkron.ru / +78007772176 Veuillez lire toutes les instructions avant de commencer l'assemblage et le motange.
  • Seite 19: Kit De Montage

    Kit de montage Tout d'abord, déballez tous les composants et assurez-vous d'avoir toutes les pièces dont vous avez besoin. En cas de manque, contactez-nous et nous vous les enverrons. Consultez la liste: (x1) (x2) (x1) (x1) (x2) (x1) (x1) (x1) (2x) (x3) 4mm (x1)
  • Seite 20: Choisissez Le Type D'installation Du Support

    1. Choisissez le type d'installation du support: a) L'installation en bordure de table à l'aide de pinces de table: • Prenez la pince (B), elle se compose de deux pièces fixées par deux boulons. Si l'épaisseur de votre table est de 35~80 mm (1.3" – 3.1"), utilisez les deux trous inférieurs, si de 10 à...
  • Seite 21: L'installation À Travers Le Trou Dans La Table

    b) L'installation à travers le trou dans la table: • Tout d'abord démontez la pince (B) comme l'indique l'image. Fixez la pièce (J) au tuyau de support (E) à l'aide d'un seul boulon (H). Installez le panneau décoratif en plastique (C). Faites glisser la vis de serrage (de la pince B démontée) a travers la plaque (I) et dans le trou de la table, puis vissez la vis de serrage dans le tuyau du support (E).
  • Seite 22: L'assemblage Du Support

    2. L'assemblage du support • Placez le clip de câble (F) sur le tuyau du support (E). Puis installez le bras de support (A) à la hauteur souhaitée et serrez les boulons avec la clé (L). L'installation de panneaux VESA sur des moniteurs •...
  • Seite 23: L'installation Des Écrans

    • Utilisez d'autres vis (M-B), (M-D), rondelles (M-E), entretoises en plastique (M-F) ou la clé (L) si vous en avez besoin. Veuillez consulter attentivement l'image ci-dessous: 4. L'Installation des écrans • Accrochez les moniteurs au bras (A) et (E). Fixez les panneaux VESA (D) avec des vis (G).
  • Seite 24: La Pose Des Câbles

    5. La pose des câbles 5.1 Retirez les panneaux décoratifs en plastique du bas du support en tirant doucement vers le tube de feutre (E). 5.2 Placez les câbles à l'intérieur de la partie supérieur du bras (A). 5.3 Fixez les panneaux décoratifs dans leur place (E).
  • Seite 25: Porte-Clés

    • Vous pouvez utiliser la clé (L). Soulevez et abaissez les moniteurs pour vérifier la tension. Les moniteurs doivent être solidement fixés dans n'importe quelle position intermédiaire. 6.2 Ajustez la vis d'inclinaison si nécessaire. Vous pouvez utiliser la clé (L). NE serrez PAS trop fort les vis.
  • Seite 26 Se hai domande o problemi, puoi contattarci in qualsiasi momento e ti aiuteremo: USA: sale@onkron.us / +13159682278 Europa: sale@onkron.de / +494029996807 Federazione Russa: support@onkron.ru / +78007772176 Leggi l'intero manuale prima di procedere con l'assemblaggio e l'installazione. In caso di domande relative all'assemblaggio o alle avvertenze, contattare il distributore locale.
  • Seite 27: Kit Di Montaggio

    Kit di montaggio Disimballare prima tutti i componenti e assicurarsi di avere tutte le parti necessarie. Se mancano delle parti, contattaci e te le invieremo. Controlla l'elenco: (x1) (x2) (x1) (x1) (x2) (x1) (x1) (x1) (2x) (x3) 4mm (x1) 6mm (x1) COMPOSIZIONE DEL FISSAGGIO A TV: M4x12 (x8) M4x16 (x8)
  • Seite 28: Scegli Come Installare La Staffa

    1. Scegli come installare la staffa: a) Installazione sul bordo del tavolo con un morsetto: • Prendi il MORSETTO (B), è in due parti, tenuto insieme da due bulloni. Se il tuo tavolo ha uno spessore di 35 ~ 80 mm (1,3 "- 3,1"), utilizza i due fori inferiori, se 10 ~ 45 mm (0,4 "- 1,77") - i primi due.
  • Seite 29: Installazione Attraverso Un Foro Nel Tavolo

    b) Installazione attraverso un foro nel tavolo: • Per prima cosa smontare il morsetto (B) come mostrato nell'illustrazione. Allega parte (J) al tubo della staffa (E) utilizzando un bullone (H). Installa la copertura di plastica (C). Far scorrere la vite di fermo (dal morsetto smontato B) attraverso piastra (I) e attraverso il foro nel tavolo, quindi avvitare la vite di fissaggio nel tubo di staffa (E).
  • Seite 30: Montaggio Del Braccio Della Staffa

    2. Montaggio del braccio della staffa • Far scorrere il portacavo (F) sul tubo della staffa (E). Posizionare sul tubo (E)il braccio (A) in all'altezza desiderata e serrare i bulloni con la chiave (L). 3. Installazione di pannelli VESA sui monitor •...
  • Seite 31: Installazione Del Monitor

    • Se necessario, utilizzare altre viti (M-B) e (M-D), rondelle (M-E) e distanziali in plastica (M-F). Puoi usare la CHIAVE (L) e dare un'occhiata da vicino all'immagine qui sotto: 4. Installazione del monitor • Appendere i monitor al braccio della staffa (A) e al braccio (E). Fissare i pannelli VESA (D) con le viti (G).
  • Seite 32: Cablaggio

    5. Cablaggio 5.1 Far scorrere i cappucci terminali del braccio inferiore lontano dal tubo (E). 5.2 Instradare i cavi nella copertura nella parte superiore del braccio della staffa (A). 5.3 Sostituire i cappucci premendo contro il tubo (E). Per regolare liberamente la posizione dei monitor, i cavi devono essere leggermente allentati.
  • Seite 33: Supporto Per Riporre Le Chiavi

    • È possibile utilizzare la CHIAVE (L). Sollevare e abbassare i monitor per controllare la tensione. I monitor devono essere fissati saldamente in una qualsiasi delle posizioni scelte. 6.2 Se necessario, regolare la vite di inclinazione. È possibile utilizzare la CHIAVE (L).
  • Seite 34 ¡ Gracias por elegir el producto de ONKRON! Esperamos que Usted esté feliz con su compra. Si está contento con el producto adquirido le agradeceríamos por compartir su opinion. Si tiene algun solicitud o necesita ayuda no dude on contactárnos directamente y le asistimos lo antes posible: Estados Unidos: sale@onkron.us / +13159682278...
  • Seite 35: Kit De Montaje

    Kit de montaje Primero desempaquete todos los elementos y compruebe que tiene todos los detalles según la lista del manual. Si falta algún detalle, contáctese con nosotros y se los enviaremos. Compruébese con la lista: (x1) (x2) (x1) (x1) (x2) (x1) (x1) (x1)
  • Seite 36: Elige El Tipo De Instalación A La Mesa

    1. Elige el tipo de instalación a la mesa: a) Fijación al borde del tablero con una abrazadera C-clamp: • Fijación al borde del tablero con una abrazadera C-clamp: Tome la abrazadera C- clamp (B) formada de dos detalles que van unidos por dos tornillos. Si el grosor del tablero de su escritorio es menos de 1.3"...
  • Seite 37: Instalación A Escritorio Por Orificio Grommet

    b) Instalación a escritorio por orificio Grommet: • Primero desmonte la pieza C-clamp (B) según la ilustración. Une el detalle (J) al tubo (E) con el tornillo (H). Tambien hay que instalar el tapón plastico (C). Pase el tornillo de apriete lateral por el detalle (I) y el ojal en el tablero de la mesa entornillándola al tubo (E).
  • Seite 38: Montaje Del Soporte

    2. Montaje del soporte • Pone el clip para sujeción del cable (F). Instale el mango del soporte (A) sobre el tubo (E) a la altura deseable y tensa los tornillos (L). 3. Instalacion de la placa VESA al monitor •...
  • Seite 39: El Montaje De Los Monitores

    • Se puede usar otros tornillos (M-B) y (M - D), arandelas (M-E) y adaptadores plásticos (M-F) si sea necesario. Puede utilizar la llave (L). Consúltese la ilustración siguiente: 4. El montaje de los monitores • Cuelgue los monitores sobre los brazos (A). Fije las placas VESA (D) con los tornillos (G).
  • Seite 40: El Paso De Los Cables

    5. El paso de los cables 5.1 Desplace los embellecedores plásticos de la inferior del mango del soporte a la dirección opuesta del tubo (E). 5.2 Pase los cables a través de la caja en la parte superior del asa del soporte. (A). 5.3 Instale los embellecedores plásticos fijándoles hacia el tubo del soporte (E).
  • Seite 41: El Anclaje Para Sostener Las Llaves

    • Puede utilizar la llave (L). Sube y baje los monitores para comprobar la tensión del resorte. Los monitores deben estar fijados bien en cualquier posición elegida. 6.2 Regule el tornillo de inclinación si sea necesario. Puede usar la llave (L). ¡...
  • Seite 42 пожалуйста, оставьте Ваш отзыв. Если у Вас возникли вопросы или какие-либо проблемы, то Вы можете связаться с нами в любое время, и мы Вам поможем: США: sale@onkron.us / +13159682278 Европа: sale@onkron.de / +494029996807 Россия: support@onkron.ru / +78007772176 Полностью прочитайте данную инструкцию до начала сборки и установки. При...
  • Seite 43: Комплект Сборки

    Комплект сборки Сначала распакуйте все компоненты и убедитесь, что у вас есть все необходимые детали. Если деталей не хватает, свяжитесь с сервисной службой. Сверьтесь со списком: (x1) (x2) (x1) (x1) (x2) (x1) (x1) (x1) (2x) (x3) 4мм (x1) 6мм (x1) СОСТАВ...
  • Seite 44: Способы Установки Кронштейна

    1. Способы установки кронштейна: a) Установка на край стола с помощью струбцины: • Возьмите струбцину (B), она состоит из двух частей, скрепленных двумя винтами. Если толщина вашего стола 35-80 мм используйте два нижних отверстия, если 10-45 мм – два верхних. Закрутите винты, используя ключ (L). •...
  • Seite 45: Установка Через Отверстие В Столе

    b) Установка через отверстие в столе: • Сначала разберите струбцину (B) как показано на рисунке. Присоедините деталь (J) к трубе кронштейна (E), используя один винт (H). Установите пластиковую накладку (C). Просуньте зажимной винт (из разобранной струбцины B) через пластину (I) и через отверстие в столе, а затем вкрутите зажимной...
  • Seite 46: Сборка Кронштейна

    2. Сборка плеча кронштейна • Наденьте держатель кабеля (F) на трубу кронштейна (E). На трубу (E) установите плечо кронштейна (A) на желаемой высоте и затяните винты с помощью ключа (L). 3. Установка VESA панелей к мониторам • Установите VESA-панели (D) на ваши мониторы, используя подходящие винты...
  • Seite 47: Установка Мониторов

    • При необходимости можно воспользоваться другими винтами (М-В) и (М-D), шайбами (M-E) и пластмассовыми прокладками (M-F). Можете воспользоваться ключом (L). Внимательно рассмотрите рисунок ниже: 4. Установка мониторов • Навесьте мониторы на плечо кронштейна (A). Зафиксируйте VESA- панели (D) с помощью винтов (G).
  • Seite 48: Прокладка Проводов

    5. Прокладка проводов 5.1 Сдвиньте заглушки нижних частей плеча кронштейна (A) в направлении от трубы (E). 5.2 Проложите провода в кожухи верхних частей плеча кронштейна (A). 5.3 Установите заглушки на свое место, зафиксировав их движением к трубе (E). Для свободной регулировки положения мониторов, провода...
  • Seite 49: Крепление Для Хранения Ключей

    • Можете воспользоваться ключом (L). Поднимайте и опускайте мониторы для проверки натяжения. Мониторы должен быть надежно зафиксированы в любом из выбранных вами положений. 6.2 Отрегулируйте наклоняющий винт, если необходимо. Можете воспользоваться ключом (L). Газлифты необходимо регулировать под каждый монитор индивидуально! НЕ...
  • Seite 50 біздің өнім ұнаса, пікіріңізді қалдыруыңызды өтінеміз. Егер сізде сұрақтар немесе кез-келген мәселелер туындаса, бізбен кез-келген уақытта байланыса аласыз, біз сізге көмектесеміз: АҚШ: sale@onkron.us / +13159682278 Еуропа: sale@onkron.de / +494029996807 Ресей: support@onkron.ru / +78007772176 Монтаждауды және орнатуды бастамас бұрын осы нұсқаулықты толығымен оқып...
  • Seite 51: Inhaltsverzeichnis

    Content: PAGE Assembly kit.............................3 1. Choose how you want to install the desk mount..............4 a) C-Clamp installation on the edge of the desk...............4 b) Installation with a grommet hole in the desk..............5 2. Mounting arm assembly......................6 3. VESA panel installation......................6 4.
  • Seite 52 Установка на край стола с помощью струбцины...............44 b) Установка через отверстие в столе..................45 2. Сборка кронштейна.........................46 3. Установка VESA панелей к мониторам................46 4. Установка мониторов......................47 5. Прокладка проводов.......................48 6. Регулировка газлифтов кронштейна..................48 7. Крепление для хранения ключей..................49 210511 onkron.com...

Inhaltsverzeichnis