Herunterladen Diese Seite drucken

Manhattan 180535 Bedienungsanleitung

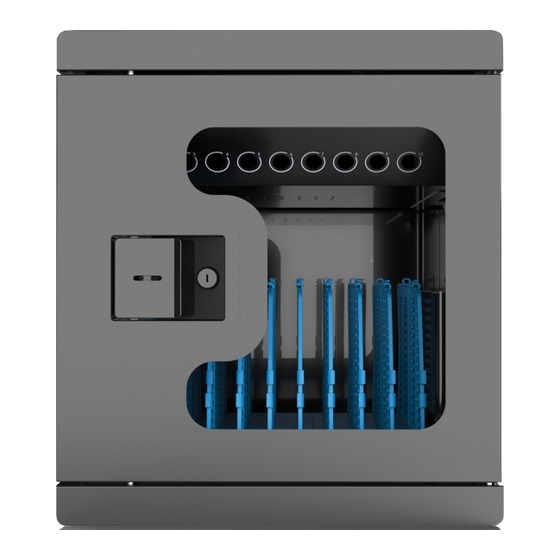
10-port ac charging cabinet

Werbung

Verfügbare Sprachen
  • DE

Verfügbare Sprachen

  • DEUTSCH, seite 4
10-Port AC
Charging Cabinet
Instructions
Model 1 80535
For additional benefits
Scan to
register your
product warranty
or visit:
register.manhattanproducts.com/r/180535

Werbung

loading

Inhaltszusammenfassung für Manhattan 180535

  • Seite 1 10-Port AC Charging Cabinet Instructions Model 1 80535 For additional benefits Scan to register your product warranty or visit: register.manhattanproducts.com/r/180535...
  • Seite 2: Installation Options

    Instructions For specifications, please visit manhattanproducts.com. Register your product at register. manhattanproducts.com/r/180535 or scan the QR code on the cover. Setup 1 Unlock unit door and open it. 2 To fit larger devices, remove bay divider(s). • Unscrew bar and set it aside.
  • Seite 3: Mounting To The Wall

    Instructions 3 Flip door and guide pins into holes on other side of 4 Reattach grounding cable to door and cabinet. cabinet frame. Release pins and ensure door is secure. Mounting to the Wall 1 At desired location on wall, use the spacing 2 Install included screws into holes so they shown in the graphic below to mark four level protrude 0.4 in.
  • Seite 4 Anleitung Die Spezifikationen finden Sie auf manhattanproducts.com. Registrieren Sie Ihr Produkt auf register. manhattanproducts.com/r/180535 oder scannen Sie den QR-Code auf dem Deckblatt. Einrichtung 1 Gerätetür entriegeln und öffnen. 2 Zum Einbau größerer Geräte die Facheinteilung(en) entfernen. • Schrauben Sie die Stange ab und legen Sie sie beiseite.
  • Seite 5 Anleitung 3 Entfernen Sie die Tür vom Schrank, indem Sie an den 4 Bringen Sie das Erdungskabel wieder an der Tür und am L-förmigen Stiften ziehen. Schrank an. Montage an der Wand - WARNUNG: Nur in Beton oder Holzständerwerk montieren! 1 Markieren Sie an der gewünschten Stelle an der Wand 2 Montieren Sie die mitgelieferten Schrauben so in die anhand der in der Grafik unten dargestellten Abstände...
  • Seite 6 Instrucciones Para mas especificaciones, visita manhattanproducts.com. Registre el producto enregister. manhattanproducts.com/r/180535 o escanee el código QR en la cubierta. Configuración 1 Desbloquee la puerta de la unidad y ábrala. 2 Para adaptar a dispositivos más grandes, retire los separadores de compartimentos.
  • Seite 7 Instrucciones 3 Voltee la puerta y guíe los pernos hacia adentro de los 4 Vuelva a sujetar el cable de puesta a tierra a la puerta y el agujeros del otro lado del marco del gabinete. Suelte los gabinete. pernos y asegúrese de que la puerta esté bien fijada. Instalación en la pared.
  • Seite 8: Installation

    Instructions Vous trouvez les spécifications sur, visitez manhattanproducts.com. Enregistrez votre produit surat register. manhattanproducts.com/r/180535 ou scannez le code QR figurant sur la couverture. Installation 1 Déverrouillez la porte de l’unité et ouvrez. 2 Pour s’adapter à des appareils plus grands, retirez le(s) séparateur(s) de compartiment.
  • Seite 9 Instructions 3 Retournez la porte et placez les goupilles dans les trous 4 Fixez à nouveau le câble de terre à la porte et à l’armoire. situées de l’autre côté de la structure de l’armoire. Relâchez les goupilles et assurez-vous que la porte est bien fixée.
  • Seite 10 Instrukcje Pełną specyfikację produktu znajdziecie Państwo na stronie manhattanproducts.com. Zarejestruj produkt register.manhattanproducts.com/r/180535 or scan the QR code on the cover. Configuration 1 Odblokuj drzwi urządzenia i otwórz je. 2 Aby zmieścić większe urządzenia, wyjmij przegrodę (przegrody). • Odkręć pasek i odłóż go na bok.
  • Seite 11 Instrukcje 3 Odwróć drzwi i wsuń sworznie prowadzące w otwory po 4 Ponownie zamocuj przewód uziemiający na drzwiach i drugiej stronie ramy szafki. Zwolnij sworznie i upewnij się, szafce. że drzwi są zabezpieczone. Montaż naścienny — OSTRZEŻENIE! Urządzenie należy montować wyłącznie do betonowych lub drewnianych elementów konstrukcyjnych! 1 W wybranym miejscu na ścianie zaznaczyć...
  • Seite 12 Istruzioni Per ulteriori specifiche, visita il sito manhattanproducts.com. Registra il tuo prodotto su register. manhattanproducts.com/r/180535 o scansiona il codice QR presente sulla copertina. Installazione 1 Sbloccare lo sportello dell’unità e aprirlo. 2 Per inserire dispositivi più voluminosi, rimuovere il/i divisore/i dell’alloggiamento.
  • Seite 13 Istruzioni 3 Capovolgere lo sportello e guidare i perni nei fori sull’altro 4 Riattaccare il cavo di messa a terra allo sportello e lato del telaio dell’armadietto. Sganciare i perni e all’armadietto. assicurarsi che lo sportello sia ben saldo. Montaggio a parete — ATTENZIONE: Montare solo in prigionieri in cemento o in legno! 1 Nella posizione desiderata sulla parete, utilizzare 2 Inserire le viti in dotazione nei fori in modo che sporgano la spaziatura mostrata nel grafico sottostante per...
  • Seite 14 WARRANTY • GARANTIEINFORMATIONEN • GARANTÍA • GARANTIE • GWARANCJI • GARANZIA manhattanproducts.com EN MÉXICO: Póliza de Garantía Manhattan — Datos del importador y responsable ante el consumidor IC Intracom México, S.A.P.I. de C.V. • Av. Interceptor Poniente # 73, Col. Parque Industrial La Joya, Cuautitlán Izcalli, Estado de México, C.P.
  • Seite 15 : Urządzenie spełnia wymagania CE 2014/30/EU i / lub 2014/35/EU. Deklaracja zgodności dostępna jest na stronie internetowej producenta: ITALIANO : Questo dispositivo è conforme alla CE 2014/30/EU e / o 2014/35/EU. La dichiarazione di conformità è disponibile al: support.manhattanproducts.com/barcode/180535 North & South America Asia & Africa Europe...
  • Seite 16 © IC Intracom. All rights reserved. Manhattan is a trademark of IC Intracom, registered in the U.S. and other countries. Printed on recycled paper. MH_180535_QIG_0621_REV_5.11...