Herunterladen Diese Seite drucken

Werbung

Verfügbare Sprachen
  • DE

Verfügbare Sprachen

  • DEUTSCH, seite 13
Adventurer 4 / 冒险家4
EN/CN/DE/FR/한-A01
Quick Start Guide
快速启动指南
EN P01 / CN P06 / DE P11 / FR P16 / 한 P21
WARNING
1. Do not remove the wrapping around the nozzle.
注意事项
2. Hot! Avoid touching the heating nozzle in operation.
3. Moving parts in printer may cause injury. Do not
wear gloves or other sources of entanglement in
operation.
1. 切勿去除包裹在喷嘴处的耐高温材料。
2. 高温危险!打印机喷嘴在工作时会被加热,操作时请避免
接触!
3. 可动部件可能会造成卷入挤压和切割伤害。操作机器时请
不要配带手套或缠绕物。
This guide is only applicable to FLASHFORGE Adventurer 4 3D printer
本手册仅适用于闪铸科技 冒险家4 3D打印机

Werbung

loading

Inhaltszusammenfassung für FLASHFORGE 3D PRINTER Adventurer 4

  • Seite 1 3. Moving parts in printer may cause injury. Do not wear gloves or other sources of entanglement in operation. 1. 切勿去除包裹在喷嘴处的耐高温材料。 2. 高温危险!打印机喷嘴在工作时会被加热,操作时请避免 接触! 3. 可动部件可能会造成卷入挤压和切割伤害。操作机器时请 不要配带手套或缠绕物。 This guide is only applicable to FLASHFORGE Adventurer 4 3D printer 本手册仅适用于闪铸科技 冒险家4 3D打印机...
  • Seite 3: Component Introduction

    Adventurer 4 Quick Start Guide Component Introduction 1. Power switch 2. Power socket 3. Filament cover 4. Spool holder 5. Filament intake cover 6. Front cover 7. Platform base 8. Build plate 9. Touch screen 10. USB 11. Ethernet input 12.
  • Seite 4 1. 切勿去除包裹在喷嘴处的耐高温材料。 2. 高温危险!打印机喷嘴在工作时会被加热,操作时请避免 接触! 3. 可动部件可能会造成卷入挤压和切割伤害。操作机器时请 不要配带手套或缠绕物。 This guide is only applicable to FLASHFORGE Adventurer 4 3D printer 本手册仅适用于闪铸科技 冒险家4 3D打印机 Quick Start Guide Screwdriver Unclogging 0.4-265 Nozzle Pin Tool (Adventurer 4 Equipped)...
  • Seite 5: Software Installation

    Software Installation Find the FlashPrint installation package in the USB disk and select the version corresponding to your system to install. Or you can download it from https://www.flashforge.com/download-center. Preparation of Device The equipment has been leveled and calibrated before delivery, but due to transportation or other influences, the distance between nozzle and platform may change.
  • Seite 6 Method 1: Wi-Fi Connection Tap [Settings]-[Network]-[WIFI], operate according to the instruction. Open FlashPrint, click [Print], then click [Machine Type], select [FlashForge Adventurer 4]. You can try to enter the IP address or scan it automatically. The IP address can be...
  • Seite 7 Import stl or obj file into the slicer; after slicing, the printer will heat up and start printing automatically. Method 2: USB Device Files can be read in USB disk. Insert USB disk and select the files to print. 4.Model Removal Take out the removable build plate, and bend the plate to get the model.
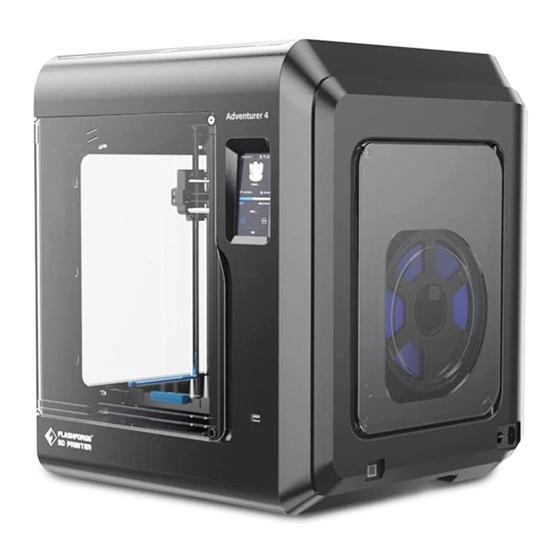
  • Seite 8 冒险家4 快速启动指南 整机介绍 1. 电源开关 2. 电源插座 3. 丝盘门 4. 料盘架 5. 送丝盖板 6. 前门 7. 平台底座 8. 平台板 9. 触控屏 10. USB 11. 网口 12. 喷头 13.气管接头 14. 排线槽 15. 模型冷却风扇 16. 喷头冷却风扇 17. 卡扣 18. 导风嘴 19. 喷嘴 20.
  • Seite 9 3. Moving parts in printer may cause injury. Do not wear gloves or other sources of entanglement in operation. 1. 切勿去除包裹在喷嘴处的耐高温材料。 2. 高温危险!打印机喷嘴在工作时会被加热,操作时请避免 接触! 3. 可动部件可能会造成卷入挤压和切割伤害。操作机器时请 不要配带手套或缠绕物。 This guide is only applicable to FLASHFORGE Adventurer 4 3D printer 本手册仅适用于闪铸科技 冒险家4 3D打印机 快速启动指南 0.4-265喷嘴 十字螺丝刀 通针 (冒险家4 配置) 内六角扳手...
  • Seite 10 软件安装 方法一:在U盘中找到FlashPrint软件安装包,选择对应的系统版本进行安装。 方法二:从官方网站 www.sz3dp.com 下载最新的切片软件。 注:官网可下载到最新的切片软件。 设备预准备 设备出厂经过调平校准,但由于运输等情况,喷嘴与平台间距 可能发生变化,建议在开箱后进行一次【喷头校准】。 此步骤非完全必要操作。具体操作根据界面指引。 首次打印 通过电源线连接电源与打印机; 开启开关,屏幕点亮。 电源开关 1.连接电源。...
  • Seite 11 2.安装丝料:打开右侧耗材门,将丝料插入进丝口,推入送丝轮内,感受到一定阻力即可。 请务必确认丝料已经推入送丝轮。点击屏幕准备-丝料-进丝。按屏幕指示操作,待喷嘴吐出丝 料说明进丝完成。 连接机器 IP地址 自动扫描 IP端口: 8899 注意事项 打印机连接的网络和电脑连接的 网络必须在同一网段中,否则无 法连接成功。 连接机器 3.传输文件 方式一:传输WiFi 点击设备的设置-网络-WiFi,按屏幕提示连接即可;打开FlashPrint,点击菜单中的打印按 钮,选择冒险家4连接机器;可通过输入IP地址或自动扫描的方式,IP地址可在设备设置-关于 中查看。...
  • Seite 12 将stl或obj 文件导入到切片软件中;进行切片,软件切片完成后,打印机进行加温等工作,准 备完成后自动开始打印。 方式二:U盘打印 设备也可通过U盘打印,将切片好的文件保存至U 盘,将U盘插入到设备,选择对应文件点击 打印。 4.打印后模型移除 直接取出平台柔性钢板,折弯平台即可取下模型。 注意事项 打印完成时,喷嘴和打印平台仍处于高温状态,建议冷却后操作。 模型移除建议将平台板拿到设备外部再进行移除,否则模型碎屑容易留在设备腔体内,建议保 持腔体清洁。...
  • Seite 13: Vorstellung Der Komponenten

    Adventurer 4 Kurzanleitung Vorstellung der Komponenten 1. Netzschalter 2. Steckdose 3. Filamentabdeckung 4. Spulenhalter 5. Filamenteinzugsabdeckung 6. Frontblende 7. Plattformsockel 8. Konstruktionsplattform 9.Touchscreen 10. USB 11. Ethernet-Eingang 12. Extruder 13. Filamentführung-Rohrverbindung 14. Kabelschlitz Gebläse für die Modellkühlung 15. Gebläse für die Modellkühlung 16.
  • Seite 14 1. 切勿去除包裹在喷嘴处的耐高温材料。 2. 高温危险!打印机喷嘴在工作时会被加热,操作时请避免 接触! 3. 可动部件可能会造成卷入挤压和切割伤害。操作机器时请 不要配带手套或缠绕物。 This guide is only applicable to FLASHFORGE Adventurer 4 3D printer 本手册仅适用于闪铸科技 冒险家4 3D打印机 Kurzanleitung Schraubendreher Reinigungsstif Düse 0,4-265 twerkzeug (Adventurer 4 Ausstattung)...
  • Seite 15: Vorbereitung Des Gerätes

    Software-Installation Suchen Sie das FlashPrint-Installationspaket auf dem USB-Wechseldatenträger und wählen Sie für die Installation die entsprechende Version für Ihr System. Sie können das Paket auch hier herunterladen: https://www.flashforge.com/download-center. Vorbereitung des Gerätes Das Gerät wurde vor der Auslieferung nivelliert und kalibriert, allerdings kann sich die Distanz zwischen, Düse und Plattform infolge von Transport- oder anderen Einflüssen verändern.Es wird empfohlen, dass Sie nach dem Auspacken eine [Kalibrierung] durchführen.
  • Seite 16 Berühren Sie [Einstellungen]-[Netzwerk]-[WIFI] und befolgen Sie die Anweisungen. Öffnen FlashPrint. Tippen Sie auf [Drucken] > [Gerätetyp] und auf [Flashforge Adventurer 4]. Sie können auch die IP-Adresse eingeben oder automatisch nach dem Gerät suchen (Scan). Die IP-Adresse finden Sie unter [Einstellungen] - [Über].
  • Seite 17 Importieren Sie die stl- oder obj-Datei in den Slicer. Nach dem Slicen erfolgt der Aufwärmvorgang. Dann startet der Druckvorgang automatisch. Methode 2: USB-Gerät Die Dateien können vom USB-Wechseldatenträger eingelesen werden. Verbinden Sie den USB-Wechseldatenträger und wählen Sie die Dateien für den Druck aus. 4.
  • Seite 18 Adventurer 4 Guide rapide Présentation des composants 1. Interrupteur 2. Prise de courant 3. Couvercle de filament 4. Support de bobine 5. Couvercle de l’entrée de filament 6. Couvercle avant 7. Support du plateau 8. Plateau 9.Ecran tactile 10. USB 11.
  • Seite 19 1. 切勿去除包裹在喷嘴处的耐高温材料。 2. 高温危险!打印机喷嘴在工作时会被加热,操作时请避免 接触! 3. 可动部件可能会造成卷入挤压和切割伤害。操作机器时请 不要配带手套或缠绕物。 This guide is only applicable to FLASHFORGE Adventurer 4 3D printer 本手册仅适用于闪铸科技 冒险家4 3D打印机 Guide rapide Tournevis Aiguille de Buse 0.4-265 nettoyage (pour Adventurer 4) Clé...
  • Seite 20: Installation Du Logiciel

    Installation du logiciel Vous pouvez trouvez votre package d’installation de FlashPrint dans la clé USB. Sélectionnez la version qui correspond à votre système. Vous pouvez également le télécharger depuis ce lien: https://www.flashforge.com/download-center. Préparation de la machine La machine a été nivellée et calibrée avant la livraison. Mais en raison du transport ou d’autres aspects, la distance entre la buse et le plateau pourrait changer.
  • Seite 21 Méthode 1: Connection au Wi-Fi Cliquez sur [Paramètres]-[Réseau]-[WIFI], et suivez les instructions. Ouvrez le FlashPrint, cliquez sur [Imprimer],puis cliquez sur [Type Machine], sélectionnez [Flashforge Adventurer 4]. Vous pouvez entrer l’adresse IP et scanner automatiquement. Vous pouvez voir l’adresse IP dans [Paramètres] - [A propos].
  • Seite 22 Importer un fichier stl ou obj dans l’outil de tranchage ; après le tranchage, l’imprimante se chauffe et lance automatiquement l’impression. Méthode 2: Clé USB Les fichiers dans la clé USB sont lisibles. Insérez la clé USB et sélectionnez le fichier à imprimer.
  • Seite 23 Aadventurer 4 빠른 가이드 컴포넌트 소개 1. 전원 스위치 2. 전원 소켓 3. 필라멘트 커버 4. 스풀 홀더 5.필라멘트 흡기 커버 6. 전면 커버 7. 플랫폼 베이스 8. 빌드 플레이트 9. 터치 스크린 10. USB 11. 이더넷 입력 12. 익스트루더 13.
  • Seite 24 1. 切勿去除包裹在喷嘴处的耐高温材料。 2. 高温危险!打印机喷嘴在工作时会被加热,操作时请避免 接触! 3. 可动部件可能会造成卷入挤压和切割伤害。操作机器时请 不要配带手套或缠绕物。 This guide is only applicable to FLASHFORGE Adventurer 4 3D printer 本手册仅适用于闪铸科技 冒险家4 3D打印机 빠른 가이드 0.4-265 노즐 스크류 드라이버 막힘제거 (어드벤쳐4 제공)...
  • Seite 25 장 소프트웨어 설치 USB 디스크에서 FlashPrint 설치 패키지를 찾아 설치할 시스템에 해당하는 버전을 선 택합니다. 또는 https://www.flashforge.com/download-center에서 다운로드할 수 있습니 다. 장 장치 준비 3D프린터는 배송 전에 수평을 맞추고 보정되었지만 운송 또는 기타 영향으로 인해 노즐과 플랫폼 사이의 거리가 변경될 수 있 습니다.
  • Seite 26 라우터에 연결된 상태 ). Connect 3.모델 파일 전송 방법1: 와이파이 연결 [셋팅]-[네트워크]-[와이파이]를 누르고 지시에 따라 작동하십시오. FlashPrint를 열고 [프린팅]를클릭한 다음 [기기 종류]을 클릭하고 [FlashForge Adventurer 4]를 선택합니다. IP 주소를 입력하거나 자동으로 스캔할 수 있습니다. IP 주소는 [셋팅] - [대하여]에서 확인할 수 있습니다.
  • Seite 27 stl 또는 obj 파일을 슬라이서로 가져옵니다. 슬라이싱 후 프린터가 가열되고 자동으로 인 쇄가 시작됩니다. 방법 2: USB 장치 파일은 USB 디스크에서 읽을 수 있습니다. USB 디스크를 삽입하고 프린팅할 파일을 선택합 니다. 4. 출력모델 제거 (Removable) 빌드 플레이트를 꺼내고 플레이트를 구부려 모델을 얻습니다. 주의...
  • Seite 28 Follow us Zhejiang Flashforge 3D Technology Co., Ltd. Address: No.518 XianYuan Road, Jinhua City,Zhejiang Province, China Service Hotline: +86 579 82273989 support@flashforge.com...