THOMSON ROC8209 Bedienungsanleitung

Verwandte Anleitungen für THOMSON ROC8209


Inhaltszusammenfassung für THOMSON ROC8209
- Seite 1 ROC8209 All manuals and user guides at all-guides.com 2R198457 Bedienungsanleitung Operating Instruction IN 1 UNIVERSAL FERNBEDIENUNG Universal Remote Control...
- Seite 2 All manuals and user guides at all-guides.com Bedienungsanleitung............. 01 Operating Instructions ............09 Characteristics - Eigenschaften Weight - Gewicht = 78 grammes / Gramm Dimensions - Abmessungen = 190 x 48 x 15 mm...
- Seite 3 All manuals and user guides at all-guides.com ROC8209 2R198457 Sie benötigen 2 Microzellen LR03 „AAA“. Wir empfehlen Alkaline-Batterien für die längere Haltbarkeit. Lösen Sie den Batteriefachdeckel, indem Sie ihn nach unten abziehen. Legen Sie die beiden Batterien unter Beachtung der Polarität +/– in das Fach ein. Setzen Sie die Abdeckung wieder auf.
-
Seite 4: Sicherheitshinweise
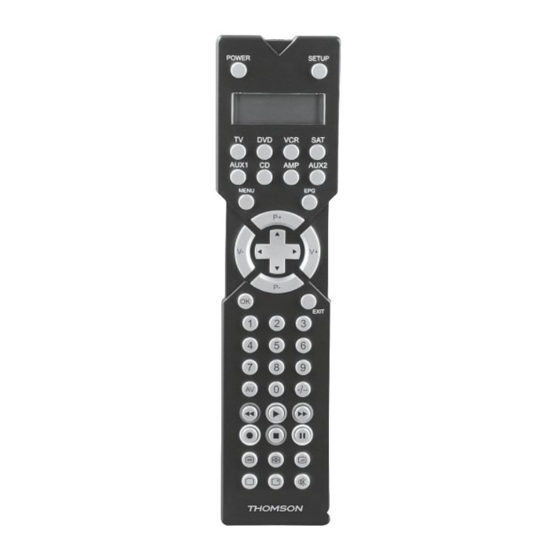
All manuals and user guides at all-guides.com Diese Universal-Fernbedienung verfügt über 8 Gerätetasten (Quellentasten) und kann da- durch bis zu acht normale Fernbedienungen ersetzen („8 in1-Funktion“). Dies können Fern- bedienungen für praktisch jeglicher Art der Unterhaltungselektronik sein. Die Bezeichnungen auf den Quellentasten (TV, VCR, SAT, DVD, AUX1, CD, AMP, AUX2) dienen der Übersichtlichkeit. -
Seite 5: Standard Display
All manuals and user guides at all-guides.com Display Standard Display In der ersten Zeile der aktive Modus (Gerätetyp); in der zweiten Zeile Wochentag und Uhrzeit. Modus bzw. Gerät wählen Display Mit einer Quellentaste wählen Sie den Modus bzw. das Gerät, das auf diese Quellentaste programmiert wurde. - Seite 6 All manuals and user guides at all-guides.com Code Setup Optionen Sie haben vier Möglichkeiten im CODE SETUP Menü den Geräte Code zu programmieren. Gerätecode über das Display auswählen a. Schalten Sie das zu steuernde Gerät ein. b. Halten Sie die Taste Setup für ca. 3 Sekunden gedrückt, bis die Anzeige CODE SETUP erscheint. Drücken Sie OK.
-
Seite 7: Code-Identifizierung
Drücken Sie OK. Es erscheint die Abfrage HERSTEL.-CODE?. Drücken Sie eine Zifferntaste für einen gewünschten Hersteller gemäß folgender Übersicht: 1. Philips 2. Sony, Panasonic, JVC, Toshiba 3. Thomson 4. Telefunken 5. Grundig 6. Nokia 0. Alle anderen Marken für diese Gerätegruppe Führen Sie jetzt den Funktionstest aus, indem Sie mehrmals nacheinander die Tasten CH+, oder PLAY... - Seite 8 All manuals and user guides at all-guides.com System Setup Optionen Einstellung für die Punch-Through Funktionen, Zeit, Datum, Hintergrundbeleuchtung und System Wiederherstellung. Die “Punch-Through“ (VOL/MUTE) Funktionen ermöglichen Ihnen, die Funktionen Lautstärke, Stummschaltung an einem anderen Gerätetyp als dem eingestellten auszuführen. Häufig haben Bildübertragende Geräte, die an ein TV-Gerät angeschlossen sind (z. B. TV, DVD, VCR, SAT, CBL), keine eigene Lautstärkeregelung.
-
Seite 9: Uhrzeit Und Datum Einstellen
All manuals and user guides at all-guides.com Punch-Through (VOL/MUTE) auf die Werkseinstellungen zurückstellen Falls Sie die „Punch-Through“ Funktion VOL/MUTE wie in den vorangehenden zwei Abschnitten beschrieben ver- ändert haben, können Sie sie durch die folgende Programmierung wieder auf die Werkseinstellung zurückstellen. Halten Sie die Taste Setup für ca. -
Seite 10: Befehlstimer Programmieren
All manuals and user guides at all-guides.com Timer Setup Optionen Die Universal-Fernbedienung verfügt über zwei Timer-Funktionen: • einen Sleeptimer für das TV-Gerät (automatische Ausschaltung nach 1 bis 90 Minuten); im Display erscheint „Zzz“; • vier weitere Timer für selbstdefinierte Befehle (z. B. die Umschaltung auf ein anderes Programm);... - Seite 11 All manuals and user guides at all-guides.com Wenn keine weitere Eingabe notwendig ist, drücken Sie OK oder EXIT. m. Es erscheint die Anzeige TIMER 1 EING2. Geben Sie den zweiten Befehl ein. In unserem Beispiel: Drücken Sie die Aufnahme-Taste. n. Nach dem zweiten Befehl erscheint TIMER 1 EING3. In unserem Beispiel drücken Sie die Aufnahme-Taste ein zweites Mal.
-
Seite 12: Fehlerbehebung
All manuals and user guides at all-guides.com Befehle löschen Befehle für nur eine Quellentaste löschen: a. Rufen Sie den Lernen-Modus auf, wie im vorigen Abschnitt, Schritt a. bis d. beschrieben. Fahren Sie folgendermaßen fort: b. Wählen Sie mit den Navigationstasten das LOESCHEN MODUS Menü und drücken Sie OK. Wählen Sie nun die Quellentaste, deren Befehle gelöscht werden sollen.