Herunterladen Inhalt Inhalt Diese Seite drucken

Werbung

Verfügbare Sprachen
  • DE

Verfügbare Sprachen

  • DEUTSCH, seite 53
PNI House IP716
EN
User manual .........................................................
BG
Ръководство за употреба .............................
DE
Benutzerhandbuch ..............................................
ES
Manual de usuario ...............................................
FR
Manuel utilisateur ...............................................
HU
Használati utasítás ..............................................
IT
Manuale utente ..................................................
NL
Handleiding ........................................................
PL
Instrukcja obsługi ...............................................
RO
Manual de utilizare .............................................
NVR
3
28
53
78
103
128
153
178
203
228

Werbung

Inhaltsverzeichnis
loading

Inhaltszusammenfassung für PNI House IP716

  • Seite 1: Inhaltsverzeichnis

    PNI House IP716 User manual ............Ръководство за употреба ......Benutzerhandbuch ..........Manual de usuario ..........Manuel utilisateur ..........Használati utasítás ..........Manuale utente ..........Handleiding ............Instrukcja obsługi ..........Manual de utilizare ..........
  • Seite 3: Main Functions

    Main functions • Simultaneous real-time multi-channel recording, remote playback and configuration • Supports up to 16 channels with a maximum 4K resolution. • Backup on USB flash memory and external HDD. • Supports face and human shape detection (depending on the camera) •...
  • Seite 4: Turn On The Device

    • Close back the NVR housing • Connect the power and internet cable to the NVR Turn on the device Plug the power cord into a 230V outlet. The NVR will start. The indicator LED will light up. By default, 16 channels will be displayed on the screen. If the start time is within the preset schedule for recording, then the recording function will start automatically.
  • Seite 5 General CMS package or from the Download section on the product web page (www. pni.ro) System authentication After turning on the device, log in to the system. By default, the admin user is password protected by 1234. If the password is entered incorrectly 5 times in a row, the account will be blocked.
  • Seite 6 Steps to follow: 1. Set the time, date and time zone. 2. Soon, a popup window will appear on the screen asking you to change the authentication password in the system. Follow the steps on the screen or press the ESC key on the NVR to exit the password setting interface. Note: For the security of your system, we recommend changing the password after the first login in the system.
  • Seite 7 The menu In the main preview interface, right- click with the mouse to access the menu. Main Menu Options: Playback, Record Conf, Network, Date Time. User manual...
  • Seite 8 Playback The system offers numerous filters and options for identifying the desired record. You can search by channel number, date and time interval or by file type. Record Conf. The interface allows you to make the following settings: the length of a recording file, the recording mode (programmed or manual), the period (day and time interval) and the recording type (normal, motion detection and alarm).
  • Seite 9 Network Manually set the network parameters (IP address, gateway, DNS, port, etc.) or check the DHCP option for automatic parameter retrieval. Note: For the settings to take effect, restart the system. Right click on the screen - Logout - Reboot. Date time Set the time zone, date, time and format.
  • Seite 10 System Options: General, Encode, Backup, Snapshot Config., Display, Account. General The interface will allow the following settings: the menu display language, the behavior in case of a full hard disk (overwrite or stop recording), the session duration and enable / disable quick configuration guide at system startup. User manual...
  • Seite 11 Encode Displays the technical parameters of the connected cameras (resolution, frame rate, video compression, quality, etc.). Backup The USB memory or external HDD must be installed in the NVR before starting the backup. Press the Detect button to identify the storage device, then the Backup button to perform the backup.
  • Seite 12 Snapshot Config Set to take cyclic captures at a certain time and send them by email, FTP or store them on your hard disk. Display In the local preview mode can be displayed: time, channel name, recording status, alarm status, transparency and display resolution. Note: Before changing the resolution, make sure that your monitor supports that resolution.
  • Seite 13 Account The interface allows managing users who have access to the system, adding users, changing user rights, changing the password, creating user groups and setting an account security level by registering answers to certain predefined questions. In case of password reset, the verification code can be sent in the mobile application or at the set email address.
  • Seite 14 Alarm Options: Intelligent Alert, Abnormality and Traditional alarm (No image, No video signal, etc.). Alarm input and Intelligent options are not available for this model. Intelligent Alert Set the system behavior in case of motion detection: registration and / or notification in the application.
  • Seite 15 Abnormality Set the system behavior in case of: storage device error, lack of space on the storage device, lack of internet connection or IP conflict. In such situations you can set to send a notification in the application or an email. Traditional alarm Set the system behavior in case of missing image or missing video signal.
  • Seite 16 Advanced Options: HDD info, Upgrade, AutoMaintain, Restore, Import / Export, Digital, LOG, BPS and Version. HDD info Set how the hard drive works (read-only or read-write). Note: In order to save recordings to the hard disk, it must be set to read / write mode.
  • Seite 17 Upgrade Insert a USB stick into the NVR that should contain the update file in the root folder. Select the storage drive and file from the NVR menu and click the Upgrade button. AutoMaintain Set the system to restart on a certain day and time or set the automatic deletion of files older than a certain period.
  • Seite 18 Import/Export Export or import system settings. User manual...
  • Seite 19 Digital Options: Digital channels, Channel status and Channel Type. Digital channels Add a camera on a specific channel. Click the Add button, then Search to find all the cameras connected in the same network (same router) with the NVR. User manual...
  • Seite 20 Channel type Displays the maximum number of cameras and the resolution of the cameras that can be connected to the system. The PNI IP716 NVR supports a maximum of 16 IP cameras with a maximum resolution of 4K. User manual...
  • Seite 21 Displays the history of actions performed in the system. Version Displays useful information about firmware and QR code with the system serial number (useful for adding it to the mobile application) and QR code for downloading the mobile application. User manual...
  • Seite 22 Other menu options Right click on the screen to display additional options: Channel Set, Record Mode, Playback, Face detection, parameters, Color settings, Split menu, PTZ Control, Output adjust, NetDetect, Logout. Channel set The interface allows adding and managing the cameras added to the system. Add cameras interface 1.
  • Seite 23 7. Channel title. Rename cameras. 8. NVR Network. Configure NVR network parameters. 9. Close adaptive. Disables the IP adaptation function for the selected cameras. User manual...
  • Seite 24 Record mode Set the recording mode (manual or programmed) for each channel. Playback Shortcut for accessing the search and playback interface of recordings. Face detection The interface is only available for cameras that support this feature. User manual...
  • Seite 25 Color settings Adjust color parameters (brightness, contrast, saturation, etc.) for the camera viewing interface. Split menu Select how to display the cameras on the same screen. Options: display 1 camera, 2, 4, 6, 8, 9 or 16 cameras simultaneously. Output Adjust Set the volume and image.
  • Seite 26 Net Detect 1. Local Net Detect. Camera connection monitoring and diagnostics. 2. Remote Net Detect. Monitoring, diagnostics and configuration of network and Cloud server. User manual...
  • Seite 27 3. Net traffic Detect. Monitoring data traffic performed by NVR in the network. Logout Log out, shut down or restart the system. User manual...
  • Seite 28: Основни Функции

    Основни функции • Едновременен многоканален запис в реално време, възпроизвеждане и конфигуриране от разстояние • Поддържа до 16 канала с максимална разделителна способност • Архивиране на USB флаш памет и външен твърд диск. • Поддържа разпознаване на лица и човешка форма (в зависимост от...
  • Seite 29 Инструкции за употреба Инсталиране на модула за съхранение Преди първата употреба, моля, инсталирайте модула за съхранение. Само един SATA HDD с максимален капацитет от 14TB може да бъде инсталиран в записващото устройство (HDD не е включен в пакета). • Разхлабете винтовете и отворете корпуса на NVR •...
  • Seite 30 к о м п а к т д и с к а , Windows General CMS включен в пакета, или от раздела за изтегляне на уеб страницата на продукта (www.pni.bg) Удостоверяване на системата След включване на устройството влезте в системата. По подразбиране потребителят на администратор е защитен с Ръководство...
  • Seite 31 парола от 1234. Ако паролата е въведена неправилно 5 пъти подред, акаунтът ще бъде блокиран. Чрез рестартиране на устройството или след половин час акаунтът ще бъде отключен автоматично. Забележка: За сигурността на вашата система, моля, променете паролата след първото влизане. Ръководство...
  • Seite 32 на системата. 7. Щракнете с десния бутон върху екрана и отворете опцията NetDetect. Щракнете върху Diagnose, за да тествате мрежовата конфигурация . Забележка: За да влязат в сила настройките, рестартирайте системата. Щракнете с десния бутон на екрана - Изход - Рестартиране. Менюто...
  • Seite 33 Main Menu (Главно меню) Настроики: Playback, Record Conf, Network, Date Time. Playback (Възпроизвеждане) Системата предлага множество филтри и опции за идентифициране на желания запис. Можете да търсите по номер на канал, дата и интервал от време или по тип файл. Ръководство...
  • Seite 34 Record Conf. (Конфигурация на записа) Интерфейсът ви позволява да направите следните настройки: дължината на записващия файл, режимът на запис (програмиран или ръчен), периодът (ден и интервал от време) и видът на записа (нормално, детектиране на движение и аларма). Network (Мрежа) Задайте...
  • Seite 35 Date time (Дата и час) Задайте часовата зона, датата, часа и формата. System (Система) Настроики: General, Encode, Backup, Snapshot Config., Display, Account. General (Общ) Интерфейсът ще позволи следните настройки: език на дисплея Ръководство...
  • Seite 36 на менюто, поведение в случай на пълен твърд диск (презапис или спиране на запис), продължителност на сесията и активиране / деактивиране на ръководството за бързо конфигуриране при стартиране на системата. Encode (Кодиране) Показва техническите параметри на свързаните камери (резолюция, честота на кадрите, видео компресия, качество и др.). Ръководство...
  • Seite 37 Backup (Архивиране) USB паметта или външният твърд диск трябва да бъдат инсталирани в NVR, преди да стартирате архивирането. Натиснете бутона Detect, за да идентифицирате устройството за съхранение, след това бутона Backup, за да извършите архивирането. Snapshot Config Настройте да правите циклични заснемания в определено време и да...
  • Seite 38 Display (Дисплей) В режим на локален визуализация могат да се показват: време, име на канал, състояние на запис, състояние на аларма, прозрачност и разделителна способност на дисплея. Забележка: Преди да промените разделителната способност, уверете се, че мониторът ви поддържа тази разделителна способност. Ако зададената...
  • Seite 39 Alarm (Аларма) Настроики: Intelligent Alert, Abnormality и Traditional alarm (Няма изображение, няма видео сигнал и т.н.). Аларма и интелигентни опции не са налични за този модел. Intelligent Alert (Интелигентна сигнализация) Задайте поведението на системата в случай на откриване на движение: регистрация...
  • Seite 40 нивото на чувствителност към движение и зоната на действие. Abnormality (Ненормалност) Задайте поведението на системата в случай на: грешка на устройството за съхранение, липса на място на устройството за съхранение, липса на интернет връзка или IP конфликт. В такива ситуации можете да настроите...
  • Seite 41 Traditional alarm (Традиционна аларма) Задайте поведението на системата в случай на липсващо изображение или липсващ видео сигнал. В такива ситуации можете да настроите да изпращате известие в приложението или имейл, да стартирате запис, да правите заснемания или да записвате записа на алармата на...
  • Seite 42 HDD info (Информация за HDD) Задайте как работи твърдият диск (само за четене или за четене и запис). Забележка: За да запишете записите на твърдия диск, той трябва да бъде настроен на режим на четене / запис. Upgrade (Подобряване на) Поставете...
  • Seite 43 AutoMaintain Настройте системата да се рестартира в определен ден и час или задайте автоматичното изтриване на файлове, по-стари от определен период. Restore (Нулиране) Изберете опциите, които искате да нулирате. Import/Export (Внос износ) Експортиране или импортиране на системни настройки. Ръководство...
  • Seite 44 Digital (Дигитален) Настроики: Digital channels, Channel status и Channel Type. Digital channels (Цифрови канали) Добавете камера към определен канал. Щракнете върху бутона Добавяне, след това Търсене, за да намерите всички камери, свързани в една и съща мрежа (един и същ рутер) с NVR. Ръководство...
  • Seite 45 Показва състоянието (свързано, несвързано или неконфигурирано) за всички 16 канала. Channel Type (Тип канал) Показва максималния брой камери и разделителната способност на камерите, които могат да бъдат свързани към системата. PNI IP716 NVR поддържа максимум 16 IP камери с максимална разделителна способност 4K. Ръководство...
  • Seite 46 Log (Исторически) Показва историята на действията, извършени в системата. Version (Версия) Показва полезна информация за фърмуера и QR кода със системния сериен номер (полезен за добавянето му към мобилното приложение) и QR кода за изтегляне на мобилното приложение. Ръководство...
  • Seite 47 Други опции на менюто Щракнете с десния бутон на екрана, за да се покажат допълнителни опции: Channel Set, Record Mode, Playback, Face detection, parameters, Color settings, Split menu, PTZ Control, Output adjust, NetDetect, Logout. Channel set (Каналът е зададен) Интерфейсът позволява добавяне и управление на камерите, добавени...
  • Seite 48 3. Add. От списъка с показани камери изберете желаните камери и щракнете върху Добави, за да ги добавите в системата. 4. Network. Конфигуриране на мрежови параметри за камери (IP адрес, шлюз и др.) 5. Quick set. Бързо добавяне и конфигуриране на камери. 6.
  • Seite 49 Record mode (Режим на запис) Задайте режим на запис (ръчен или програмиран) за всеки канал. Ръководство...
  • Seite 50 Playback (Възпроизвеждане) Преки пътища за достъп до интерфейса за търсене и възпроизвеждане на записи. Face detection (Разпознаване на лица) Интерфейсът е достъпен само за камери, които поддържат тази функция. Color settings (Настройки на цвета) Регулирайте цветовите параметри (яркост, контраст, наситеност и др.) За...
  • Seite 51 Split menu (Разделено меню) Изберете как да се показват камерите на същия екран. Настроики: покажете едновременно 1 камера, 2, 4, 6, 8, 9 или 16 камери. Изходна настройка Задайте силата на звука и изображението. Net Detect 1. Local Net Detect. Наблюдение и диагностика на връзката на камерата.
  • Seite 52 2. Remote Net Detect. Мониторинг, диагностика и конфигуриране на мрежа и облачен сървър. 3. Net traffic Detect. Мониторинг на трафика на данни, извършван от NVR в мрежата. Logout (Излез от профила си) Излезте, изключете или рестартирайте системата. Ръководство...
  • Seite 53: Hauptfunktionen

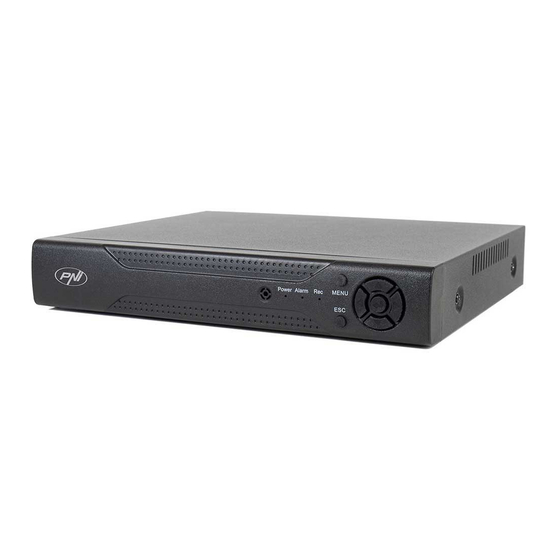
    Hauptfunktionen • Gleichzeitige Echtzeit-Mehrkanalaufzeichnung, Remote-Wiedergabe und -Konfiguration • Unterstützt bis zu 16 Kanäle mit einer maximalen 4K-Auflösung. • Backup auf USB-Flash-Speicher und externer Festplatte. • Unterstützt die Erkennung von Gesichtern und menschlichen Formen (je nach Kamera) • Möglichkeit zum Anschluss externer Lautsprecher. Technische Spezifikationen Video Eingang 16 x 4K (access bandwidth 72Mbps)
  • Seite 54 • Lösen Sie die Schrauben und öffnen Sie das NVR-Gehäuse • Schließen Sie die Datenkabel an und befestigen Sie die Festplatte mit den Schrauben • Schließen Sie das NVR-Gehäuse wieder • Verbinden Sie das Strom- und Internetkabel mit dem NVR Schalten Sie das Gerät ein Stecken Sie das Netzkabel in eine 230V-Steckdose.
  • Seite 55: Fernbedienung Des Geräts

    Fernbedienung des Geräts Der NVR kann lokal oder aus der Ferne sowohl von Smartphones als auch von Computern mit Windows-Betriebssystem gesteuert werden. Betriebssystem Anwendung Herunterladen Android, iOS XMEye Android Die Installationsdatei kann von der im Paket enthaltenen CD oder aus dem Windows General CMS Download-Bereich auf...
  • Seite 56 Kameras am endgültigen Standort installieren. Schritte zum folgen: 1. Stellen Sie Uhrzeit, Datum und Zeitzone ein. 2. Bald erscheint auf dem Bildschirm ein Popup-Fenster, in dem Sie aufgefordert werden, das Authentifizierungskennwort im System zu ändern. Befolgen Sie die Schritte auf dem Bildschirm oder drücken Sie die ESC-Taste auf dem NVR, um die Passworteinstellungsoberfläche zu verlassen.
  • Seite 57: Main Menu (Hauptmenü)

    Das Menü Klicken Hauptvorschauoberfläche mit der rechten Maustaste, um auf das Menü zuzugreifen. Main Menu (Hauptmenü) Optionen: Playback, Record Conf, Network, Date Time. Benutzerhandbuch...
  • Seite 58 Playback (Wiedergabe) Das System bietet zahlreiche Filter und Möglichkeiten zur Identifizierung des gewünschten Datensatzes. Sie können nach Kanalnummer, Datum und Zeitintervall oder nach Dateityp suchen. Record Conf. (Aufnahmekonfiguration) Über die Schnittstelle können Sie folgende Einstellungen vornehmen: die Länge einer Aufnahmedatei, den Aufnahmemodus (programmiert oder manuell), den Zeitraum (Tag und Zeitintervall) und den Aufnahmetyp (normal, Bewegungserkennung und Alarm).
  • Seite 59 Network (Netzwerk) Stellen Sie die Netzwerkparameter (IP-Adresse, Gateway, DNS, Port usw.) manuell ein oder aktivieren Sie die DHCP-Option für den automatischen Parameterabruf. Hinweis: Starten Sie das System neu, damit die Einstellungen wirksam werden. Rechtsklick auf den Bildschirm - Abmelden - Neustart. Date time (Datum und Uhrzeit) Stellen Sie Zeitzone, Datum, Uhrzeit und Format ein.
  • Seite 60 System (System) Optionen: General, Encode, Backup, Snapshot Config., Display, Account. General (Allgemeines) Die Benutzeroberfläche ermöglicht die folgenden Einstellungen: die Sprache der Menüanzeige, das Verhalten bei voller Festplatte (Überschreiben oder Stoppen der Aufzeichnung), die Sitzungsdauer und die Aktivierung / Deaktivierung der Schnellkonfigurationsanleitung beim Systemstart. Benutzerhandbuch...
  • Seite 61 Encode (Kodieren) Zeigt die technischen Parameter der angeschlossenen Kameras an (Auflösung, Bildrate, Videokompression, Qualität usw.). Backup (Sicherung) Der USB-Speicher oder die externe Festplatte muss im NVR installiert sein, bevor die Sicherung gestartet wird. Drücken Sie die Detect-Taste, um das Speichergerät zu identifizieren, und dann die Backup-Taste, um die Sicherung durchzuführen.
  • Seite 62 Snapshot-Konfiguration Legen Sie fest, dass zyklische Aufnahmen zu einem bestimmten Zeitpunkt erstellt und per E-Mail, FTP gesendet oder auf Ihrer Festplatte gespeichert werden. Display (Anzeige) Im lokalen Vorschaumodus können angezeigt werden: Uhrzeit, Kanalname, Aufnahmestatus, Alarmstatus, Transparenz Anzeigeauflösung. Hinweis: Stellen Sie vor dem Ändern der Auflösung sicher, dass Ihr Monitor diese Auflösung unterstützt.
  • Seite 63 Account (Konto) Die Benutzeroberfläche ermöglicht die Verwaltung von Benutzern, die Zugriff auf das System haben, das Hinzufügen von Benutzern, das Ändern von Benutzerrechten, das Ändern des Passworts, das Erstellen von Benutzergruppen und das Festlegen einer Kontosicherheitsstufe, indem Antworten auf bestimmte vordefinierte Fragen registriert werden. Im Falle einer Passwortzurücksetzung kann der Verifizierungscode in der mobilen Anwendung oder an die eingestellte E-Mail-Adresse gesendet werden.
  • Seite 64 Alarm (Alarm) Optionen: Intelligent Alert, Abnormality and Traditional alarm (Kein Bild, kein Videosignal usw.). Alarmeingang und intelligente Optionen sind für dieses Modell nicht verfügbar. Intelligent Alert (Intelligente Warnung) Stellen Sie das Systemverhalten bei Bewegungserkennung ein: Registrierung und / oder Benachrichtigung in der Anwendung. Stellen Sie auch die Bewegungsempfindlichkeit und den Aktionsbereich ein.
  • Seite 65 Abnormality (Anomalie) Legen Sie das Systemverhalten fest bei: Speichergerätefehler, Platzmangel auf dem Speichergerät, fehlende Internetverbindung oder IP-Konflikt. In solchen Situationen können Sie festlegen, dass eine Benachrichtigung in der Anwendung oder eine E-Mail gesendet wird. Traditional alarm (Traditioneller Wecker) Stellen Sie das Systemverhalten bei fehlendem Bild oder fehlendem Videosignal ein.
  • Seite 66 Advanced (Fortgeschritten) Optionen: HDD info, Upgrade, AutoMaintain, Restore, Import / Export, Digital, LOG, BPS und Version. HDD info (HDD-Info) Legen Sie fest, wie die Festplatte funktioniert (nur Lesen oder Lesen/ Schreiben). Hinweis: Um Aufnahmen auf der Festplatte zu speichern, muss diese auf den Lese-/ Schreibmodus eingestellt sein.
  • Seite 67 Upgrade (Aktualisierung) Stecken Sie einen USB-Stick in den NVR, der die Update-Datei im Stammordner enthalten sollte. Wählen Sie das Speicherlaufwerk und die Datei aus dem NVR-Menü aus und klicken Sie auf die Schaltfläche Upgrade. AutoMaintain Stellen Sie das System so ein, dass es an einem bestimmten Tag und einer bestimmten Uhrzeit neu startet oder stellen Sie das automatische Löschen von Dateien ein, die älter als ein bestimmter Zeitraum sind.
  • Seite 68 Import/Export Systemeinstellungen exportieren oder importieren. Benutzerhandbuch...
  • Seite 69 Digital Optionen: Digital channels, Channel status und Channel Type. Digital channels (Digitale Kanäle) Fügen Sie eine Kamera auf einem bestimmten Kanal hinzu. Klicken Sie auf die Schaltfläche Hinzufügen und dann auf Suchen, um alle Kameras zu finden, die im selben Netzwerk (gleicher Router) mit dem NVR verbunden sind. Benutzerhandbuch...
  • Seite 70 16 Kanäle an. Channel type (Kanaltyp) Zeigt die maximale Anzahl von Kameras und die Auflösung der Kameras an, die an das System angeschlossen werden können. Der PNI IP716 NVR unterstützt maximal 16 IP-Kameras mit einer maximalen Auflösung von 4K. Benutzerhandbuch...
  • Seite 71 Zeigt den Verlauf der im System ausgeführten Aktionen an. Ausführung Zeigt nützliche Informationen über Firmware und QR-Code mit der Seriennummer des Systems (nützlich zum Hinzufügen zur mobilen Anwendung) und QR-Code zum Herunterladen der mobilen Anwendung an. Benutzerhandbuch...
  • Seite 72 Andere Menüoptionen Klicken Sie mit der rechten Maustaste auf den Bildschirm, um zusätzliche Optionen anzuzeigen: Channel Set, Record Mode, Playback, Face detection, parameters, Color settings, Split menu, PTZ Control, Output adjust, NetDetect, Logout. Channel set (Kanal eingestellt) Die Schnittstelle ermöglicht das Hinzufügen und Verwalten der zum System hinzugefügten Kameras.
  • Seite 73 4. Edit devices. IP und Port für den ausgewählten Kanal ändern. 5. Bulk upgrade. Firmware-Update für ausgewählte Kameras. 6. Network detect. Tests und Diagnose von Cloud-Netzwerken und -Servern. 7. Channel title. Kameras umbenennen. 8. NVR Network. Konfigurieren Sie die NVR-Netzwerkparameter. 9.
  • Seite 74 Record mode (Aufnahmemodus) Stellen Sie den Aufnahmemodus (manuell oder programmiert) für jeden Kanal ein. Playback (Wiedergabe) Verknüpfung für den Zugriff auf die Such- und Wiedergabeoberfläche von Aufzeichnungen. Face detection (Gesichtserkennung) Die Schnittstelle ist nur für Kameras verfügbar, die diese Funktion unterstützen. Benutzerhandbuch...
  • Seite 75 Farbeinstellungen Passen Sie die Farbparameter (Helligkeit, Kontrast, Sättigung usw.) für die Kameraanzeigeschnittstelle an. Menü aufteilen Wählen Sie aus, wie die Kameras auf demselben Bildschirm angezeigt werden sollen. Optionen: 1 Kamera, 2, 4, 6, 8, 9 oder 16 Kameras gleichzeitig anzeigen. Output Adjust (Bildeinstellungen) Stellen Sie die Lautstärke und das Bild ein.
  • Seite 76 Net Detect 1. Local Net Detect. Überwachung und Diagnose der Kameraverbindung. 2. Remote Net Detect. Überwachung, Diagnose und Konfiguration von Netzwerk und Cloud-Server. Benutzerhandbuch...
  • Seite 77 3. Net traffic Detect. Überwachung des vom NVR durchgeführten Datenverkehrs im Netzwerk. Ausloggen Melden Sie sich ab, fahren Sie das System herunter oder starten Sie es neu. Benutzerhandbuch...
  • Seite 78: Funciones Principales

    Funciones principales • Grabación simultánea multicanal en tiempo real, reproducción y configuración remotas • Admite hasta 16 canales con una resolución máxima de 4K. • Copia de seguridad en memoria flash USB y disco duro externo. • Admite detección de rostros y formas humanas (según la cámara) •...
  • Seite 79: Apagar El Dispositivo

    unidad de grabación (el disco duro no está incluido en el paquete). • Afloje los tornillos y abra la carcasa del NVR • Conecte los cables de datos y asegure el disco duro con los tornillos • Vuelva a cerrar la carcasa del NVR •...
  • Seite 80 General CMS en el paquete o desde la sección de Descargas en la página web del producto (www.pni.es) Autenticación del sistema Después de encender el dispositivo, inicie sesión en el sistema. De forma predeterminada, el usuario administrador está protegido con contraseña por 1234.
  • Seite 81 Pasos a seguir: 1. Configure la hora, la fecha y la zona horaria. 2. Pronto, aparecerá una ventana emergente en la pantalla pidiéndole que cambie la contraseña de autenticación en el sistema. Siga los pasos en la pantalla o presione la tecla ESC en el NVR para salir de la interfaz de configuración de contraseña .
  • Seite 82: Main Menu (Menú Principal)

    El menú En la interfaz de vista previa principal, haga clic con el botón derecho del ratón para acceder al menú. Main Menu (Menú principal) Opciones: Playback, Record Conf, Network, Date Time. Manual de usuario...
  • Seite 83 Playback (Reproducción) El sistema ofrece numerosos filtros y opciones para identificar el registro deseado. Puede buscar por número de canal, fecha e intervalo de tiempo o por tipo de archivo. Record Conf. (Configuración de registro) La interfaz le permite realizar los siguientes ajustes: la duración de un archivo de grabación, el modo de grabación (programado o manual), el período (día y intervalo de tiempo) y el tipo de grabación (normal, detección de movimiento y alarma).
  • Seite 84 Network (red) Configure manualmente los parámetros de red (dirección IP, puerta de enlace, DNS, puerto, etc.) o marque la opción DHCP para la recuperación automática de parámetros. Nota: Para que la configuración surta efecto, reinicie el sistema. Haga clic derecho en la pantalla - Logout - Reboot.
  • Seite 85 System (Sistema) Opciones: General, Encode, Backup, Snapshot Config., Display, Account. General La interfaz permitirá las siguientes configuraciones: el idioma de visualización del menú, el comportamiento en caso de un disco duro lleno (sobrescribir o detener la grabación), la duración de la sesión y habilitar / deshabilitar la guía de configuración rápida al iniciar el sistema.
  • Seite 86 Encode (Codifica) Muestra los parámetros técnicos de las cámaras conectadas (resolución, velocidad de cuadros, compresión de video, calidad, etc.). Backup (Respaldo) La memoria USB o el disco duro externo deben estar instalados en el NVR antes de iniciar la copia de seguridad. Presione el botón Detectar para identificar el dispositivo de almacenamiento, luego el botón Copia de seguridad para realizar la copia de seguridad.
  • Seite 87 Snapshot Config (Configuración de instantánea) Configure para tomar capturas cíclicas en un momento determinado y enviarlas por correo electrónico, FTP o almacenarlas en su disco duro. Display (Monitor) En el modo de vista previa local se puede mostrar: hora, nombre del canal, estado de grabación, estado de alarma, transparencia y resolución de pantalla.
  • Seite 88 Account (Cuenta) La interfaz permite administrar los usuarios que tienen acceso al sistema, agregar usuarios, cambiar los derechos de los usuarios, cambiar la contraseña, crear grupos de usuarios y establecer un nivel de seguridad de la cuenta al registrar respuestas a ciertas preguntas predefinidas. En caso de restablecer la contraseña, el código de verificación se puede enviar en la aplicación móvil o en la dirección de correo electrónico establecida.
  • Seite 89 Alarm (Alarma) Opciones: Intelligent Alert, Abnormality and Traditional alarm (Sin imagen, sin señal de video, etc.). La entrada de alarma y las opciones inteligentes no están disponibles para este modelo. Intelligent Alert (Alerta inteligente) Configure el comportamiento del sistema en caso de detección de movimiento: registro y / o notificación en la aplicación.
  • Seite 90 Abnormality (Anomalía) Configure el comportamiento del sistema en caso de: error del dispositivo de almacenamiento, falta de espacio en el dispositivo de almacenamiento, falta de conexión a Internet o conflicto de IP. En tales situaciones, puede configurar para enviar una notificación en la aplicación o un correo electrónico. Traditional alarm (Alarma tradicional) Configure el comportamiento del sistema en caso de que falte una imagen o una señal de video.
  • Seite 91 Advanced (Avanzado) Opciones: HDD info, Upgrade, AutoMaintain, Restore, Import / Export, Digital, LOG, BPS y Version. HDD info (Información del disco duro) Establezca cómo funciona el disco duro (solo lectura o lectura-escritura). Nota: Para guardar grabaciones en el disco duro, debe configurarse en modo lectura / escritura.
  • Seite 92 Upgrade Inserte una memoria USB en el NVR que debe contener el archivo de actualización en la carpeta raíz. Seleccione la unidad de almacenamiento y el archivo del menú NVR y haga clic en el botón Actualizar. AutoMaintain Configure el sistema para que se reinicie en un día y una hora determinados o configure la eliminación automática de archivos con una antigüedad superior a un determinado período.
  • Seite 93 Importación y exportación Exportar o importar la configuración del sistema. Manual de usuario...
  • Seite 94 Digital Opciones: Digital channels, Channel status y Channel Type. Digital channels (Canales digitales) Agrega una cámara en un canal específico. Haga clic en el botón Agregar, luego en Buscar para encontrar todas las cámaras conectadas en la misma red (mismo enrutador) con el NVR. Manual de usuario...
  • Seite 95 Channel type (Tipo de canal) Muestra el número máximo de cámaras y la resolución de las cámaras que se pueden conectar al sistema. El NVR PNI IP716 admite un máximo de 16 cámaras IP con una resolución máxima de 4K.
  • Seite 96 Muestra el historial de acciones realizadas en el sistema. Version (Versión) Muestra información útil sobre el firmware y el código QR con el número de serie del sistema (útil para agregarlo a la aplicación móvil) y el código QR para descargar la aplicación móvil.
  • Seite 97 Otras opciones de menú Haga clic derecho en la pantalla para mostrar opciones adicionales: Channel Set, Record Mode, Playback, Face detection, parameters, Color settings, Split menu, PTZ Control, Output adjust, NetDetect, Logout. Channel set (Conjunto de canales) La interfaz permite agregar y administrar las cámaras agregadas al sistema. Agregar interfaz de cámaras 1.
  • Seite 98 5. Bulk upgrade. Actualización de firmware para cámaras seleccionadas. 6. Network detect. Pruebas y diagnósticos de servidores y redes en la nube. 7. Channel title. Cambiar el nombre de las cámaras. 8. NVR Network. Configurar los parámetros de red del NVR. 9.
  • Seite 99 Record mode (Modo de grabación) Configure el modo de grabación (manual o programado) para cada canal. Playback (Reproducción) Atajo para acceder a la interfaz de búsqueda y reproducción de grabaciones. Face detection (Detección de rostro) La interfaz solo está disponible para cámaras que admitan esta función. Manual de usuario...
  • Seite 100 Color settings (Configuraciones de color) Ajuste los parámetros de color (brillo, contraste, saturación, etc.) para la interfaz de visualización de la cámara. Split menu (Menú dividido) Seleccione cómo mostrar las cámaras en la misma pantalla. Opciones: mostrar 1 cámara, 2, 4, 6, 8, 9 o 16 cámaras simultáneamente. Output Adjust (Ajustes de imagen) Configure el volumen y la imagen.
  • Seite 101 Net Detect 1. Local Net Detect. Monitoreo y diagnóstico de la conexión de la cámara. 2. Remote Net Detect. Monitorización, diagnóstico y configuración de red y servidor Cloud. Manual de usuario...
  • Seite 102 3. Net traffic Detect. Monitoreo del tráfico de datos realizado por NVR en la red. Logout (Cerrar sesión) Cierre sesión, apague o reinicie el sistema. Manual de usuario...
  • Seite 103: Fonctions Principales

    Fonctions principales • Enregistrement multicanal simultané en temps réel, lecture et configuration à distance • Prend en charge jusqu’à 16 canaux avec une résolution maximale de 4K. • Sauvegarde sur mémoire flash USB et disque dur externe. • Prend en charge la détection de visage et de forme humaine (selon la caméra) •...
  • Seite 104 • Desserrez les vis et ouvrez le boîtier du NVR • Connectez les câbles de données et fixez le disque dur avec les vis • Fermez le boîtier du NVR • Connectez le câble d’alimentation et Internet au NVR Allumez l’appareil Branchez le cordon d’alimentation dans une prise 230V.
  • Seite 105 General CMS à partir de la section Téléchargement de la page Web du produit (www.pni.fr) Authentification du système Après avoir allumé l’appareil, connectez-vous au système. Par défaut, l’utilisateur admin est protégé par mot de passe par 1234. Si le mot de passe est mal saisi 5 fois de suite, le compte sera bloqué. En redémarrant l’appareil ou après une demi-heure, le compte sera déverrouillé...
  • Seite 106 Étapes à suivre: 1. Réglez l’heure, la date et le fuseau horaire. 2. Bientôt, une fenêtre contextuelle apparaîtra à l’écran vous demandant de modifier le mot de passe d’authentification dans le système. Suivez les étapes à l’écran ou appuyez sur la touche ESC du NVR pour quitter l’interface de configuration du mot de passe.
  • Seite 107: Main Menu (Menu Principal)

    Le menu Dans l’interface principale prévisualisation, faites un clic droit avec la souris pour accéder au menu. Main Menu (Menu principal) Options: Playback, Record Conf, Network, Date Time. Manuel utilisateur...
  • Seite 108 Playback (Relecture) Le système propose de nombreux filtres et options pour identifier l’enregistrement souhaité. Vous pouvez rechercher par numéro de chaîne, date et intervalle de temps ou par type de fichier. Record Conf. (Configuration enregistrer) L’interface permet de faire les réglages suivants : la durée d’un fichier d’enregistrement, le mode d’enregistrement (programmé...
  • Seite 109 Network (Réseau) Définissez manuellement les paramètres réseau (adresse IP, passerelle, DNS, port, etc.) ou cochez l’option DHCP pour la récupération automatique des paramètres. Remarque : pour que les paramètres prennent effet, redémarrez le système. Clic droit sur l’écran - Logout - Reboot. Date time (Date et heure) Réglez le fuseau horaire, la date, l’heure et le format.
  • Seite 110 System (Système) Options: General, Encode, Backup, Snapshot Config., Display, Account. General (Général) L’interface permettra les réglages suivants : la langue d’affichage du menu, le comportement en cas de disque dur plein (écraser ou arrêter l’enregistrement), la durée de la session et activer/désactiver le guide de configuration rapide au démarrage du système.
  • Seite 111 Encode (Encoder) Affiche les paramètres techniques des caméras connectées (résolution, fréquence d’images, compression vidéo, qualité, etc.). Backup (Sauvegarde) La mémoire USB ou le disque dur externe doit être installé dans le NVR avant de démarrer la sauvegarde. Appuyez sur le bouton Détecter pour identifier le périphérique de stockage, puis sur le bouton Sauvegarder pour effectuer la sauvegarde.
  • Seite 112 Snapshot Config (Configuration d’instantané) Configurez pour effectuer des captures cycliques à un certain moment et les envoyer par e-mail, FTP ou les stocker sur votre disque dur. Display (Afficher) Dans le mode de prévisualisation local peuvent être affichés : l’heure, le nom du canal, l’état de l’enregistrement, l’état de l’alarme, la transparence et la résolution d’affichage.
  • Seite 113 Account (Compte) L’interface permet de gérer les utilisateurs ayant accès au système, d’ajouter des utilisateurs, de modifier les droits des utilisateurs, de modifier le mot de passe, de créer des groupes d’utilisateurs et de définir un niveau de sécurité de compte en enregistrant des réponses à...
  • Seite 114 Alarm (Alarme) Options: Intelligent Alert, Abnormality and Traditional alarm (Pas d’image, Pas de signal vidéo, etc.). L’entrée d’alarme et les options intelligentes ne sont pas disponibles pour ce modèle. Intelligent Alert (Alerte intelligente) Paramétrez le comportement du système en cas de détection de mouvement : enregistrement et/ou notification dans l’application.
  • Seite 115 Abnormality (Anomalie) Définissez le comportement du système en cas de : erreur de périphérique de stockage, manque d’espace sur le périphérique de stockage, manque de connexion Internet ou conflit IP. Dans de telles situations, vous pouvez configurer l’envoi d’une notification dans l’application ou par e-mail. Traditional alarm (Alarme traditionnelle) Définissez le comportement du système en cas d’image manquante ou de signal vidéo manquant.
  • Seite 116 Advanced (Avancée) Options: HDD info, Upgrade, AutoMaintain, Restore, Import / Export, Digital, LOG, BPS et Version. HDD info (Informations sur le disque dur) Définissez le fonctionnement du disque dur (lecture seule ou lecture-écriture). Remarque : Afin de sauvegarder les enregistrements sur le disque dur, celui-ci doit être réglé...
  • Seite 117 Upgrade Insérez une clé USB dans le NVR qui doit contenir le fichier de mise à jour dans le dossier racine. Sélectionnez le lecteur de stockage et le fichier dans le menu NVR et cliquez sur le bouton Upgrade. AutoMaintain (Maintenance automatique) Configurez le système pour qu’il redémarre à...
  • Seite 118 Import/Export Exportez ou importez les paramètres système. Manuel utilisateur...
  • Seite 119 Digital (Numérique) Options: Digital channels, Channel status and Channel Type. Digital channels (Chaînes numériques) Ajouter une caméra sur un canal spécifique. Cliquez sur le bouton Ajouter, puis sur Rechercher pour trouver toutes les caméras connectées au même réseau (même routeur) avec le NVR. Manuel utilisateur...
  • Seite 120 Channel type (Type de canal) Affiche le nombre maximum de caméras et la résolution des caméras pouvant être connectées au système. Le NVR PNI IP716 prend en charge un maximum de 16 caméras IP avec une résolution maximale de 4K.
  • Seite 121 Log (Journal) Affiche l’historique des actions effectuées dans le système. Version Affiche des informations utiles sur le firmware et le code QR avec le numéro de série du système (utile pour l’ajouter à l’application mobile) et le code QR pour télécharger l’application mobile. Manuel utilisateur...
  • Seite 122 Autres options de menu Faites un clic droit sur l’écran pour afficher des options supplémentaires : Channel Set, Record Mode, Playback, Face detection, parameters, Color settings, Split menu, PTZ Control, Output adjust, NetDetect, Logout. Channel set (Ensemble de chaînes) L’interface permet d’ajouter et de gérer les caméras ajoutées au système. Ajouter de caméras 1.
  • Seite 123 5. Bulk upgrade. Mise à jour du firmware pour les caméras sélectionnées. 6. Network detect. Tests et diagnostics du réseau cloud et des serveurs. 7. Channel title. Renommer les caméras. 8. NVR Network. Configurer les paramètres du réseau NVR. 9. Close adaptive. Désactive la fonction d’adaptation IP pour les caméras sélectionnées.
  • Seite 124 Record mode (Mode d’enregistrement) Réglez le mode d’enregistrement (manuel ou programmé) pour chaque canal. Playback (Relecture) Raccourci pour accéder à l’interface de recherche et de lecture des enregistrements. Face detection (Détection facial) L’interface n’est disponible que pour les caméras prenant en charge cette fonctionnalité.
  • Seite 125 Color settings (Paramètres de couleur) Ajustez les paramètres de couleur (luminosité, contraste, saturation, etc.) pour l’interface de visualisation de la caméra. Split menu Sélectionnez comment afficher les caméras sur le même écran. Options : afficher 1 caméra, 2, 4, 6, 8, 9 ou 16 caméras simultanément. Output Adjust Réglez le volume et l’image.
  • Seite 126 Net Detect 1. Local Net Detect. Surveillance et diagnostic de la connexion des caméras. 2. Remote Net Detect. Surveillance, diagnostic et configuration du réseau et du serveur Cloud. Manuel utilisateur...
  • Seite 127 3. Net traffic Detect. Surveillance du trafic de données effectué par le NVR dans le réseau. Logout Déconnectez-vous, arrêtez ou redémarrez le système. Manuel utilisateur...
  • Seite 128: Műszaki Adatok

    Fő funkciók • Egyidejű valós idejű többcsatornás felvétel, távoli lejátszás és konfigurálás • Akár 16 csatornát támogat, maximális 4K felbontással. • Biztonsági másolat készítése USB flash memóriára és külső merevlemezre. • Támogatja az arc és az emberi alak érzékelését (a kamerától függően) •...
  • Seite 129 Kapcsolja be a készüléket Csatlakoztassa a tápkábelt egy 230 V-os konnektorhoz. Az NVR elindul. A jelző LED kigyullad. Alapértelmezés szerint 16 csatorna jelenik meg a képernyőn. Ha a kezdési idő a rögzítés előre beállított ütemezésén belül van, akkor a felvételi funkció automatikusan elindul. Megjegyzések: 1.
  • Seite 130: Gyors Telepítési Útmutató

    A telepítőfájl letölthető a csomagban található Windows General CMS CD-ről, vagy a termék weboldalának (www.pni. hu) Letöltés részéről. A rendszer hitelesítése A készülék bekapcsolása után jelentkezzen be a rendszerbe. Alapértelmezés szerint az adminisztrátort az 1234. jelszóval védi. Ha a jelszót egymás után ötször helytelenül adják meg, a fiók blokkolásra kerül.
  • Seite 131 3. Állítsa be manuálisan a hálózati paramétereket, vagy aktiválja a DHCP opciót az automatikus letöltéshez. 4. Olvassa be a képernyőn található QR-kódot az XMEye alkalmazás mobiltelefonjára történő telepítéséhez. Olvassa be a QR-kódot a sorozatszámmal, hogy hozzáadja a rendszert az alkalmazáshoz. 5.
  • Seite 132: Main Menu (Főmenü)

    The menu (A menü) A fő előnézeti felületen kattintson a jobb gombbal az egérrel a menü eléréséhez. Main Menu (Főmenü) Opciók: Playback, Record Conf, Network, Date Time. Használati utasítás...
  • Seite 133 Playback (Lejátszás) A rendszer számos szűrőt és lehetőséget kínál a kívánt rekord azonosítására. Kereshet csatornaszám, dátum és időintervallum vagy fájltípus szerint. Record Conf. (Rekordkonfiguráció) Az interfész lehetővé teszi a következő beállítások elvégzését: a felvételi fájl hossza, a rögzítési mód (programozott vagy manuális), az időszak (nap és időintervallum) és a felvétel típusa (normál, mozgásérzékelés és riasztás).
  • Seite 134 Network (Hálózat) Állítsa be kézzel a hálózati paramétereket (IP-cím, átjáró, DNS, port stb.), Vagy ellenőrizze a DHCP opciót az automatikus paraméter-visszakereséshez. Megjegyzés: A beállítások életbe lépéséhez indítsa újra a rendszert. Kattintson a jobb gombbal a képernyőn - Logout - Reboot. Date time (Dátum és idő) Állítsa be az időzónát, a dátumot, az időt és a formátumot.
  • Seite 135 System (Rendszer) Opciók: General, Encode, Backup, Snapshot Config., Display, Account. General (Tábornok) Az interfész a következő beállításokat teszi lehetővé: a menü megjelenítési nyelve, a viselkedés teljes merevlemez esetén (felülírja vagy leállítja a felvételt), a munkamenet időtartama és a rendszerindításkor engedélyezi / letiltja a gyors konfigurációs útmutatót.
  • Seite 136 Encode Megjeleníti a csatlakoztatott kamerák műszaki paramétereit (felbontás, képkockasebesség, videotömörítés, minőség stb.). Backup (Biztonsági mentés) Az USB-memóriát vagy a külső HDD-t a biztonsági mentés megkezdése előtt telepíteni kell az NVR-be. Nyomja meg a Detect gombot a tárolóeszköz azonosításához, majd a Backup gombot a biztonsági mentés végrehajtásához. Használati utasítás...
  • Seite 137 Snapshot Config (Pillanatkép konfiguráció) Állítsa be, hogy ciklikus felvételeket készítsen egy adott időpontban, és e-mailben, FTP-ben küldje el, vagy tárolja a merevlemezen. Display (Kijelző) Helyi előnézeti módban megjeleníthető: idő, csatorna neve, felvételi állapot, riasztási állapot, átlátszóság és a kijelző felbontása. Megjegyzés: A felbontás módosítása előtt ellenőrizze, hogy a monitor támogatja-e ezt a felbontást.
  • Seite 138 Account (Számla) A felület lehetővé teszi a rendszerhez hozzáféréssel rendelkező felhasználók kezelését, felhasználók hozzáadását, felhasználói jogok megváltoztatását, jelszó megváltoztatását, felhasználói csoportok létrehozását és a fiók biztonsági szintjének beállítását bizonyos előre meghatározott kérdésekre adott válaszok regisztrálásával. Jelszó alaphelyzetbe állítása esetén az ellenőrző kód elküldhető a mobilalkalmazásban vagy a megadott e-mail címen.
  • Seite 139 Alarm (Riasztás) Opciók: Intelligent Alert, Abnormality and Traditional alarm (Nincs kép, nincs videojel stb.). A riasztás bevitele és az intelligens opciók nem állnak rendelkezésre ennél a modellnél. Intelligent Alert (Intelligens riasztás) Állítsa be a rendszer viselkedését mozgásérzékelés esetén: regisztráció és / vagy értesítés az alkalmazásban.
  • Seite 140 Abnormality (Rendellenesség) Set the system behavior in case of: storage device error, lack of space on the storage device, lack of internet connection or IP conflict. In such situations you can set to send a notification in the application or an email. Traditional alarm (Hagyományos riasztó) Állítsa be a rendszer viselkedését hiányzó...
  • Seite 141 Fejlett Opciók: HDD info, Upgrade, AutoMaintain, Restore, Import / Export, Digital, LOG, BPS és Version. HDD info (HDD információk) Állítsa be a merevlemez működését (csak olvasható vagy írható és írható). Megjegyzés: A felvételek merevlemezre történő mentéséhez olvasási / írási módra kell állítani.
  • Seite 142 Upgrade Helyezzen egy USB-meghajtót az NVR-be, amelynek tartalmaznia kell a frissítési fájlt a gyökérmappában. Válassza ki a tároló meghajtót és a fájlt az NVR menüből, majd kattintson a Frissítés gombra. AutoMaintain Állítsa be a rendszert egy adott napon és időpontban történő újraindításra, vagy állítsa be az adott időtartamnál régebbi fájlok automatikus törlését.
  • Seite 143 Import/Export Exportálja vagy importálja a rendszerbeállításokat. Használati utasítás...
  • Seite 144 Digital (Digitális) Opciók: Digital channels, Channel status és Channel Type. Digitális csatornák Adjon hozzá kamerát egy adott csatornához. Kattintson a Hozzáadás gombra, majd a Keresés gombra, hogy megtalálja az NVR-rel ugyanabba a hálózatba (ugyanazon az útválasztón) csatlakoztatott összes kamerát. Használati utasítás...
  • Seite 145 Megjeleníti mind a 16 csatorna állapotát (csatlakoztatva, nem csatlakozva vagy konfigurálatlanul). Channel type (Csatorna típusa) Megjeleníti a kamerák maximális számát és a rendszerhez csatlakoztatható kamerák felbontását. A PNI IP716 NVR maximum 16 IP kamerát támogat, maximális felbontása 4K. Használati utasítás...
  • Seite 146 Log (Napló) Megjeleníti a rendszerben végrehajtott műveletek előzményeit. Változat Displays useful information about firmware and QR code with the system serial number (useful for adding it to the mobile application) and QR code for downloading the mobile application. Használati utasítás...
  • Seite 147 Egyéb menüopciók Kattintson jobb gombbal képernyőn a további lehetőségek megjelenítéséhez: Channel Set, Record Mode, Playback, Face detection, parameters, Color settings, Split menu, PTZ Control, Output adjust, NetDetect, Logout. Channel set (Csatorna beállítása) Az interfész lehetővé teszi a rendszerhez hozzáadott kamerák hozzáadását és kezelését.
  • Seite 148 4. Szerkessze az eszközöket. Változtassa meg a kiválasztott csatorna IP-címét és portját. 5. Tömeges frissítés. Firmware frissítés a kiválasztott kamerákhoz. 6. Hálózati észlelés. Felhő hálózati és szerver tesztelés és diagnosztika. 7. Csatorna címe. Nevezze át a kamerákat. 8. NVR hálózat. Konfigurálja az NVR hálózati paramétereket. 9.
  • Seite 149 Record mode (Felvétel mód) Állítsa be az egyes csatornák felvételi módját (manuális vagy programozott). Playback (Lejátszás) Parancsikon a felvételek keresési és lejátszási felületének eléréséhez. Face detection (Arcfelismerés) Az interfész csak az ezt a funkciót támogató kamerák számára érhető el. Használati utasítás...
  • Seite 150 Color settings (Színbeállítások) Állítsa be a színparamétereket (fényerő, kontraszt, telítettség stb.) A kamera néző felületéhez. Split menu Válassza ki, hogyan jelenítse meg a kamerákat ugyanazon a képernyőn. Opciók: 1 kamera, 2, 4, 6, 8, 9 vagy 16 kamera egyidejű megjelenítése. Output Adjust Állítsa be a hangerőt és a képet.
  • Seite 151: Net Detect

    Net Detect 1. Local Net Detect. Kamera csatlakozás figyelése és diagnosztika. 2. Remote Net Detect. A hálózat és a Cloud szerver figyelése, diagnosztikája és konfigurálása. Használati utasítás...
  • Seite 152 3. Net traffic Detect. Az NVR által a hálózatban végrehajtott adatforgalom figyelése. Logout Jelentkezzen ki, állítsa le vagy indítsa újra a rendszert. Használati utasítás...
  • Seite 153: Funzioni Principali

    Funzioni principali • Registrazione multicanale simultanea in tempo reale, riproduzione e configurazione da remoto • Supporta fino a 16 canali con una risoluzione massima di 4K. • Backup su memoria flash USB e HDD esterno. • Supporta il rilevamento di volti e forme umane (a seconda della telecamera) •...
  • Seite 154: Accendere Il Dispositivo

    • Allentare le viti e aprire l’alloggiamento dell’NVR • Collegare i cavi dati e fissare il disco rigido con le viti • Richiudere l’alloggiamento dell’NVR • Collegare il cavo di alimentazione e Internet all’NVR Accendere il dispositivo Collegare il cavo di alimentazione a una presa da 230V. L’NVR si avvierà. Il LED indicatore si accenderà.
  • Seite 155 Windows General CMS o dalla sezione Download nella pagina web del prodotto (www.pni.it) Autenticazione del sistema Dopo aver acceso il dispositivo, accedere al sistema. Per impostazione predefinita, l’utente amministratore è protetto da password 1234. Se la password viene inserita in modo errato per 5 volte di seguito, l’account verrà...
  • Seite 156 Pasi da seguire: 1. Impostare l’ora, la data e il fuso orario. 2. Presto sullo schermo apparirà una finestra popup che ti chiederà di cambiare la password di autenticazione nel sistema. Seguire i passaggi sullo schermo o premere il tasto ESC sull’NVR per uscire dall’interfaccia di impostazione della password.
  • Seite 157 Il menu Nell’interfaccia anteprima principale, fare clic con il pulsante destro del mouse per accedere al menu. Main Menu (Il emnu principale) Opzioni: Playback, Record Conf, Network, Date Time. Manuale dell’utente...
  • Seite 158 Playback (Riproduzione) Il sistema offre numerosi filtri e opzioni per identificare il filmino desiderato. È possibile effettuare la ricerca per numero di canale, data e intervallo di tempo o per tipo di file. Record Conf. (Configurazione registrazione) L’interfaccia consente di effettuare le seguenti impostazioni: la lunghezza di un file di registrazione, la modalità...
  • Seite 159 Network (Impostazioni di rete) Impostare manualmente i parametri di rete (indirizzo IP, gateway, DNS, porta, ecc.) o selezionare l’opzione DHCP per il recupero automatico dei parametri. Nota: per rendere effettive le impostazioni, riavviare il sistema. Fare clic con il tasto destro sullo schermo - Logout - Reboot.
  • Seite 160 System (Sistema) Opzioni: General, Encode, Backup, Snapshot Config., Display, Account. General (Generale) L’interfaccia consentirà le seguenti impostazioni: la lingua di visualizzazione del menu, il comportamento in caso di disco rigido pieno (sovrascrivere o interrompere la registrazione), la durata della sessione e l’attivazione/ disattivazione della guida di configurazione rapida all’avvio del sistema.
  • Seite 161 Encode (Decodifica) Visualizza i parametri tecnici delle telecamere collegate (risoluzione, frame rate, compressione video, qualità, ecc.). Backup (Copia di sicurezza) La memoria USB o l’HDD esterno deve essere installato nell’NVR prima di avviare il backup. Premere il pulsante Rileva per identificare il dispositivo di archiviazione, quindi il pulsante Backup per eseguire il backup.
  • Seite 162 Snapshot Config (Configurazione salvaschermo) Imposta per acquisire acquisizioni cicliche in un determinato momento e inviarle via e-mail, FTP o memorizzarle sul disco rigido. Display Nella modalità di anteprima locale possono essere visualizzati: ora, nome del canale, stato di registrazione, stato di allarme, trasparenza e risoluzione del display.
  • Seite 163 Account (Conto) L’interfaccia consente di gestire gli utenti che hanno accesso al sistema, aggiungere utenti, modificare i diritti utente, modificare la password, creare gruppi di utenti e impostare un livello di sicurezza dell’account registrando le risposte a determinate domande predefinite. In caso di reimpostazione della password, il codice di verifica può...
  • Seite 164 Alarm (Allarme) Opzioni: Intelligent Alert, Abnormality e Traditional alarm (Nessuna immagine, nessun segnale video, ecc.). Le opzioni Ingresso allarme e Intelligente non sono disponibili per questo modello. Intelligent Alert (Allarme Intelligente) Imposta il comportamento del sistema in caso di rilevamento del movimento: registrazione e/o notifica nell’applicazione.
  • Seite 165 Abnormality (Situazione anomala) Imposta il comportamento del sistema in caso di: errore del dispositivo di archiviazione, mancanza di spazio sul dispositivo di archiviazione, mancanza di connessione Internet o conflitto IP. In tali situazioni è possibile impostare l’invio di una notifica nell’applicazione o un’e-mail. Traditional alarm (Allarme tradizionale) Imposta il comportamento del sistema in caso di immagine mancante o segnale video mancante.
  • Seite 166 Advanced (Avanzzato) Opzioni: HDD info, Upgrade, AutoMaintain, Restore, Import / Export, Digital, LOG, BPS e Version. HDD info (Informazioni sul HDD) Imposta il funzionamento del disco rigido (sola lettura o lettura-scrittura). Nota: per salvare le registrazioni sul disco rigido, è necessario impostare la modalità di lettura/scrittura.
  • Seite 167 Upgrade (Aggiornamento) Inserisci una chiavetta USB nell’NVR che dovrebbe contenere il file di aggiornamento nella cartella principale. Selezionare l’unità di archiviazione e il file dal menu NVR e fare clic sul pulsante Aggiorna. AutoMaintain (Mantenimento automatico) Imposta il riavvio del sistema in un determinato giorno e ora o imposta l’eliminazione automatica dei file più...
  • Seite 168 Restore (Repristino) Seleziona le opzioni che desideri ripristinare. Import/Export (Importa/Esporta) Esporta o importa le impostazioni di sistema. Manuale dell’utente...
  • Seite 169 Digital (Digitale) Opzioni: Digital channels, Channel status e Channel Type. Digital channels (Canali digitali) Aggiungi una telecamera su un canale specifico. Fare clic sul pulsante Aggiungi, quindi su Cerca per trovare tutte le telecamere collegate alla stessa rete (stesso router) con l’NVR. Manuale dell’utente...
  • Seite 170 Visualizza lo stato (connesso, non connesso o non configurato) per tutti i 16 canali. Channel type (Tipo canale) Visualizza il numero massimo di telecamere e la risoluzione delle telecamere collegabili al sistema. L’NVR PNI IP716 supporta un massimo di 16 telecamere IP con una risoluzione massima di 4K. Manuale dell’utente...
  • Seite 171 Log (Storico) Visualizza la cronologia delle azioni eseguite nel sistema. Version (Versione) Visualizza informazioni utili su firmware e codice QR con il numero di serie del sistema (utile per aggiungerlo all’applicazione mobile) e codice QR per scaricare l’applicazione mobile. Manuale dell’utente...
  • Seite 172 Other menu options (Opzioni aggiuntive) Fare clic con il pulsante destro del mouse sullo schermo per visualizzare opzioni aggiuntive: Channel Set, Record Mode, Playback, Face detection, parameters, Color settings, Split menu, PTZ Control, Output adjust, NetDetect, Logout. Channel set (Impostazione canali) L’interfaccia permette di aggiungere e gestire le telecamere aggiunte al sistema.
  • Seite 173 3. Add. Dall’elenco delle telecamere visualizzate, selezionare le telecamere desiderate e fare clic su Aggiungi per aggiungerle al sistema. 4. Network. Configurare i parametri di rete per le telecamere (indirizzo IP, gateway, ecc.) 5. Quick set. Aggiunta e configurazione rapida delle telecamere. 6.
  • Seite 174 Record mode (Modalità di registrazione) Impostare la modalità di registrazione (manuale o programmata) per ciascun canale. Manuale dell’utente...
  • Seite 175 Preview (Anteprima) Scorciatoia per accedere all’interfaccia di ricerca e riproduzione delle registrazioni. Face detection (Rilevamento viso) L’interfaccia è disponibile solo per le fotocamere che supportano questa funzione. Color settings (Impostazione colori) Regola i parametri del colore (luminosità, contrasto, saturazione, ecc.) per l’interfaccia di visualizzazione della telecamera.
  • Seite 176 Split menu (Dividi visualizzazione) Selezionare come visualizzare le telecamere sullo stesso schermo. Opzioni: visualizzare 1 telecamera, 2, 4, 6, 8, 9 o 16 telecamere contemporaneamente. Output Adjust (Impostazioni immagine) Imposta il volume e l’immagine. Net Detect 1. Local Net Detect. Monitoraggio e diagnostica della connessione della telecamera.
  • Seite 177 2. Remote Net Detect. Monitoraggio, diagnostica e configurazione di rete e server Cloud. 3. Net traffic Detect. Monitoraggio del traffico dati eseguito da NVR in rete. Logout Esci, spegni o riavvia il sistema. Manuale dell’utente...
  • Seite 178: Technische Specificaties

    Hoofdfuncties • Gelijktijdige realtime meerkanaalsopname, afspelen op afstand en configuratie • Ondersteunt tot 16 kanalen met een maximale 4K-resolutie. • Back-up op USB-flashgeheugen en externe HDD. • Ondersteunt gezichts- en menselijke vormdetectie (afhankelijk van de camera) • Mogelijkheid om externe luidspreker aan te sluiten. Technische specificaties Video-ingang 16 x 4K (access bandwidth 72Mbps)
  • Seite 179 • Sluit de datakabels aan en zet de harde schijf vast met de schroeven • Sluit de NVR-behuizing terug • Sluit de stroom- en internetkabel aan op de NVR Zet het apparaat aan Steek de stekker van het netsnoer in een 230V stopcontact. De NVR wordt gestart.
  • Seite 180 Afstandsbediening van het apparaat De NVR kan lokaal of op afstand worden bediend vanaf zowel smartphones als computers met Windows-besturingssysteem. Besturingssysteem Sollicitatie Downloaden Android, iOS XMEye Android installatiebestand worden gedownload vanaf cd die is meegeleverd Windows General CMS in het pakket of via de downloadsectie op de productwebpagina (www.
  • Seite 181 Opmerking: we raden aan het systeem te configureren voordat u de NVR en camera’s op de uiteindelijke locatie installeert. Te volgen stappen: 1. Stel de tijd, datum en tijdzone in. 2. Binnenkort verschijnt er een pop-upvenster op het scherm waarin u wordt gevraagd het authenticatiewachtwoord in het systeem te wijzigen.
  • Seite 182: Main Menu (Hoofdmenu)

    Het menu Klik in de hoofdvoorbeeldinterface met de rechtermuisknop om het menu te openen. Main Menu (Hoofdmenu) Opties: Playback, Record Conf, Network, Date Time. Gebruikershandleiding...
  • Seite 183 Playback (Afspelen) Het systeem biedt tal van filters en mogelijkheden om het gewenste record te identificeren. U kunt zoeken op kanaalnummer, datum en tijdsinterval of op bestandstype. Record Conf. (Opnameconfiguratie) Via de interface kunt u de volgende instellingen maken: de lengte van een opnamebestand, de opnamemodus (geprogrammeerd of handmatig), de periode (dag en tijdsinterval) en het opnametype (normaal, bewegingsdetectie en alarm).
  • Seite 184 Network (Netwerk) Stel handmatig de netwerkparameters in (IP-adres, gateway, DNS, poort, enz.) of vink de DHCP-optie aan voor het automatisch ophalen van parameters. Opmerking: Start het systeem opnieuw op om de instellingen van kracht te laten worden. Klik met de rechtermuisknop op het scherm - Logout - Reboot. Date time (Datum Tijd) Stel de tijdzone, datum, tijd en formaat in.
  • Seite 185 System (Systeem) Opties: General, Encode, Backup, Snapshot Config., Display, Account. General (Algemeen) De interface maakt de volgende instellingen mogelijk: de menuweergavetaal, het gedrag bij een volle harde schijf (overschrijven of stoppen met opnemen), de sessieduur en de snelle configuratiegids bij het opstarten van het systeem in-/uitschakelen.
  • Seite 186 Encode Toont de technische parameters van de aangesloten camera’s (resolutie, framerate, videocompressie, kwaliteit, enz.). Backup Het USB-geheugen of de externe HDD moet in de NVR zijn geïnstalleerd voordat de back-up wordt gestart. Druk op de knop Detecteren om het opslagapparaat te identificeren en vervolgens op de knop Back-up om de back- up uit te voeren.
  • Seite 187 Snapshot Config (Momentopnameconfiguratie) Stel in om op een bepaald tijdstip cyclische opnamen te maken en deze per e-mail, FTP te verzenden of op uw harde schijf op te slaan. Display In de lokale voorbeeldmodus kunnen worden weergegeven: tijd, kanaalnaam, opnamestatus, alarmstatus, transparantie en schermresolutie. Opmerking: Voordat u de resolutie wijzigt, moet u ervoor zorgen dat uw monitor die resolutie ondersteunt.
  • Seite 188 Account (Rekening) Met de interface kunnen gebruikers die toegang hebben tot het systeem beheren, gebruikers toevoegen, gebruikersrechten wijzigen, het wachtwoord wijzigen, gebruikersgroepen maken en een accountbeveiligingsniveau instellen door antwoorden op bepaalde vooraf gedefinieerde vragen te registreren. In geval van wachtwoord reset kan de verificatiecode worden verzonden in de mobiele applicatie of op het ingestelde e-mailadres.
  • Seite 189 Alarm (Alarm) Opties: Intelligent Alert, Abnormality en Traditional alarm (Geen beeld, Geen videosignaal, enz.). Alarmingang en intelligente opties zijn niet beschikbaar voor dit model. Intelligent Alert (Intelligente waarschuwing) Stel het systeemgedrag in bij bewegingsdetectie: registratie en/of melding in de applicatie. Stel ook het gevoeligheidsniveau voor beweging en het actiegebied Gebruikershandleiding...
  • Seite 190 Abnormality (Afwijking) Stel het systeemgedrag in in geval van: opslagapparaatfout, gebrek aan ruimte op het opslagapparaat, geen internetverbinding of IP-conflict. In dergelijke situaties kunt u instellen om een melding in de applicatie of een e-mail te sturen. Traditional alarm (Traditioneel alarm) Stel het systeemgedrag in bij ontbrekend beeld of ontbrekend videosignaal.
  • Seite 191 Advanced (Geavanceerd) Opties: HDD info, Upgrade, AutoMaintain, Restore, Import / Export, Digital, LOG, BPS en Version. HDD info Stel in hoe de harde schijf werkt (alleen-lezen of lezen-schrijven). Opmerking: om opnames op de harde schijf op te slaan, moet deze in de lees-/ schrijfmodus staan.
  • Seite 192 Upgrade Plaats een USB-stick in de NVR die het updatebestand in de hoofdmap moet bevatten. Selecteer het opslagstation en het bestand in het NVR-menu en klik op de knop Upgrade. AutoMaintain (Automatisch onderhouden) Stel het systeem in om op een bepaalde dag en tijd opnieuw op te starten of stel het automatisch verwijderen van bestanden die ouder zijn dan een bepaalde periode in.
  • Seite 193 Import/Export (Importeren/Exporteren) Systeeminstellingen exporteren of importeren. Gebruikershandleiding...
  • Seite 194 Digital (Digitaal) Opties: Digital channels, Channel status en Channel Type. Digital channels (Digitale kanalen) Voeg een camera toe aan een specifiek kanaal. Klik op de knop Toevoegen en vervolgens op Zoeken om alle camera’s te vinden die op hetzelfde netwerk (dezelfde router) zijn aangesloten met de NVR.
  • Seite 195 16 kanalen. Channel type (Kanaaltype) Toont het maximale aantal camera’s en de resolutie van de camera’s die op het systeem kunnen worden aangesloten. De PNI IP716 NVR ondersteunt maximaal 16 IP-camera’s met een maximale resolutie van 4K. Gebruikershandleiding...
  • Seite 196 Log (Logboek) Geeft de geschiedenis weer van acties die in het systeem zijn uitgevoerd. Version (Versie) Geeft nuttige informatie weer over firmware en QR-code met het serienummer van het systeem (handig om het toe te voegen aan de mobiele applicatie) en QR-code om de mobiele applicatie te downloaden.
  • Seite 197 Andere menu-opties Klik met de rechtermuisknop op het scherm om extra opties weer te geven: Channel Set, Record Mode, Playback, Face detection, parameters, Color settings, Split menu, PTZ Control, Output adjust, NetDetect, Logout. Channel set (Kanaal ingesteld) Met de interface kunnen de camera’s die aan het systeem zijn toegevoegd, worden toegevoegd en beheerd.
  • Seite 198 (resolutie, framerate, videocompressie, kwaliteit, enz.). 4. Edit devices. Wijzig IP en poort voor het geselecteerde kanaal. 5. Bulk upgrade. Firmware-update voor geselecteerde camera’s. 6. Network detect. Testen en diagnostiek van cloudnetwerken en servers. 7. Channel title. Camera’s hernoemen. 8. NVR Network. NVR-netwerkparameters configureren. 9.
  • Seite 199 Record mode (Opnamemodus) Stel de opnamemodus in (handmatig of geprogrammeerd) voor elk kanaal. Preview (Voorbeeld) Snelkoppeling voor toegang tot de zoek- en afspeelinterface van opnamen. Face detection (Gezichtsherkenning) De interface is alleen beschikbaar voor camera’s die deze functie ondersteunen. Gebruikershandleiding...
  • Seite 200 Color settings (Kleurinstellingen) Pas de kleurparameters (helderheid, contrast, verzadiging, enz.) aan voor de cameraweergave-interface. Split menu (Gesplitste weergave) Selecteer hoe de camera’s op hetzelfde scherm moeten worden weergegeven. Opties: 1 camera, 2, 4, 6, 8, 9 of 16 camera’s tegelijk weergeven. Output Adjust Stel het volume en de afbeelding in.
  • Seite 201 Net Detect 1. Local Net Detect. Bewaking en diagnose van cameraverbindingen. 2. Remote Net Detect. Monitoring, diagnose en configuratie van netwerk en cloudserver. Gebruikershandleiding...
  • Seite 202 3. Net traffic Detect. Monitoring van dataverkeer uitgevoerd door NVR in het netwerk. Logout Log uit, sluit het systeem af of start het opnieuw op. Gebruikershandleiding...
  • Seite 203: Główne Funkcje

    Główne funkcje • Jednoczesne nagrywanie wielokanałowe w czasie rzeczywistym, zdalne odtwarzanie i konfiguracja • Obsługuje do 16 kanałów o maksymalnej rozdzielczości 4K. • Kopia zapasowa na pamięci flash USB i zewnętrznym dysku twardym. • Obsługuje wykrywanie twarzy i kształtu ludzkiego (w zależności od aparatu) •...
  • Seite 204: Włącz Urządzenie

    • Zamknij obudowę NVR • Podłącz kabel zasilający i internetowy do NVR Włącz urządzenie Podłącz przewód zasilający do gniazdka 230V. NVR zostanie uruchomiony. Zaświeci się wskaźnik LED. Domyślnie na ekranie będzie wyświetlanych 16 kanałów. Jeśli czas rozpoczęcia mieści się w ustalonym harmonogramie nagrywania, funkcja nagrywania rozpocznie się...
  • Seite 205 Windows General CMS lub z sekcji Download na stronie produktu (www. pni.pl) Uwierzytelnianie systemu Po włączeniu urządzenia zaloguj się do systemu. Domyślnie administrator jest chroniony hasłem 1234. Jeśli hasło zostanie wprowadzone niepoprawnie 5 razy z rzędu, konto zostanie zablokowane.
  • Seite 206 Kroki do naśladowania: 1. Ustaw godzinę, datę i strefę czasową. 2. Wkrótce na ekranie pojawi się wyskakujące okienko z prośbą o zmianę hasła uwierzytelniającego w systemie. Postępuj zgodnie z instrukcjami wyświetlanymi na ekranie lub naciśnij klawisz ESC na rejestratorze NVR, aby wyjść...
  • Seite 207: Main Menu (Menu Główne)

    Menu W głównym interfejsie podglądu kliknij prawym przyciskiem myszy, aby uzyskać dostęp do menu. Main Menu (Menu główne) Opcje: Playback, Record Conf, Network, Date Time. Instrukcja obsługi...
  • Seite 208 Playback (Odtwarzanie nagranego dźwięku) System oferuje liczne filtry i opcje identyfikacji żądanego rekordu. Możesz wyszukiwać według numeru kanału, daty i przedziału czasowego lub według typu pliku. Record Conf. (Konf. rekordów) Interfejs umożliwia dokonanie następujących ustawień: długość pliku nagrania, tryb nagrywania (programowany lub ręczny), okres (dzień i interwał czasowy) oraz typ nagrywania (normalny, detekcja ruchu i alarm).
  • Seite 209 Network (Sieć) Ręcznie ustaw parametry sieciowe (adres IP, brama, DNS, port itp.) lub zaznacz opcję DHCP w celu automatycznego pobierania parametrów. Uwaga: aby ustawienia zaczęły obowiązywać, uruchom ponownie system. Kliknij prawym przyciskiem myszy na ekranie - Logout - Reboot. Date time (Data i godzina) Ustaw strefę...
  • Seite 210 System Opcje: General, Encode, Backup, Snapshot Config., Display, Account. General (Ogólny) Interfejs umożliwi następujące ustawienia: język wyświetlania menu, zachowanie w przypadku zapełnienia dysku twardego (nadpisanie lub zatrzymanie nagrywania), czas trwania sesji oraz włączenie/wyłączenie przewodnika szybkiej konfiguracji przy starcie systemu. Instrukcja obsługi...
  • Seite 211 Encode Wyświetla parametry techniczne podłączonych kamer (rozdzielczość, liczba klatek na sekundę, kompresja wideo, jakość itp.). Backup Pamięć USB lub zewnętrzny dysk twardy musi być zainstalowany w NVR przed rozpoczęciem tworzenia kopii zapasowej. Naciśnij przycisk Wykryj, aby zidentyfikować urządzenie pamięci, a następnie przycisk Kopia zapasowa, aby wykonać...
  • Seite 212 Snapshot Config (Konfiguracja zrzutu) Ustaw, aby robić cykliczne przechwytywanie o określonej godzinie i wysyłać je e-mailem, FTP lub przechowywać na dysku twardym. Display (Wyświetlacz) W trybie podglądu lokalnego mogą być wyświetlane: czas, nazwa kanału, stan nagrywania, stan alarmów, przezroczystość i rozdzielczość wyświetlania. Uwaga: przed zmianą...
  • Seite 213 Account (Konto) Interfejs umożliwia zarządzanie użytkownikami mającymi dostęp do systemu, dodawanie użytkowników, zmianę uprawnień użytkowników, zmianę hasła, tworzenie grup użytkowników oraz ustawianie poziomu bezpieczeństwa konta poprzez rejestrację odpowiedzi na określone predefiniowane pytania. W przypadku zresetowania hasła kod weryfikacyjny można wysłać w aplikacji mobilnej lub na podany adres e-mail.
  • Seite 214 Alarm Opcje: Intelligent Alert, Abnormality oraz Traditional alarm (Brak obrazu, brak sygnału wideo itp.). Wejście alarmowe i opcje inteligentne nie są dostępne w tym modelu. Intelligent Alert (Inteligentny alert) Ustaw zachowanie systemu w przypadku wykrycia ruchu: rejestracja i/lub powiadomienie w aplikacji. Ustaw również poziom wrażliwości na ruch i obszar działania.
  • Seite 215 Abnormality (Nieprawidłowość) Ustaw zachowanie systemu w przypadku: błędu urządzenia pamięci masowej, braku miejsca na urządzeniu pamięci masowej, braku połączenia internetowego lub konfliktu IP. W takich sytuacjach możesz ustawić wysyłanie powiadomienia w aplikacji lub e-mail. Traditional alarm (Tradycyjny alarm) Ustaw zachowanie systemu w przypadku braku obrazu lub braku sygnału wideo. W takich sytuacjach można ustawić...
  • Seite 216 Advanced (Zaawansowany) Opcje: HDD info, Upgrade, AutoMaintain, Restore, Import / Export, Digital, LOG, BPS oraz Version. HDD info (Informacje o dysku twardym) Ustaw sposób działania dysku twardego (tylko do odczytu lub do odczytu i zapisu). Uwaga: Aby zapisać nagrania na dysku twardym, należy go ustawić w trybie odczytu / zapisu.
  • Seite 217 Upgrade Włóż pamięć USB do NVR, która powinna zawierać plik aktualizacji w folderze głównym. Wybierz dysk i plik z menu NVR i kliknij przycisk Aktualizuj. AutoMaintain (Autokonserwacja) Ustaw system, aby uruchamiał się w określonym dniu i godzinie lub ustaw automatyczne usuwanie plików starszych niż określony okres. Restore (Resetowanie) Wybierz opcje, które chcesz zresetować.
  • Seite 218: Import Eksport

    Import Eksport Eksportuj lub importuj ustawienia systemowe. Instrukcja obsługi...
  • Seite 219 Digital (Cyfrowy) Opcje: Digital channels, Channel status oraz Channel Type. Kanały cyfrowe Dodaj kamerę na określonym kanale. Kliknij przycisk Dodaj, a następnie Wyszukaj, aby znaleźć wszystkie kamery podłączone do tej samej sieci (ten sam router) z rejestratorem NVR. Instrukcja obsługi...
  • Seite 220 Wyświetla stan (podłączony, niepodłączony lub nieskonfigurowany) dla wszystkich 16 kanałów. Channel type (Typ kanału) Wyświetla maksymalną liczbę kamer i rozdzielczość kamer, które można podłączyć do systemu. Rejestrator PNI IP716 NVR obsługuje maksymalnie 16 kamer IP o maksymalnej rozdzielczości 4K. Instrukcja obsługi...
  • Seite 221 Log (Dziennik) Wyświetla historię akcji wykonywanych w systemie. Version (Wersja) Wyświetla przydatne informacje o oprogramowaniu i kodzie QR wraz z numerem seryjnym systemu (przydatne do dodania go do aplikacji mobilnej) oraz kodem QR do pobrania aplikacji mobilnej. Instrukcja obsługi...
  • Seite 222 Inne opcje menu Kliknij prawym przyciskiem myszy na ekranie, aby wyświetlić dodatkowe opcje: Channel Set, Record Mode, Playback, Face detection, parameters, Color settings, Split menu, PTZ Control, Output adjust, NetDetect, Logout. Zestaw kanałów Interfejs umożliwia dodawanie i zarządzanie kamerami dodanymi do systemu. Add cameras Dodaj kamery 1.
  • Seite 223 7. Channel title. Zmień nazwy kamer. 8. NVR Network. Skonfiguruj parametry sieci NVR. 9. Close adaptive. Wyłącza funkcję adaptacji IP dla wybranych kamer. Instrukcja obsługi...
  • Seite 224 Record mode (Tryb nagrywania) Ustaw tryb nagrywania (ręczny lub programowany) dla każdego kanału. Playback (Odtwarzanie nagranego dźwięku) Skrót dostępu do interfejsu wyszukiwania i odtwarzania nagrań. Face detection (Wykrywanie twarzy) Interfejs jest dostępny tylko dla kamer obsługujących tę funkcję. Instrukcja obsługi...
  • Seite 225 Color settings (Ustawienia kolorów) Dostosuj parametry kolorów (jasność, kontrast, nasycenie itp.) dla interfejsu podglądu kamery. Split menu (Podzielony widok) Select how to display the cameras on the same screen. Opcje: display 1 camera, 2, 4, 6, 8, 9 or 16 cameras simultaneously. Output Adjust Ustaw głośność...
  • Seite 226 Net Detect 1. Local Net Detect. Monitorowanie i diagnostyka połączenia kamery. 2. Remote Net Detect. Monitorowanie, diagnostyka i konfiguracja serwerów sieciowych i Cloudr. Instrukcja obsługi...
  • Seite 227 3. Net traffic Detect. Monitorowanie ruchu danych realizowanego przez NVR w sieci. Logout Wyloguj się, zamknij lub uruchom ponownie system. Instrukcja obsługi...
  • Seite 228: Specificatii Tehnice

    Functii principale • Inregistrare simultana in timp real pe mai multe canale, redare si configurare de la distanta • Suporta maxim 16 canale cu o rezolutie maxima 4K. • Backup pe stick USB si HDD extern. • Suporta detectie chip si forma umana (in functie de camera) •...
  • Seite 229 • Puneti capacul NVR-ului la loc • Conectati la NVR cablul de alimentare si de internet Pornirea dispozitivului Introduceti cablul de alimentare intr-o priza 230V. NVR-ul va porni. LED-ul indicator se va aprinde. In mod implicit, vor fi afisate 16 canale pe ecran. Daca ora de pornire se incadreaza in programul presetat pentru inregistrare, atunci functia de inregistrare va porni automat.
  • Seite 230: Autentificarea In Sistem

    Windows General CMS din sectiunea Download de pe pagina web a produsului (www.pni.ro) Autentificarea in sistem Dupa pornirea dispozitivului, autentificati-va in sistem. Implicit, utilizatorul admin este protejat de parola 1234. Daca parola este introdusa gresit de 5 ori la rand, contul va fi blocat. Prin repornirea dispozitivului sau dupa o jumatate de ora, contul va fi deblocat automat.
  • Seite 231 Pasii de urmat: 1. Setati ora, data si fusul orar. 2. In scurt timp, pe ecran va aparea un popup prin care vi se cere sa schimbati parola de autentificare in sistem. Urmati pasii de pe ecran sau apasati tasta ESC de pe NVR pentru a iesi din interfata de setare a parolei.
  • Seite 232: Main Menu (Meniul Principal)

    Meniul In interfata principala de previzualizare faceti click dreapta cu mouse-ul pentru a accesa meniul. Main Menu (Meniul principal) Optiuni: Playback (Redare), Record Conf (Configurare inregistrari), Network (Retea), Date Time (Setare data si ora) Manual de utilizare...
  • Seite 233 Playback (Redare inregistrari) Sistemul va ofera numeroase filtre si optiuni pentru identificarea inregistrarii dorite. Puteti cauta dupa numarul canalului, data si intervalul orar sau dupa tipul fisierului. Record Conf. (Configurare inregistrari) Interfata va permite urmatoarele setari: durata unui fisier de inregistrare, modul de inregistrare (programat sau manual), a perioadei (zi si interval orar) si tipul de inregistrare (inregistrare normala, la detectie miscare si la alarma).
  • Seite 234 Network (Configurari retea) Setati manual parametrii de retea (adresa IP, gateway, DNS, port etc.) sau bifati optiunea DHCP pentru preluarea automata a parametrilor. Nota: Pentru ca setarile sa aiba efect, restartati sistemul. Click dreapta pe ecran - Logout - Reboot. Date time (Setare data si ora) Setati fusul orar, data, ora si formatul.
  • Seite 235 System (Sistem) Optiuni: General, Encode, Backup, Snapshot Config. (Configurare capturi imagine), Display (Afisare), Account (Cont). General Interfata va permite urmatoarele setari: setarea limbii de afisare a meniului, comportamentul in caz de hard disk plin (suprascriere sau oprire inregistrare), durata unei sesiuni si activare/dezactivare ghid rapid de configurare la pornirea sistemului.
  • Seite 236 Encode Afiseaza parametrii tehnici ai camerelor conectate (rezolutie, frame rate, compresie video, calitate etc.). Backup (Copie de siguranta a inregistrarilor) Memoria USB sau HDD-ul extern trebuie sa fie instalat in NVR inainte de a porni executia copiei de rezerva. Apasati butonul Detect pentru identificarea dispozitivului de stocare, apoi butonul Backup pentru executarea copiei de rezerva.
  • Seite 237 Snapshot Config (Configurare captura imagine) Setati realizarea de capturi ciclic la un anumit interval de timp si trimiterea acestora pe email, FTP sau stocarea acestora pe hard disk. Display (Afisare) In modul de previzualizare local pot fi afisate: ora, numele canalului, statusul inregistrarii, statusul alarmei, transparenta si rezolutia de afisare.
  • Seite 238 Account (Cont) Interfata permite gestionarea utilizatorilor care au acces la sistem, adaugarea de utilizatori, modificarea drepturilor utilizatorilor, modificarea parolei, creearea de grupuri de utilizatori si setarea unui nivel de securitate a contului prin inregistrarea unor raspunsuri la anumite intrebari predefinite. In caz de resetare parola, codul de verificare poate fi trimis in aplicatia de mobil sau la adresa de email setata.
  • Seite 239 Alarm (Alarma) Optiuni: Intelligent Alert (Alerta inteligenta), Abnormality (Comportament anormal) si Traditional alarm (Lipsa imaginea, Lipsa semnal video etc. ). Optiunile Alarm input si Intelligent nu sunt disponibile pentru acest model. Intelligent Alert (Alerta inteligenta) Setati comportamentul sistemului in caz de detectie miscare: inresistrare si/sau notificare in aplicatie.
  • Seite 240 Abnormality (Comportament anormal) Setati comportamentul sistemului in caz de: eroare dispozitiv de stocare, lipsa spatiu pe dispozitivul de stocare, lipsa conexiune la internet sau conflict IP. In astfel de situatii puteti seta trimitea unei notificari in aplicatie sau a unui email. Traditional alarm (Alarma) Setati comportamentul sistemului in caz de lipsa imagine sau lipsa semnal video.
  • Seite 241 Advanced (Setari avansate) Optiuni: HDD info, Upgrade, AutoMaintain (mentenanta automata), Restore (Reset), Import/Export, Digital, LOG, BPS si Version (Versiune). HDD info (Informatii hard disk) Setati modul de functionare al hard disk-ului (doar citire sau citire scriere). Nota: ca sa puteti salva inregistrarile pe hard disk, acesta trebuie sa fie setat pe modul citire/scriere.
  • Seite 242 Upgrade (Actualizare firmware) Introduceti in NVR un stick USB care trebuie sa contina fisierul de actualizare in folderul principal (root). Selectati din meniul NVR-ului unitatea de stocare si fisierul si faceti click pe butonul Upgrade. AutoMaintain (Mentenanta automata) Setati repornirea sistemului intr-o anumita zi si ora sau setati stergerea automata a fisierelor mai vechi de o anumita perioada.
  • Seite 243 Import/Export Exportati sau importati setarile sistemului. Manual de utilizare...
  • Seite 244 Digital Optiuni: Digital channels (canale digitale), Channel status (status canale) si Channel Type. Digital channels (Canale digitale) Adaugati o camera pe un anumit canal. Faceti click pe butonul Add, apoi pe Search pentru a gasi toate camerele conectate in aceeasi retea (acelasi router) cu NVR-ul.
  • Seite 245 Afiseaza statusul (conectat, neconectat sau neconfigurat) pentru toate cele 16 canale. Channel type (Tip canale) Afiseaza numarul maxim de camere si rezolutia camerelor care pot fi conectate la sistem. NVR-ul PNI IP716 suporta maxim 16 camere IP cu rezolutie maxima de 4K. Manual de utilizare...
  • Seite 246 Log (Istoric evenimente) Afiseaza istoricul actiunilor executate in sistem. Version (Versiune software) Afiseaza informatii utile despre firmware si cod QR cu numarul de serie al sistemului (util pentru adaugarea acestuia in aplicatia de mobil) si cod QR pentru descarcarea aplicatiei de mobil. Manual de utilizare...
  • Seite 247 Alte optiuni meniu Click dreapta pe ecran pentru a afisa optiunile suplimentare: Channel Set, Record Mode, Playback, Face detection, parameters, Color settings, Split menu, PTZ Control, Output adjust, NetDetect, Logout. Channel set Interfata permite adaugarea si gestionarea camerelor adaugate in sistem. Zona adaugare camere 1.
  • Seite 248 3. Encode. Afiseaza parametrii tehnici ai camerelor conectate (rezolutie, frame rate, compresie video, calitate etc.). 4. Edit devices. Schimbare IP si port pentru canalul selectat. 5. Bulk upgrade. Actualizare firmware pentru camerele selectate. 6. Network detect. Testare si diagnosticare retea si server Cloud. 7.
  • Seite 249 Record mode (Mod inregistrare) Setati modul de inregistrare (manual sau programat) pentru fiecare canal in parte. Playback (Redare) Scurtatura pentru accesarea interfetei de cautare si redare a inregistrarilor. Face detection (Detectie chip uman) Interfata este disponibila doar pentru camerele care suporta aceasta functie. Manual de utilizare...
  • Seite 250 Color settings (Setari culoare) Reglati parametrii de culoare (luminozitate, contrast, saturatie etc.) pentru interfata de vizualizare a camerelor. Split menu (Mod afisare canale pe ecran) Selectati modul de afisare a camerelor pe acelasi ecran. Optiuni: afisare 1 camera, 2, 4, 6, 8, 9 sau 16 camere simultan. Output Adjust (Reglari interfata afisare) Setati volumul si imaginea.
  • Seite 251 Net Detect 1. Local Net Detect. Monitorizare si diagnosticare conexiune camere. 2. Remote Net Detect. Monitorizare, diagnosticare si configurare retea si server Cloud. Manual de utilizare...
  • Seite 252 3. Net traffic Detect. Monitorizare trafic de date efectuat de NVR in retea. Logout Iesiti din cont, inchideti sau reporniti sistemul. Manual de utilizare...
  • Seite 253 Declaración UE de conformidad simplificada SC ONLINESHOP SRL declara que el NVR PNI House IP716 cumple con la Directiva EMC 2014/30/EU. El texto completo de la declaración de conformidad de la UE está disponible en la siguiente dirección de Internet: https://www.mypni.eu/products/8167/download/certifications...
  • Seite 254 Vereenvoudigde EU-conformiteitsverklaring SC ONLINESHOP SRL verklaart dat NVR PNI House IP716 voldoet aan de richtlijn EMC 2014/30/EU. De volledige tekst van de EU-conformiteitsverklaring is beschikbaar op het volgende internetadres: https://www.mypni.eu/products/8167/download/certifications Uproszczona deklaracja zgodności UE SC ONLINESHOP SRL oświadcza, że NVR PNI House IP716 jest zgodny z dyrektywą...

Inhaltsverzeichnis