Inhaltsverzeichnis
Werbung
Verfügbare Sprachen
Verfügbare Sprachen
Quicklinks
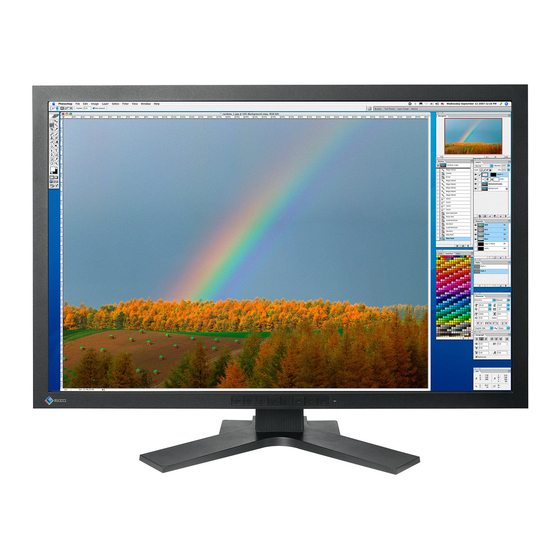
Calibration Color LCD Monitor
Setup Manual
Important:
Please read this Setup Manual and the User's Manual stored on the
CD-ROM carefully to familiarize yourself with safe and effective usage.
Please retain this manual for future reference.
Installationshandbuch
Wichtig:
Lesen Sie dieses Installationshandbuch und das Benutzerhandbuch
(auf der CD-ROM) aufmerksam durch, um sich mit der sicheren und
effizienten Bedienung vertraut zu machen. Bewahren Sie dieses
Handbuch zum späteren Nachschlagen auf.
Manuel d'installation
Important:
Veuillez lire attentivement ce manuel d'installation, ainsi que le manuel
d'utilisation inclus sur le CD-ROM, pour vous familiariser avec une
utilisation efficace et en toute sécurité. Veuillez conserver ce manuel
pour référence ultérieure.
设定手册
重要事项:
请仔细阅读储存在光盘片中的设定手册和用户手册,以便熟悉安全有效
使用本显示器的信息。请保留本手册,以便今后参考。
Werbung
Inhaltsverzeichnis

Verwandte Anleitungen für Eizo ColorEdge CG301W


Inhaltszusammenfassung für Eizo ColorEdge CG301W
- Seite 1 Calibration Color LCD Monitor Setup Manual Important: Please read this Setup Manual and the User’s Manual stored on the CD-ROM carefully to familiarize yourself with safe and effective usage. Please retain this manual for future reference. Installationshandbuch Wichtig: Lesen Sie dieses Installationshandbuch und das Benutzerhandbuch (auf der CD-ROM) aufmerksam durch, um sich mit der sicheren und effizienten Bedienung vertraut zu machen. Bewahren Sie dieses Handbuch zum späteren Nachschlagen auf.
- Seite 2 Compatible Resolutions/Frequencies Kompatible Auflösungen/Bildwiederholfrequenzen Résolutions/Fréquences compatibles 兼容的分辨率/频率 The monitor supports the following resolutions. Der Monitor unterstützt die nachfolgend aufgeführten Auflösungen. Le moniteur est compatible avec les résolutions suivantes. 本显示器支持下列分辨率。 Frequency Display setup/Anzeigeneinr./Conf. affichage/ 显示设定 Single Display/ Dual Display/ Einfache Anzeige/ Dualanzeige/ Affichage simple/ Affichage double/ Resolution Dot clock Horizontal (kHz) 单显示...
- Seite 3 SAFETY SYMBOLS This manual uses the safety symbols below. They denote critical information. Please read them carefully. WARNING CAUTION Failure to abide by the information in a Failure to abide by the information in a WARNING may result in serious injury and CAUTION may result in moderate injury and/ can be life threatening.
- Seite 4 • Digital Signal Cable (FD-C39) …………………………………………………………………… x 1 • EIZO USB Cable (MD-C93)………………………………………………………………………… x 1 • Mounting Screws (M4 x 12 mm) … ………………………………………………………………… x 4 pcs. • Hood ………………………………………………………………………………………………… x 1 set • “ScreenCleaner” Cleaning Kit … …………………………………………………………………… x 1 • EIZO LCD Utility Disk (CD-ROM) ………………………………………………………………… x 1 • “ColorNavigator” Calibration Software User’s Manuals (PDF format) ColorEdge CG301W ColorEdge ColorNavigator Setup Manual (this manual) ……………………………………………………………………… x 1 • ColorNavigator Quick Reference ………………………………………………………………… x 1 • Adjustment Certificate ……………………………………………………………………………… x 1 •...
-
Seite 5: Controls And Functions
Switches input signals for display when two PCs are connected to the monitor. button Displays the Fine Contrast menu. Mode button Displays the Adjustment menu, determines an item on the menu screen, and Enter button saves values adjusted. Control buttons Chooses an adjustment item or increases/decreases adjusted values for advanced adjustments using the Adjustment menu. (Left, Down, Up, Right) Power button Turns the power on or off. Indicates monitor’s operation status. Blue: Operating Orange: Power saving Off: Power off Power indicator When the timer is set for ColorNavigator, notifies that a recalibration is required (for CAL mode or EMU mode). Stand Used to adjust the height of the monitor. Security lock slot Complies with Kensington’s MicroSaver security system. Connects the USB cable in order to use the provided software. For how to use USB port (UP) refer to the User’s Manual on the CD-ROM. Left: DVI-D connector (SIGNAL1 DUAL LINK) / Right: DVI-D connector Input signal connectors (SIGNAL2) Power connector Connects the power cord. Connects peripheral USB devices. USB port (DOWN) * S creenManager is an EIZO’s nickname of the Adjustment menu. (For how to use ScreenManager, refer to the User’s Manual on the ® CD-ROM.) - Seite 6 Connecting Cables and Displaying the Screen Connect the monitor to the PC. Turn the monitor, the PC, and all peripheral devices off before connecting the cables. The following instructions are for connecting a single display via Dual Link (default factory settings). Connect to monitor Connect to PC To SIGNAL1...
- Seite 7 Note It is required to set the monitor depending on the setting and type of your graphics board. (e.g. • for dual display) For details, refer to the ColorEdge CG301W User’s Manual on the EIZO LCD Utility Disk. Press to turn on the PC.
-
Seite 8: Attaching The Hood
Attaching the Hood Attaching the hood can effectively shut out reflections from fluorescent lights and other external light sources. Checking Package Contents Left cover Top cover Right cover Check that all the items on the right are in the package. Attaching the Hood Attach the hood according to the following procedure. - Seite 9 For details regarding the calibration procedure, refer to the ColorNavigator User’s Manual on the CD-ROM. Installing ColorNavigator MacOS X Insert the "EIZO LCD Utility Disk" to the CD-ROM drive The "EIZO LCD Utility Disk" icon appears on the desktop. Double click the icon to open the window. Double click "ColorNavigator" folder on the window Double click "ColorNavigator.pkg" icon on the window The ColorNavigator installer starts up.
- Seite 10 Connecting the Measurement Device Connect the measurement device to a USB port (downstream) on the PC, or to the USB port (downstream) on the back of the monitor. Either OK Measurement Device Note • A measurement device is not included with this unit. Please purchase separately. Tips •...
- Seite 11 SICHERHEITSSYMBOLE In diesem Handbuch werden die unten dargestellten Sicherheitssymbole verwendet. Sie geben Hinweise auf äußerst wichtige Informationen. Bitte lesen Sie diese Informationen sorgfältig durch. ACHTUNG VORSICHT Die Nichbeachtung unter ACHTUNG Die Nichtbefolgung von unter VORSICHT angegebener Informationen kann angegebenen Anweisungen kann schwere mittelschwere Verletzungen und/oder Schäden Verletzungen oder sogar lebensbedrohende oder Veränderungen des Produkts zur Folge...
-
Seite 12: Überprüfen Des Verpackungsinhalts
Ort auf. Wenn das Gerät zur Reparatur eingesandt werden muss, wird die Verpackung wieder benötigt. Monitor ……………………………………………………………………………………………… x 1 • Netzkabel …………………………………………………………………………………………… x 1 • Doppelanschlusskabel (DD200DL-BK) ………………………………………………………… x 1 • Digitales Signalkabel (FD-C39) …………………………………………………………………… x 1 • EIZO-USB-Kabel (MD-C93) ……………………………………………………………………… x 1 • Befestigungsschrauben (M4 x 12 mm) … ………………………………………………………… x 4 Stk. • Abdeckhaube ……………………………………………………………………………………… x 1 Set • „ScreenCleaner“-Reinigungsset … ………………………………………………………………… x 1 • CD-ROM mit EIZOs LCD Utility Disk ……………………………………………………………… x 1 •... -
Seite 13: Bedienelemente Und Funktionen
Taste zur Zeigt das Feinkontrastmenü an. Modusauswahl Zeigt das Justierungsmenü an, wählt ein Element im Menübildschirm und speichert Eingabetaste geänderte Werte. Wählt ein Einstellungselement oder erhöht/reduziert justierte Werte erweiterter Steuertasten (Links, Einstellungen mithilfe des Justierungsmenüs. Unten, Oben, Rechts) Netzschalter Zum Ein- und Ausschalten. Zeigt den Betriebsstatus des Monitors an. Blau: In Betrieb Orange: Energiesparmodus Aus: Hauptstromversorgung getrennt Betriebsanzeige Beachten Sie, dass der Monitor (im CAL-Modus oder im EMU-Modus) neu zu kalibrieren ist, wenn der Timer auf ColorNavigator eingestellt ist. Wird verwendet, um die Höhe des Monitors einzustellen. Fuß Öffnung für Ist mit dem Kensington MicroSaver-Sicherheitssystem kompatibel. Diebstahlsicherung Schließen Sie das USB-Kabel an, um die mitgelieferte Software verwenden zu USB-Anschluss können. Informationen zur Verwendung der Software entnehmen Sie der (hinten) Benutzerhandbuch auf der CD-ROM. Links: DVI-D-Anschluss (SIGNAL1 DUAL LINK) / Signaleingänge Rechts: DVI-D-Anschluss (SIGNAL2) Zum Anschließen des Netzkabels. Netzstecker USB-Anschluss Zum Anschließen der USB-Geräte. (seitlich) ScreenManager ist der Name des Justierungsmenüs von EIZO. (Informationen zur Verwendung von ScreenManager ® entnehmen Sie dem Benutzerhandbuch auf der CD-ROM.) -
Seite 14: Anschluss Von Kabeln Und Anzeige Des Bildschirms
Anschluss von Kabeln und Anzeige des Bildschirms Schließen Sie den Monitor an den PC an. Schalten Sie den Monitor, den PC und alle externen Geräte aus, bevor Sie die Kabel anschließen. Die nachfolgenden Anweisungen gelten für den Anschluss eines einzelnen Bildschirms per Doppelanschluss (werksseitige Einstellungen). -
Seite 15: Einstellung Von Höhe Und Winkel Des Monitors
Drücken Sie , um den Monitor einzuschalten. Die Betriebsanzeige des Monitors leuchtet auf (blau). Empfohlene Auflösung (für Einzelbildschirm) Netzschalter Betriebsanzeige 2560 Bildpunkte x 1600 Zeilen (60 Hz) Hinweis Wenn der ColorNavigator in Betrieb ist, empfehlen wir, den Monitor im Landschaftsmodus zu • betreiben. Hinweis Der Monitor muss in Abhängigkeit von den Einstellungen und der Art der Grafikkarte (z.B. für •... -
Seite 16: Anbringen Der Abdeckhaube
Anbringen der Abdeckhaube Durch Anbringen der Abdeckhaube lassen sich Reflexionen von Neonleuchten und anderen externen Lichtquellen wirksam abschirmen. Linke Obere Rechte Abdeckung Abdeckung Abdeckung Überprüfen des Verpackungsinhalts Überprüfen Sie, ob sich alle Teile auf der rechten Seite in der Verpackung befinden. Anbringen der Abdeckhaube Bringen Sie die Abdeckhaube gemäß... -
Seite 17: Vorbereitung Der Umgebung Für Das Kalibrieren
Einzelheiten bezüglich des Kalibriervorgangs entnehmen Sie bitte dem ColorNavigator-Benutzerhandbuch auf der CD-ROM. Installieren des ColorNavigators MacOS X Setzen Sie die „EIZO LCD Dienstprogramm-Disk“ in das CD-ROM-Laufwerk des PCs ein. Das Symbol „EIZO LCD Utility Disk“ erscheint auf dem Desktop. Doppelklicken Sie auf das Symbol, um das Fenster zu öffnen. Doppelklicken Sie auf den Ordner „ColorNavigator“ in dem Fenster. Doppelklicken Sie auf das „ColorNavigator.pkg“-Symbol in dem Fenster. Das ColorNavigator-Installationsprogramm wird gestartet. Installieren Sie die Software. -
Seite 18: Anschließen Des Messgeräts
Anschließen des Messgeräts Schließen Sie das Messgerät an einen USB-Port (seitlich) des PC oder an einen USB-Port (seitlich) an der Rückseite des Monitors an. Beides möglich Messgerät Hinweis • Diesem Gerät liegt kein Messgerät bei. Bitte kaufen Sie dieses separat. Hinweis •... - Seite 19 SYMBOLES DE SECURITE Ce manuel utilise les symboles de sécurité présentés ci-dessous. Ils signalent des informations critiques. Veuillez les lire attentivement. ATTENTION AVERTISSEMENT Le non respect des consignes données dans un Le non respect des consignes données dans un message ATTENTION peut entraîner des message AVERTISSEMENT peut entraîner blessures et/ou des dommages au matériel ou des blessures sérieuses ou même la mort.
- Seite 20 Câble Dual Link (DD200DL-BK) … ………………………………………………………………… x 1 • Câble de signal numérique (FD-C39) …………………………………………………………… x 1 • Câble USB EIZO (MD-C93)………………………………………………………………………… x 1 • Vis de montage (M4 x 12 mm) …………………………………………………………………… x 4 pièces • Capot ………………………………………………………………………………………………… x 1 ensemble • Kit de nettoyage « ScreenCleaner » ……………………………………………………………… x 1 • EIZO LCD Utility Disk (CD-ROM) ………………………………………………………………… x 1 • Logiciel d’étalonnage « ColorNavigator » Manuels d’utilisation au format PDF ColorEdge CG301W ColorEdge ColorNavigator Manuel d’installation (le présent manuel) ………………………………………………………… x 1 • Référence rapide de ColorNavigator …………………………………………………………… x 1 • Certification de réglage …………………………………………………………………………… x 1 •...
-
Seite 21: Commandes Et Fonctions
Touche Mode Affiche le menu Fine Contrast (contraste fin). Pour afficher le menu Ajustage, pour sélectionner un élément de l’écran de Touche de validation menu et sauvegarder les valeurs ajustées. Touches de commande Pour sélectionner un élément d’ajustage ou augmenter/diminuer les valeurs (Gauche, Bas, Haut, ajustées pour des ajustages avancés à l’aide du menu Ajustage. Droite) Touche d’alimentation Met l’appareil sous/hors tension. Pour indiquer l’état de fonctionnement du moniteur. Bleu : En fonctionnement Orange : Economie d’énergie Eteint : Hors tension Voyant d’alimentation Lorsque le minuteur est défini dans ColorNavigator, indique qu’un nouveau calibrage est nécessaire (en mode CAL ou EMU). Pied Permet de régler la hauteur du moniteur. Fente pour le Compatible avec le système de sécurité MicroSaver de Kensington. verrouillage de sécurité Raccorde le câble USB pour utiliser le logiciel fourni. Consultez le manuel Port USB (amont) d’utilisation inclus sur le CD-ROM pour savoir comment utiliser ce logiciel. Gauche : connecteur DVI-D (SIGNAL1 DUAL LINK) / Droit : connecteur DVI-D Connecteurs de signaux d’entrée (SIGNAL2) Connecteur Permet de connecter le cordon d’alimentation. d’alimentation Permet de connecter les périphériques USB. Port USB (aval) ScreenManager est un alias choisi par EIZO pour le menu Ajustage. (Consultez le manuel d’utilisation sur le CD-ROM ® si vous désirez de plus amples détails sur l’utilisation de ScreenManager.) - Seite 22 Connexion des câbles et mise sous tension Permet de connecter le moniteur au PC. Eteignez le moniteur, le PC et tous les périphériques avant de connecter les câbles. Les instructions suivantes se rapportent au branchement d’un seul ordinateur par connexion Dual Link (paramètres d’usine).
- Seite 23 Il est nécessaire de régler le moniteur en fonction des paramètres et du type de votre carte • graphique (par exemple pour le mode double affichage). Pour plus d’informations, reportez-vous au Manuel d’utilisation ColorEdge CG301W sur le CD-ROM d’utilitaires EIZO LCD. Appuyez sur pour mettre le PC sous tension.
-
Seite 24: Fixation Du Capot
Fixation du capot Fixer le capot peut éliminer efficacement les réflexions de lumières fluorescentes et provenant d’autres sources extérieures de lumière. Vérification du contenu de l’emballage Capot Capot Capot gauche supérieur droit Vérifiez que tous les éléments ci-contre figurent bien dans la boîte. - Seite 25 Pour plus d’informations sur la procédure de calibrage, reportez-vous au Manuel d’utilisation de ColorNavigator fourni sur le CD-ROM. Installation de ColorNavigator MacOS X Insérez le « Disque d’Utilitaires EIZO LCD » dans le lecteur de CD-ROM. L´icône du « EIZO LCD Utility Disk » s´affiche sur le bureau. Faites double-clic sur l´icône pour ouvrir la fenêtre. Double-cliquez sur le dossier « ColorNavigator » de la fenêtre. Double-cliquez sur l´icône « ColorNavigator.pkg » de la fenêtre. L´installateur ColorNavigator démarre.
- Seite 26 Raccordement de l’appareil de mesure Connectez l’appareil de mesure à un port USB (aval) sur le PC, ou sur le port USB (aval) à l’arrière du moniteur. L’un ou l’autre est Appareil de mesure Attention • L’appareil de mesure n’est pas fourni avec cette unité. Vous devez l’acheter séparément. Remarque •...
- Seite 27 安全符号 本手册使用的安全符号如下。它们表示重要信息。请仔细阅读。 警告 注意 若不遵守“警告”中的信息,可能会造成严重 若不遵守“注意”中的信息,可能会造成中度 伤害或威胁到生命安全。 伤害并/或使财产或产品受损。 表示禁止的动作。 表示必须遵照执行的命令动作。 预防措施 警告 若机器出现烟雾,闻起来像是东西着火,或者有奇 使用内附电源线,并连接当地的标准电源插座。 怪声音,请立刻断开所有电源,并联络经销商以寻 确保电源电压在电源线的额定电压范围内。否则可 求建议。 能会造成火灾或电击。 尝试使用功能异常的机器可能会造成火灾、电击或 “电源:100-120/200-240 V AC 50/60Hz” 设备受损。 让机器远离小物品或液体。 在适当的位置安装机器。 小物品意外掉入通风槽而进入机壳,或液体溢入机 否则可能会造成火灾、电击或设备受损。 壳会造成火灾、电击或设备受损。若物品掉入或液 • 请勿放于户外。 体溢入机壳,请立刻拔下机器的电源插头。再次使 • 请勿放于交通运输系统中(轮船、飞机、火车、 用机器前,请由合格的服务工程师检查。 汽车等)。 • 请勿放于布满灰尘或潮湿的环境中。 • 请勿放于蒸气直接达到屏幕的地方。 •...
- Seite 28 电源线 ………………………………………………………………………………………………… x 1 · 双链路电缆 (DD200DL-BK) ………………………………………………………………………… x 1 · 数字信号电缆 (FD-C39) …………………………………………………………………………… x 1 · EIZO USB 电缆 (MD-C93) …………………………………………………………………………… x 1 · 安装螺丝 (M4 x 12 mm) …………………………………………………………………………… x 4 个 · 遮光板 ………………………………………………………………………………………………… x 1 套 ·...
- Seite 29 在为 ColorNavigator 设置计时器时, 通知需要进行重新校准(针对 CAL 模式或 EMU 模式) 。 底座 用于调整显示器的高度。 安全锁插槽 符合 Kensington 的 MicroSaver 安全系统。 USB 端口(上) 使用软件时,用 USB 电缆连接。关于如何使用此软件,请参考光盘上的用户手册。 输入信号连接器 左侧:DVI-D 连接器(SIGNAL1 DUAL LINK)/ 右侧:DVI-D 连接器(SIGNAL2) 电源连接器 连接电源线。 USB 端口(下) 连接外围 USB 设备。 ScreenManager 是调整菜单的 EIZO 别称。 (关于如何使用 ScreenManager,请参考光盘中的用户手册。 ) ®...
- Seite 30 连接电缆与显示屏幕 将显示器连接到 PC。 在连接电缆之前,请关闭显示器、PC 及所有外围设备。 下面是通过双链路(出厂默认设置)连接单个显示器的操作说明。 连接显示器 连接 PC 到 SIGNAL1 电源线 USB 电缆 连接电源插座 双链路电缆 检查 PC 连接器的形状并连接电缆。 在连接好电缆之后,使用连接器螺丝将电缆牢牢固定。 显示器上的连接器 连接电缆 PC 上的连接器 [ 双链路电缆 ] DD200DL-BK SIGNAL1 (DUAL LINK) 注意 设备有两个 DVI-D 连接器,允许同时连接到两台 PC。 • SIGNAL1 连接器仅限于同双链路配合使用。 使用 USB 电缆将 PC 与显示器连接起来。 连接...
- Seite 31 建议的分辨率(针对单个显示器) 电源 电源 2560 点 x 1600 行 (60 Hz) 按钮 指示灯 注意 运行 ColorNavigator 时,建议在横向显示模式下使用显示器。 • 注意 需要根据显卡的设置与类型对显示器进行设置(如针对双显示器时) 。如需有关详细信息,请参 • 阅 EIZO LCD 实用程序光盘上的 ColorEdge CG301W 用户手册。 按 打开 PC。 屏幕图像出现。如果未显示屏幕,请参阅“无图片的问题”。 注意 在关闭 PC 与显示器之后,尽管电源线仍然与显示器相连,但显示器电源已被完全切断。 • 调整显示器的高度与角度 显示器的高度与角度可以调整。 调整屏幕的高度与角度,并将屏幕倾斜和旋转到最佳工作位置。...
- Seite 32 安装遮光板 安装显示器遮光板可有效地遮住来自荧光灯及其它外部光源的反射。 检查包装内容 左侧板 顶板 右侧板 检查包装中的所有物品,如右图所示。 安装遮光板 按照以下步骤安装遮光罩。 将左侧板或右侧板与顶板安装在一起。 注意 装上顶板,使带有遮护板的边缘处于后部。将盖子后部安装到前部将产生缝隙,光会从中穿过。 • 后部 前部 前部 后部 遮护板 将左侧板与右侧板从上部安装到显示器上。显示器的两侧有用于安装遮光板的凸 出物。将盖子牢牢勾住凸出物,这样它们便无法移动。 固定遮光板的槽孔 固定遮光板的槽孔 滑动顶板封住缝隙。 注意 校准显示器时,只需简单地打开或关闭顶盖即可安装测定仪。 •...
- Seite 33 准备校准环境 如需有关校准步骤的详细信息,请参阅光盘上的 ColorNavigator 用户手册。 ColorNavigator 的安装 MacOS X 将“EIZO LCD实用光盘”插入CD-ROM驱动器。 在桌面上会出现“EIZO LCD Utility Disk”图标。双击此图标打开视窗。 双击视窗上的“ColorNavigator”文件夹。 双击视窗上的“ColorNavigator.pkg”图标。 ColorNavigator安装程序启动。 安装软件。 按照指示安装软件。 Windows 将“EIZO LCD实用光盘”插入CD-ROM驱动器。 启动菜单打开。点击“Software”(软件)标签。 如果菜单不自动打开,请双击“Launcher.exe”图标。 如果操作系统是Windows Vista,则双击“Launcher.exe”时可能会出现“User Account Con- trol”(用户帐户控制)对话框。单击[Continue](继续)打开菜单。 点击菜单中的“ColorNavigator”。 出现其它对话框。 点击菜单中的“Install”(安装)。 ColorNavigator安装程序启动。 安装驱动程序软件时,可能会出现几次“硬件安装”(Windows XP) / “Windows 安全”(Windows Vista)对话框。点击[仍然继续](Windows XP) / [始终安装此驱动程序软件](Windows Vista),...
- Seite 34 测定仪的连接 将测定仪连接到 PC 的 USB 端口(下游) ,或者连接到显示器后部的 USB 端口(下游) 。 二者均可 测定仪 注意 此设备不随附测定仪。请单独购买。 • 注意 如需有关连接测定仪的详细信息,请参阅其用户手册。 • 无图片的问题 如果在尝试以下步骤后屏幕仍然显示空白,请与您当地的经销商联系。 检查电源指示灯。 症状 状态 原因和补救措施 • 检查电源线是否正确插入。 电源指示灯关闭 • 按 按钮。 电源指示灯呈蓝色 • 将 RGB 增益级别设置为高值。 无图片 用 切换输入信号。 • 电源指示灯呈橙色 •...
- Seite 35 No part of this manual may be reproduced, stored in a retrieval system, or transmitted, in any form or by any means, electronic, mechanical, or otherwise, without the prior written permission of EIZO NANAO CORPORATION. EIZO NANAO CORPORATION is under no obligation to hold any submitted material or information confidential unless prior arrangements are made pursuant to EIZO NANAO CORPORATION’s receipt of said information. Although every effort has been made to ensure that this manual provides up-to-date information, please note that EIZO monitor specifications are subject to change without notice. Macintosh is a registered trademark of Apple Inc.
- Seite 36 EIZO NANAO CORPORATION 153 Shimokashiwano, Hakusan, Ishikawa 924-8566 Japan Phone: +81 76 277 6792 Fax: +81 76 277 6793 EIZO EUROPE AB Lovangsvagen 14 194 61, Upplands Väsby, Sweden Phone: +46 8 594 105 00 Fax: +46 8 590 91 575 This document is printed on recycled chlorine free paper.