Bonaldo AX Aufbauanleitung
Quicklinks
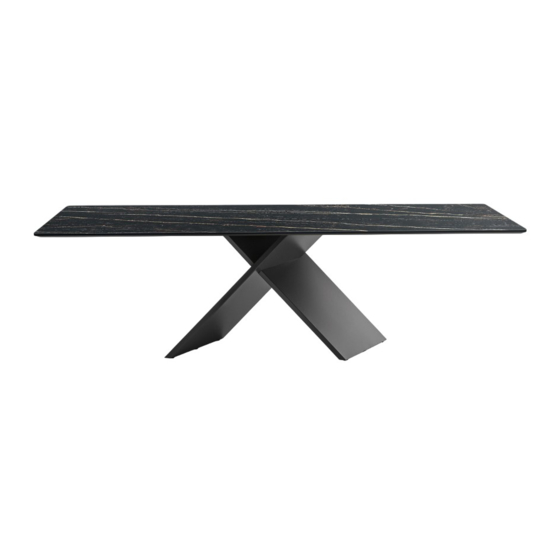
AX
design: Gino Carollo
Tavolo allungabile
Leaf table
Ausziehtisch
Table allongeable
A
1
A
2
B
C
1
C
2
C
3
D
E
F
G
scheda montaggio
- assembly instruction - Aufbauanleitung - notice de montage
V
M8
20
- M8
20
ite
x
x
screw
s
M8
20 - V
M8
20
chraube
x
is
x
V
tpsei M8
20
- M8
ite
x
s
M8
20 - V
M8
20
chraube
x
is
x
G
iunto per fissaGGio prolunGa
joint for fixinG extension
V
b
V
erbindunG zur
efestiGunG der
j
oint pour fixation rallonGe
V
M 8
90
ite senza testa
x
s
M8
90 - V
chnittschraube
x
is sans tête
V
M 8
80
ite senza testa
x
s
M8
90 - V
chnittschraube
x
is sans tête
V
M 8
70
ite senza testa
x
s
M8
90 - V
chnittschraube
x
is sans tête
b
M 8
- M 8
occola
bushinG
b
M 8 - d
M 8
uchse
ouille
G
M 8
- M 8
hiera ziGrinata
r
M 8 - r
ändelschraube
ondelle Moletée
M 8
V
tbei M4
10
- M4
10
ite
x
x
s
M4
10 - V
M4
10
chraube
x
is
x
c
2,5; 4; 5
hiaVe a bruGola
i
2,5; 4; 5 - c
a
nbusschlüssel
lé
llen
20
x
screw
erlänGerunG
- M 8
M8
90
headless screw
x
M8
90
x
- M 8
M8
90
headless screw
x
M8
90
x
- M 8
M8
90
headless screw
x
M8
90
x
rinG nut
screw
-
2,5; 4; 5
allen key
2,5; 4; 5
n° 10
n° 10
n° 8
n° 4
n° 4
n° 4
n° 4
n° 4
n° 16
n° 1
1

Verwandte Anleitungen für Bonaldo AX


Inhaltszusammenfassung für Bonaldo AX
- Seite 1 design: Gino Carollo Tavolo allungabile Leaf table Ausziehtisch Table allongeable n° 10 - M8 screw 20 - V chraube tpsei M8 n° 10 - M8 screw 20 - V chraube n° 8 iunto per fissaGGio prolunGa joint for fixinG extension erbindunG zur efestiGunG der erlänGerunG...
- Seite 2 Bonaldo Spa Via Straelle, 3 – P.O. Box n. 6 – 35010 Villanova (Pd) Italia Tel. +39 049 9299011 Fax +39 049 9299000 www.bonaldo.it - bonaldo@bonaldo.it scheda montaggio - assembly instruction - Aufbauanleitung - notice de montage...
- Seite 3 design: Gino Carollo Aprire l’imballo e porre la gamba a terra, su un piano morbido, coi fori per l’aggancio telaio rivolti verso l’alto. Open the packaging and lay the leg on the floor, on a soft surface, with the holes for attaching the frame turned upwards.
- Seite 4 Gino Carollo AX 200 n° 10 - M8 screw 20 - V chraube AX 160-180 tpsei M8 n° 10 - M8 screw 20 - V chraube Mit Hilfe der 10 Schrauben A und des Innense- Fissare il telaio alla gamba utilizzando le 10 viti A chskantschluessels G den Rahmen an das Bein befe- e la chiave a brugola G.
- Seite 5 design: Gino Carollo Aprire le prolunghe. Open the extensions. Die Verlängerungen öffnen. Ouvrir les rallonges. Aprire l’imballo contenente piano e prolunghe. I fori più lontani dal bordo della prolunga indicano la parte esterna della stessa. Open the packaging containing the top and the extensions.
- Seite 6 design: Gino Carollo Montare le prolunghe fissando le staffe Mount the extensions by fixing the alla struttura con le 8 viti F . brackets to the structure with the 8 F screws. Die Verlängerungen durch Befestigung Monter les rallonges en fixant les brides der Bügel an der Struktur mit den 8 à...
- Seite 7 Gino Carollo AX 200 AX 160 - 180 PIANO IN LEGNO - WOOD TOP HOLZ PLATTE - PLATEAU EN BOIS n° 4 n° 4 - M 8 - M 8 ite senza testa headless screw ite senza testa headless screw...
- Seite 8 design: Gino Carollo 25 cm MANTENENDO LE PROLUNGHE WHILE KEEPING THE EXTENSIONS LEGGERMENTE APERTE inserire il piano SLIGHTLY OPEN insert the table top sul telaio precedentemente montato. into the frame you have previously Aprire le prolunghe. assembled. Open the extensions. EN TENANT LES RALLONGES DIE VERLÄNGERUNGEN ETWAS LÉGÈREMENT OUVERTES placer le plan...
- Seite 9 design: Gino Carollo Adjust the height of the table top using Regolare l’altezza del piano agendo sulle the ring nuts E assembled in point 9; once ghiere zigrinate E montate al punto 9; these are aligned, fix the table top with una volta allineate le stesse bloccare il the 4 heads D (fig 18).
- Seite 10 design: Gino Carollo left link gauche right recht droit É possibile aggiustare lo spazio tra piano It is possible to adjust the space between e prolunga agendo sulle viti poste nel top and extension, acting on the screws telaio sotto la prolunga fig 20-21. located in the frame under the extension (fig.
- Seite 11 design: Gino Carollo NOTA PIANO IN VETRO NOTE FOR GLASS TOP: In case of glass Nel caso di piano in vetro alzare le viti top, raise the screws bringing the portando la prolunga a 5 mm dal piano. extension to 5 mm from the top. NOTE POUR PLATEAU EN CRISTAL: Si le VERMERK FUER DIE GLASPLATTE : Bei plateau est en cristal, élever les vis pour...
- Seite 12 design: Gino Carollo scheda montaggio - assembly instruction - Aufbauanleitung - notice de montage...