Hama AC-140 Bedienungsanleitung
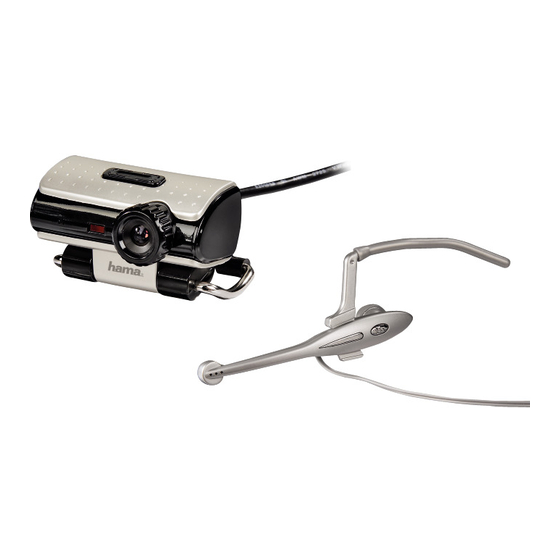
Webcam & headset

Verwandte Anleitungen für Hama AC-140


Inhaltszusammenfassung für Hama AC-140
- Seite 3 USB-Anschluss Ihres Computers. Der Computer erkennt das neue Gerät sofort. 3. Bitte starten Sie die Programme „AMCAP“ oder „Hama Webcam Suite” um das Bild der WEBCAM zu sehen. Installation des Headsets Verbinden Sie nach der Installation der Kamera die beiden 3,5-mm- Klinkenstecker des Headsets mit der Soundkarte des Computers.
- Seite 4 * File/Set Capture File: Hier speichern Sie die aufgenommene Datei ab. * Files/Allocate File Space: Der Speichervorgang verläuft reibungsloser, wenn Sie dafür eine .AVI-Datei verwenden, die bereits auf Ihrem lokalen Laufwerk existiert. Hier legen Sie fest, wie viel Platz benötigt wird (wie groß...
- Seite 5 * Options/Video Capture Pin: Wählen Sie den Videofarbraum und die Videogröße aus. Unterstützt werden die Farbräume RBG24, I420 Unterstützt wird die Größe 160*120, 176*144, 320*240, 352*288, 640*480, 800*600, 1024*768, 1280*1024 * Capture/Start Capture: Speichern Sie die aufgenommene Datei auf Ihrem Computer ab; wählen Sie „START“ und danach „OK“ um die Videosequenz abzuspeichern oder „Cancel“...
- Seite 6 2. Wählen Sie Hama PC-Webcam AC-140 -> „Uninstall“ und folgen Sie den Anweisungen. Support- und Kontaktinformation Bei defekten Produkten: Bitte wenden Sie sich bei Produktreklamationen an Ihren Händler oder an die Hama Produktberatung. Internet / World Wide Web: Produktunterstützung, neue Treiber oder Produktinformationen sind unter www.hama.com erhältlich.