Werbung
Quicklinks
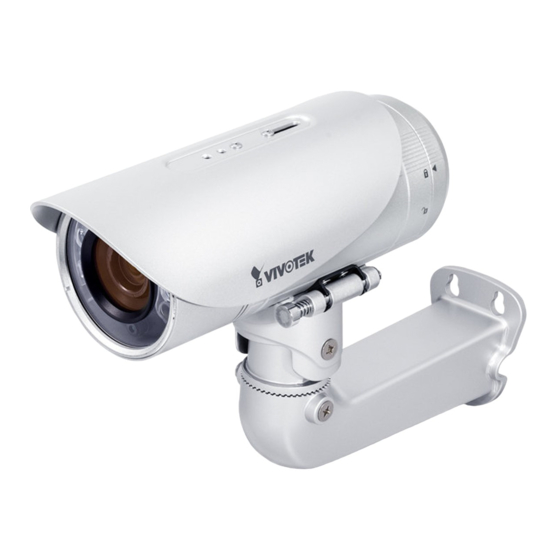
IP8355EH / IP8365EH
Quick Installation Guide
繁中
簡中
日本語
English
Indonesia
Dansk
1.3 / 2MP • WDR Pro II / WDR Pro • 30M Smart IR •
Smart Focus System
www.a1securitycameras.com email: sales@a1securitycameras.com
Français
Deutsch
Español
Available from A1 Security Cameras
Bullet
Network Camera
Türkçe
Italiano
Português
Русский
Česky
Svenska
Polski
Nederlands
Werbung

Inhaltszusammenfassung für Vivotek IP8355EH
- Seite 1 IP8355EH / IP8365EH Bullet Network Camera Quick Installation Guide Русский Česky Svenska Nederlands 繁中 簡中 日本語 Türkçe Français Deutsch Italiano Polski English Español Português Indonesia Dansk 1.3 / 2MP • WDR Pro II / WDR Pro • 30M Smart IR •...
- Seite 2 Warning Before Installation / Packungsinhalt kontrollieren / Advarsel før installation Power off the Network Camera as soon as Do not touch the Network Camera during smoke or unusual odors are detected. a lightning storm. Netzwerkkamera bei Gewittern nicht Netzwerkkamera bei Rauchentwicklung anfassen.
- Seite 3 Physical Description / Beschreibung der Teile / Afmetingen Lens Linse Lens IR LEDs IR-LED IR-LED Light Sensor Lichtsensor Licht sensor Zoom out Hineinzoomen Zoom in Uitzoomen Herauszoomen Inzoomen NTSC-PAL switch Auto Focus NTSC-PAL Schalter Autofokus Auto Focus NTSC-PAL schakelaar Reset Button NTSC Rückstellungsschalter Herzet knop...
- Seite 4 Hardware Installation / Hardwareinstallation / Hardware installeren 1. Attach the alignment sticker to the wall. Drill four holes into the wall. Then hammer the supplied plastic anchors into the holes and secure the plate with supplied screws. Bringen Sie den Ausrichtungsaufkleber an der Wand an. Bohren Sie vier Löcher in die Wand. Bringen Sie dann die beiliegenden Plastikdübel an den Löchern an und befestigen Sie die Platte mit den beiliegenden Schrauben.
- Seite 5 4. Push the spring mortise and hook the bracket onto the groove of the wall mount bracket. Drücken Sie die Feder und haken Sie die Halterung auf der Wandhalterung ein. Druk het veer tapgat en breng het rekje aan op de gleuf van het muur monteerbaar rek. 5.
- Seite 6 Pin Definitions / Pin Beschreibung / Pin Definitie AC 24V IN AC 24V IN DC12V+ IN DC12V- IN DI DO Pin number EXT_MIC Audio Out Audio GND TV Out Assembling Steps / Zusammenbau / Assemblage stappen 1. Disassemble the components of the waterproof connector into part (A) ~ (E) as shown above. Zerlegen Sie die Bestandteile des wasserdichten Anschluss in Teil (A) ~ (E), wie oben gezeigt.
- Seite 7 4. You may choose to use AC24V or DC12V inputs as power source, please feed the power lines through the wall mount bracket and the waterproof connector (E --> D --> B --> A) as illustrated below. Pass power lines through the rubber seal (B) and then connect the power lines to the terminal block.
- Seite 8 9. Open the aluminum foil vacuum bag and take out the desiccant bag. Attach the desiccant bag to the inner side of the rear cover, to under the insulation pad, and then tighten the rear cover. (Please replace the desiccant bag with a new one whenever you open the rear cover.) Öffnen Sie die Aluminiumfolie der Vakuumtasche und entnehmen Sie den Trockenmittelbeutel.
- Seite 9 Assembling Steps / Zusammenbau / Assemblage stappen Prepare an Ethernet cable and Insert the housing into the screw nut. Insert the seal into the housing. strip part of the sheath. Fügen Sie das Gehäuse in die Fügen Sie die Dichtung in das Nehmen Sie ein Ethernetkabel Schraubenmutter ein.
- Seite 10 1. Install the "Installation Wizard 2." Installieren Sie den “Installationsassistenten 2”. Installeer “Installatiewizard 2”. 2. The program will search for VIVOTEK Video Receivers, Video Servers or Network Cameras on the same LAN. Das Programm sucht nach VIVOTEK Videoempfängern, Videoservern oder Netzwerkkameras in demselben LAN.
- Seite 11 NOTE / Hinweis / Opmerking If you want to use the supplied sun shield for outdoor environments, please follow the steps below to install: Um den mitgelieferten Sonnenschutz bei Gebrauch im Freien zu installieren, folgendermaßen vorgehen: Als u het bijgeleverd zonnescherm buiten wilt gebruiken,volg dan de onderstaande stappen voor de installatie: 1.
- Seite 12 VIVOTEK also provides other accessories for versatile applications as the following illustrations. Please visit VIVOTEK's official website for more purchase information. VIVOTEK bietet, wie auf den folgenden Abbildungen gezeigt, auch anderes Zubehör für vielseitige Anwendungen. Für weitere Kaufinformation besuchen Sie bitte die offizielle VIVOTEK Website.
- Seite 13 Available from A1 Security Cameras www.a1securitycameras.com email: sales@a1securitycameras.com...
- Seite 14 P/N:625023800G Rev. 1.0 All specifications are subject to change without notice. Copyright 2013 VIVOTEK INC. All rights reserved. Available from A1 Security Cameras www.a1securitycameras.com email: sales@a1securitycameras.com...


