Werbung
Quicklinks
FD8373-(E)HV
Quick Installation Guide
繁中
簡中 日本語
English
Indonesia
Dansk
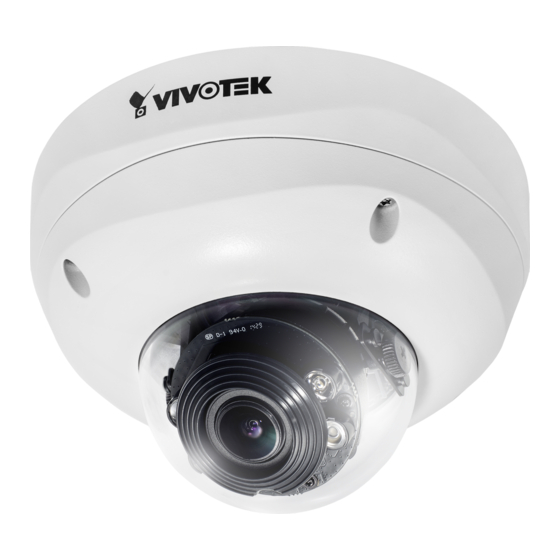
3MP • 20m IR • IP66 • Smart IR • Smart Focus System
www.a1securitycameras.com email: sales@a1securitycameras.com
Fixed Dome
Network Camera
Français
Español
Deutsch
Português
Available from A1 Security Cameras
Русский
Italiano
Türkçe
Polski
Česky
Svenska
Nederlands
Werbung

Inhaltszusammenfassung für Vivotek FD8373-HV
- Seite 1 FD8373-(E)HV Fixed Dome Network Camera Quick Installation Guide Русский Česky Svenska 繁中 簡中 日本語 Nederlands Italiano Türkçe English Français Español Deutsch Português Polski Indonesia Dansk 3MP • 20m IR • IP66 • Smart IR • Smart Focus System Available from A1 Security Cameras www.a1securitycameras.com email: sales@a1securitycameras.com...
- Seite 2 Warning Before Installation / Warnung vor der Installation / Waarschuwing voor installatie Power off the Network Camera as soon as Keep the Network Camera away from smoke or unusual odors are detected. water. If the Network Camera becomes wet, power off immediately. Netzwerkkamera bei Rauchentwicklung oder ungewöhnlichem Geruch sofort Halten Sie die Netzwerkkamera von...
- Seite 3 Physical Description / Beschreibung der Teile / Afmetingen IR LEDs (4 units, effective up to 20m) IR-LEDs (4 Einheiten mit einer Inner View Reichweite von bis zu 20 m) IR-leds (4 eenheden, effectief Vari-focal Lens tot 20m) Gleitsichtobjektiv Varifocusknop Tilt Adjustment Screw Kippanpassungsschraube Bevestigingschroef Focus &...
- Seite 4 Use the included AV cable to connect to a camera tester or LCD monitor to begin initial setup. Verwenden Sie das beiliegende AV-Kabel, um den Kameratester oder LCD-Monitor für die grundlegende Einrichtung anzuschließen. Gebruik de bijgesloten AV-kabel om een cameratester of lcd-scherm aan te sluiten om de camera voor het eerst in te stellen.
- Seite 5 Cabling Assembly / Kabelverbindung / De kabels leggen Connect power lines and if you have external devices such as sensors and alarms, make the connection from the general I/O terminal block. Schließen Sie die Stromkabel an und stellen Sie den Anschluss vom allgemeinen I/O Anschlussblock her, wenn Sie über externe Geräte wie z.B.
- Seite 6 Waterproof Connector / Vandtæt konnektor / Waterdichte aansluiting Sealing Nut (A) Dichtungsmutter Verzegelingsmoer Housing (B) Gehäuse Behuizing Seals (C) Dichtungen Verzegelingen Seal (D) Dichtung Verzegeling Screw Nut (E) Schraubenmutter Schroefmoer Hex Nut (F) Sechstkantmutter Netmoer Assembling Steps / Wasserdichter Anschluss / Montagestappen 4.
- Seite 7 Connecting RJ45 Ethernet Cable / Anschluss des RJ45 Ethernetkabels / RJ45 Ehternet-kabel aansluiten RJ45 Cable Dimension / RJ45 Kabelabmessung / Afmetingen van de RJ45-kabel Recommended cable diameter: 5 to 8mm Empfohlene Kabeldicke: 5 bis 8 mm Aanbevolen kabeldikte: 5 tot 8 mm Assembling Steps / Zusammenbau / Montagestappen Rubber Seal Plug 1.
- Seite 8 Mounting the Camera / Montieren der Kamera / De Camera monteren 1. Attach the supplied alignment sticker to the wall. Bringen Sie den Aufkleber an der Wand an. Bevestig de bijgesloten uitlijnsticker op het plafond. 2. Using the circle marks on the sticker, drill at least 2 pilot holes symmetrically on each side into the wall.
- Seite 9 Installieren Sie den “Installationsassistenten 2”. Installeer de “Installatiewizard 2.” vanaf de map Software Utility op de software-cd. 2. The program will search for VIVOTEK Video Receivers, Video Servers or Network Cameras on the same LAN. Das Programm sucht nach VIVOTEK Videoempfängern, Videoservern oder Netzwerkkameras in demselben LAN.
- Seite 10 To adjust the zoom factor and focus range Zur Einstellung des Zoomfaktors und des Fokusbereichs De zoomfactor en focusbereik aanpassen 1. The camera comes with a motorized vari-focal lens module. With a web console, you can enter the Configuration > Media > Image > Focus page to tune the image zoom and focus.
- Seite 11 Completion / Abschluss / Voltooien 1. Attach the dome cover to the camera by combining it to the retainer and aligning with the mounting holes. Bringen Sie die Kugelabdeckung an der Kamera an, indem Sie sie mit der Halterung zusammenführen und an den Montageöffnungen ausrichten.
- Seite 12 Available from A1 Security Cameras www.a1securitycameras.com email: sales@a1securitycameras.com...
- Seite 13 |T: +886-2-82455282| F: +886-2-82455532| E: sales@vivotek.com |T: 408-773-8686| F: 408-773-8298| E: salesusa@vivotek.com VIVOTEK Netherlands B.V. Busplein 36, 1315KV, Almere, The Netherlands Available from A1 Security Cameras |T: +31 (0)36 5389 149| F: +31 (0)36 5389 111| E: saleseurope@vivotek.com www.a1securitycameras.com email: sales@a1securitycameras.com...


