
Verwandte Anleitungen für Dell latitude d830


Inhaltszusammenfassung für Dell latitude d830
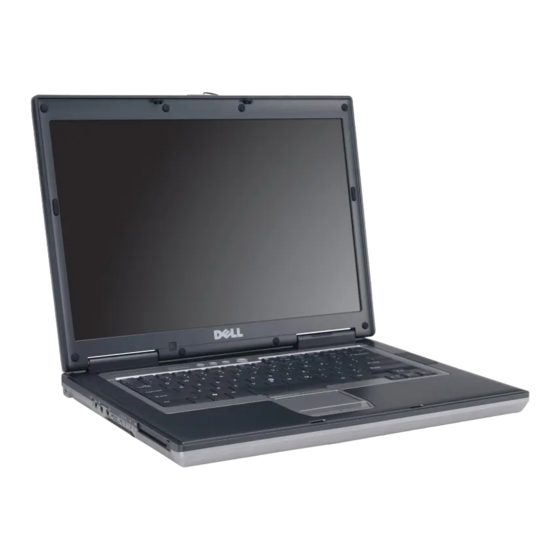
- Seite 1 Dell™ Latitude™ D830 Quick Reference Guide Model PP04X w w w . d e l l . c o m | s u p p o r t . d e l l . c o m...
- Seite 2 Reproduction in any manner whatsoever without the written permission of Dell Inc. is strictly forbidden. Trademarks used in this text: Dell, the DELL logo, Latitude, and ExpressCharge are trademarks of Dell Inc.; Intel is a registered trademark of Intel Corporation; Microsoft and Windows are registered trademarks of Microsoft Corporation.
-
Seite 3: Inhaltsverzeichnis
..... Starting the Dell Diagnostics From Your Hard Drive ... . - Seite 4 Contents...
-
Seite 5: Finding Information
Documentation and drivers are already installed on your computer. You can use the media to reinstall drivers (see "Reinstalling Drivers and Utilities" in your online User’s Guide) or to run the Dell Diagnostics (see "Dell Diagnostics" on page 20). Readme files may be... - Seite 6 License • Microsoft Windows License Label These labels are located on your computer. • Use the Service Tag to identify your computer when you use support.dell.com or contact support. • Enter the Express Service Code to direct your call when contacting support.
- Seite 7 Access the Dell Support Utility from the icon in the taskbar. For more information, see "Dell Support Utility" in your User’s Guide. • How to use Windows XP Windows Help and Support Center →...
- Seite 8 What Are You Looking For? Find It Here • Information on network activity, the Power Dell QuickSet Help Management Wizard, hotkeys, and other items To view Dell QuickSet Help, right-click the QuickSet controlled by Dell QuickSet. ® ® icon in the Microsoft Windows taskbar.
-
Seite 9: Setting Up Your Computer
Setting Up Your Computer CAUTION: Before you begin any of the procedures in this section, follow the safety instructions in the Product Information Guide 1 Unpack the accessories box. 2 Set aside the contents of the accessories box, which you will need to complete the setup of your computer. The accessories box also contains user documentation and any software or additional hardware (such as PC Cards, drives, or batteries) that you have ordered. -
Seite 10: About Your Computer
About Your Computer Front View display latch display power button device status lights speakers (2) keyboard touch pad touch pad/track stick buttons track stick keyboard status lights volume control buttons mute button ambient light sensor Quick Reference Guide... -
Seite 11: Left View
Left View security cable slot air vents IEEE 1394 connector audio connectors ExpressCard slot wireless switch Wi-Fi Catcher™ light PC Card slot smart card slot Right View CAUTION: Do not block, push objects into, or allow dust to accumulate in the air vents. Do not store your computer in a low-airflow environment, such as a closed briefcase, while it is running. -
Seite 12: Back View
Back View network connector (RJ-45) S-video TV-out connector powered USB connector modem connector (RJ-11) serial connector video connector AC adapter connector air vents Bottom View CAUTION: Do not block, push objects into, or allow dust to accumulate in the air vents. Do not store your computer in a low-airflow environment, such as a closed briefcase, while it is running. -
Seite 13: Using A Battery
Using an incompatible battery may increase the risk of fire or explosion. Replace the battery only with a compatible battery purchased from Dell. The lithium ion battery is designed to work with your Dell computer. Do not use a battery from other computers with your computer. -
Seite 14: Checking The Battery Charge
Dell™ QuickSet Battery Meter If Dell QuickSet is installed, press <Fn><F3> to display the QuickSet Battery Meter. The Battery Meter displays status, battery health, charge level, and charge completion time for the battery in your computer. ®... -
Seite 15: Conserving Battery Power
NOTE: You can check battery health in one of two ways: by using the charge gauge on the battery as described below and by using the Battery Meter in Dell QuickSet. For information about QuickSet, right-click the QuickSet ® ®... -
Seite 16: Hibernate Mode
To enter standby mode: → Shut Down→ Stand by. • Click Start or • Depending on how you set the power management options in the Power Options Properties window or the QuickSet Power Management Wizard, use one of the following methods: –... -
Seite 17: Configuring Power Management Settings
Using an incompatible battery may increase the risk of fire or explosion. Replace the battery only with a compatible battery purchased from Dell. The battery is designed to work with your Dell™ computer. Do not use a battery from other computers with your computer. -
Seite 18: Storing A Battery
To remove the battery: 1 If the computer is connected to a docking device (docked), undock it. See the documentation that came with your docking device for instructions. 2 Ensure that the computer is turned off. 3 Slide the battery-bay latch release on the bottom of the computer until the release clicks. 4 Using the tab on the battery, lift the battery out of the computer. -
Seite 19: Troubleshooting
Troubleshooting Lockups and Software Problems CAUTION: Before you begin any of the procedures in this section, follow the safety instructions in the Product Information Guide The computer does not start up N S U R E T H A T T H E A D A P T E R I S F I R M L Y C O N N E C T E D T O T H E C O M P U T E R A N D T O T H E E L E C T R I C A L O U T L E T The computer stops responding NOTICE:... -
Seite 20: Dell Diagnostics
Internet, your computer might be infected with spyware. Use an anti-virus program that includes anti-spyware protection (your program may require an upgrade) to scan the computer and remove spyware. For more information, go to support.dell.com and search for the keyword spyware. -
Seite 21: Starting The Dell Diagnostics From Your Hard Drive
If the Pre-boot System Assessment completes successfully, you will receive the message, "Booting Dell Diagnostic Utility Partition.Press any key to continue". 4 Press any key to start the Dell Diagnostics from the diagnostics utility partition on your hard drive. Starting the Dell Diagnostics From the Drivers and Utilities Media 1 Insert the Drivers and Utilities media. -
Seite 22: Dell Diagnostics Main Menu
Write down the error code and problem description and contact Dell (see "Contacting Dell" in your online User’s Guide). NOTE: The Service Tag for your computer is located at the top of each test screen. If you contact Dell, technical support will ask for your Service Tag. Quick Reference Guide... - Seite 23 Allows you to customize the test by changing the test settings. 5 When the tests are complete, close the test screen to return to the Main Menu screen. To exit the Dell Diagnostics and restart the computer, close the Main Menu screen.
- Seite 24 Quick Reference Guide...
-
Seite 25: Index
Dell Diagnostics, 20 Dell Diagnostics, 20 Dell Diagnostics, 20 lockups, 19 Help and Support Center, 7 program crashes, 19 Dell support site, 7 program stops responding, 19 help file diagnostics programs and Windows Windows Help and Support Dell, 20... - Seite 26 19-20 wizards spyware, 20 Program Compatibility Wizard, 19 standby mode about, 15 support website, 7 system views back, 12 bottom, 12 front, 10 left side, 11 right side, 11 troubleshooting Dell Diagnostics, 20 Help and Support Center, 7 Index...
- Seite 27 Dell™ Latitude™ D830 Snelle referentiegids Model PP04X w w w . d e l l . c o m | s u p p o r t . d e l l . c o m...
- Seite 28 Andere merken en handelsnamen die mogelijk in dit document worden gebruikt, dienen ter aanduiding van de rechthebbenden met betrekking tot de merken en namen of ter aanduiding van hun producten. Dell Inc. claimt op geen enkele wijze enig eigendomsrecht ten aanzien van andere merken of handelsnamen dan haar eigen merken en handelsnamen.
- Seite 29 ....Wanneer u Dell Diagnostics (Dell-diagnoseprogramma) moet gebruiken Dell Diagnostics (Dell-diagnoseprogramma) starten vanaf de vaste schijf Het diagnoseprogramma starten vanaf het medium Drivers and Utilities (stuur- en hulpprogramma's) .
- Seite 30 Inhoudsopgave...
-
Seite 31: Informatie Zoeken
De documentatie en stuurprogramma's zijn reeds op de computer geïnstalleerd. U kunt het medium gebruiken om de stuurprogramma's opnieuw te installeren (zie "Stuur- en hulpprogramma's opnieuw installeren" in de Gebruikershandleiding) of om het Dell- diagnoseprogramma te gebruiken (zie "Dell Diagnostics (Dell-diagnoseprogramma)" op pagina 46). Mogelijk bevat het... - Seite 32 Help en ondersteuning van Windows → → • Systeeminstellingen configureren Klik op Startof Help en ondersteuning • Problemen vaststellen en oplossen Dell User and System Guides (Gebruiks- en → systeemhandleidingen) System Guides (Systeemhandleidingen). Klik op de Gebruikershandleiding van uw computer. ®...
- Seite 33 Ga als volgt te werk om Notebook Systeem Software te besturingsysteem van de computer opnieuw downloaden: installeert, moet u het NSS-hulpprogramma ook Ga naar support.dell.com, selecteer uw regio of business- opnieuw installeren. NSS biedt essentiële updates segment en geef uw servicelabel op. voor uw besturingssysteem en ondersteuning voor Selecteer Drivers &...
- Seite 34 ® ® taakbalk van Microsoft Windows Voor meer informatie over Dell QuickSet raadpleegt u "Dell™ QuickSet" in de on line Gebruikershandleiding. • Het besturingssysteem opnieuw installeren Medium met besturingssysteem OPMERKING: Het medium met het besturingssysteem kan optioneel zijn en is wellicht niet meegeleverd met uw computer.
-
Seite 35: De Computer Instellen
De computer instellen WAARSCHUWING: Voordat u aan een van de procedures in deze sectie begint, dient u de veiligheidsinstructies Productinformatiegids te volgen die u vindt in de 1 Haal de onderdelen uit de accessoiredoos. 2 Leg de onderdelen terzijde. U hebt deze nodig om de computer te kunnen instellen. De accessoiredoos bevat tevens gebruikersdocumentatie en eventuele software of extra hardware die u hebt besteld (zoals pc-kaarten, stations of batterijen). -
Seite 36: Over De Computer
Over de computer Vooraanzicht schermvergrendeling beeldscherm aan/uit-knop statuslampjes apparaat luidsprekers (2) toetsenbord touchpad touchpad-/track stick-knoppen 9 track stick statuslampjes toetsenbord 11 volumeknoppen dempknop omgevingslichtsensor Snelle referentiegids... -
Seite 37: Linkeraanzicht
Linkeraanzicht sleuf voor ventilatieopeningen IEEE 1394-connector beveiligingskabel audioconnectoren ExpressCard-sleuf knop voor een draadloos netwerk Wi-Fi Catcher™-lampje pc-kaartsleuf smartcard-sleuf Rechteraanzicht WAARSCHUWING: Blokkeer de luchtopeningen niet, duw er geen voorwerpen in en zorg dat er zich geen stof in ophoopt. Plaats de computer niet in een omgeving waar weinig lucht beschikbaar is, zoals een gesloten koffer, als de computer is ingeschakeld. -
Seite 38: Achteraanzicht
Achteraanzicht netwerkconnector (RJ-45) S-video TV-out-connector USB-ingang modemconnector (RJ-11) seriële connector videoconnector connector voor netadapter ventilatieopeningen Onderaanzicht WAARSCHUWING: Blokkeer de luchtopeningen niet, duw er geen voorwerpen in en zorg dat er zich geen stof in ophoopt. Plaats de computer niet in een omgeving waar weinig lucht beschikbaar is, zoals een gesloten koffer, als de computer is ingeschakeld. -
Seite 39: Batterijen Gebruiken
Het gebruik van een incompatibele batterij kan de kans op brand of een explosie vergroten. Vervang de batterij uitsluitend met een compatibele batterij die u bij Dell hebt aangeschaft. De lithium-ionbatterij is ontwikkeld voor gebruik met uw Dell-computer. Gebruik geen batterij van een andere computer voor uw computer. -
Seite 40: De Batterijlading Controleren
Dell™ QuickSet-batterijmeter Als Dell QuickSet is geïnstalleerd, drukt u op <Fn><F3> om de QuickSet-batterijmeter weer te geven. De batterijmeter toont de status en de gezondheid van de batterij, het oplaadniveau en de tijd totdat het opladen is voltooid. -
Seite 41: Batterijstroom Besparen
De gezondheid van de batterij controleren OPMERKING: De gezondheid van de batterij kan op twee manieren worden gecontroleerd: door de ladingsmeter te gebruiken zoals hieronder wordt beschreven, en door de batterijmeter te gebruiken in Del QuickSet. Klik met ® ® de rechtermuisknop op het QuickSet-pictogram voor meer informatie over QuickSet op de Microsoft Windows taakbalk en klik op Help. -
Seite 42: Slaapstand
U zet de computer als volgt in de stand-by-modus: → Uitschakelen→ Stand-by. • Klik op Start of • Afhankelijk van de ingestelde energiebeheeropties in het venster Eigenschappen voor Energiebeheer of in de wizard QuickSet Energiebeheer, gebruikt u een van de onderstaande methoden: –... -
Seite 43: De Energiebeheerinstellingen Configureren
Het gebruik van een incompatibele batterij kan de kans op brand of een explosie vergroten. Vervang de batterij uitsluitend met een compatibele batterij die u bij Dell hebt aangeschaft. De batterij is speciaal gemaakt voor een Dell™-computer. Gebruik geen batterij van een andere computer voor uw computer. -
Seite 44: Een Batterij Opslaan
De batterij verwijderen: 1 Als de computer is aangesloten op een dockingstation, koppelt u het dockingstation los. Raadpleeg de documentatie bij het dockingstation voor instructies voor het loskoppelen. 2 Zorg ervoor dat de computer uitstaat. 3 Open het ontgrendelingsschuifje van de batterijhouder aan de onderkant van de computer totdat dit vastklikt. -
Seite 45: Problemen Oplossen
Problemen oplossen Vastlopen en softwareproblemen WAARSCHUWING: Voordat u aan een van de procedures in deze sectie begint, dient u de veiligheidsinstructies Productinformatiegids te volgen die u vindt in de De computer start niet op O N T R O L E E R O F D E N E T A D A P T E R G O E D I S A A N G E S L O T E N O P D E C O M P U T E R E N H E T S T O P C O N T A C T De computer reageert niet meer KENNISGEVING: U loopt het risico gegevens te verliezen als u het besturingssysteem niet afsluit. -
Seite 46: Dell Diagnostics (Dell-Diagnoseprogramma)
Gebruik een virusscanner met bescherming tegen spyware (mogelijk is voor uw programma een upgrade nodig) om de computer te scannen en eventuele spyware te verwijderen. Ga voor meer informatie naar support.dell.com en zoek op het trefwoord spyware. -
Seite 47: Dell Diagnostics (Dell-Diagnoseprogramma) Starten Vanaf De Vaste Schijf
Dell Diagnostics (Dell-diagnoseprogramma) bevindt zich op een verborgen partitie op de vaste schijf. OPMERKING: Als de computer geen beeld op het scherm kan weergeven, moet u contact opnemen met Dell (zie "Contact met Dell opnemen" in de on line Gebruikershandleiding voor meer informatie). -
Seite 48: Hoofdmenu Dell Diagnostics
5 Typ 1 om te beginnen met het cd-menu en druk op <Enter> om verder te gaan. 6 Selecteer Run the 32 Bit Dell Diagnostics (32-bit Dell-diagnoseprogramma uitvoeren) in de genummerde lijst. Als er meerdere versies worden aangegeven, moet u de versie selecteren die op uw computer van toepassing is. - Seite 49 3 Als er tijdens een test een probleem wordt gedetecteerd, wordt er een bericht weergegeven met de foutcode en een beschrijving van het probleem. Noteer de foutcode en de beschrijving van het probleem en neem contact op met Dell (zie Contact opnemen met Dell in de on line Gebruikershandleiding). OPMERKING: Het servicelabel voor de computer bevindt zich boven aan elk testvenster.
- Seite 50 5 Wanneer de tests zijn voltooid, sluit u het testscherm om terug te keren naar het scherm met het hoofdmenu. U sluit Dell Diagnostics (Dell-diagnoseprogramma) af en start de computer opnieuw op door het scherm met het hoofdmenu te sluiten.
-
Seite 51: Index
Productinformatiegids, 31 prestaties, 39 regelgeving, 31 verwijderen, 43 veiligheid, 31 informatie over besturingssysteem Drivers and Utilities media regelgeving, 31 media, 34 Dell Diagnostics, 46 opnieuw installeren, 34 labels energie Microsoft Windows, 32 Cd's/dvd's slaapstand, 42 Servicelabel, 32 besturingssysteem, 34 stand-by-modus, 41... - Seite 52 45 troubleshooting computer start niet op, 45 Dell Diagnostics, 46 programma crasht, 45 programma reageert niet meer, 45 programma's en compatibiliteit met veiligheidsinstructies, 31 Windows, 45 software, 45-46 spyware, 46 trage computerprestaties, 46 Windows XP vastlopen, 45...
-
Seite 53: Référence Rapide
Dell™ Latitude™ D830 Référence rapide Modèle PP04X w w w . d e l l . c o m | s u p p o r t . d e l l . c o m... - Seite 54 La reproduction de ce document, de quelque manière que ce soit, sans l'autorisation écrite de Dell Inc. est strictement interdite. Marques utilisées dans ce document : Dell, le logo DELL, Latitude et ExpressCharge sont des marques déposées Dell Inc.; Intel est une marque déposée de Intel Corporation;...
- Seite 55 ..... . . Démarrage de Dell Diagnostics à partir de votre disque dur ..Démarrage de Dell Diagnostics à partir du média Drivers and Utilities ..Menu principal de Dell Diagnostics .
- Seite 56 Sommaire...
-
Seite 57: Recherche D'informations
Vous pouvez utiliser le média pour réinstaller les pilotes (reportez-vous à la section «Réinstallation des pilotes et des utilitaires» de votre Guide d'utilisation en ligne) ou exécuter Dell Diagnostics (reportez-vous à la section «Dell Diagnostics» à la page 72). Des fichiers Lisez-moi peuvent être inclus sur... - Seite 58 • Étiquette de licence Microsoft Windows Ces étiquettes sont apposées sur l'ordinateur. • Utilisez le numéro de service pour identifier votre ordinateur lorsque vous accédez au site Web support.dell.com ou lorsque vous appelez le support. • Entrez le code de...
- Seite 59 à jour essentielles pour le système de service. d'exploitation et la prise en charge des lecteurs de Sélectionnez Drivers & Downloads (Pilotes et disquette USB Dell™ de 3,5 pouces, des processeurs téléchargements) et cliquez sur Go. ® Intel , des lecteurs optiques et des périphériques USB.
- Seite 60 • Informations concernant l'activité réseau, l'Assistant Aide Dell QuickSet de gestion d'énergie, les raccourcis clavier et autres Pour consulter l'Aide de Dell QuickSet, cliquez avec le fonctions commandées par Dell QuickSet. bouton droit sur l'icône Quickset de la barre des tâches ®...
-
Seite 61: Configuration De Votre Ordinateur
Configuration de votre ordinateur PRÉCAUTION : Avant de commencer toute procédure de cette section, suivez les consignes de sécurité du Guide d'information sur le produit 1 Déballez la boîte d'accessoires. 2 Mettez de côté le contenu de la boîte d'accessoires ; vous en aurez besoin ultérieurement pour configurer votre ordinateur. -
Seite 62: A Propos De Votre Ordinateur
A propos de votre ordinateur Vue frontale loquet de l'écran écran bouton d'alimentation voyants d'état de l'appareil 5 haut-parleurs (2) clavier tablette tactile boutons de la tablette ergot de pointage tactile/de l'ergot de pointage voyants d'état du clavier boutons de contrôle du volume 12 bouton de mise en sourdine capteur de lumière... -
Seite 63: Vue De Gauche
Vue de gauche emplacement pour entrées d'air connecteur IEEE câble de sécurité 1394 Connecteurs audio Logement ExpressCard 6 commutateur sans fil voyant Wi-Fi Catcher™ 8 logement d'extension logement de carte de carte PC à puce Vue de droite PRÉCAUTION : Ne bloquez pas les entrées d'air de l'ordinateur et n'insérez pas d'objets dedans ;... -
Seite 64: Vue Arrière
Vue arrière connecteur réseau (RJ-45) connecteur de sortie TV S-vidéo 3 connecteur USB alimenté connecteur modem (RJ-11) connecteur série connecteur vidéo connecteur d'adaptateur secteur 8 entrées d'air Vue du dessous PRÉCAUTION : Ne bloquez pas les entrées d'air de l'ordinateur et n'insérez pas d'objets dedans ; évitez également toute accumulation de poussière. -
Seite 65: Utilisation D'une Batterie
L'utilisation d'une batterie non compatible peut accroître le risque d'incendie ou d'explosion. Ne remplacez la batterie que par une batterie compatible achetée auprès de Dell. La batterie au lithium-ion est conçue pour fonctionner avec votre ordinateur Dell. N'utilisez pas de batterie provenant d'un autre ordinateur. -
Seite 66: Vérification De La Charge De La Batterie
Jauge de batterie Dell™ QuickSet Si Dell QuickSet est installé, appuyez sur <Fn><F3> pour afficher la jauge de batterie QuickSet. La Jauge de batterie affiche l'état de fonctionnement de la batterie, le niveau de charge et la durée nécessaire à... -
Seite 67: Économie D'énergie Sur Batterie
REMARQUE : Vous pouvez vérifier la durée de vie de la batterie de deux façons : par la jauge de charge sur la batterie comme indiqué ci-dessous ou par la jauge de Dell QuickSet. Pour plus d’informations sur QuickSet, cliquez ®... -
Seite 68: Mode Mise En Veille Prolongée
AVIS : Si votre ordinateur tombe en panne de batterie sans alimentation secteur en mode veille, il peut perdre des données. Pour entrer en mode veille : → Arrêter→ Mettre en veille. • Cliquez sur Démarrer ou • Selon les options de gestion de l'alimentation configurées dans la fenêtre Propriétés de Options d'alimentation ou l'assistant de gestion d'énergie QuickSet, utilisez une des méthodes suivantes : –... -
Seite 69: Configuration Des Paramètres De Gestion D'énergie
Charge de la batterie REMARQUE : À l'aide de Dell™ ExpressCharge™, l'adaptateur secteur charge une batterie complètement déchargée à 80 pour cent en environ 1 heure et à 100 pour cent en environ 2 heures, lorsque l'ordinateur est hors tension. La durée de charge est plus longue lorsque l'ordinateur est allumé. Vous pouvez laisser la batterie dans l'ordinateur aussi longtemps que vous le souhaitez. -
Seite 70: Stockage De La Batterie
L'utilisation d'une batterie non compatible peut accroître le risque d'incendie ou d'explosion. Ne remplacez la batterie que par une batterie compatible achetée auprès de Dell. La batterie est conçue pour fonctionner avec votre ordinateur Dell™. N'utilisez pas de batterie provenant d'un autre ordinateur. -
Seite 71: Dépannage
Dépannage Problèmes de blocage et problèmes logiciels PRÉCAUTION : Avant de commencer toute procédure de cette section, suivez les consignes de sécurité du Guide d'information sur le produit L'ordinateur ne démarre pas S S U R E Z V O U S Q U E L A D A P T A T E U R S E C T E U R E S T S O L I D E M E N T B R A N C H É... -
Seite 72: Dell Diagnostics
à niveau de votre programme sera peut-être nécessaire) afin d'analyser votre ordinateur et de supprimer les logiciels espions. Pour plus d'informations, allez sur le site support.dell.com et lancez une recherche à l'aide du mot clé espion. — Reportez-vous à la section «Dell Diagnostics» à la page 72. Si tous les tests X É... -
Seite 73: Démarrage De Dell Diagnostics À Partir De Votre Disque Dur
Si l'évaluation de préamorçage du système se déroule sans problème, vous recevez le message «Booting Dell Diagnostic Utility Partition. Press any key to continue». 4 Appuyez sur une touche pour démarrer Dell Diagnostics à partir de la partition de diagnostics du disque dur. Guide de référence rapide... -
Seite 74: Démarrage De Dell Diagnostics À Partir Du Média Drivers And Utilities
7 Lorsque l'écran de menu principal de Dell Diagnostics s'affiche, sélectionnez le test à effectuer. Menu principal de Dell Diagnostics 1 Une fois Dell Diagnostics chargé et l'écran du menu principal affiché, cliquez sur le bouton correspondant à l'option souhaitée. - Seite 75 3 Si un problème est rencontré lors d'un test, un message affiche le code d'erreur et une description du problème. Notez le code d'erreur et la description du problème avant de prendre contact avec Dell (reportez-vous à la section «Prendre contact avec Dell» dans votre Guide d'utilisation en ligne).
- Seite 76 (Paramètres) ses paramètres. 5 Une fois les tests effectués, fermez l'écran pour revenir au Menu principal. Pour quitter Dell Diagnostics et redémarrer l'ordinateur, fermez l'écran du Menu Main (Principal). 6 Retirez le média Dell Drivers and Utilities (le cas échéant).
-
Seite 77: Index
Index aide QuickSet, 60 Dell Diagnostics, 72 Guide d'information sur le produit, 57 alimentation dépannage Guide d'utilisation, 58 mode mise en veille Centre d'aide et de support, 60 prolongée, 68 Dell Diagnostics, 72 mode veille, 67 diagnostics assistants Dell, 72 assistant Compatibilité... - Seite 78 71 l'ordinateur ne répond plus, 71 logiciel, 71-72 logiciel espion, 72 performances de l'ordinateur ralenties, 72 un programme ne répond plus, 71 site de support Dell, 59 site web de support, 59 système d'exploitation média, 60 réinstallation, 60 Index...
- Seite 79 Dell™ Latitude™ D830 Schnellreferenzhandbuch Modell PP04X w w w . d e l l . c o m | s u p p o r t . d e l l . c o m...
-
Seite 80: Anmerkungen, Hinweise Und Vorsichtshinweise
Die Vervielfältigung oder Wiedergabe in jeglicher Weise ist ohne schriftliche Genehmigung von Dell Inc. strengstens untersagt. In diesem Dokument verwendete Marken: Dell, das DELL-Logo, Latitude und ExpressCharge sind Marken von Dell Inc.; Intel ist eine eingetragene Marke von Intel Corporation; Microsoft und Windows sind eingetragene Marken von Microsoft Corporation. - Seite 81 Starten des Programms „Dell Diagnostics” von der Festplatte ..Starten von Dell Diagnostics über den Drivers and Utilities-Datenträger Dell Diagnostics-Hauptmenü ..... . .
- Seite 82 Inhalt...
-
Seite 83: Informationsquellen
Sie können den Datenträger dazu verwenden, Treiber neu zu installieren (siehe „Neuinstallieren von Treibern und Dienstprogrammen” im Online- Benutzerhandbuch) oder das Programm Dell Diagnostics auszuführen (siehe „Dell Diagnostics” auf Seite 99). Möglicherweise finden Sie auf dem Datenträger Infodateien („Readme”- Dateien). - Seite 84 • Microsoft Windows-Lizenzetikett Die Aufkleber befinden sich an der Seite Ihres Computers. • Geben Sie die Service-Tag-Nummer auf der Website support.dell.com oder beim Anruf beim technischen Support an, um den Computer identifizieren zu können. • Geben Sie beim Anruf beim technischen...
- Seite 85 • Notebook-System-Software (NSS) – Wenn Sie das So laden Sie Notebook-System-Software herunter: Betriebssystem auf Ihrem Computer neu installieren, Wählen Sie auf der Website support.dell.com Ihre sollten Sie das NSS-Dienstprogramm ebenfalls neu Region oder Ihren Geschäftsbereich aus und geben installieren. NSS stellt wichtige Updates für Ihr Sie Ihre Service-Tag-Nummer ein.
- Seite 86 Folgen Sie den Anweisungen auf dem Bildschirm. • Informationen zur Netzwerkaktivität, zum Dell QuickSet-Hilfe Assistenten für die Energieverwaltung, zu Hotkeys Um die Dell QuickSet-Hilfe anzuzeigen, klicken Sie und weiteren von Dell QuickSet verwalteten mit der rechten Maustaste auf das QuickSet-Symbol Einstellungen.
-
Seite 87: Einrichten Des Computers
Einrichten des Computers VORSICHT: Bevor Sie gemäß den in diesem Abschnitt beschriebenen Anleitungen verfahren, lesen Sie zunächst Produktinformationshandbuch die Sicherheitshinweise im 1 Packen Sie das Zubehör aus. 2 Legen Sie die für das Einrichten des Computers erforderlichen Zubehörteile bereit. Der Zubehörkarton enthält ferner die Benutzerdokumentation sowie die Software oder zusätzliche Hardware (z. -
Seite 88: Informationen Über Den Computer
Informationen über den Computer Vorderansicht Bildschirmverriegelung Bildschirm Betriebsschalter Gerätestatusanzeigen Lautsprecher ( 2) Tastatur Touchpad Touchpad-/Trackstick-Tasten Trackstick Tastaturstatusanzeigen Tasten zur Lautstärkeregelung 12 Stummtaste Umgebungslichtsensor Schnellreferenzhandbuch... -
Seite 89: Linke Seitenansicht
Linke Seitenansicht Sicherheitskabeleinschub 2 Lüftungsschlitze IEEE 1394-Anschluss Audioanschlüsse ExpressCard-Steckplatz 6 Wireless-Schalter Wi-Fi Catcher™-Anzeige 8 PC Card-Steckplatz Smart Card-Steckplatz Rechte Ansicht VORSICHT: Achten Sie darauf, die Lüftungsschlitze nicht zu blockieren, schieben Sie keine Gegenstände hinein und halten Sie die Lüftungsschlitze staubfrei. Bewahren Sie den Computer während des Betriebs nicht in schlecht durchlüfteten Umgebungen, z. -
Seite 90: Rückansicht
Rückansicht Netzwerkanschluss (RJ-45) S-Video-TV-Ausgang Erweiterter USB-Anschluss Modemanschluss (RJ-11): Serieller Anschluss Monitoranschluss: Netzadapteranschluss Lüftungsschlitze Unterseite VORSICHT: Achten Sie darauf, die Lüftungsschlitze nicht zu blockieren, schieben Sie keine Gegenstände hinein und halten Sie die Lüftungsschlitze staubfrei. Bewahren Sie den Computer während des Betriebs nicht in schlecht durchlüfteten Umgebungen, z. -
Seite 91: Verwenden Eines Akkus
Bei Verwendung ungeeigneter Akkus besteht Brand- oder Explosionsgefahr. Ersetzen Sie die Akkus nur mit einem kompatiblen Akku von Dell. Der Lithium-Ionen-Akku ist für den Einsatz in Ihrem Dell-Computer vorgesehen. Setzen Sie keine Akkus aus anderen Computern in Ihren Computer ein. -
Seite 92: Prüfen Des Akkuladestands
Informationen zum Ladestatus des Akkus bereit. Akkuanzeige von Dell™ QuickSet Ist Dell QuickSet installiert, drücken Sie <Fn><F3>, um die QuickSet-Akkuanzeige anzuzeigen. In der Akkuanzeige werden Status, Akkuzustand, Ladestand und Ladedauer des Akkus im Computer angezeigt. Weitere Informationen zu QuickSet erhalten Sie, indem Sie mit der rechten Maustaste auf das ®... -
Seite 93: Einsparen Von Leistung
Sie können den Akkuzustand auf die beiden folgenden Weisen überprüfen: Indem Sie die Ladestandanzeige auf dem Akku wie nachstehend beschrieben verwenden oder indem Sie die Akkuanzeige in Dell QuickSet verwenden. Weitere Informationen zu QuickSet erhalten Sie, indem Sie mit der rechten Maustaste ®... -
Seite 94: Energieverwaltungsmodi
Energieverwaltungsmodi Standby-Modus Im Standby-Modus wird Energie eingespart, indem der Bildschirm und die Festplatte nach einem festgelegten Zeitraum von Inaktivität (dem so genannten Timeout) abgeschaltet werden. Wenn der Computer aus dem Standby-Modus in den Normalbetrieb zurückwechselt, wird der Zustand vor dem Aktivieren des Standby-Modus wiederhergestellt. -
Seite 95: Konfigurieren Der Energieverwaltungs-Einstellungen
Aufladen des Akkus ANMERKUNG: Durch Dell™ ExpressCharge™ kann der Netzadapter bei ausgeschaltetem Computer einen vollständig entleerten Akku in etwa einer Stunde auf 80 Prozent und in etwa zwei Stunden auf 100 Prozent Ladestand aufladen. Bei eingeschaltetem Computer verlängert sich die Ladezeit entsprechend. Der Akku kann beliebig lange im Computer bleiben. -
Seite 96: Ersetzen Des Akkus
Bei Verwendung ungeeigneter Akkus besteht Brand- oder Explosionsgefahr. Ersetzen Sie die Akkus nur mit einem kompatiblen Akku von Dell. Der Akku ist für den Einsatz in Ihrem Dell™-Computer vorgesehen. Setzen Sie keine Akkus aus anderen Computern in Ihren Computer ein. -
Seite 97: Lagern Eines Akkus
Akkuhaltezapfen Akku Akkufach-Freigabevorrichtung Um den Akku zu ersetzen, schieben Sie den neuen Akku in das Fach, bis die Verriegelung hörbar einrastet. Lagern eines Akkus Entfernen Sie den Akku, wenn Sie den Computer für längere Zeit lagern möchten. Akkus entladen sich während einer längeren Lagerzeit. - Seite 98 Ein Programm reagiert nicht mehr oder stürzt wiederholt ab ANMERKUNG: Anweisungen für die Installation von Software finden Sie im Allgemeinen in der jeweiligen Dokumentation oder auf einer mitgelieferten Diskette, CD oder DVD. — E E N D E N D E S R O G R A M M S 1 Drücken Sie gleichzeitig <Strg><Umschalttaste><Esc>.
-
Seite 99: Dell Diagnostics
Das Programm „Dell Diagnostics” befindet sich auf der Festplatte in einer verborgenen Partition. ANMERKUNG: Falls Ihr Computer nicht in der Lage ist, ein Monitorbild anzuzeigen, wenden Sie sich an Dell (weitere Informationen siehe unter „Kontaktaufnahme mit Dell” im Online-Benutzerhandbuch). ANMERKUNG: Falls der Computer mit einem Docking-Gerät verbunden (angedockt) ist, trennen Sie die Verbindung. -
Seite 100: Starten Von Dell Diagnostics Über Den Drivers And Utilities-Datenträger
3 Starten Sie Dell Diagnostics mithilfe einer der nachfolgend beschriebenen Methoden: Wenn das Dell™-Logo angezeigt wird, drücken Sie sofort die Taste <F12>. Wählen Sie „Diagnostics” aus dem Startmenü und drücken Sie die <Eingabetaste>. ANMERKUNG: Wird das Betriebssystem-Logo angezeigt, haben Sie <F12> vermutlich zu spät gedrückt. -
Seite 101: Dell Diagnostics-Hauptmenü
Liste. Sind mehrere Versionen aufgelistet, wählen Sie die für Ihren Computer geeignete Version. 7 Wenn das Dell Diagnostics-Hauptmenü angezeigt wird, wählen Sie den Test, den Sie ausführen möchten. Dell Diagnostics-Hauptmenü 1 Klicken Sie nach dem Laden von Dell Diagnostics in der Hauptmenü-Auswahl auf die Schaltfläche für die gewünschte Option. ANMERKUNG: Es wird empfohlen, die Option (Systemtest) auszuwählen, um einen... - Seite 102 ANMERKUNG: Die Service-Tag-Nummer des Computers finden Sie im oberen Bereich der einzelnen Testfenster. Wenn Sie Kontakt zu Dell aufnehmen, werden Sie vom Technischen Support zur Angabe der Service-Tag-Nummer aufgefordert. 4 Klicken Sie beim Ausführen eines Tests mit der Option Custom Test (Benutzerdefinierter Test) oder Symptom Tree (Problemübersicht) auf die entsprechende, in der folgenden Tabelle beschriebene...
-
Seite 103: Stichwortverzeichnis
Stichwortverzeichnis Computer Abstürze, 97-98 Akku Fehlerbehebung System reagiert nicht mehr, 97 aufladen, 95 Dell Diagnostics, 99 Systemleistung, geringe, 99 Energiestatusanzeige, 92 Hilfe- und Supportcenter, 86 entfernen, 96 Ladestandanzeige, 92 lagern, 97 Leistung, 91 Dell Diagnostics, 99 Garantieinformationen, 83 Überprüfen des... - Seite 104 Computer-Start Support-Website, 85 fehlgeschlagen, 97 Systemansichten Dell Diagnostics, 99 Linke Seite, 89 Lockups, 97 Rechte Seite, 89 Programm reagiert nicht Rückseite, 90 mehr, 98 Unterseite, 90 Programmabstürze, 98 Vorderseite, 88 Programme und Windows- Kompatibilität, 98 Software, 97-98 Spyware, 99 Windows XP...
- Seite 105 Dell™ Latitude™ D830 Guida di consultazione rapida Modello PP04X w w w . d e l l . c o m | s u p p o r t . d e l l . c o m...
- Seite 106 Altri marchi e nomi commerciali possono essere utilizzati in questo documento sia in riferimento alle aziende che rivendicano il marchio e i nomi che ai prodotti stessi. Dell Inc. nega qualsiasi partecipazione di proprietà relativa a marchi e nomi commerciali diversi da quelli di sua proprietà.
- Seite 107 ....Avvio del programma Dell Diagnostics dal disco rigido ..Avvio di Dell Diagnostics dal supporto Drivers and Utilities ..Menu principale di Dell Diagnostics .
- Seite 108 Sommario...
-
Seite 109: Ricerca Di Informazioni
La documentazione e i driver sono già installati sul computer. È possibile utilizzare il supporto per reinstallare i driver (consultare "Reinstallazione di driver e utilità" nella Guida dell'utente) o per eseguire il programma Dell Diagnostics (consultare "Dell Diagnostics" a pagina 125). I file Leggimi possono... - Seite 110 • Come individuare e risolvere i problemi tecnico Dell User and System Guides Guide di sistema. Fare clic sulla Guida dell'utente per il computer. ® ® • Numero di servizio e codice del servizio espresso Numero di servizio e licenza di Microsoft Windows •...
- Seite 111 Cosa si ricerca? Si trova qui • Soluzioni — suggerimenti per la risoluzione dei Sito Web del supporto tecnico della Dell — support.dell.com problemi, articoli di tecnici, corsi in linea e domande N.B. Selezionare il Paese o il settore commerciale per frequenti visualizzare il sito del supporto corretto.
- Seite 112 Guida in linea di Dell QuickSet Wizard (Procedura guidata di gestione del risparmio Per visualizzare la Guida di Dell QuickSet, fare clic di energia), i tasti di scelta rapida e altri elementi sono con il pulsante destro del mouse sull'icona di QuickSet controllati da Dell QuickSet ®...
-
Seite 113: Installazione Del Computer
Installazione del computer ATTENZIONE: Prima di eseguire le procedure descritte in questa sezione, seguire le istruzioni di sicurezza Guida alle informazioni sul prodotto riportate nella 1 Disimballare la scatola degli accessori. 2 Mettere da parte il contenuto della scatola degli accessori, che sarà necessario per completare l'installazione del computer. -
Seite 114: Informazioni Sul Computer
Informazioni sul computer Vista frontale dispositivo di chiusura schermo pulsante di dello schermo alimentazione indicatori luminosi di altoparlanti (2) tastiera stato della periferica touchpad pulsanti del touchpad/track stick 9 track stick indicatori di stato della pulsanti di controllo del pulsante di disattivazione tastiera volume del volume... -
Seite 115: Vista Da Sinistra
Vista da sinistra slot per cavo di prese d'aria connettore IEEE 1394 sicurezza connettori audio slot ExpressCard interruttore per la rete senza fili indicatore Wi-Fi slot per PC Card slot smart card Catcher™ Vista da destra ATTENZIONE: Non ostruire le prese d'aria, non introdurvi oggetti ed evitare l'accumulo di polvere. Non riporre il computer in un ambiente con aerazione-insufficiente, ad esempio una valigetta chiusa, durante il funzionamento, in quanto ciò... -
Seite 116: Vista Posteriore
TV S-Video connettore USB alimentato connettore del modem (RJ-11) 5 porta seriale porta video porta dell'adattatore c.a. prese d'aria Vista inferiore ATTENZIONE: Non ostruire le prese d'aria, non introdurvi oggetti ed evitare l'accumulo di polvere. Non riporre il computer in un ambiente con aerazione-insufficiente, ad esempio una valigetta chiusa, durante il funzionamento, in quanto ciò... -
Seite 117: Uso Della Batteria
L'uso di batterie incompatibili potrebbe provocare incendi o esplosioni. Sostituire la batteria esclusivamente con una compatibile acquistata presso Dell. La batteria agli ioni di litio è stata progettata per i computer Dell. Non utilizzare una batteria proveniente da altri computer. -
Seite 118: Controllo Della Carica Della Batteria
Non smaltire le batterie insieme ai rifiuti domestici. Quando la batteria non è più in grado di mantenere il livello di carica, contattare l'autorità locale preposta allo smaltimento dei rifiuti o l'ente per la protezione dell'ambiente per ottenere suggerimenti su come smaltire la batteria agli ioni di litio. Consultare Guida alle informazioni sul prodotto "Smaltimento della batteria"... -
Seite 119: Conservazione Dell'autonomia Della Batteria
N.B. È possibile controllare la salute della batteria in due modi: usando l’indicatore di carica sulla batteria, come descritto più avanti, e con il Misuratore di alimentazione di Dell QuickSet. Per ulteriori informazioni su QuickSet, ® fare clic con il pulsante destro del mouse sull'icona di QuickSet icon nella barra delle applicazioni di Microsoft ®... -
Seite 120: Modalità Del Risparmio Energia
AVVISO: In caso di interruzione dell'alimentazione c.a. e della batteria mentre il computer si trova in modalità standby, potrebbe verificarsi una perdita di dati. Per attivare la modalità standby: →... -
Seite 121: Configurazione Delle Impostazioni Di Risparmio Energia
Se necessario, l'adattatore c.a. carica la batteria e la mantiene carica. Se la temperatura della batteria è elevata a causa dell'utilizzo o perché si trova in un ambiente caldo, la ricarica potrebbe non avere luogo quando si collega il computer a una presa elettrica. -
Seite 122: Sostituzione Della Batteria
ATTENZIONE: L'uso di batterie incompatibili potrebbe provocare incendi o esplosioni. Sostituire la batteria esclusivamente con una compatibile acquistata presso Dell. La batteria è progettata per funzionare con il computer Dell™. Non utilizzare una batteria proveniente da altri computer. AVVISO: È... -
Seite 123: Conservazione Della Batteria
Per sostituire la batteria, collocare la batteria nell'apposito alloggiamento e premere verso il basso l'alloggiamento della batteria fino a far scattare la chiusura. Conservazione della batteria Se non si intende usare il computer per un periodo di tempo prolungato, estrarre la batteria. Se rimane a lungo inutilizzata, la batteria si scarica pertanto occorre ricaricarla completamente prima di usarla (consultare "Ricarica della batteria"... - Seite 124 — Se il computer non risponde alla pressione di un tasto o al movimento del mouse, P E G N E R E I L C O M P U T E R premere il pulsante di alimentazione e tenerlo premuto per almeno 8-10 secondi fino a quando il computer si spegne.
-
Seite 125: Dell Diagnostics
Internet, il computer potrebbe contenere software spia. Utilizzare un programma anti-virus che include protezione anti-software spia (il programma può richiedere un aggiornamento) per eseguire una scansione del computer e rimuovere i software spia. Per ulteriori informazioni, visitare l’indirizzo support.dell.com e ricercare la parola chiave spyware. -
Seite 126: Avvio Di Dell Diagnostics Dal Supporto Drivers And Utilities
5 Digitare 1 per avviare il menu del supporto e premere <Invio> per procedere. 6 Selezionare Run the 32 Bit Dell Diagnostics (Esegui Dell Diagnostics a 32 bit) dall'elenco numerato. Se sono elencate più versioni, selezionare quella appropriata per il proprio computer. -
Seite 127: Menu Principale Di Dell Diagnostics
Il Numero di servizio per il computer si trova nella parte superiore di ciascuna schermata di verifica. Se si contatta la Dell, il personale del supporto tecnico richiederà all'utente il Numero di servizio. 4 Se si esegue una prova dalle opzioni Custom Test (Prova personalizzata) o Symptom Tree (Albero dei sintomi), fare clic sulla scheda pertinente descritta nella tabella seguente per maggiori informazioni. - Seite 128 5 Al termine delle prove, chiudere la schermata corrente per tornare alla schermata Main Menu. Per uscire da Dell Diagnostics e riavviare il computer, chiudere la schermata Main Menu (Menu principale). 6 Rimuovere il supporto Drivers and Utilities di Dell (se possibile).
- Seite 129 Indice Guida dell'utente, 110 guida in linea di alimentazione Dell Diagnostics, 125 QuickSet, 112 modalità sospensione, 120 diagnostica modalità standby, 120 guida in linea e supporto Dell, 125 tecnico, 112 avvisi normativi, 109 documentazione contratto di licenza Microsoft con l'utente finale, 109...
- Seite 130 120 reinstallazione, 112 Verifica guidata compatibilità risoluzione dei problemi programmi, 124 Dell Diagnostics, 125 guida in linea e supporto tecnico, 112 sistema operativo reinstallazione, 112 supporti multimediali, 112 sito di supporto Dell, 111 sito Web di supporto, 111 Indice...
- Seite 131 Dell™ Latitude™ D830 Guía de referencia rápida Modelo PP04X w w w . d e l l . c o m | s u p p o r t . d e l l . c o m...
- Seite 132 Queda estrictamente prohibido realizar cualquier tipo de reproducción sin el consentimiento por escrito de Dell Inc. . Marcas comerciales utilizadas en este texto: Dell, el logotipo de DELL, Latitude y ExpressCharge son marcas comerciales de Dell Inc.; Intel es una maca comercial registrada de Intel Corporation; Microsoft y Windows son marcas comerciales registradas de Microsoft Corporation.
- Seite 133 Cuándo usar los Dell Diagnostics ..... Inicio de Dell Diagnostics desde la unidad de disco duro ..
- Seite 134 Contenido...
-
Seite 135: Localización De Información
Puede utilizar el soporte para reinstalar los controladores (consulte el apartado “Reinstalación de controladores y utilidades en la Guía del usuario en línea”) o ejecutar los Dell Diagnostics (consulte “Dell Diagnostics” en la página 150). Los archivos Readme (léame) pueden estar... - Seite 136 Centro de ayuda y soporte → → • Cómo detectar y solucionar problemas técnico Guías del sistema y del usuario de Dell Guías del sistema. Haga clic en la Guía del usuario de su equipo. ® ® • Etiqueta de servicio y código de servicio rápido...
- Seite 137 • Actualizaciones de software y sugerencias para la Utilidad Dell Support solución de problemas. Preguntas más frecuentes, temas La utilidad de soporte técnico de Dell es una actualización candentes y estado general del entorno del equipo automatizada y un sistema de notificación instalado en su equipo.
- Seite 138 • Información sobre la actividad de la red, asistente de Ayuda de Dell QuickSet administración de energía y otros puntos controlados Para ver Ayuda de Dell QuickSet, haga clic con el botón por Dell QuickSet derecho del ratón en el icono de Quickset en la barra ®...
-
Seite 139: Configuración De Su Equipo
Configuración de su equipo PRECAUCIÓN: Antes de comenzar cualquiera de los procedimientos de esta sección, siga las instrucciones de Guía de información del producto. seguridad incluidas en la 1 Desempaquete la caja de accesorios. 2 Saque el contenido de la caja de accesorios, que necesitará para completar la configuración del equipo. La caja de accesorios también contiene la documentación del usuario y todo el software o hardware adicional (como PC Cards, unidades o baterías) que ha solicitado. -
Seite 140: Acerca De Su Equipo
Acerca de su equipo Vista frontal Seguro de la pantalla Pantalla Botón de alimentación Indicadores luminosos Altavoces (2) Teclado de estado del dispositivo Ratón táctil Botones del ratón Palanca de seguimiento táctil/palanca de seguimiento Indicadores luminosos Botones de control de volumen 12 Botón de silencio de estado del teclado Sensor de luz ambiente... -
Seite 141: Vista Izquierda
Vista izquierda Ranura para cable de Rejillas de ventilación 3 Conector IEEE 1394 seguridad Conectores de audio Ranura para Conmutador ExpressCard inalámbrico Indicador de Wi-Fi Ranura de PC Card Ranura para Smart Catcher™ Card Vista derecha PRECAUCIÓN: No introduzca objetos ni permita que el polvo se acumule en las rejillas de ventilación ni las bloquee. -
Seite 142: Vista Posterior
Vista posterior Conector de red (RJ-45) Conector para S-vídeo y salida de TV 3 Conector USB alimentado Conector del módem (RJ-11) Conector serie Conector de vídeo Conector del adaptador de CA 8 Rejillas de ventilación Vista inferior PRECAUCIÓN: No introduzca objetos ni permita que el polvo se acumule en las rejillas de ventilación ni las bloquee. -
Seite 143: Uso De La Batería
El uso de baterías incompatibles puede aumentar el riesgo de incendio o explosión. Sustituya la batería únicamente por baterías de Dell. La batería de iones de litio está diseñada para funcionar con equipos Dell. No utilice una batería de otro equipo. -
Seite 144: Comprobación De La Carga De La Batería
Comprobación de la carga de la batería El medidor de batería Dell QuickSet, la ventana del medidor de batería de Microsoft Windows y el icono , el el medidor de carga de la batería y la advertencia de batería baja proporcionan información acerca de la carga de la batería. -
Seite 145: Conservación De La Energía De La Batería
NOTA: Puede comprobar el estado de consumo de la batería de dos maneras: utilizando el medidor de carga de la batería según se describe a continuación y utilizando el medidor de batería en Dell QuickSet. Para obtener más ® ®... -
Seite 146: Modos De Administración De Energía
Modos de administración de energía Modo de espera El modo de espera permite ahorrar energía apagando la pantalla y la unidad de disco duro después de un período predeterminado de inactividad (tiempo de espera). Cuando el ordenador sale del modo de espera, vuelve al mismo estado operativo en el que estaba antes de pasar a dicho modo. -
Seite 147: Configuración De Los Valores De Administración De Energía
Carga de la batería NOTA: Con Dell™ ExpressCharge™, cuando el equipo está apagado, el adaptador de CA carga una batería completamente descargada al 80 % en alrededor de 1 hora y al 100 % en aproximadamente 2 horas. El tiempo de carga aumenta con el ordenador encendido. -
Seite 148: Sustitución De La Batería
PRECAUCIÓN: El uso de baterías incompatibles puede aumentar el riesgo de incendio o explosión. Sustituya la batería únicamente por baterías de Dell. La batería está diseñada para funcionar con equipos Dell™. No utilice una batería de otro equipo. AVISO: Debe retirar todos los cables externos para evitar posibles daños en el conector. -
Seite 149: Almacenamiento De Una Batería
Almacenamiento de una batería Extraiga la batería cuando vaya a guardar el equipo durante un período largo. Las baterías se descargan durante los almacenamientos prolongados. Tras un largo período de almacenamiento, recargue la batería completamente antes de utilizarla (consulte el apartado “Carga de la batería” en la página 147). Solución de problemas Bloqueos y problemas con el software PRECAUCIÓN:... -
Seite 150: Dell Diagnostics
(es posible que el programa necesite una actualización) para explorar el equipo y eliminar el software espía. Para obtener más información, vaya a support.dell.com y busque las palabras clave software espía. -
Seite 151: Inicio De Dell Diagnostics Desde La Unidad De Disco Duro
NOTA: Si el equipo no muestra ninguna imagen en la pantalla, póngase en contacto con Dell (consulte el apartado “Cómo ponerse en contacto con Dell” en la Guía del usuario en línea para obtener más información). -
Seite 152: Iniciar Dell Diagnostics Desde El Soporte Drivers And Utilities
7 Cuando aparezca la pantalla del Menú principal de Dell Diagnostics, seleccione la prueba que desea ejecutar. Menú principal de Dell Diagnostics (Diagnósticos Dell) 1 Una vez se hayan cargado los Dell Diagnostics y aparezca la pantalla Menú principal, haga clic en el botón de la opción que desea. NOTA:... - Seite 153 3 Si se produce un problema durante una prueba, aparecerá un mensaje con un código de error y una descripción del problema. Anote el código de error y la descripción del problema y póngase en contacto con Dell (consulte “Cómo ponerse en contacto con Dell” en la Guía del usuario en línea). NOTA: La etiqueta de servicio del equipo está...
- Seite 154 5 Cuando las pruebas hayan terminado, cierre la pantalla de la prueba para volver a la pantalla Menú principal. Para salir de Dell Diagnostics y reiniciar el equipo, cierre la pantalla Menú principal. 6 Retire el soporte Drivers and Utilities de Dell (si es necesario).
-
Seite 155: Índice
Índice alimentación Dell Diagnostics, 150 hardware modo de espera, 146 Dell Diagnostics, 150 diagnósticos modo de hibernación, 146 Dell, 150 archivo de ayuda documentación Centro de ayuda y soporte Contrato de licencia de usuario técnico de Windows, 138 final, 135 información ergonómica, 135... - Seite 156 Web de soporte técnico, 137 software problemas, 149-150 software espía, 150 solución de problemas Centro de ayuda y soporte técnico, 138 Dell Diagnostics, 150 Soporte Drivers and Utilities, 135 Dell Diagnostics, 150 vistas del sistema atrás, 142 delantera, 140 inferior, 142...