Inhaltsverzeichnis

Verwandte Anleitungen für Fantini Rubinetti Venezia C904S+5848


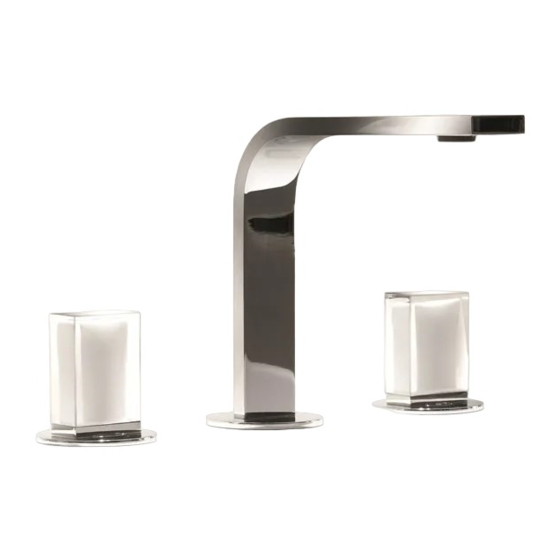
Inhaltszusammenfassung für Fantini Rubinetti Venezia C904S+5848
- Seite 1 VENEZIA Istruzioni / Instructions / Instructions De Montage / Bedienungsanleitung / Instrucciones C909S+5848 5911A+C911SB+5848 C904S+5848 ART. ART. ART. C909S+5948 5911A+C911SB+5948 C904S+5948 ART. ART. ART. 5913A+C913SB+5848 ART. 5913A+C913SB+5948 ART.
-
Seite 2: Utensili Necessari
Installazione / Installation. Utensili necessari / Tools needed / Outils nécessaires / Werkzeuge benötigt / Instrumentos necesarias TEFLON 17 mm 33 mm 30 mm 23 mm 4 mm 2 mm 1,5 mm... -
Seite 3: Inhaltsverzeichnis
VENEZIA Indice / Index / Index / Übersicht / Índice Montaggio flessibili / Flexible mounting C904S Gruppo lavabo / Washbasin / Lavabo 1 trous / Waschtischarmatur / Lavabo C909S Gruppo bidet / Bidet Mixer / Mélangeur bidet / Einloch-Bidetarmatur / Monobloc Bidet Regolazioni / Adjustments /... -
Seite 4: Montaggio Flessibili / Flexible Mounting
Installazione / Installation. Montaggio flessibili / Flexible mounting. Prima dell’installazione controllare la presenza e Avvitare i raccordi con tenuta O.R. a mano. l’integrità delle graffature dei flessibili da ambo i lati. Coppia massima di serraggio 3 Nm. / Before installation, check presence and integrity of the / Hand-tighten O-ring seal connectors. - Seite 5 VENEZIA Non incassare il condotto nel muro. Non installare il flessibile in torsione o in tensione. / Do not set the hose in the wall. / Tighten the hose without any twist or tension. Il contatto prolungato con sostanze, pur blandamente aggressive, può...
-
Seite 6: C904S Gruppo Lavabo / Washbasin / Lavabo 1 Trous / Waschtischarmatur / Lavabo
Installazione / Installation. C904S+5848 Gruppo lavabo / Washbasin / Lavabo 1 trous / Waschtischarmatur / Lavabo ART. ART. C904S+5948 C909S+5848 ART. Gruppo Bidet / Bidet mixer / Mélangeur bidet / Einloch-Bidetarmatur / Monobloc bidet ART. C909S+5948... - Seite 7 VENEZIA 33 mm 30 mm 29 mm...
- Seite 8 Installazione / Installation. 2 mm 1,5 Nm...
-
Seite 9: Regolazioni / Adjustments / Ajustements / Anpassungen / Ajustes
VENEZIA Regolazioni / Adjustments / Ajustements / Anpassungen / Ajustes... -
Seite 10: 5911A Parte Incasso / Built-In Pieces
Installazione / Installation. 5911A Parte incasso / Built-in pieces / Partier à encastrer / Eingebaute Stüke / ART. Pedazos incorporados... - Seite 11 VENEZIA •MONTAGGIO PIASTRA Qualora necessitasse fissare al muro il miscelatore incasso, é possibile montare l’apposita piastra come indicato in fig. •ASSEMBLING PLATE In the case that the built-in mixer should be installed to the wall, it is possible to fix the special plate as shown by fig. •MONTAGE DE LA PLAQUE Dans le cas où...
- Seite 12 Installazione / Installation. •Con l’ausilio di una livella posizionare correttamente il corpo incasso sia in orizzontale che in verticale seguendo le specifiche delle figure seguenti prestando particolare attenzione alla profonidtà d’incasso minima e massima riportate sulle etichette poste sulla protezione. •With the help of a level, correctly position the built-in body both horizontally and vertically according to the specifications of the following indications, paying particular attention to the minimum and maximum mounting depth information on labels on the protective covering.
- Seite 13 VENEZIA •Localizzazione dell’etichetta: •Position of the label: •Localisation de l’étiquette: •Etikettenlokalisierung: •Localización de la etiqueta: profondità minima / minimum depth / profondità massima / maximum depth / profondeur minimale / minimale tiefe / profondeur maximale / maximale tiefe / profundidad mínima profundidad máxima Filo rivestimento Line of the facing...
- Seite 14 Installazione / Installation. •Tagliare le piastrelle a filo della protezione considerando le dimensioni delle piastra che verrà installata. In figura 9 sono riportate le misure minime per il taglio delle piastrelle e interassi per pre-forare il rivestimento. •Cut the tiles along the protective cover, considering the size of the plaque which will be installed. Figure 9 shows the minimum measures for cutting tiles and distances to pre-drill the cover.
- Seite 15 VENEZIA...
-
Seite 16: C911Sb Parte Esterna / External Pieces / Parties Externes / Up-Teil / Parte Externa
Installazione / Installation. C911SB Parte esterna / External pieces / Parties externes / Up-Teil / Parte externa ART. 5848 / ART. 5948 ART. - Seite 17 VENEZIA 30 mm 29 mm 23 mm 2 mm 1,5 Nm...
-
Seite 18: Regolazioni / Adjustments / Ajustements / Anpassungen / Ajustes
Installazione / Installation. Regolazioni / Adjustments / Ajustements / Anpassungen / Ajustes... - Seite 19 VENEZIA...
-
Seite 20: 5913A Parte Incasso / Built-In Pieces
Installazione / Installation. 5913A Parte incasso / Built-in pieces / Partier à encastrer / Eingebaute Stüke / ART. Pedazos incorporados •MONTAGGIO PIASTRA Qualora necessitasse fissare al muro il miscelatore incasso, é possibile montare l’apposita piastra come indicato in fig. •ASSEMBLING PLATE In the case that the built-in mixer should be installed to the wall, it is possible to fix the special plate as shown by fig. - Seite 21 VENEZIA •Esempi installazione entrata acqua (utilizzare del teflon sui filetti delle tubazioni): •Sample installation and water outlet (use Teflon on the pipe threads): •Exemple de câblage de l’entrée de l’eau (utiliser du téflon sur les filets des tuyaux) : •Beispiele Installation des Wasserein (hierzu Teflon auf den Rohrgewinden verwenden): •Ejemplo de cableado entrada de agua (utilizar teflón en las roscas de las tuberías): TEFLON INGRESSO...
- Seite 22 Installazione / Installation. •Con l’ausilio di una livella posizionare correttamente il corpo incasso sia in orizzontale che in verticale seguendo le specifiche delle figure seguenti prestando particolare attenzione alla profonidtà d’incasso minima e massima riportate sulle etichette poste sulla protezione. •With the help of a level, correctly position the built-in body both horizontally and vertically according to the specifications of the following indications, paying particular attention to the minimum and maximum mounting depth information on labels on the protective covering.
- Seite 23 VENEZIA •Localizzazione dell’etichetta: •Position of the label: •Localisation de l’étiquette: •Etikettenlokalisierung: •Localización de la etiqueta: profondità minima / minimum depth / profondità massima / maximum depth / profondeur minimale / minimale tiefe / profondeur maximale / maximale tiefe / profundidad mínima profundidad máxima Filo rivestimento Line of the facing...
- Seite 24 Installazione / Installation. •Tagliare le piastrelle a filo della protezione considerando le dimensioni delle piastra che verrà installata. In figura 11 sono riportate le misure minime per il taglio delle piastrelle e interassi per pre-forare il rivestimento. •Cut the tiles along the protective cover, considering the size of the plaque which will be installed. Figure 11 shows the minimum measures for cutting tiles and distances to pre-drill the cover.
- Seite 25 VENEZIA...
-
Seite 26: C913Sb Parte Esterna / External Pieces / Parties Externes / Up-Teil / Parte Externa
Installazione / Installation. C913SB Parte esterna / External pieces / Parties externes / Up-Teil / Parte externa ART. 5848 / ART. 5948 ART. -
Seite 27: Regolazioni / Adjustments / Ajustements / Anpassungen / Ajustes
VENEZIA TEFLON 2 mm 1,5 Nm •Nel caso la bocca non vada a far battuta sul rivestimento del muro, rimuoverla e tagliare, tramite un seghetto, una parte del filetto della bocca stessa. •If the spout does does not line up to the wall, remove it and, with a hacksaw, cut a part of the thread of the spout itself. -
Seite 28: Sustitucion Rosca De Extrusion
Installazione / Installation. Sostituzione vitone / Bolt Replacement / Remplacement de la tête Oberteilsersetzung / Sustitucion rosca de extrusion Per art. C904S-C909S 2 mm 17 mm Rimontare seguendo il procedimento inverso (5-4-3-2-1). Replace following the instructions in reverse order (5-4-3-2-1). Re-installer au contraire du procédé... - Seite 29 VENEZIA Sostituzione vitone / Bolt Replacement / Remplacement de la tête Oberteilsersetzung / Sustitucion rosca de extrusion Per art. C911SB-C913SB 2 mm 17 mm Rimontare seguendo il procedimento inverso (6-5-4-3-2-1). Replace following the instructions in reverse order (6-5-4-3-2-1). Re-installer au contraire du procédé (6-5-4-3-2-1). Die umgekehrte Vorgehensweise folgen um die Teil wieder zu installieren (6-5-4-3-2-1).
-
Seite 30: Limitatore / Flow Control / Economiseur D'eau / Durchflussregler / Limitador
Installazione / Installation. LimitatorE / Flow control / Economiseur d’eau Durchflussregler / Limitador Per art. C909S-C911SB 4 mm Rimontare seguendo il procedimento inverso (5-4-3-2-1). Replace following the instructions in reverse order (5-4-3-2-1). Re-installer au contraire du procédé (5-4-3-2-1). Die umgekehrte Vorgehensweise folgen um die Teil wieder zu installieren (5-4-3-2-1). Colocar según el procedimiento inverso (5-4-3-2-1). - Seite 31 VENEZIA Sostituzione aeratore / Substitute aerator / Remplacement de l’aèrateur / Den Lüfter auswescseln / Sustituir el aireador Per art. C904S-C913SB Rimontare seguendo il procedimento inverso (2-1) Replace following the instructions in reverse order (2-1) Re-installer au contraire du procédé (2-1) Die umgekehrte Vorgehensweise folgen um die Teil wie der zu installieren (2-1) Colocar según el procedimiento inverso (2-1)
- Seite 32 Installazione / Installation. Sostituzione aeratore / Substitute aerator / Remplacement de l’aèrateur / Den Lüfter auswescseln / Sustituir el aireador Per art. C909S-C911SB 1,5 mm Rimontare seguendo il procedimento inverso (3-2-1) Replace following the instructions in reverse order (3-2-1) Re-installer au contraire du procédé (3-2-1) Die umgekehrte Vorgehensweise folgen um die Teil wie der zu installieren (3-2-1) Colocar según el procedimiento inverso (3-2-1)
-
Seite 33: Datos Tècnicos
VENEZIA Dati tecnici Pressione minima 1 BAR Technische Daten Pressione massima 10 BAR Minimum druck 1 BAR Pressione di esercizio consigliata 2-5 BAR Höchste druck 10 BAR Temperatura massima 80° Empfehlener druck 2-5 BAR Temperatura massima consigliata 65° Höchste wasser Temperatur 80°... - Seite 34 Installazione / Installation. Cura del prodotto La pulizia delle superfici va fatta utilizzando un sapone liquido diluito in acqua. Pflege hinweise unserer artikel Zur Reinigung empfehlen wir Wasser und flüssige Non usare mai in nessun caso detersivi liquidi Seife. contenenti sostanze abrasive o a base di acido muriatico, spugne abrasive, aceto, ammoniaca, Verwenden Sie bitte nie flüssige Reinigungsmittel, acetone, candeggina, acidi di uso domestico,...
- Seite 35 VENEZIA Note / Notes / Notes / Notizen / Notas...
- Seite 36 Australian Standard Installation Products shall be installed in accordance with AS/NZS 3500 series of standards. Installer shall ensure that the flow controlled aerator is tightened to prevent removal by hand.