Herunterladen Inhalt Inhalt Diese Seite drucken
Klarstein SKYSCRAPER HEAT Handbuch

Klarstein SKYSCRAPER HEAT Handbuch

Kerakmik-heizlüfter

Werbung

Verfügbare Sprachen
  • DE

Verfügbare Sprachen

  • DEUTSCH, seite 1
SKYSCRAPER
HEAT
Kerakmik-Heizlüfter
Ceramic Column Heater
Radiateur colonne céramique
Calefactor cerámico vertical
Termoventilatore in Ceramica Colonna
10029344
www.klarstein.com
Hinweis: Dieses Produkt ist nur für gut isolierte Räume
oder für den gelegentlichen Gebrauch geeignet.
Note: This product is only suitable for well insulated
spaces or occasional use.
Nota: Este producto está indicado únicamente en
lugares abrigados o para una utilización punctual.
Remarque : Ce produit ne peut être utilisé que dans
des locaux bien isolés ou de manière occasionnelle.
Advertencia: Questo prodotto è adatto solo per spazi
ben isolati o uso occasionale.

Werbung

Inhaltsverzeichnis
loading

Inhaltszusammenfassung für Klarstein SKYSCRAPER HEAT

  • Seite 1 Radiateur colonne céramique Calefactor cerámico vertical Termoventilatore in Ceramica Colonna 10029344 www.klarstein.com Hinweis: Dieses Produkt ist nur für gut isolierte Räume oder für den gelegentlichen Gebrauch geeignet. Note: This product is only suitable for well insulated spaces or occasional use.
  • Seite 3: Inhaltsverzeichnis

    Sehr geehrter Kunde, wir gratulieren Ihnen zum Erwerb Ihres Gerätes. Lesen Sie die folgenden Hinweise sorgfältig durch und befolgen Sie diese, um möglichen Schäden vorzubeugen. Für Schäden, die durch Missachtung der Hinweise und unsachgemäßen Gebrauch entstehen, übernehmen wir keine Haftung. Scannen Sie den folgenden QR-Code, um Zugriff auf die aktuellste Bedienungsanleitung und weitere Informationen rund um das Produkt zu erhalten.
  • Seite 4: Produktdatenblatt

    PRODUKTDATENBLATT Modellkennung(en) 10029344 Angabe Symbol Wert Einheit Angabe Einheit Wärmeleistung Nur bei elektrischen Speicher-Einzelraumheizgeräten: Art der Regelung der Wärmezufuhr Nennwärmeleistung Manuelle Regelung der Wärmezufuhr mit k.A. integriertem Thermostat Mindestwärmeleistung Manuelle Regelung der Wärmezufuhr k.A. (Richtwert) mit Rückmeldung der Raum- und/oder Außentemperatur Maximale kontinuierliche Elektronische Regelung der Wärmezufuhr...
  • Seite 5: Sicherheitshinweise

    SICHERHEITSHINWEISE • Kinder ab 8 Jahren, psychisch, sensorisch und körperlich eingeschränkte Menschen dürfen das Gerät nur benutzen, wenn sie vorher von einer für sie verantwortlichen Aufsichtsperson ausführlich mit den Funktionen und den Sicherheitsvorkehrungen vertraut gemacht wurden und die damit verbundenen Risiken verstehen. •...
  • Seite 6 Spezielle Sicherheitsvorkehrungen Überprüfen Sie vor der Verwendung die Markierung am Netzkabel. Abhängig vom Netzkabel kann dieses Gerät unter verschiedenen Umgebungsbedingungen betrieben werden: Beschriftung Kann verwendet werden in: Nicht verwenden in: H07RN-F Haushalt, Lagerhäusern, Werkstätten, Baustellen und Gewächshäusern. H05RN-F Haushalt, Lagerhäusern, Baustellen Werkstätten und Gewächshäusern.
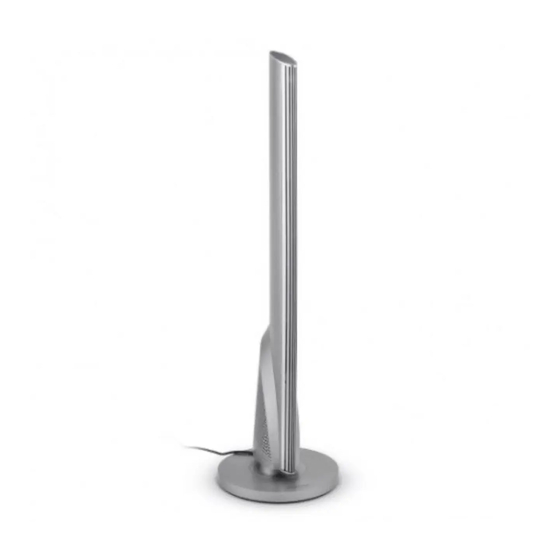
  • Seite 7: Geräteübersicht

    GERÄTEÜBERSICHT Bedienfeld Ein/Aus-Schalter IR-Empfänger Netzkabel Luftauslass Ständer Lufteinlass Flügelschraube...
  • Seite 8: Bedienfeld

    BEDIENFELD FERNBEDIENUNG...
  • Seite 9: Montage

    MONTAGE Entnehmen Sie die Gegenstände aus der Verpackung, einschließlich folgender vier Teile: Grundgerät, Standfuß, Fernbedienung und Flügelschrauben. Legen Sie das Hauptgerät auf einen Tisch, so dass die Enden hervorragen (siehe Bild 1). Verbinden Sie den Standfuß mit der Halterung des Grundgerätes. Verwenden Sie die Flügelschrauben (siehe Bild 2).
  • Seite 10: Inbetriebnahme

    INBETRIEBNAHME Bedienelemente Unterer Ein/Aus- Bedienfeld (schematische Darstellung) Schalter Drücken Sie den Ein/Aus-Schalter auf der Rückseite des Gerätes. Das Gerät tritt mit einem Piepton in den Bereitsschaftsmodus. Alle Funktionen und Anzeigen sind noch aus. Im Bereitschaftmodus werden keine Eingaben über das Bedienfeld angenommen außer der Taste .
  • Seite 11 Einstellen des Timers während des Betriebes (1x drücken) • Die Zeitanzeige schaltet sich ein. Die Anzeige blinkt im 0,5-Sekunden-Rhythmus. Drücken Sie in dem Moment die Tasten (+) und (-), um die Zeit in Stufen von 1 Stunde einzustellen (1-12 Stunden). •...
  • Seite 12: Wartung

    WARTUNG Batteriewechsel der Fernbedienung • Ziehen Sie das Batteriefach der Fernbedienung heraus • Achten Sie auf die Polarität und setzen Sie eine CR2032-Knopfzelle in das Batteriefach ein. • Schieben Sie das Batteriefach wieder in die Fernbedienung. Reinigung • Achten Sie darauf, dass das Gerät vor der Reingigung ausgeschaltet ist. •...
  • Seite 13: Hinweise Zur Entsorgung

    HINWEISE ZUR ENTSORGUNG Wenn es in Ihrem Land eine gesetzliche Regelung zur Entsorgung von elektrischen und elektronischen Geräten gibt, weist dieses Symbol auf dem Produkt oder auf der Verpackung darauf hin, dass dieses Produkt nicht im Hausmüll entsorgt werden darf. Stattdessen muss es zu einer Sammelstelle für das Recycling von elektrischen und elektronischen Geräten gebracht werden.
  • Seite 15 Dear Customer, Congratulations on purchasing this device. Please read the following instructions carefully and follow them to prevent possible damages. We assume no liability for damage caused by disregard of the instructions and improper use. Scan the QR code to get access to the latest user manual and more product information.
  • Seite 16: Product Data Sheet

    PRODUCT DATA SHEET Model identifier(s): Item Symbol Value Unit Item Unit Heat output Type of heat input, for electric storage local space heaters only Nominal heat output manual heat charge control, with integrated thermostat Minimum heat output manual heat charge control with room and/or (indicative) outdoor temperature feedback Maximum continuous heat...
  • Seite 17: Safety Instructions

    SAFETY INSTRUCTIONS • Children over the age of 8 and persons with reduced physical, sensory or mental capabilities or those with a lack of experience and knowledge may only use the device if they are instructed on how to do so by a person responsible for their safety, or if they are supervised and understand the hazards associated with the use of the device.
  • Seite 18 Special safety precautions Check the marking on the power cord before use. Depending on the power cord, this unit may operate in different environmental conditions: Labeling Can be used in: Do not use in: H07RN-F Household, warehouses, workshops, construction sites and greenhouses.
  • Seite 19: Product Overview

    PRODUCT OVERVIEW Operation panel Power switch Remote control receiver Power cord window Air outlet Base Air inlet Wing screw...
  • Seite 20: Operation Panel

    OPERATION PANEL REMOTE CONTROL...
  • Seite 21: Assembly

    ASSEMBLY Take the devices out of the bubble bag, including the following four parts, master machine, base, remote controller, Wing screw Put the master machine on a desktop, with the bottom reaching out, as picture 1 shows. Connect the base with the machine’s holder, tie the base with four pc wing screw, as picture 2 shows.
  • Seite 22: Operation

    OPERATION Operating panel Bottom power switch Operating panel schematic diagram on top Press Power switch which is in the back of the device, the device enters into energized state, and the heater is ready to use with a Bi sound, now all the functions and displays are off.
  • Seite 23 Setting the time (press this key once in working condition) • The time indicator will be on. The light will flicker twice per second. At this time press the „UP (+)“ and the „DOWN (-)“ key to set the timer (within a range of 1-12 hours), the timer will add or subtract 1 h with every press.
  • Seite 24: Maintenance

    MAINTENANCE Changing the battery • Pull out the battery door at the back side of remote control. • Pay attention to the battery polarity, and insert the battery (CR2032) to the tray of the door . • Push the battery door into the remote control. Cleaning •...
  • Seite 25: Disposal Considerations

    DISPOSAL CONSIDERATIONS If there is a legal regulation for the disposal of electrical and electronic devices in your country, this symbol on the product or on the packaging indicates that this product must not be disposed of with household waste. Instead, it must be taken to a collection point for the recycling of electrical and electronic equipment.
  • Seite 27 Estimado cliente, Le felicitamos por la adquisición de este producto. Lea atentamente las siguientes instrucciones y sígalas para evitar posibles daños. No asumimos ninguna responsabilidad por los daños causados por el incumplimiento de las instrucciones y el uso inadecuado. Escanee el siguiente código QR para obtener acceso a la última guía del usuario y más información sobre el producto.
  • Seite 28: Hoja De Datos Del Producto

    HOJA DE DATOS DEL PRODUCTO Denominación del modelo 10029344 Dato Símbolo Valor Unidad Dato Unidad Potencia térmica Solo con dispositivos de acumulación de calor eléctricos para abastecimiento local: Tipo de regulación del abastecimiento de calor Potencia térmica nominal Regulación manual del abastecimiento de calor con termostato integrado: Potencia térmica mínima Regulación manual de abastecimiento de...
  • Seite 29: Indicaciones De Seguridad

    INDICACIONES DE SEGURIDAD • Los niños mayores de 8 años y las personas con discapacidades físicas o psíquicas sola- mente podrán utilizar el aparato si han sido previamente instruidas sobre su uso y conocen las indicaciones de seguridad. • Asegúrese de que los niños no jueguen con el aparato. •...
  • Seite 30 Indicaciones especiales de seguridad Antes de su uso, compruebe la marca del cable de alimentación. Dependiendo del cable de alimentación, este aparato puede ponerse en funcionamiento bajo determinadas condiciones ambientales: Denominación Puede emplearse en: No debe emplerse en: H07RN-F Hogar, almacenes, talleres, obras e invernaderos.
  • Seite 31: Descripción Del Aparato

    DESCRIPCIÓN DEL APARATO Panel de control Interruptor on/off Receptor IR Cable de alimentación Salida de aire Soporte Entrada de aire Tuerca de mariposa...
  • Seite 32: Controles

    CONTROLES MANDO A DISTANCIA...
  • Seite 33: Montaje

    MONTAJE Extraiga el aparato de su embalaje, encontrará las siguientes cuatro partes: aparato principal, soporte, mando a distancia y tuercas de mariposa. Coloque el aparato sobre una mesa de la que sobresalga el extremo inferior (consulte ilustración 1). Atornille el soporte al aparato con las tuercas de mariposa (consulte ilustración 2).
  • Seite 34: Puesta En Marcha

    PUESTA EN MARCHA Controles Interruptor on/off Panel de control (representación esquemática) inferior Pulse el interruptor on/off situado en la parte trasera del aparato. Este entrará en modo standby y emitirá un pitido. Todas las funciones e indicadores todavía permanecen desactivados. 2.
  • Seite 35 Configuración del temporizador durante el funcionamiento (pulsar 1 vez) • El indicador de tiempo se enciende. Parpadeará cada medio segundo. Pulse los botones UP (+) y DOWN (-) para aumentar o reducir el tiempo en intervalos de una hora. • Pulse de nuevo SET para confirmar el tiempo seleccionado y abandonar la configu- ración.
  • Seite 36: Mantenimiento

    MANTENIMIENTO Cambio de las pilas del mando a distancia • Abra el compartimento para las pilas del mando a distancia. • Tenga en cuenta la polaridad y coloque una pila de botón tipo CR2023. • Vuelva a colocar el compartimento para la pila dentro del mando: Limpieza •...
  • Seite 37: Indicaciones Sobre La Retirada Del Aparato

    INDICACIONES SOBRE LA RETIRADA DEL APARATO Si en su país existe una disposición legal relativa a la eliminación de aparatos eléctricos y electrónicos, este símbolo estampado en el producto o en el embalaje advierte que no debe eliminarse como residuo doméstico. En lugar de ello, debe depositarse en un punto de recogida de reciclaje de aparatos eléctricos y electrónicos.
  • Seite 39: Fiche Technique

    Chère cliente, cher client, Toutes nos félicitations pour l’acquisition de ce nouvel appareil. Veuillez lire attentivement et respecter les instructions de ce mode d’emploi afin d’éviter d’éventuels dommages. Nous ne saurions être tenus pour responsables des dommages dus au non-respect des consignes et à la mauvaise utilisation de l’appareil.
  • Seite 40: Fiche De Données Produit

    FICHE DE DONNÉES PRODUIT Référence (s) du produit 10029344 Donnée Symbole Valeur Unité Donnée Unité Puissance calorifique Uniquement pour les radiateurs électriques à accumulation : Type de régulation de l'apport de chaleur Puissance calorifique Régulation manuelle de l'apport de chaleur n.c.
  • Seite 41: Consignes De Sécurité

    CONSIGNES DE SÉCURITÉ • Les enfants de plus de 8 ans ainsi que les personnes aux capacités physiques et mentales réduites ne doivent pas utiliser l’appareil à moins d’avoir assimilé dans le détail les con- signes d‘utilisation et de sécurité données par la personne chargée de les surveiller.
  • Seite 42 Mesures de sécurité spéciales Vérifier l’inscription sur le cordon d’alimentation avant de l’utiliser. En fonction du cordon d’alimentation, cet appareil peut être utilisé dans différentes conditions d’environnement : Inscription Lieux où l’appareil peut être Lieux ou l’appareil ne doit utilisé : pas être utilisé...
  • Seite 43: Aperçu De L'appareil

    APERÇU DE L’APPAREIL Panneau de commande Interrupteur marche/arrêt Capteur IR Cordon d’alimentation Sortie d’air Socle Entrée d’air Vis à oreilles...
  • Seite 44: Panneau De Commande

    PANNEAU DE COMMANDE TÉLÉCOMMANDE...
  • Seite 45: Montage

    MONTAGE Sortir les objets de l’emballage, de sorte à réunir les éléments suivants : l’appareil de base, le pied de support, la télécommande et les vis à oreilles. Poser l’appareil principal à plat sur une table de sorte à faire dépasser les extrémités (cf.
  • Seite 46: Mise En Marche

    MISE EN MARCHE Éléments de commande Interrupteur mar- Panneau de commande (représentation schématique) che/arrêt situé sur le dessous Appuyer sur l’interrupteur marche/arrêt situé à l’arrière de l’appareil. L’appareil produit un bip sonore et se met en mode veille. Toutes les fonctions et tous les affichages sont encore éteints.
  • Seite 47 Réglage du temps pendant le fonctionnement de l’appareil (appuyer 1x) • L’affichage du temps s’allume. L’affichage clignote à intervalles de 0,5 secondes. À ce moment-là, appuyer sur les touches « UP (+) » et « DOWN (-) » pour paramétrer le temps par paliers de 1 heure (1-12 heures).
  • Seite 48: Maintenance

    MAINTENANCE Remplacement des piles de la télécommande • Sortir le compartiment des piles de la télécommande • Respecter les polarités et introduire une pile bouton CR2032 dans le compartiment des piles. • Réintroduire le compartiment des piles dans la télécommande. Nettoyage •...
  • Seite 49: Informations Sur Le Recyclage

    INFORMATIONS SUR LE RECYCLAGE S‘il existe une réglementation pour l‘élimination ou le recyclage des appareils électriques et électroniques dans votre pays, ce symbole sur le produit ou sur l‘emballage indique que cet appareil ne doit pas être jeté avec les ordures ménagères.
  • Seite 51 Gentile cliente, La ringraziamo per aver acquistato il dispositivo. La preghiamo di leggere attentamente le seguenti istruzioni per l’uso e di seguirle per evitare possibili danni. Non ci assumiamo alcuna responsabilità per danni scaturiti da una mancata osservazione delle avvertenze di sicurezza e da un uso improprio del dispositivo.
  • Seite 52: Scheda Informativa Del Prodotto

    SCHEDA INFORMATIVA DEL PRODOTTO Identificazione del modello (i) 10029344 Indicazione Simbolo Valore Unità Indicazione Unità Potenza termica Solo per gli apparecchi per il riscaldamento d'ambiente locale elettrici ad accumulo: Tipo di controllo dell´apporto termico Potenza termica nominale Controllo manuale del carico termico con n.d.
  • Seite 53: Avvertenze Di Sicurezza

    AVVERTENZE DI SICUREZZA • Questo dispositivo non deve essere utilizzato da persone (compresi i bambini) con capacità fisiche, sensoriali o mentali ridotte e da persone che manchino di esperienza e conoscenza del dispositivo, a meno che siano attentamente sorvegliate o ben istruite relativamente all’utilizzo del dispositivo stesso da parte di un supervisore responsabile della loro sicurezza.
  • Seite 54 Avvertenze di sicurezza specifiche Prima dell´uso controllare l´indicazione sul cavo di alimentazione. In base al tipo di cavo di alimentazione, il dispositivo può essere utilizzato in diversi ambienti: Tipo Può essere utilizzato in: Non utilizzare in: H07RN-F Ambienti domestici, depositi, officine, cantieri e serre.
  • Seite 55: Descrizione Del Prodotto

    DESCRIZIONE DEL PRODOTTO Pannello di controllo On/off Ricevitore a infrarossi Cavo di rete Uscita aria Base d’appoggio Entrata aria Viti ad alette...
  • Seite 56: Pannello Di Controllo

    PANNELLO DI CONTROLLO TELECOMANDO...
  • Seite 57: Montaggio

    MONTAGGIO Rimuovere i componenti dalla confezione, inclusi i seguenti componenti: unità principale, base d’appoggio, telecomando e viti ad alette. Posizionare l‘unità principale su un tavolo come mostrato nella figura 1. Assemblare la base d’appoggio all’unità principale (vedi Figura 2). Per fare ciò, utilizzare le viti ad alette.
  • Seite 58: Messa In Funzione

    MESSA IN FUNZIONE Comandi Interruttore on/off Pannello di controllo (rappresentazione schematica) Premere l‘interruttore on/off posto sul retro del dispositivo. Un segnale acustico avverte che il dispositivo è in modalità operatività ed è pronto per l’uso. Tutte le funzioni e le spie sono ancora spente. In modalità...
  • Seite 59 Impostare il timer durante il funzionamento (premere 1x) • Il display dell’ora si accende. L‘indicatore lampeggia ad intervalli di 0,5 secondi. Premere i tasti „UP (+)“ e „DOWN (-)” per impostare il tempo a intervalli di 1 ora (1-12 ore). •...
  • Seite 60: Manutenzione

    MANUTENZIONE Sostituzione della batteria del telecomando • Aprire il vano batteria del telecomando. • Assicurarsi che la polarità sia corretta e inserire una batteria a bottone CR2032 nel vano batteria. • Reinserire il vano batteria nel telecomando. Pulizia • Assicurarsi che la spina sia disinserita prima di effettuare la pulizia. •...
  • Seite 61: Avviso Di Smaltimento

    AVVISO DI SMALTIMENTO Se nel proprio paese si applicano le regolamentazioni inerenti lo smaltimento di dispositivi elettrici ed elettronici, questo simbolo sul prodotto o sulla confezione segnala che questi prodotti non possono essere smaltiti con i rifiuti normali e devono essere portati a un punto di raccolta di dispositivi elettrici ed elettronici.

Diese Anleitung auch für:

10029344

Inhaltsverzeichnis