Herunterladen Inhalt Inhalt Diese Seite drucken
Klarstein 10029344 Bedienungsanleitung
Vorschau ausblenden Andere Handbücher für 10029344:

Werbung

Verfügbare Sprachen
  • DE

Verfügbare Sprachen

  • DEUTSCH, seite 1
Heizlüfter
10029344

Werbung

Inhaltsverzeichnis
loading

Inhaltszusammenfassung für Klarstein 10029344

  • Seite 1 Heizlüfter 10029344...
  • Seite 2: Inhaltsverzeichnis

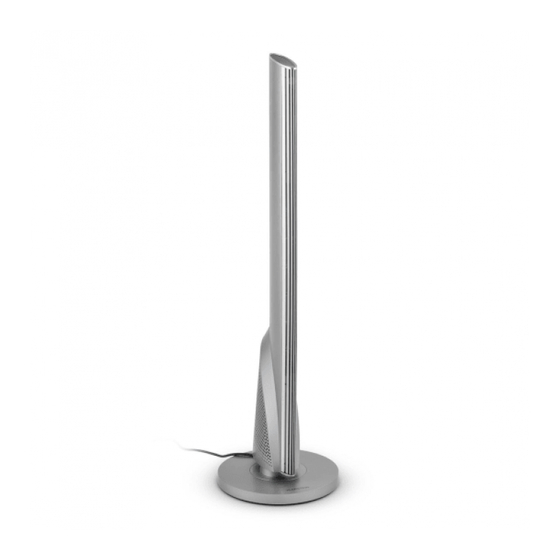
    Konformitätserklärung ..........9 Technische Daten Artikelnummer 10029344 Größe 32 x 113 cm...
  • Seite 3: Sicherheitshinweise

    Sicherheitshinweise • Dieses Gerät darf von Kindern ab 8 Jahren und Personen mit eingeschränkten körperlichen, sensorischen und geistigen Fähigkeiten und Kenntnissen verwendet werden, wenn sie in die sichere Verwendung des Gerätes eingewiesen wurden und die damit verbundenen Gefahren verstehen. • Kinder unter 3 Jahren müssen ständig vom Gerät ferngehalten werden, sofern sie nicht unter ständiger Beaufsichtigung stehen.
  • Seite 4: Geräteübersicht

    • Achten Sie darauf, dass die Spannung der Stromversorgung der des Gerätes entspricht (220-240 V). Achten Sie beim Umstellen des Gerätes auf die Betriebsspannung. • Es ist untersagt, das Gerät in der Nähe von Badewannen, Sprinklern oder Schwimmbecken zu betreiben. •...
  • Seite 5 Bedienfeld Temperaturanzeige Anzeige Schwenkmodus Timer Anzeige Raumtemperatur und Zeitschaltuhr Betriebsanzeige Ein/Aus Fernbedienung...
  • Seite 6: Montage

    Montage 1. Entnehmen Sie die Gegenstände aus der Verpackung, einschließlich folgender vier Teile: Grundgerät, Standfuß, Fernbedienung und Flügelschrauben. 2. Legen Sie das Hauptgerät auf einen Tisch, so dass die Enden hervorragen (siehe Bild 1). 3. Verbinden Sie den Standfuß mit der Halterung des Grundgerätes. Verwenden Sie die Flügelschrauben (siehe Bild 2).
  • Seite 7: Inbetriebnahme

    Inbetriebnahme Bedienelemente unterer Ein/Aus-Schalter Bedienfeld (schematische Darstellung) 1. Drücken Sie den Ein/Aus-Schalter auf der Rückseite des Gerätes. Das Gerät tritt mit einem Piepton in den Bereitsschaftsmodus. Alle Funktionen und Anzeigen sind noch aus. 2. Im Bereitschaftmodus werden keine Eingaben über das Bedienfeld angenommen außer der Taste Drücken Sie und das Gerät geht in den Betrieb über.
  • Seite 8: Wartung

    Einstellen der Temperatur (während des Betriebes 2x drücken) • Die Temperaturanzeige schaltet sich ein. Die Anzeige blinkt zweimal die Sekun- de. Drücken Sie in dem Moment die Tasten „UP (+)“ und „DOWN (-)“, um die Tempe- ratur in Stufen von 1 °C einzustellen (15-28 °C). •...
  • Seite 9: Hinweise Zur Entsorgung

    Batterie Batteriefach Reinigung • Achten Sie darauf, dass das Gerät vor der Reingigung ausgeschaltet ist. • Verwenden Sie einen sauberen, feuchten Lappen. • Verwenden Sie keine Reingungsmittel wie Beizmittel, Benzin, chemische Substanzen usw. Hinweise zur Entsorgung Befindet sich die linke Abbildung (durchgestrichene Mülltonne auf Rädern) auf dem Produkt, gilt die Europäische Richtlinie 2002/96/EG.
  • Seite 10: Technical Data

    Declaration of Conformity ......... 17 Technical Data Item number 10029344 Dimensios 32 x 113 cm...
  • Seite 11: Security Instructions

    Security Instructions • This appliance can be used by children aged from 8 years and above and persons with reduced physical, sensory or mental capabilities or lack of experience and knowledge if they have been given supervision or instruction concerning use of the appliance in a safe way and understand the hazards involved. Children shall not play with the appliance.
  • Seite 12: Product Overview

    • Forbid to use the device directly below the power outlet. • Do not make the device close to the walls, curtains or other combustible materials, cause it may cause a fire • Never place any objects in the device Product Overview Operation panel 5 Power switch...
  • Seite 13 Operation panel Temperature indicator Swing indicator Timer Room temperature & timer indicator ON/OFF indicator Remote control...
  • Seite 14: Assembly

    Assembly 1. Take the devices out of the bubble bag, including the following four parts, master machine, base, remote controller, Wing screw 2. Put the master machine on a desktop, with the bottom reaching out, as picture 1 shows. 3. Connect the base with the machine’ s holder, tie the base with four pc wing screw, as picture 2 shows. 4.
  • Seite 15: Operation

    Operation Operating panel Bottom power switch operating panel schematic diagram on top 1. Press Power switch which is in the back of the device, the device enters into energized state, and the heater is ready to use with a Bi sound, now all the functions and displays are off. 2.
  • Seite 16: Maintenance

    Setting the temperature (press this key twice in working conditition) • The light indicator will be on. The LED will flicker twice a second. You can change the temperature by pressing the „UP (+)“ and „DOWN (-)“ key. The range of tempera- ture is from 15 to 28 °C.
  • Seite 17: Disposal Considerations

    Cleaning • Make sure that the device is switched off before cleaning or maintenance. • Wipe the surface of the device by using a clean wet cloth or punctuate washing-up liquid. Do not use the washing-up liquid which is mordant, like petrol, Do not submerge in water. Do not use chemical liquids. Disposal Considerations According to the European waste regulation 2002/96/EC this symbol on the product or on its packaging indicates that this product may not be treated as household waste.
  • Seite 18: Dati Tecnici

    Dichiarazione di conformità ........25 Dati tecnici Numero articolo 10029344 Dimensioni 32 x 113 cm...
  • Seite 19: Avvertenze Di Sicurezza

    Avvertenze di sicurezza • I bambini, di età pari o superiore agli 8 anni, possono utilizzare il dispositivo, solo se un supervisore ha prima illustrato loro le avvertenze di sicurezza e come utilizzare il dispositivo. • Tenere il dispositivo e il cavo di rete fuori dalla portata dei bambini sotto i 3 anni. •...
  • Seite 20: Descrizione Del Prodotto

    • Evitare di far surriscaldare l‘unità. Non coprire il dispositivo. • Non introdurre oggetti nel dispositivo. Descrizione del prodotto Pannello di controllo 6 Cavo di rete 2 Ricevitore a infrarossi 7 Base d’ a ppoggio 3 Uscita aria 8 Viti ad alette 4 Entrata aria 5 On/off...
  • Seite 21 Pannello di controllo Spia temperatura Spia modalità oscillazione Timer Indicatore temperatu- ra stanza e timer Spia operatività On/off Telecomando...
  • Seite 22: Montaggio

    Montaggio 1. Rimuovere i componenti dalla confezione, inclusi i seguenti componenti: unità principale, base d’ a ppoggio, telecomando e viti ad alette. 2. Posizionare l'unità principale su un tavolo come mostrato nella figura 1. 3. Assemblare la base d’ a ppoggio all’unità principale (vedi Figura 2). Per fare ciò, utilizzare le viti ad alette. 4.
  • Seite 23: Messa In Funzione

    Messa in funzione Comandi Interruttore on/off Pannello di controllo (rappresentazione schematica) 1. Premere l'interruttore on/off posto sul retro del dispositivo. Un segnale acustico avverte che il dispositivo è in modalità operatività ed è pronto per l’uso. Tutte le funzioni e le spie sono ancora spente. 2.
  • Seite 24: Manutenzione

    Regolare la temperatura (premere 2 volte durante il funzionamento) • Il display della temperatura si accende e inizia a lampeggiare due volte al secon- do. Premere i tasti „UP (+)“ e „DOWN (-)“per impostare la temperatura a intervalli di 1°C (15-35 °C).
  • Seite 25: Smaltimento

    batteria Batteriefach Pulizia • Assicurarsi che la spina sia disinserita prima di effettuare la pulizia. • Usare un panno pulito e umido. • Non usare per la pulizia detergenti aggressivi, prodotti chimici, benzina ecc. Smaltimento Se sul prodotto è presente la figura a sinistra (il cassonetto dei rifiuti mobile sbarrato), si ap- plica la direttiva europea 2002/96/CE.
  • Seite 26: Données Techniques

    Déclaration de conformité ......... 33 Données techniques Numéro d’article 10029344 Dimensions 32 x 113 cm Alimentation électrique...
  • Seite 27: Consignes De Sécurité

    Consignes de sécurité • Les enfants de plus de 8 ans ainsi que les personnes dont les capacités et expériences physiques, senso- rielles et mentales sont réduites ne peuvent utiliser l’ a ppareil que s’ils ont été sensibilisés à une utilisation sécurisée de l’...
  • Seite 28: Aperçu De L'appareil

    • Ne pas utiliser l’ a ppareil à proximité d’une baignoire, d’un arroseur ou d’un bassin d’ e au. • Ne pas installer l’ a ppareil trop près de murs, de rideaux ou d’ a utres matériaux inflammables, car cela pour- rait provoquer des incendies.
  • Seite 29 Panneau de commande Affichage de la tempé- rature Affichage du mode de ro- tation Minuteur Affichage de la tem- pérature ambiante et du minuteur Témoin de marche/ arrêt Télécommande...
  • Seite 30: Montage

    Montage 1. Sortir les objets de l’ e mballage, de sorte à réunir les éléments suivants : l’ a ppareil de base, le pied de support, la télécommande et les vis à oreilles. 2. Poser l’ a ppareil principal à plat sur une table de sorte à faire dépasser les extrémités (cf. image 1) 3.
  • Seite 31: Mise En Marche

    Mise en marche Éléments de commande Interrupteur marche/arrêt situé sur Panneau de commande (représentation schématique) le dessous 1. Appuyer sur l’interrupteur marche/arrêt situé à l’ a rrière de l’ a ppareil. L’ a ppareil produit un bip sonore et se met en mode veille.
  • Seite 32: Maintenance

    Réglage de la température (appuyer 2x pendant le fonctionnement de l’appareil) • L’ a ffichage de la température s’ a llume. L’ a ffichage clignote deux fois par seconde. À ce moment-là, appuyer sur les touches « UP (+) » et « DOWN (-) » pour paramétrer la température par paliers de 1 °C (15-35 °C).
  • Seite 33: Information Sur Le Recyclage

    Pile Batteriefach Nettoyage • Veiller à ce que l’ a ppareil soit éteint avant de le nettoyer. • Utiliser un chiffon propre et humide. • Ne pas utiliser de produits d’ e ntretien tels que du décapant, de l’ e ssence, des substances chimiques etc. Information sur le recyclage Vous trouverez sur le produit l’image ci-contre (une poubelle sur roues, barrée d‘une croix), ce qui indique que le produit se trouve soumis à...
  • Seite 34: Datos Técnicos

    Declaración de conformidad ........41 Datos técnicos Número de artículo 10029344 Dimensiones 32 x 113 cm Suministro eléctrico...
  • Seite 35: Indicaciones De Seguridad

    Indicaciones de seguridad • Los niños mayores de 8 años y las personas con discapacidades físicas, psíquicas o sensoriales podrán utilizar el aparato si han sido previamente instruidos sobre sus funciones y conocen las indicaciones de seguridad. • Los niños menores de 3 años deben mantenerse alejados del aparato si no están bajo supervisión. •...
  • Seite 36: Descripción Del Aparato

    Descripción del aparato Panel de control 5 Interruptor on/off 2 Receptor IR 6 Cable de alimentación 3 Salida de aire 7 Soporte 4 Entrada de aire 8 Tuerca de mariposa...
  • Seite 37 Controles Indicador de tempera- tura Indicador modo oscilación Temporizador Indicador de tem- peratura ambiente y minutero Indicador de funciona- miento on/off Mando a distancia...
  • Seite 38: Montaje

    Montaje 1. Extraiga el aparato de su embalaje, encontrará las siguientes cuatro partes: aparato principal, soporte, mando a distancia y tuercas de mariposa. 2. Coloque el aparato sobre una mesa de la que sobresalga el extremo inferior (consulte ilustración 1). 3.
  • Seite 39: Puesta En Marcha

    Puesta en marcha Controles Interruptor on/off inferior Panel de control (representación esquemática) 1. Pulse el interruptor on/off situado en la parte trasera del aparato. Este entrará en modo standby y emitirá un pitido. Todas las funciones e indicadores todavía permanecen desactivados. 2.
  • Seite 40: Mantenimiento

    Ajuste de temperatura (durante el funcionamiento, pulse 2 veces) • El indicador de temperatura sse encenderá y parpadeará dos veces por segun- do. Pulse los botones UP (+) y DOWN (-) para aumentar o reducir la temperatura en intervalos de 1 °C (15-35 °C. •...
  • Seite 41: Indicaciones Para La Retirada Del Aparato

    Pila Batteriefach Limpieza • Asegúrese de apagar el aparato antes de limpiarlo. • Utilice un paño limpio y húmedo. • No utilice productos de limpieza como abrasivos, gasolina o sustancias químicas. Indicaciones para la retirada del aparato Si el aparato lleva adherida la ilustración de la izquierda (el contenedor de basura tachado) entonces rige la normativa europea, directiva 2002/96/CE.

Inhaltsverzeichnis