Herunterladen Inhalt Inhalt Diese Seite drucken
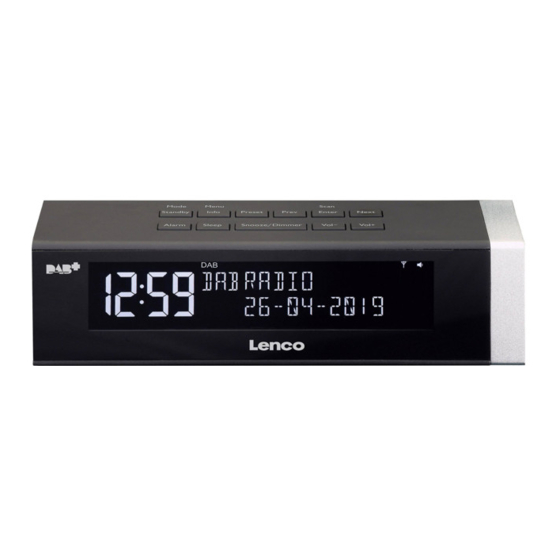
LENCO CR-630 Bedienungsanleitung

LENCO CR-630 Bedienungsanleitung

Dab+/ukw-stereoradiowecker
Vorschau ausblenden Andere Handbücher für CR-630:

Werbung

Verfügbare Sprachen
  • DE

Verfügbare Sprachen

Model: CR-630
USER MANUAL
DAB+/FM Stereo Clock radio
HANDLEIDING
DAB+/FM-stereoklokradio
BEDIENUNGSANLEITUNG
DAB+/UKW-Stereoradiowecker
MODE D'EMPLOI
Radio-réveil stéréo DAB+/FM
MANUAL DEL USUARIO
Radio reloj estéreo DAB+/FM
Version: 2.0

Werbung

Inhaltsverzeichnis
loading

Inhaltszusammenfassung für LENCO CR-630

  • Seite 1 Model: CR-630 USER MANUAL DAB+/FM Stereo Clock radio HANDLEIDING DAB+/FM-stereoklokradio BEDIENUNGSANLEITUNG DAB+/UKW-Stereoradiowecker MODE D’EMPLOI Radio-réveil stéréo DAB+/FM MANUAL DEL USUARIO Radio reloj estéreo DAB+/FM Version: 2.0...
  • Seite 2: Inhaltsverzeichnis

    Index: English ..............................3 Nederlands ............................12 Deutsch ..............................22 Français ..............................32 Español ..............................42 Version: 2.0...
  • Seite 3: English

    English CR-630 CAUTION: Usage of controls or adjustments or performance of procedures other than those specified herein may result in hazardous radiation exposure. PRECAUTIONS BEFORE USE KEEP THESE INSTRUCTIONS IN MIND: Do not cover or block any ventilation openings. When placing the device on a shelf, leave 5 cm (2”) free space around the whole device.
  • Seite 4 20. Make sure the unit is adjusted to a stable position. Damage caused by using this product in an unstable position vibrations or shocks or by failure to follow any other warning or precaution contained within this user manual will not be covered by warranty. 21.
  • Seite 5 INSTALLATION • Unpack all parts and remove protective material. • Do not connect the unit to the mains before checking the mains voltage and before all other connections have been made. WARNING: To prevent possible hearing damage, do not listen at high volume levels for long periods.
  • Seite 6: Product Overview

    Product Overview 1. Standby/Mode button 2. Info/Menu button 3. Preset button 4. Previous button 5. Enter/Scan button 6. Next button 7. Antenna 8. Alarm button 9. Sleep button 10. Snooze/Dimmer button 11. Vol- button 12. Vol+ button 13. LCD Screen 14.
  • Seite 7: System Settings

    Selecting the modes When the radio is turned on, press the Mode button repeatedly to switch between DAB + and FM modes. DAB+ operation When you first select DAB+ radio, press and hold Scan button it will search for and store all available DAB+ stations.Once Auto search is completed, your radio will select the first station tuned.
  • Seite 8: Using The Alarm

    Press the Prev or Next button to select your desired Sub-option. Setting the Time/Date Press and hold Info/Menu button, the <Time/Date> will be shown on screen, press Enter button to enter time setting mode. The hour digit will flash. Press the Prev or Next button to set the hour. Press the Enter button to confirm.
  • Seite 9 Warning: At location with poor DAB reception after power interruption time setting may not recover and for that wake up by timer could fail. Deactivate the alarm With radio on, press Alarm button, and then select the alarm you wish to turn off using the Prev or Next button to choose the Alarm to OFF position.
  • Seite 10 Guarantee Lenco offers service and warranty in accordance to European law, which means that in case of repairs (both during and after the warranty period) you should contact your local dealer. Important note: It is not possible to send products that need repairs to Lenco directly.
  • Seite 11 (Waste Electrical and Electronic Equipment Directive). CE Marking Hereby, Lenco Benelux B.V., Thermiekstraat 1a, 6361 HB Nuth, The Netherlands, declares that this product is in compliance with the essential EU directive requirements. The declaration of conformity may be consulted via techdoc@commaxxgroup.com...
  • Seite 12: Nederlands

    Nederlands CR-630 LET OP: Gebruik van bedieningen of afstellingen of uitvoer van procedures anders dan gespecificeerd in deze documentatie kan leiden tot blootstelling aan schadelijke straling. VOORZORGSMAATREGELEN VOOR GEBRUIK ONTHOUD DE VOLGENDE INSTRUCTIES: Bedek of blokkeer de ventilatieopeningen niet. Wanneer u het apparaat op een schap plaatst, dient u 5 cm (2”) vrije ruimte rondom het gehele apparaat te behouden.
  • Seite 13 staan of instructies hebben over het juiste gebruik van het apparaat hebben gekregen van de persoon die verantwoordelijk is voor hun veiligheid. 19. Dit product is alleen voor niet-professioneel gebruik bedoeld en niet voor commercieel of industrieel gebruik. 20. Verzeker u ervan dat het apparaat in een stabiele positie staat opgesteld. Beschadigingen veroorzaakt door het gebruik van dit apparaat in een onstabiele positie, trillingen of schokken of door het niet opvolgen van andere waarschuwingen of voorzorgsmaatregelen beschreven in deze gebruikshandleiding worden niet gedekt door de garantie.
  • Seite 14: Productoverzicht

    ⚫ Stel de batterij niet bloot aan extreem hoge of lage temperaturen of een lage luchtdruk op grote hoogte tijdens gebruik, opslag of transport. ⚫ Vervanging van een batterij door een incorrect type kan leiden tot een ontploffing of de lekkage van ontvlambare vloeistoffen of gas.
  • Seite 15 9. Slaap-knop 10. Sluimer/Dimmertoets 11. Vol- toets 12. Vol+ toets 13. LCD-scherm 14. Koptelefoonaansluiting 15. Jack voor DC in 16. USB-uitgangspoort voor opladen...
  • Seite 16 Instructies Basishandelingen Uw radio voor de eerste keer gebruiken Verbind uw radio met de meegeleverde stroomadapter. Steek het andere uiteinde in de voedingsingang, het apparaat zal inschakelen, “Welcome to digital Radio” (Welkom bij digitale radio) weergeven en op stand-by schakelen. Druk op de toets Stand-by/Moduse om de radio in te schakelen.
  • Seite 17: Systeeminstellingen

    Stations herroepen die zijn opgeslagen in het stationsgeheugen. Een voorkeuzestation herroepen: Selecteer de bandbreedte (DAB+ of FM) van het station, door op de Mode-toets te drukken. Druk op de Preset-toets om de opgeslagen stations naar voren te halen, gebruik vervolgens de Vorige- of Volgende-toets om door uw voorkeuzes te bladeren en druk op de Enter toets om uw keuze te bevestigen.
  • Seite 18: Het Alarm Gebruiken

    Het alarm gebruiken Alarminstelling Met de radio ingeschakeld, druk op de Alarmtoets en vervolgens op de Entertoets; de display zal OFF (uit) weergeven. Druk vervolgens op de Vorige- of Volgende-toets om Alarm 1 op ON (AAN) te zetten en druk op de Enter toets om uw keuze te bevestigen.
  • Seite 19 Bitfoutenkans (BER): Geeft informatie over signaalfouten. Kanaalfrequentie: Geeft het nummer en de frequentie van het transmissiekanaal weer. Soort programma (PTY): Geeft het type en de beschrijving weer van het programma op de DAB+zender. Tijd/datum: Geeft de tijd en datum weer die door de zender wordt gegeven. Bitsnelheid: De datasnelheid waar het signaal mee verstuurd wordt.
  • Seite 20 Gebruik uitsluitend de voeding die op de gebruiksaanwijzing is aangegeven Garantie Lenco biedt service en garantie aan overeenkomstig met de Europese wetgeving. Dit houdt in dat u, in het geval van reparaties (zowel tijdens als na de garantieperiode), uw lokale handelaar moet contacteren.
  • Seite 21 (Afgedankte Elektrische en Elektronische Apparatuur). CE-markering Lenco Benelux B.V., Thermiekstraat 1a, 6361 HB Nuth, Nederland, verklaart hierbij dat dit product voldoet aan de vereisten van de essentiële EU-richtlijnen. De conformiteitsverklaring kan worden opgevraagd via techdoc@commaxxgroup.com...
  • Seite 22: Deutsch

    Deutsch CR-630 ACHTUNG: Eine andere als die hier beschriebene Bedienung, Einstellung oder Verwendung der Funktionen kann zu gefährlicher Strahlenbelastung führen. VORSICHTSMASSNAHMEN VOR DER BENUTZUNG BEFOLGEN SIE IMMER FOLGENDE ANWEISUNGEN: Blockieren oder bedecken Sie keine Lüftungsöffnungen. Wenn Sie das Gerät auf ein Regal stellen, lassen Sie um das gesamte Gerät 5 cm (2”) freien Platz.
  • Seite 23 18. Dieses Gerät ist nicht zur Benutzung durch Personen (auch Kinder) mit physischen, sensorischen oder mentalen Beeinträchtigungen oder ohne ausreichender Erfahrung vorgesehen, es sei denn, sie werden durch eine verantwortliche Person beaufsichtigt oder wurden in die ordnungsgemäße Bedienung des Gerätes durch eine für ihre Sicherheit verantwortlichen Person eingewiesen.
  • Seite 24: Produktübersicht

    29. Warnhinweise bzgl. der Verwendung von Batterien: ⚫ Es besteht Explosionsgefahr, wenn die Batterien nicht korrekt eingelegt werden. Nur mit Batterien des gleichen oder entsprechenden Typs ersetzen. ⚫ Die Batterie darf während der Benutzung, Aufbewahrung oder des Transports weder sehr hohen oder sehr niedrigen Temperaturen noch niedrigem Luftdruck in großen Höhenlagen ausgesetzt werden.
  • Seite 25 2. Info/Menü-Taste 3. Speicherplatz-Taste 4. Zurück-Taste 5. Enter/Scan-Taste 6. Vor-Taste 7. Antenne 8. Wecker-Taste 9. Abschaltautomatik-Taste 10. Schlummerautomatik/Dimmer-Taste 11. Lautstärke- Taste 12. Lautstärke+ Taste 13. LCD-Display 14. Kopfhörerbuchse 15. DC-Eingangsbuchse 16. USB-Ladeausgang...
  • Seite 26 Anleitungen Grundbedienung Bei der Erstinbetriebnahme Ihres Radios Schließen Sie den mitgelieferten Netzadapter am Radio an. Wenn Sie nun den Netzstecker des Netzadapters in eine Netzsteckdose stecken, schaltet sich das Radio ein, zeigt auf dem Display „Welcome to digital Radio“ (Willkommen beim digitalen Radio) an und wechselt anschließend in den Standby-Modus.
  • Seite 27: Systemeinstellungen

    Drücken Sie die Taste Enter, um den Radiosender zu speichern. Auf dem Display erscheint die Mitteilung „Preset xx stored“ (Speicherplatz xx gespeichert). Abruf eines auf einem Speicherplatz abgespeicherten Radiosenders Um einen auf einem Speicherplatz gespeicherten Radiosender abzurufen: Wählen Sie das Band (DAB+ oder UKW) des Radiosenders aus, indem Sie die Taste Mode drücken. Drücken Sie die Taste Preset, um die Speicherplätze abzurufen.
  • Seite 28: Verwendung Des Weckers

    Drücken Sie die Taste Prev oder Next, um entweder AUS, 120, 90, 60, 45, 30, 15 oder 5 Minuten auszuwählen. Drücken Sie zur Bestätigung die Taste Enter. Verwendung des Weckers Wecker einstellen Drücken Sie bei eingeschaltetem Radio die Taste Alarm. Auf der Anzeige blinkt jetzt OFF (aus). Drücken Sie nun die Taste Prev oder Next, um Alarm1 (Wecker 1) auf ON (Ein) zu stellen.
  • Seite 29 Senderinformationen im DAB-Modus Bei jedem Druck der Taste Info/Menu erscheinen im DAB-Modus auf dem Display nacheinander folgende Informationen: Dynamisches Etikettensegment (DLS): Anzeige einer durch den Radiosender bereitgestellten Laufbandinformation. Signalstärke: Anzeige eines Statusbalkens mit der Signalstärke des gerade wiedergegeben Radiosenders. Bit-Fehlerrate (BER): Zeigt Details zur Signalfehlerrate an. Frequenz des Kanals: Zeigt sowohl Kanalnummer als auch Frequenz des empfangenen Radiosenders Programmart (PTY): Zeigt sowohl Art als auch Beschreibung des durch den DAB+Radiosender bereitgestellten Programms an.
  • Seite 30 Reparaturen (sowohl während als auch nach Ablauf der Garantiezeit) sollten Sie deshalb Ihren Einzelhändler kontaktieren. Wichtiger Hinweis: Es ist nicht möglich, Geräte für Reparaturen direkt an Lenco zu schicken. Wichtiger Hinweis: Falls dieses Gerät von einem nicht autorisierten Kundendienst geöffnet oder darauf zugegriffen wird, erlischt die Garantie.
  • Seite 31 Verwertung und Entsorgung von Altgeräten aufrecht zu halten (Waste Electrical and Electronic Equipment Directive). CE-Kennzeichen Hiermit erklärt Lenco Benelux B.V., Thermiekstraat 1a, 6361 HB Nuth, The Netherlands, dass dieses Produkt den grundsätzlichen Anforderungen der EU-Richtlinie entspricht. Die Konformitätserklärung ist erhältlich unter techdoc@commaxxgroup.com...
  • Seite 32: Français

    Français CR-630 ATTENTION : L’utilisation de commandes ou de réglages ou l’exécution de procédures autres que celles spécifiées dans ce manuel peut entraîner une exposition à des rayonnements dangereux. PRÉCAUTIONS AVANT UTILISATION GARDEZ CES INSTRUCTIONS À L’ESPRIT : Ne couvrez pas et n’obturez pas les ouvertures de ventilation. Lorsque vous placez l’appareil sur une étagère, laissez 5 cm (2”) d’espace libre tout autour de l’appareil.
  • Seite 33 sont sous surveillance ou ont reçu des instructions sur l’utilisation correcte de l’appareil par la personne qui est responsable de leur sécurité. 19. Ce produit est conçu pour un usage non professionnel, et non commercial ou industriel. 20. Vérifiez que l’appareil est en position stable. La garantie ne couvre pas les dégâts occasionnés par des vibrations, par des chocs, par l’utilisation de cet appareil en position instable ou par la non-observation de tout autre avertissement ou précaution contenus dans ce mode d’emploi.
  • Seite 34: Présentation Du Produit

    ⚫ Élimination d’une batterie dans un feu ou un four chaud, ou broyage ou découpe mécanique d’une batterie, qui peut entraîner une explosion. ⚫ Le fait de laisser une batterie dans un environnement extrêmement chaud qui peut entraîner une explosion ou une fuite de liquide ou de gaz inflammable. ⚫...
  • Seite 35 10. Bouton Rappel de sonnerie/variateur 11. Bouton Vol- 12. Bouton Vol+ 13. Écran à cristaux liquides 14. Prise casque 15. Prise d'entrée CC 16. Port de sortie de charge USB...
  • Seite 36 Instructions Fonctionnement de base Première utilisation de la radio Connectez la radio à l'adaptateur d'alimentation fourni. Branchez l’autre extrémité dans une prise secteur, l'appareil sera sous tension et affichera « Welcome to digital Radio » (Bienvenue sur la radio numérique) et passera en mode veille. Appuyez sur le bouton Veille/Mode pour mettre en marche la radio.
  • Seite 37: Réglages Système

    Chargement de stations mémorisées comme présélections Pour charger une station présélectionnée : Sélectionnez la bande (DAB+ ou FM) de la station en appuyant sur le bouton Mode. Appuyez sur le bouton Preset pour charger la station présélectionnée, puis en utilisant le bouton Préc ou Suiv pour parcourir vos présélections et appuyez sur le bouton Enter pour confirmer.
  • Seite 38: Utilisation De L'alarme

    Utilisation de l’alarme Réglage d'alarme Avec la radio en marche, appuyez sur le bouton Alarm puis sur le bouton Enter et OFF (désactivé) clignote sur l'écran. Ensuite, appuyez sur le bouton Préc ou Suiv pour choisir Alarm 1 (alarme 1) en position ON (activé), puis appuyez sur le bouton Enter pour confirmer.
  • Seite 39 Taux d’erreurs sur les bits (BER) : Fournit des détails du taux d’erreur de signal. Fréquence des stations : Affiche le numéro et la fréquence du canal de transmission de la station. Type de programme (PTY): Affiche le type et la description du programme fourni par la station DAB+. Heure/date: Affiche les informations sur l’heure et la date fournies par le diffuseur.
  • Seite 40 Garantie Lenco propose un entretien et une garantie conformément à la législation européenne, ce qui signifie qu’en cas de besoin de réparation (aussi bien pendant et après la période de garantie), vous pouvez contacter votre revendeur le plus proche.
  • Seite 41 (Directive sur les déchets des équipements électriques et électroniques). Marquage CE Par la présente, Lenco Benelux B.V., Thermiekstraat 1a, 6361 HB Nuth, Pays-Bas, déclare que ce produit est conforme aux exigences principales des directives européennes. La déclaration de conformité peut être consultée au lien : techdoc@commaxxgroup.com...
  • Seite 42: Español

    Español CR-630 PRECAUCIÓN: El uso de los controles o ajustes o el funcionamiento de los procedimientos excepto a aquellos especificados aquí pueden provocar una exposición peligrosa a la radiación. PRECAUCIONES PREVIAS AL USO TENGA ESTAS INSTRUCCIONES EN MENTE: No cubra o bloquee ninguna apertura de ventilación. Cuando coloque el dispositivo en una estantería, deje 5 cm (2”) de espacio libre alrededor de todo el dispositivo.
  • Seite 43 la supervisión o hayan recibido formación sobre el uso correcto del dispositivo por parte de una persona responsable de su seguridad. 19. Este producto está diseñado para un uso no profesional únicamente y no para un uso comercial o industrial. 20.
  • Seite 44 ⚫ La sustitución de una pila por un tipo incorrecto puede provocar una explosión o la fuga de líquido o gas inflamable. ⚫ La eliminación de la pila en un fuego o en un horno, o cortando o aplastando mecánicamente una pila, puede provocar una explosión. ⚫...
  • Seite 45: Descripción General Del Producto

    INSTALACIÓN Desembale todas las piezas y retire el material protector. No conecte la unidad a la corriente eléctrica antes de comprobar la tensión de la corriente y antes de que se hayan hecho todas las demás conexiones. No cubra ninguna ventilación y asegúrese de que hay un espacio de varios centímetros alrededor de la unidad para su ventilación.
  • Seite 46 Instrucciones Funcionamiento básico Encender la radio por primera vez Conecte la radio con el adaptador de alimentación que se adjunta. Conecte el otro extremo a la toma de corriente. La unidad se encenderá, mostrará el mensaje "Welcome to digital Radio" (Bienvenido a la radio digital) y pasará al modo en espera. Pulse el botón Standby/Mode para encender la radio.
  • Seite 47: Configuración Del Sistema

    Recuperar emisoras guardadas como presintonizaciones Para recuperar una emisora presintonizada: Seleccione la banda (DAB+ o FM) de la emisora pulsando el botón Mode. Pulse el botón Preset para recordar la emisora presintonizada; posteriormente, use el botón Prev o Next para navegar por las presintonías y pulse el botón Enter para confirmarlo. Configurar la hora automáticamente Cuando encienda la radio por primera vez, se sincronizará...
  • Seite 48: Uso De La Alarma

    Uso de la alarma Ajustar la alarma Con la radio encendida, pulse el botón Alarm y después el botón Enter. En la pantalla parpadeará OFF (Desactivado). Posteriormente, pulse el botón Prev o Next para cambiar Alarma 1 a la posición ON; pulse el botón Enter para confirmarlo.
  • Seite 49 Frecuencia del canal: Muestra el número de canal y la frecuencia de transmisión de la emisora. Tipo de programa (PTY): Muestra el tipo y la descripción del programa proporcionado por la emisora DAB+. Hora/Fecha: Muestra la información de hora y fecha proporcionada por la emisora. Vel bits: La tasa de fecha en la cual se transmite la señal.
  • Seite 50 Garantía Lenco ofrece servicio y garantía en cumplimiento con las leyes de la Unión Europea, lo cual implica que, en caso de que su producto precise ser reparado (tanto durante como después del periodo de garantía), deberá contactar directamente con su distribuidor.
  • Seite 51 (Directiva sobre la Eliminación de Equipos Eléctricos y Electrónicos). Marca CE Por la presente, Lenco Benelux B.V., Thermiekstraat 1a, 6361 HB Nuth, Países Bajos, declara que este producto cumple con las exigencias esenciales de la directiva de la UE. La declaración de conformidad puede consultarse mediante techdoc@commaxxgroup.com...

Diese Anleitung auch für:

Cr-630bk

Inhaltsverzeichnis