Inhaltsverzeichnis
Werbung
Verfügbare Sprachen
Verfügbare Sprachen
Quicklinks
OWNER'S MANUAL
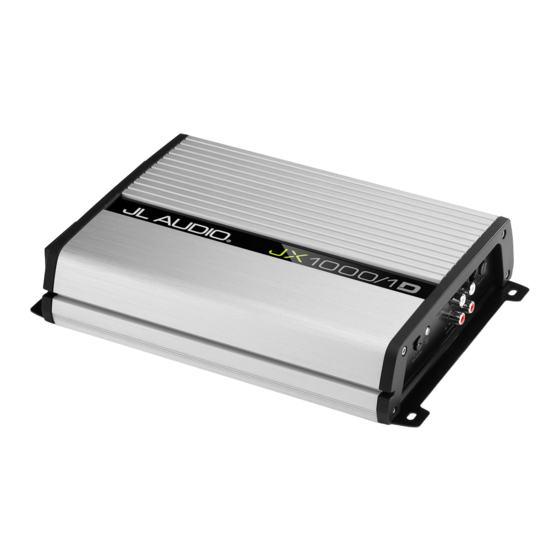
Monoblock Subwoofer Amplifiers
Thank you for purchasing a JL Audio amplifier for
your automotive sound system.
Your amplifier has been designed and manufactured to exacting
standards in order to ensure years of musical enjoyment in your vehicle.
For maximum performance, we highly recommend that you have
your new amplifier installed by an authorized JL Audio dealer. Your
authorized dealer has the training, expertise and installation equipment
to ensure optimum performance from this product. Should you
decide to install the amplifier yourself, please take the time
to read this manual thoroughly so as to familiarize yourself
with its installation requirements and setup procedures.
If you have any questions regarding the instructions in this
manual or any aspect of your amplifier's operation, please contact your
authorized JL Audio dealer for assistance. If you need further assistance,
please call our Technical Support Department
at (954) 443-1100 during business hours.
Downloaded from
www.Manualslib.com
manuals search engine
Werbung
Inhaltsverzeichnis

Verwandte Anleitungen für JL Audio JX 350/1


Inhaltszusammenfassung für JL Audio JX 350/1
- Seite 1 For maximum performance, we highly recommend that you have your new amplifier installed by an authorized JL Audio dealer. Your authorized dealer has the training, expertise and installation equipment to ensure optimum performance from this product.
- Seite 2 (pg. 11) (pg. 8) (pg. 6,7) (pg. 8) (pg. 9) Protection Status Input Sensitivity Left & Right Remote Indicator Control Preamp Input Jacks Level Control (pg. 11) (pg. 7) (pg. 6) (pg. 9) JL Audio Downloaded from www.Manualslib.com manuals search engine...
- Seite 3 Cooling Efficiency Considerations: Stupid Mistakes to Avoid: The outer shell of your JL Audio amplifier is • Check before drilling any holes in your vehicle designed to remove heat from the amplifier to make sure that you will not be drilling circuitry.
-
Seite 4: Product Description
If you have any questions, please contact your battery post terminal. authorized JL Audio dealer for assistance. 14) Turn on the source unit at a low level to double-check that the amplifier is 1) Disconnect the negative battery post configured correctly. -
Seite 5: Power Connections
The use of a #10 sheet metal screw and star washer to lock down the connection is advisable. Alternatively, you can use a specialized grounding lug, such as the JL Audio XB-MGLU. Any wires run through metal barriers (such The amplifier’s “+12 VDC” (positive) and as firewalls), must be protected with a high “Ground”... - Seite 6 1) Low-Level Inputs: A standard left/ right pair of RCA type jacks is used for preamp level (low-level) signal input on the JX monoblocks. This is the preferred connection method whenever available. JL Audio Downloaded from www.Manualslib.com manuals search engine...
- Seite 7 “INPUT SENSITIVITY” (GAIN) ADJUSTMENT 2) Hi-Level Inputs: If your system does not offer Located to the left of the input connectors is a a preamp level signal option, you can connect rotary control labeled “Input Sens.”. This rotary speaker level signals directly to the “Hi-Level control can be used to match the source unit’s Inputs”...
- Seite 8 I M P O R TA N T ! The "Preouts" of the JX250/1 and JX500/1 will not pass signals from the Hi-Level inputs. The JX1000/1D will pass signals from the Hi-Level inputs and will attenuate them to Low-Level. JL Audio Downloaded from www.Manualslib.com manuals search engine...
-
Seite 9: "Bass Boost" Control
“BASS BOOST” CONTROL REMOTE LEVEL CONTROL The JX monoblock includes a single band, With the optional RBC-1 Remote Level boost-only bass equalizer controlled by a rotary Control (sold separately), you can control the knob marked “Bass Boost”. This control has a subwoofer volume from the front of the vehicle. -
Seite 10: Speaker Output
Do not chassis ground any speakers connected to this or any other JL Audio amplifier. Doing so will cause the amplifier to go into protection. To connect the speaker wires to the amplifier,... - Seite 11 If your amplifier fails or malfunctions, please return it to your authorized JL Audio dealer so that it may be sent in to JL Audio for service. There are no user serviceable parts or fuses inside the amplifier. The unique nature of the circuitry in the JL Audio amplifiers requires specifically trained service personnel.
- Seite 12 44.7 V the voltage at the correct connectors (+ and –). 3Ω 44.7 V 8) Increase the “Input Sens.” control until the 2Ω 44.7 V target voltage is observed with the voltmeter. JL Audio Downloaded from www.Manualslib.com manuals search engine...
-
Seite 13: Specifications
APPENDIX B: Specifications Input Section (all models): JX500/1 Specifications: Low-Level Input: Single-ended with RCA jacks Amplifier Topology: Class A/B Low-Level Input Range: 200mV - 4V RMS Power Supply: Unregulated PWM switching type High-Level Input: Single-ended with molded connector Frequency Response: 10 - 150 Hz (+0/– 1 dB) High-Level Input Range: 2.0V - 10.0V RMS Signal to Noise Ratio: >90 dBA referred to highest rated power, >63 dBA... - Seite 14 Check the input connectors to ensure that they all are making good contact with the input jacks on the amplifier. JL Audio Downloaded from www.Manualslib.com manuals search engine...
- Seite 15 “My amplifier turns on, but there is no output” Check the input signal using an AC voltmeter to measure the voltage from the source unit while an appropriate test tone is played through the source unit (disconnect the input cables from the amplifier prior to this test).
-
Seite 16: Installation Notes
INSTALLATION NOTES: Use this diagram to document your amplifier’s switch and control positions. JL Audio Downloaded from www.Manualslib.com manuals search engine... - Seite 17 JX250/1 • JX500/1 • JX1000/1D Downloaded from www.Manualslib.com manuals search engine...
- Seite 18 All warranty returns should be sent to JL Audio ’s Amplifier Service Facility freight-prepaid through an authorized JL Audio dealer and must be accompanied by proof of purchase (a copy of the original sales receipt). Direct returns from consumers or non-authorized dealers will be refused unless specifically authorized by JL Audio with a valid return authorization number.
- Seite 19 MANUAL DEL PROPIETARIO Amplificadores Monobloque para Subwoofers Muchas gracias por adquirir un amplificador JL Audio para el sistema de audio de su automóvil. El amplificador se ha diseñado y fabricado de acuerdo con normas rigurosas a fin de asegurarle que disfrutará de la música en su vehículo durante muchos años.
-
Seite 20: Número De Serie
(pág. 9) Indicador Control de entrada de Control de estado de de nivel bajo nivel izquierdo de amplificación protección remoto de entrada y derecho (pág. 11) (pág. 9) (pág. 7) (pág. 6) JL Audio Downloaded from www.Manualslib.com manuals search engine... -
Seite 21: Planificación De La Instalación
Consideraciones relativas a la eficiencia o de la existencia de baches en el asfalto. de enfriamiento: La carcasa externa de su amplificador JL Audio Errores que hay que evitar: se ha diseñado para eliminar el calor del circuito • Antes de perforar un agujero en el vehículo, del amplificador. -
Seite 22: Descripción Del Producto
8) Conecte los cables de alimentación positivo Si tiene cualquier duda, póngase en contacto y negativo al amplificador. con un distribuidor autorizado de JL Audio para 9) Conecte el cable de encendido remoto solicitar asistencia. al amplificador. -
Seite 23: Conexiones De Alimentación
Puede utilizar, de Requisitos mínimos de tamaño del manera alternativa, un conector de toma a tierra cable de alimentación/toma a tierra: especializado como el XB-MGLU de JL Audio. JX250/1: 8 AWG Se deben proteger todos los cables que atraviesen JX500/1: 4 AWG barreras metálicas, como los cortafuegos, con una... - Seite 24 12 mm (0,5 pulgada) de aislamiento del monobloques JX. Este es el método de cable e insértelo en el receptáculo “Remote” conexión preferido cuando está disponible. JL Audio Downloaded from www.Manualslib.com manuals search engine...
- Seite 25 2) Entradas de alto nivel: Si su sistema AJUSTE DE “AMPLIFICACION DE ENTRADA” no incluye una opción de señal de bajonivel, (GANANCIA) puede conectar las señales de nivel A la izquierda de los conectores de entrada de altavoces directamente en los conectores hay un control giratorio denominado “Hi-Level Inputs”...
- Seite 26 Las salidas de bajo nivel del JX250/1 y el JX500/1 no transmiten señales de las entradas de alto nivel. El JX1000/1D enviará señales de las entradas de alto nivel y las atenuará a bajo nivel. JL Audio Downloaded from www.Manualslib.com manuals search engine...
- Seite 27 CONTROL DE REFUERZO DE BAJOS CONTROL DE NIVEL REMOTO El monobloque JX incluye un ecualizador Con el Control de nivel remoto RBC-1 de bajos de una sola banda, solo de refuerzo, opcional (que se vende por separado), puede controlado con una perilla giratoria con controlar el volumen del subwoofer desde la parte la etiqueta “Bass Boost”...
- Seite 28 12 mm (0,5 pulgada) de aislamiento de cada cable de altavoz e insértelos en el conector apropiado (observando la polaridad correcta). Luego, apriete el conector con la llave hexagonal de 2,5 mm provista. JL Audio Downloaded from www.Manualslib.com manuals search engine...
- Seite 29 CIRCUITO DE PROTECCIÓN Si el amplificador falla o no funciona correctamente, devuélvalo al distribuidor autorizado de JL Audio para que lo envíe al servicio técnico de JL Audio. No hay piezas ni fusibles que el usuario pueda reparar dentro del amplificador. La naturaleza única del circuito de los amplificadores JL Audio...
- Seite 30 7) Conecte el voltímetro de CA en los conectores de salida de altavoces del amplificador. 3 Ω 44,7 V Asegúrese de probar el voltaje en los 2 Ω 44,7 V conectores adecuados (+ y –). JL Audio Downloaded from www.Manualslib.com manuals search engine...
- Seite 31 APÉNDICE B: Especificaciones del JX500/1: Especificaciones Topología del amplificador: Clase A/B Fuente de alimentación: Tipo PWM conmutada no regulada Sección de entrada (todos los modelos): Respuesta de frecuencia: 10 - 150 Hz (+0/– 1 dB) Entrada de bajo nivel: De una sola terminación, Relación señal/ruido: >90 dBA con referencia a la con conectores RCA potencia nominal más alta, >63 dBA con referencia a 1 W...
- Seite 32 Compruebe los conectores de entrada para asegurarse de que todos hagan buen contacto con los conectores de entrada del amplificador. JL Audio Downloaded from www.Manualslib.com manuals search engine...
- Seite 33 “Mi amplificador se enciende pero no hay salida” Compruebe la señal de entrada mediante un voltímetro de CA para medir el voltaje de la unidad fuente mientras se reproduce un tono de prueba adecuado a través de la unidad fuente (desconecte los cables de entrada del amplificador antes de efectuar esta prueba).
-
Seite 34: Notas Sobre La Instalación
NOTAS SOBRE LA INSTALACIÓN: Use el diagrama siguiente para documentar las posiciones de los interruptores y controles de su amplificador. JL Audio Downloaded from www.Manualslib.com manuals search engine... - Seite 35 JX250/1 • JX500/1 • JX1000/1D Downloaded from www.Manualslib.com manuals search engine...
- Seite 36 Los productos no defectuosos recibidos se devolverán con flete de pago contra reembolso. El cliente es responsable de los cargos de transporte y seguro cuando envíe el producto a JL Audio. Los daños durante el envío para devolución no están cubiertos por la garantía.
- Seite 37 Installationsanweisungen und Einbauhinweisen vertraut. Falls Sie irgendwelche Fragen bezüglich dieses Benutzerhandbuchs oder zum Betrieb des Verstärkers haben, wenden Sie sich bitte an Ihren JL Audio Fachhändler. Falls Sie weitere Unterstützung zum Produkt benötigen, wenden Sie sich bitte an die Audio Design GmbH Support Hotline (JL Audio Vertrieb Deutschland) während der üblichen Geschäftszeiten:...
-
Seite 38: Schützen Sie Ihr Gehör
Ausgangsbuchsen Anzeige Regler Eingangs-Buchsen Bass-Boost Bass- (S. 11) (S. 8) (S. 6,7) (S. 9) (S. 9) Schutzstatus- Eingangsempfind- Cinch-Eingangs- Fernbedienungs- Anzeige lichkeits-Regler Buchsen Anschluss (S. 11) (S. 7) (S. 6,7) (S. 9,10) JL Audio Downloaded from www.Manualslib.com manuals search engine... -
Seite 39: Verwendungsbereich
• Verlegen Sie niemals elektrische Leitungen außerhalb oder unterhalb des Fahrzeugs. Dies Kühlung: ist extrem gefährlich und kann zu ernsthaften Ihr JL Audio Verstärker ist so entworfen, dass Schäden am Fahrzeug und zu Verletzungen der der Kühlkörper die enstehende Hitze optimal Insassen führen. -
Seite 40: Produktbeschreibung
PRODUKTBESCHREIBUNG JL Audio JX Monoblock Subwoofer Verstärker 4) Verlegen Sie die Audio-Signalkabel (RCA sind speziell dafür ausgelegt, Subwoofer Kabel) und die Remote-Steuerleitung vom anzutreiben. Ihr Frequenzgang ist auf einen Steuergerät zum Einbauort des Verstärkers. Bereich unter 150 Hz ausgelegt, was bedeutet,... - Seite 41 Sternscheibe wird an dieser Stelle empfohlen. Minimumanforderungen an die Grösse von Als Alternative könnnen Sie eine spezielle Strom-/ Massekabel: Erdungsklemme wie die JL Audio XB-MGLU JX250/1: 10mm2 benutzen. Alle Kabel die durch Metall JX500/1: 25mm2 führen, sollten mit einer hochwertigen...
-
Seite 42: Verstärkereingänge
+12V am „Remote“-Anschluss anliegen und wieder abgeschaltet, wenn das Steuergerät ausgeschaltet wird. Falls Ihr Steuergerät nicht über eine Einschaltleitung verfügt, kann eine andere 12V-Leitung benutzt werden, die mit der Zündung des Fahrzeugs aktiv geschaltet wird. JL Audio Downloaded from www.Manualslib.com manuals search engine... - Seite 43 W I C H T I G ! Der Verstärker kann sowohl mit einem Stellen Sie bitte sicher, dass Sie die korrekte Mono- als auch einem Stereo-Signal betrieben Polarität beachten, während Sie den Prozess der werden. Die Eingangsschaltung summiert high-level Verbindung ausführen. Eventuelle für den internen Verstärker automatisch das Fehler werden den Bass und das Stereosignal Stereo-Signal zu einem Mono-Signal.
-
Seite 44: Tiefpass-Filtereinstellungen
Lautstärke liegt, die gemäß den Anweisungen in Anhang A (Seite 12) eingestellt wurde. Dies gilt für alle Kanäle und Verstärker im System. Dies würde Verzerrungen und mögliche Schäden an den Lautsprechern verursachen. JL Audio Downloaded from www.Manualslib.com manuals search engine... -
Seite 45: Vorverstärker-Ausgänge
VORVERSTÄRKER-AUSGÄNGE „BASS BOOST“ REGLER Der JX Monoblock beinhaltet einen Der JX Monoblock besitzt einen Single-Band- konfigurierbaren Vorverstärker-Ausgangsbereich, Bassequalizer, der mit Hilfe des Drehreglers wodurch Mehrfachverstärkersysteme („Bass Boost“) eingestellt werden kann. Der erzeugt werden können. Dieser Bereich Regelbereich erstreckt sich von 0 dB (ganz links besteht aus einem Paar von RCA Buchsen, unten) bis +12 dB (ganz rechts unten) und liegt gekennzeichnet als „Preouts“. -
Seite 46: Lautsprecherausgänge
„Speaker Output (Mono)“ möglich. Die und das System einschalten, stellen Sie sicher, Doppel-Anschlüsse ermöglichen zwei getrennte dass alle Kontrolleinstellungen gemäß den Lautsprecherkabel, die parallel verbunden mit Anforderungen des Verstärkers dem Mono-Ausgang des Verstärkers sind. ausgerichtet sind. JL Audio Downloaded from www.Manualslib.com manuals search engine... -
Seite 47: Kundendienst Für Jl Audio Verstärker
Wenn Ihr Verstärker defekt sein sollte oder gar ausfällt, wenden Sie sich bitte an einen autorisierten JLAudio Händler, der ihn bei Bedarf zu JL Audio schicken kann. Es gibt keine endnutzerdienlichen Teile oder Sicherungen im Verstärker. Da es sich um eine einmalige Schaltung im Innern des Verstärkers handelt,... - Seite 48 Starten Sie dann die Wiedergabe der Sinuskurve, die für den JX (50 Hz werden 4Ω 36.9 V empfohlen) geeignet ist, bei 3/4 der Maximal- 3Ω 34.6 V Lautstärke des Steuergeräts. 2Ω 31.6 V JL Audio Downloaded from www.Manualslib.com manuals search engine...
- Seite 49 ANHANG B: Technische Daten Eingangsbereich (betrifft alle Modelle): Angaben zu JX500/1: Low-level Eingang: einendig mit RCA-Eingangsbuchsen Verstärker-Topologie: Class A/B Low-level Eingangsbereich: 200mV - 4V RMS Netzteil: Ungeregelte PWM Schaltung High-level Eingang: einendig mit einem Anschluss aus Plastik Frequenzgang: 10 - 150 Hz (+0/-1 dB) High-level Eingangsbereich: 2.0V –...
-
Seite 50: Anhang C: Fehlerbehebung
Anschlüsse und auf ausreichend abisolierte Kontaktfläche an den Kabeln im Innern der Anschlüsse. Überprüfen Sie die Verbindungen zum Verstärkereingang und achten Sie darauf, dass alle Kabel und Stecker der Audioverkabelung fest sitzen. JL Audio Downloaded from www.Manualslib.com manuals search engine... - Seite 51 „Der Verstärker schaltet sich ein, aber es ist kein Audiosignal zu hören“ Überprüfen Sie das Ausgangssignal des Steuergeräts (Autoradio) mit einem Gleichstrom-Voltmeter während ein Testsignal wiedergegeben wird (entfernen Sie dafür die Verkabelung am Verstärkereingang). Die benutzte Frequenz des Testsignals sollte der Verstärkeranwendung entsprechen (Beispiel: 50 Hz für Subwoofer- Anwendungen oder 1 kHz für Mittelhochton-Anwendungen).
- Seite 52 INSTALLATIONSNOTZIEN: Benutzen Sie dieses Diagramm um die Schalterstellungen und Reglereinstellungen zu vermerken. JL Audio Downloaded from www.Manualslib.com manuals search engine...
- Seite 53 JX250/1 • JX500/1 • JX1000/1D Downloaded from www.Manualslib.com manuals search engine...
-
Seite 54: Internationale Garantiebedingungen
Einkäufe von Produkten, die außerhalb der Vereinigten Staaten von Amerika getätigt wurden, haben nur Anrecht auf Garantievereinbarungen, die mit dem jeweiligen Händler festgesetzt wurden, nicht mit JL Audio, Inc. JL Audio Vertrieb für Deutschland: Audio Design GmbH Am Breilingsweg 3, D-76709 Kronau Tel. -
Seite 55: Manuel D'utilisation
Si vous avez la moindre question relative aux instructions de ce manuel ou à tout aspect du fonctionnement de votre amplificateur, veuillez contacter votre revendeur JL Audio agréé pour obtenir de l’ a ide. Si vous avez besoin d’une aide supplémentaire, veuillez contacter notre Service d’ a ssistance technique au (954) 443-1100 aux heures de bureau. -
Seite 56: Numéro De Série
(pg. 9) Prises jack Témoin de statut Commande Contrôle de d’entrée de préampli de protection de niveau à distance gauche et droite sensibilité d’entrée (pg. 11) (pg. 7) (pg. 9) (pg. 6) JL Audio Downloaded from www.Manualslib.com manuals search engine... - Seite 57 La coque externe de votre amplificateur ou tout autre système essentiel du véhicule. JL Audio est conçue pour évacuer la chaleur • Ne faites pas passer le câblage du système en des circuits. Pour des performances de dehors ou en dessous du véhicule.
-
Seite 58: Description Du Produit
DESCRIPTION DU PRODUIT Les amplificateurs de caisson d’extrêmes 6) Trouvez un point de masse métallique solide graves monobloc JX de JL Audio sont près de l’amplificateur et connectez le fil spécialement conçus pour gérer des subwoofers. électrique négatif à l’aide du matériel approprié. - Seite 59 Vous pouvez également et “Ground” (masse) sont conçues pour accepter utiliser une cosse de masse spéciale, telle que la JL Audio XB-MGLU. Tous les câbles courant sur les câbles d’alimentation allant jusqu’à 5,19 mm des barrières métalliques (comme des pare-feux) de diamètre.
- Seite 60 « Remote » (à distance) sur le Cette méthode est la méthode de connexion connecteur d’alimentation. Serrez le connecteur conseillée lorsqu’elle est possible. vers le bas à l’aide de la clé hexagonale de 2,5 mm fournie. JL Audio Downloaded from www.Manualslib.com manuals search engine...
- Seite 61 RÉGLAGE DE LA SENSIBILITÉ 2) Entrées de niveau élevé : Si votre système n’offre D’ENTRÉE (GAIN) pas d’option de signal de niveau de préampli, Un bouton de commande rotatif portant la vous pouvez connecter les signaux de niveau motion « Input Sens. » (Sens. d’entrée) se trouve de haut-parleur directement au connecteur à...
- Seite 62 Les « Preouts » (sorties de ligne) des JX250/1 et JX500/1 n’enverront pas de signaux à partir des entrées de niveau élevé. Le JX1000/1D transmettra les signaux des entrées de niveau élevé et les atténuera en niveau faible. JL Audio Downloaded from www.Manualslib.com manuals search engine...
- Seite 63 COMMANDE « BASS BOOST » COMMANDE DE NIVEAU À DISTANCE (SURALIMENTATION DES BASSES) Avec la commande de niveau à distance Le monobloc JX inclut un a égalisateur RBC-1 facultative (vendue séparément), vous à bande unique, à suralimentation des basses pouvez contrôler le volume de caisson d’ e xtrêmes uniquement, commandé...
- Seite 64 à passer en mode protection. Ne mettez pas à la masse du châssis des haut- parleurs connectés à cet amplificateur ou à tout autre amplificateur JL Audio. Cela pourrait conduire l’amplificateur à passer en mode protection. Pour connecter les câbles de haut-parleur à l’amplificateur, retirez 12 mm de la gaine...
- Seite 65 L’amplificateur ne contient aucune pièce ni aucun fusible pouvant être réparés par l’utilisateur. La nature unique du circuit des amplificateurs JL Audio exige que toute réparation soit faite par du personnel ayant reçu une formation adéquate. Ne tentez pas de réparer l’amplificateur vous- même ou de le faire réparer par des réparateurs...
- Seite 66 44,7 V 7) Connectez le voltmètre CA aux connecteurs 3 Ω 44,7 V de sortie de haut-parleur de l’amplificateur. 2 Ω 44,7 V Veillez à tester la tension au niveau des bons connecteurs (+ et –). JL Audio Downloaded from www.Manualslib.com manuals search engine...
- Seite 67 ANNEXE B : Caractéristiques Caractéristiques du JX500/1 : Topologie de l’amplificateur : Classe A/B Alimentation Section d’entrée (tous modèles) : Electrique : Type de commutation PWM non régulée Entrée de niveau faible : Extrémité simple avec prises Réponse de fréquence : 10 - 150 Hz (+0/– 1 dB) jack RCA Taux signal/bruit : Plage d’entrées de niveau faible : 200 mV - 4 V efficaces >90 dBA par rapport à...
- Seite 68 à l’intérieur du bloc de dérivation. Vérifiez les connecteurs d’ e ntrée pour vous assurer qu’ils sont correctement en contact avec les prises d’ e ntrée de l’amplificateur. JL Audio Downloaded from www.Manualslib.com manuals search engine...
- Seite 69 « Mon amplificateur s’allume, mais il n’y a aucune sortie » Vérifiez le signal d’ e ntrée à l’aide d’un voltmètre CA pour mesurer la tension de l’unité source au moment où une tonalité de test appropriée est lue par l’unité source (déconnectez les câbles d’...
-
Seite 70: Remarques D'installation
REMARQUES D’INSTALLATION : Utilisez ce schéma pour connaître les positions des commandes et des contacteurs de votre amplificateur. JL Audio Downloaded from www.Manualslib.com manuals search engine... - Seite 71 JX250/1 • JX500/1 • JX1000/1D Downloaded from www.Manualslib.com manuals search engine...
- Seite 72 Les articles non défectueux reçus seront renvoyés et les frais seront imputés au destinataire. Le client se verra imputer les frais d’ e xpédition et d’assurance pour l’ e nvoi du produit à JL Audio. Les dommages causés aux produits retournés lors du transport ne sont pas couverts par cette garantie.