Herunterladen Inhalt Inhalt Diese Seite drucken
Scosche MAGICGRIP MGQD Anleitung

Scosche MAGICGRIP MGQD Anleitung

Sensor uno greif kabellose ladehalterung

Werbung

Verfügbare Sprachen

Verfügbare Sprachen

Register your product onllM at
� S'CC,S'CI-IE"
MAGICGRIP
SENSE AND GRIP
WIRELESS CHARGING
READ INSTRUCTIONS COMPLETELY BEFORE
INSTALLING THIS MOUNT KIT.
WARNING: Use caution whenever removing or handling plastic parts
of any vehicle. Unnecessary force or pressure can cause pieces to
crack or break. Please use a plastic card to remove the metal plates.
Remove adhesive residue with a non-abrasive cleaner.
AIRBAG WARNING: Do not place this pad, or any other object,
@
on or near the airbag. In the event of deployment, objects placed
on or near airbag could cause serious Injury.
IF YOU NEED ASSISTANCE OR REPLACEMENT PARTS
CALL US TOLL FREE: 1-800-363-4490 X1
HOURS MON-FRI 8AM-5:30PM (PST]
©2019 SCOSCHE INDUSTRIES, INC.
www.scosche.com/register
MOUNT
IMPORTANT!
DO NOT RETURN PRODUCT
TO THE RETAILER
SATURDAY BAM-2PM (PST]
MGQD
DASH
SI 300MGQD 8/19

Werbung

Inhaltsverzeichnis
loading

Inhaltszusammenfassung für Scosche MAGICGRIP MGQD

  • Seite 1 Injury. IMPORTANT! DO NOT RETURN PRODUCT TO THE RETAILER IF YOU NEED ASSISTANCE OR REPLACEMENT PARTS CALL US TOLL FREE: 1-800-363-4490 X1 HOURS MON-FRI 8AM-5:30PM (PST] SATURDAY BAM-2PM (PST] ©2019 SCOSCHE INDUSTRIES, INC. SI 300MGQD 8/19...
  • Seite 2: Parts Included

    PARTS INCLUDED (1) Wireless charging mount with motorized support arms ° (1) Dash mount with dual 360 rotation (1) Car power adapter (1) USB-C charge cable (2) Wire clips (1) Cleaning wipe MAGICGRIP ™ CHARGING MOUNT 1a. SENSE AND GRIP MOTORIZED SUPPORT ARMS 1 b.
  • Seite 4 ™ MAGICGRIP "SENSE AND GRIP" Place your device against the charging pad as shown (A). ™ When the charging areas on the device and MAGICGRIP are aligned, the support arms will sense contact and close automatically (B). To remove the device, gently pivot the device away from the ™...
  • Seite 5 MAGICGRIP ™ TRANSMITTER PLACEMENT IN VEHICLES It is possible for the transmitter to interfere with some wireless systems within a car. Specifically, key fobs with immobilizers, keyless start systems or tire pressure monitors. Therefore, it is recommended to test the location of your transmitter before deciding on final placement.
  • Seite 6 DASH MOUNT 1. Clean the dash surface with supplied cleaning wipe (A). Note: Wipe may cause discoloration of certain plastics, vinyls and painted surfaces. It is recommended to test in an inconspicuous area first. 2. Peel the adhesive backing from the bottom of the mounting base (8), and place in position (C).
  • Seite 7 Plug the magnetic mount into your vehicle's 12V socket using the included USB-C cable and 12V power adapter as shown (A & B). Optional: Attach the included adhesive clips (C) to the dash or console to secure the cable. LED INDICATOR &...
  • Seite 8: Fcc Statement

    This equipment complies with IC RSS-102 radiation exposure limits set forth for an uncontrolled environment. This transmitter must not be co-located or operating in conjunction with any other antenna or transmitter. For complete warranty details, please visit us at www.scosche.com or call (800) 363-4490...
  • Seite 9 Enregistrez votre produit en ligne 8 MGQD @ SCDSCI-IE" MAGICGRIP"" DASH MONTAGE DE RECHARGE SANS FIL « SENSE AND GRIP » LISEZ LES INSTRUCTIONS COMPLETEMENT AVANT D'INSTALLER CET ENSEMBLE DE SUPPORT. MISE EN GARDE : Faites attention lorsque vous enlevez ou manipulez des pieces de plastique provenant de n'importe quel v0hicule.
  • Seite 10: Specifications

    LES PIECES COMPRENNENT ° (1) Montage magnetique avec recharge sans Iii et rotation 360 ° (1) Montage pour tableau de bord avec double rotation (1) Adaptateur d'alimentation pour voiture (1) Cable de charge USB-C (2) Serre-fils (1) lngette de nettoyage MONTAGE DE RSANS FIL ECHARGE M AGICGRIP 1a, BRAS DE SUPPORT MOTORISl':S •...
  • Seite 12: Montage

    MONTAGE SENSE AND GRIP • MAGICGRIP"' « Placez votre appareil contra la plaquette de recharge tel qu'illustre (A). Quand les zones de recharge sur l'appareil et le MAGICGRIP"' sont alignees, les bras de support detectent un contact et se referment automatiquement (B). Pour retirer l'appareil, tirez l'appareil delicatement pour l'eloigner de la plaquette de recharge (C).
  • Seite 13 PLACEMENT DE L'EMETTEUR MAGICGRIP DANS LES VEHICULES II est possible que l'emetteur interfere avec certains systemes sans fol dans une voiture. Plus precisement, les porte-cles avec antidf!marrage, systemes de demarrage sans cle, ou les moniteurs de pression des pneus. Par consequent, ii est recommande de tester !'emplacement de l'emetteur avant de choisir l'emplacement final.
  • Seite 14 MONTAGE POUR TABLEAU DE BORD 1. Nettoyez la surface du tableau de bord avec la lingette fournie (A). Remarque : Le chiffon de nettoyage peu causer une decoloration de certains plastiques, vinyles et surfaces peintes. II est recommande d'en faire l'essai sur une surface non visible.
  • Seite 15 CHARGEMENT SANS FI L Branchez le support magnetique dans la prise de 12 V de votre vehicule l'aide du cable USB-Cet de l'adaptateur de 12 V tel qu'illustre (A et B). En option : Fixez les attaches adhesivesincluses (C) sur le tableau de bord ou •...
  • Seite 16 DECLARATION DE CONFORMITE FCC Cet appareil est conforme aux fegles de la FCC section 15. L'utilisation est assujettie aux deux conditions sulvantes: (1) Cet apparel! ne devra pas causer d'interlerence, et (2) cet appareil doit accepter toute interlerence qui pourrait &tre captEle, y compris l'interlerence qui pourrait causer un fonctionnement ind8Sirable.
  • Seite 17 Registre su producto por internet en MGQD @SCDSCI-IE" MAGICGRIP"' DASH SOPORTE DE CARGA INAIJ\MBRICO CON SENSOR V SUJECION LEA LAS INTRUCCIONES COMPLETAMENTE ANTES DE INSTALAR ESTE SOPORTE. Siempre tenga cuidado al desmontar o manipular ADVERTENCIA: piezas plc\sticas de cualquier vehfculo. La fuerza o presi6n innecesarias pueden hacer que se rajen o se rompan.
  • Seite 18 PARTES INCLUIDAS (1) Soporte de carga inalambrico con brazes de apoyo motorizado ° (1) Montaje para 1ablero con rotaci6n dual 360 (1) Adaptador de alimentaci6n para auto (1) Cable de carga USB-C (2) Ganchos para cable (1) Pano de limpieza SOPORTE DE CARGA MAGICGRIP""...
  • Seite 20 MAGICGRIP"' "SENSE AND GRIP" (sensory sujeci6n) Coloque su dispositivo contra la almohadilla de carga coma se indica (A). Cuando las areas de carga del dispositivo y del MAGICGRIP"" esten alineadas, los brazes de sujeci6n detectaran el contacto y se cerraran automaticamente (B). Para retirar el dispositivo, separe suavemente el dispositivo de la almohadilla de carga (C).
  • Seite 21 UBICACION DEL TRANSMISOR MAGICGRIP EN VEH(CULOS El transmisor puede llegar a interfenr con algunos sistemas inalambncos del auto. Especificamente llaveros con inmovilizadores, sistemas de arranque inal8.mbricos o monitores de presi6n de los neumaticos. Per lo tanto, le recomendamos probar la ubicaci6n de su transmisor antes de decidir su ubicaci6n definitiva.
  • Seite 22 MONTAJE PARA TABLERO 1. Limpie la superficie del tablero con el paf\o de limpieza incluido (A). Nota: El trapito de limpieza puede descolorar ciertas superficies de plastico, vinilicas y pintadas. Le recomendamos probar primero en un area no visible. 2. Despegue el papel protec1or de la parte inferior de la base de montaje (B) y col6quela en su posici6n (C).
  • Seite 23 CARGADOR INALAMBRICO Enchufe la base magnetica en el enchufe de 12 V de su vehiculo con el cable US8-C y el adaptador de 12 V incluidos coma se muestra (A y 8). Opclonal: Coloque los ganchos autoadhesivos incluidos (C) en el tablero o la consola para fijar el cable.
  • Seite 24 El t8miino "IC:" antes del nUmero de certificaci6n / registro solo significa que se cumplieron las especificaciones t8Cnicas de Industry Canada. Este producto cumple con las especificaciones t8Cnicas aplicables de Industry Canada, Por detalles acerca de la garantfa complete, visite www.scosche.com o llame al (800) 363•4490...
  • Seite 25: Wichtiger Hinweis

    Reglstrleren Sle 1hr Produkt onllne unter � SCDSCI-IE" MGQD ™ MAGICGRIP DASH SENSOR UNO GREIF KABELLOSE LADEHALTERUNG LESEN SIE DIE ANLEITUNGEN VOLLSTA.NDIG DURCH BEVOR SIE DAS MONTAGE-KIT ANBRINGEN. WARNUNG: Seien Sie beim Enlfernen oder im Umgang mit Kunststoffteilen von Autos immer vorsichtig. UnnOtige Krafteinwirkung oder Druck kann dazu fOhren, dass Stocke reisen oder abbrechen.
  • Seite 26: Mitgelieferte Teile

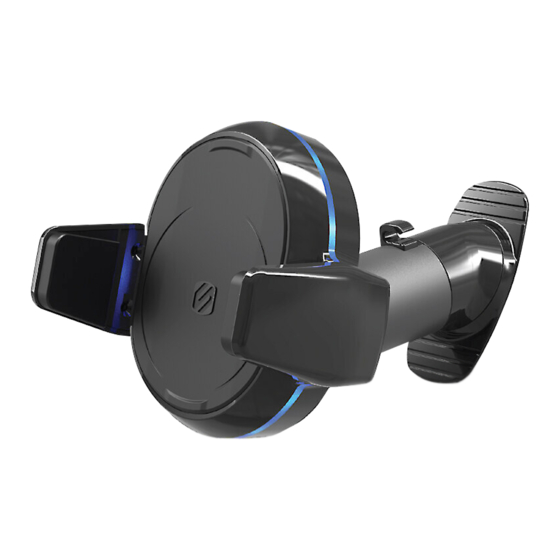
    MITGELIEFERTE TEILE (1) Kabellose Ladehalterung mit motorisierten Stutzarmen (1) Armaturenbrett-Halterung mit dualer 360 ° -Drehung (1) Fahrzeug-Netzadapter (1) Mikro-USB zu USB-Ladekabel (2) Drahtclips (1) Reinigungstuch MAGICGRIP ™ L ADEHALTERUNG 1a. SENSOR UNO GREIF MOTORISIERTE STUTZARME 1 b. QI KABELLOSER LADEBEREICH 1c.
  • Seite 28 MAGICGRIP ™ ,.SENSOR UNO GREIF" Platzieren Sie 1hr Gerilt wie abgebildet gegen das Ladepad (A). ™ Wenn die Ladebereiche am Gerilt und MAGICGRIP ausgerichlet sind, erkennen die Stiitzarme den Konlakt und schlieBen aulomalisch (8). Um das Gerat zu entfernen, nehmen Sie das Gerat vorsichtig ™...
  • Seite 29 ™ MAGICGRIP SENDERANORDNUNG IN FAHRZEUGEN Es besteht die Moglichkeit, dass der Sender einige Funksysteme in lhrem Auto beeintrlichtigt. lnsbesondere Schlusselanhlinger mil Wegfahrsperren, schlussellose Anlasssysteme oder Reifendruckkontrollen. Daher wird empfohlen, zuerst den Standort lhres Senders zu testen, bevor Sie die endgultige Entscheidung der Platzierung treffen. Sie konnen die meisten Storungen durch Beachtung der folgenden Platzierungsrichtlinien verrnindern: •...
  • Seite 30: Armaturenbrett-Halterung

    ARMATURENBRETT-HALTERUNG 1. Saubern Sie die Montageflache mitdem mitgelieferten Reinigungstuch (A). Anmerkung: Reinigen kann Verfarbung von bestimmten Kunststoffen, Vinyls und lackierten Oberflachen hervorrufen. Es wird empfohlen, zuerst eine unauffallige Stelle zu testen. 2. Ziehen Sie die Verpackung von der Unterseite des ab (B) und setzen Sie ihn auf die gewunschte Stelle (C).
  • Seite 31 DRAHTLOSES LADEN Stacken Sie die Magnethalterung mil dem mitgelieferten USB-C-Kabel und das 12V-Netzteil, wie abgebildet, in die 12V-Steckdose lhres Fahrzeugs (A und B). Optional: Befestigen Sie die mitgelieferten Heftklammern (C) am Armaturenbrett oder der Bedienkonsole, um das Kabel zu sichern. LED-ANZEIGE &...
  • Seite 32: Fcc-Bestimmungen

    Die Bezeichnung "IC:• vor der Zertifizierungs- /RegisbierungsnL111mer zeigt nur an, dass die technischen Spezifikationen von Industry Canada eingehalten wurden. Oieses Produkt entsprich den gUltigen, technischen Spezifikationen von Industry Canada Fiir vollstiindige Garantiedetails, besuchen Sie uns bitte unter www.scosche.com oder kontaktieren Sia uns unter (8001363-4490...

Inhaltsverzeichnis