Herunterladen Diese Seite drucken
Scosche magicMOUNT MPQ2V Handbuch
Vorschau ausblenden Andere Handbücher für magicMOUNT MPQ2V:

Werbung

Verfügbare Sprachen

Verfügbare Sprachen

Register your product onllM at
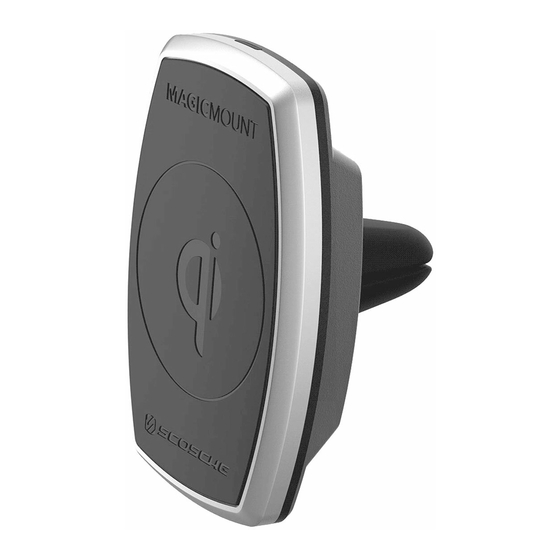
MAGICMOUNT"
MAGNETIC MOUNT
WITH Qi WIRELESS CHARGING
READ INSTRUCTIONS COMPLETELY BEFORE
INSTALLING THIS MOUNT KIT.
WARNING: Do not use the magnetic mount with any hard-drive
based devices such as: iPod classic, iPod video and Zune MP3
players. Use caution whenever removing or handling plastic parts
of any vehicle. Unnecessary force or pressure can cause pieces
to crack or break. Please use a plastic card to remove the metal
plates. Remove adhesive residue w�h a non-abrasive cleaner.
AIRBAG WARNING: Do not place this pad, or any other object,
on or near the airbag. In the event of deployment, objects
placed on or near airbag could cause serious injury.
Caution: This magnetic mount is not a toy. The small magnets are
@
harmful if swallowed. Keep away from children.
IF YOU NEEO ASSISTANCE OR REPLACEMENT PARTS
CALL US TOLL
HOURS MON-FRI 8AM-5:30PM (PS1J
©2018 SCOSCHE INDUSTRIES, INC.
www.scosche.com/register
IMPORTANT!
DO NOT RETURN PRODUCT
TO THE RETAILER
FREE:
1-800-363-4490 X1
SATURDAY 8AM-2PM (PS1J
MPQ2V
CHARGE
SI 300MPQ2V 9/18

Werbung

loading

Inhaltszusammenfassung für Scosche magicMOUNT MPQ2V

  • Seite 1 Keep away from children. IMPORTANT! DO NOT RETURN PRODUCT TO THE RETAILER IF YOU NEEO ASSISTANCE OR REPLACEMENT PARTS FREE: CALL US TOLL 1-800-363-4490 X1 HOURS MON-FRI 8AM-5:30PM (PS1J SATURDAY 8AM-2PM (PS1J ©2018 SCOSCHE INDUSTRIES, INC. SI 300MPQ2V 9/18...
  • Seite 2 PARTS INCLUDED (1) Magnetic mount with wireless charging and vent mount (1) Large single plate with template guide for mounting to device (2) Small metal plates with template guide for mounting to case (2) Small metal plates with template guide for Galaxy S9/S9+ (1) Car power adapter (1) Micro-USB to USB charge cable (2) Wire clips...
  • Seite 3 :ij�:7;; :'.::!�-=::_:.. -=--�...
  • Seite 4 MAGICPLATE™ MOUNTING OPTIONS NOTE: For mounting directly to device, use the large single plate with template guide as shown. 1. Remove paper backing from the plate. 2. Line up the corresponding arrows on the template guide to the bottom of your phone.
  • Seite 5 MAGICPLATE™ MOUNTING OPTIONS (cont'd) NOTE: For mounting to case, use the (2) small plates with the integrated template guide as shown. 1 Remove the whtte paper acking from oth plates. 2. Line up the corresponding arrows on the template guide to the bottom of your phone.
  • Seite 6 Slowly lift up and remove the plate. Do not use any heat or liquids to remove the plate, due to risk of damaging your phone. Contact Scosche C ustomer Service for any additional as sistance at...
  • Seite 7 MAGICMOUNT'" CHARGE TRANSMITTER PLACEMENT IN VEHICLES It is possible for the transmitter to interfere with some wireless systems within a (< car. Specifically, key fobs with immobilizers, keyless start systems or tire pressure monitors. Therefore, it is recommended to test the location of your transmitter before deciding on final placement.
  • Seite 8 ATTACHING THE UNIVERSAL HOLDER Insert T-notch hitch into the T-notch opening on back of holder (A). Slide T-notch forward and up into the slot (B) to lock the mounting plate in place. Listen for the "click" sound to ensure T-notch is locked (C). REMOVAL: Slide T-notch hitch down (D) to release mounting plate from holder (E).
  • Seite 9 ATTACHING THE MOUNT TO THE VENT Works with all vent styles (A). Rotate mount• (B) to align vent clips with vent louvers (C), according to vent direction. ° *Note: Vent mount rotates 360...
  • Seite 10: Wireless Charging

    WIRELESS CHARGING Plug the magnetic mount into your vehicle's 12V socket using the included micro-USB to USB cable and 12V power adapter as shown (A & B). Optional: Attach the included adhesive clips (C) to the dash or console to secure the cable. The LED indicator on the top of the mount (D) illuminates as follows: �=I•...
  • Seite 11 When placing your device on the magnetic mount, align the top & bottom magnetic surfaces on the back of your device with the top & bottom magnetic areas on the mount. For complete warranty details, please visit us at www.scosche.com or call (800) 363-4490...
  • Seite 12: Fcc Statement

    FCC STATEMENT This equipment has been tested and found to comply wijh the limijs for device, pursuant to Part 18 of the FCC Rules. These limits are designed to provide reasonable protection against harmful interference in a residential installation. CAUTION: Changes or modifications not expressly approved by the party compliance could void the user's authority to responsible for...
  • Seite 13 Enregistrez votm p,oduit en ligne 8 MPQ2V ° MAGICMOUN1 CHARGE SUPPORT MAGNETIQUE AVEC CHARGEMENT Qi SANS FIL LISEZ LES INSTRUCTIONS COMPLETEMENT AVANT D'INSTALLER CET ENSEMBLE DE SUPPORT. MISE EN GARDE : Ne pas employer la fixation magnetique avec tous les peripheriques de disque dur base tels que: l'iPod classic, iPod video et des lecteurs MP3 Zune.
  • Seite 14 LES PIECES COMPRENNENT (1) Support magnetique avec chargement sans fil et support d'event (1) Grande plaque unique avec guide gabarij destinee au montage d'un appareil (2) Petites plaques metalliques avec guide gabaril pour le montage a l'etu (2) Petites plaques metalliques avec guide gabarit pour le montage a Galaxy S9 ou S9 (1) Adaptateur d'alimentation pour voiture (1) Micro-USB to USB charge cable...
  • Seite 15 :ij�:7;; :'.::!�-=::_:.. -=--�...
  • Seite 16 OPTIONS DE MONTAGE MAGICPLATE REMARQUE : Pour le montage directement sur l'appareil, lllilisez la grande plaque unique avec le guide garabit comma illustr8. 1. Retirez la pellicule protectrice de la plaque. 2. Alignez les fleches correspondantes sur le guide gabarit au bas de votre telephone.
  • Seite 17 OPTIONS DE MONTAGE MAGICPLATE (suite) REMARQUE : Pour le montage sur l"etui de l'appareil, utilisez les petites plaques (2) avec le guide gabarit comme indique. Retirez la pellicule de papier blanc des deux plaques. 2. Alignez les 1I/Jches correspondantes sur le guide gabarit au bas de votre telephone.
  • Seite 18 Ne pas utiliser de chaleur ou de liquides pour eliminer la plaque, en raison du risque d'endommager votre telephone. Contactez le service clientele de Scosche pour toute assistance supplementaire au 800.363.4490 Ext. 1 ou customerservice@scosche.com.
  • Seite 19 PLACEMENT DE L'EMETTEUR MAGICMOUNT CHARGE DANS LES VEHICULES La plupart des problemes de brouillage seront minimises en prenant en consideration les directives de placement suivantes • lnstallez l'emetteur une distance minimum de 25 cm de la serrure de contact, la station d'accueil pour porte-cle ou n'importe quel endroit ou le porte-cle peut etre stocke pendant que vous conduisez.
  • Seite 20 FIXER LE SUPPORT UNIVERSEL lnserez l'attelage avec entaille en T dans l'ouverture de l'entaille en T sur l'arriere du support (A). Glissez l'entaille en T vers l'avant et vers le haul dans la fente (8) pour verrouiller la plaque de montage en place. Ecoutez le son clic pour vous assurer que l'entaille en Test verrouillee (C).
  • Seite 21 FIXER LE SUPPORT D'EVENT Fonctionne avec tous les styles de ventilation (A). Tourner support• (B) pour aligner clips d'event avec grilles de event (C), salon evacuer direction. *Remarque : Le support d'event pivote sur 360 °...
  • Seite 22: Chargement Sans Fil

    ��=� CHARGEMENT SANS FIL Branchez le support magnetique dans la prise de 12 V de votre vehicule l'aide du cable Micro-USS USB et de l'adaptateur de 12 V tel qu'illustre (A et B). En option : Fixez las attaches adhesives incluses (C) sur le tableau de bord ou la console pour fixer le cable.
  • Seite 23 Lorsque vous placez votre appareil sur le support magnetique, alignez !es surfaces magnetiques sup8rieure et inf8rieure de votre appareil avec celles du support. Pour les details complets de la garantie, veuillez visiter notre site www.scosche.com ou composer le (800) 363-4490...
  • Seite 24 DECLARATION DE CONFORMITE FCC Get equipement a ete teste et declare conforme aux limites d'un dispositif WPC, conformement a la partie 18 des regles de la FCC. Ces limites sont con9ues pour fournir une protection raisonnable centre les interiE!rences nuisibles dans une installation re5identielle. ATTENTION : Les changements ou modifications non expressement approuves par la partie responsable de la conformitE! peuvent annuler l'autorite de l'utilisateur a utiliser le produit.
  • Seite 25 RegiBfle SU p,oducto por infemf1f en @ SCDSCI-IE' MPQ2V MAGICMOUNT" CHARGE MONTAJE MAGNETICO CON CARGADOR INALAMBRICO Qi LEA LAS INTRUCCIONES COMPLETAMENTE ANTES DE INSTALAR ESTE SOPORTE. ADVERTENCIA: No utilice el soporte magnetico con todos los dispositivos de disco duro basado tales coma: iPod classic, iPod de video y reproductores de MP3 Zune.
  • Seite 26 PARTES INCLUIDAS (1) Montaje magn8tico con cargador inalilmbrico y montar para ventilaci6n (1) Placa grande con plantilla gufa para montar dispositivo (2) Pequeiias placas metalicas con plantilla gufa para montarlas en la funda para Pequeiias placas metalicas con plantilla gufa montarlas en la para Galaxy S9 o S9+...
  • Seite 27 :ij�:7;; :'.::!�-=::_:.. -=--�...
  • Seite 28 OPCIONES DE MONTAJE MAGICPLATE NOTA: Para instalarlo directamente en el dispositivo, utilice la placa grande con la plantilla gufa como se indica. 1. Remueva el papel protector de la placa. � � 2. Alinee las flechas correspondientes de la plantilla guia con la parte inferior del telefono.
  • Seite 29 OPCIONES DE MONTAJE MAGICPLATE (continuado) NOTA: Para instalarlo en la funda del dispositivo, utilice las 2 placas pequeilas con la plantilla gufa como se indica. 1 Remueva el apel blanco rotector de mbas placas. inee las flechas orrespondientes de la lantilla guia con la parte ferior del telefono.
  • Seite 30 No utilice calor o lfquidos para remover Ia placa, debido al riesgo de dafiar el telefono. Pongase en contacto con el Servicio de Atenci6n al Cliente de Scosche para cualquier asistencia adicional al 800.363.4490 Ext 1 o customerservice@scosche.com.
  • Seite 31 l� UBICACl6N DEL TRANSMISOR MAGICMOUNTCHARGE EN VEH[CULOS El transmisor puede llegar a interferir con algunos sistemas inal8.mbricos del (< auto. Especlficamente llaveros � --� con inmovilizadores, sistemas de -""<!J/J/ arranque inalclmbricos o monitores de presi6n de los neum8.ticos. Per lo tanto, le recomendamos probar la ubicaci6n de su l �...
  • Seite 32 COLOCACl6N DE SOPORTE UNIVERSAL lnserte el acople T-notch en la abertura T-notch de la parte de atras del soporte (A). Deslice el T-notch hacia adelante y hacia arriba dentro de la ranura (B) para trabar la placa de montaje en su lugar.Escuche el sonido de clic para asegurar que T-notch este bloqueado (C).
  • Seite 33 COLOCACl6N DE MONTAJE VENTILACl6N Funciona con lodes las estilos de ventilaci6n (A). Gire montaje• (B) para alinear clips de ventilaci6n con rejillas de ventilaci6n (C), de acuerdo con la direcci6n de ventilaci6n. *Nota: Montaje de ventilaci6n gira 360 °...
  • Seite 34 CARGADOR � =iJ INALAMBRICO � � Enchufe la base magnetica en el enchufe de 12 V de su vehiculo con el cable micro-USS a USB el adaptador de 12 V incluidos como se muestra (A Opclonal: Coloque los ganchos autoadhesivos incluidos (C) en el tablero o la consola para fijar el cable.
  • Seite 35 Al colocar su dispositivo en la base magnelica, alinee las superficies magneticas superior e inferior de la parte de atras de su dispositivo con las areas magnBticas superior e inferior del soporte. Por detalles acerca de la garantia completa, visite www.scosche.com o llame al (800) 363-4490...
  • Seite 36 DECLARACION DE FCC Este equipo ha sido probado cumple con los limites para un dispositivo WPC, de conformidad con la Parte 18 de las Reglas de la FCC. Estos limites est8.n disefiados para proporcionar una protecci6n razonable contra interterencias dafiinas en una instalaci6n residencial. PRECAUCJ6N: cambios modificaciones...
  • Seite 37: Wichtiger Hinweis

    Reglstrleren Sle 1hr Produkt onllne unter MPQ2V ™ MAGICMOUNT CHARGE MAGNETHALTERUNG MIT DRAH TLOSEM Qi-LADEGERAT LESEN SIE DIE ANLEITUNGEN VOLLSTA.NDIG DURCH BEVOR SIE DAS MONTAGE-KIT ANBRINGEN. WARNUNG: Verwenden Sie nicht die Magnethaiterung mil alien Festplatten-basierten Geriiten wie: iPod classic, iPod Video•und MP3•Player Zune.
  • Seite 38: Mitgelieferte Teile

    MITGELIEFERTE TEILE (1) Magnelhallerung mil kabellosem Laden und Lottungshallerung (1) Gro8e Einzelplatte mil Vorlagenfiihrung zur Befesligung am Geral (2) Kleine Melalplatten m� Vorlagenfiihrung zur Befestigung GeMuse (2) Kleine Melalplatten m� Vorlagenfiihrung zur Befestigung Galaxy (1) Fahrzeug-Netzadapler S9/S9+ (1) Mikro-USB zu USB-l.adekabel (2) Drahlclips (1) Reinigungsluch (1) Schutzfilmaufkleber (zur Befestigung des Gerats)
  • Seite 39 :ij�:7;; :'.::!�-=::_:.. -=--�...
  • Seite 40 MAGICPLATE™ BEFESTIGUNGSMOGLICHKEITEN ANMERKUNG: Zur direkten Befestigung am Gerat, verwenden Sie die groBe Einzelplatte mil Vorlagenfiihrung, wie abgebildet. 1. Entfernen Sie das Abdeckpapier � von der Platte. 2. Richten Sie die entsprechenden Pleile an der Vorlagenfiihrung auf die Unterseite lhres Telefons aus. �...
  • Seite 41 MAGICPLATE™ BEFESTIGUNGSMOGLICHKEITEN (Fortsetzung) ANMERKUNG: Zur Befestigung ans Gehiiuse, verwenden Sie die (2) kleinen Platten milder integrierten Vorfagenfiihrung, wie abgebildet. Entfernen Sie das weiBe Abdeckpapier von beiden Platten. 2. Richten Sie die entsprechenden Pfeile an der VorlagenfOhrung au! die Unterseite lhres Telefons aus.
  • Seite 42: Entfernen Der Metalplatte

    Verwenden entfernen. Die Platte langsam abheben und entfernen. Sie zum Entfernen der Platte keine Hitze oder Flussigkeiten, um ein Beschadigen lhres Telefons zu verrneiden. Wenden Sie sich fiir weitere Unterstiitzung an den Scosche Kundendienst unter 800.363.4490 1 oder customerservice@scosche.com. Ext.
  • Seite 43 MAGICMOUNT ™ CHARGE SENDERANORDNUNG IN FAHRZEUGEN Es besteht die Miiglichkeit, dass der Sender einige (< Funksysteme in lhrem Auto beeintrachtigt. lnsbesondere SchlOsselanhanger mil Wegfahrsperren, schlOssellose Anlasssysteme oder Reifendruckkontrollen. Daher wird empfohlen, zuerst den Standort lhres Senders zu testen, bevor Sie die endgOltige Entscheidung der Platzierung treffen.
  • Seite 44: Anbringen Der Universalhalterung

    ANBRINGEN DER UNIVERSALHALTERUNG FOgen Sie die T-Nutenkupplung in die Nutenoffnung auf der ROckseite der Halterung (A) ein. Schieben Sie die T-Nute nach vorne und nach oben in den Schlitz (B), um die Befestigungsplatte einzurasten. Achten Sie auf den .,Klick-Ton, um sicherzustellen, dass die T-Nutenkupplung gesperrt ist (C) ENTFERNEN: Schieben Sie die T-Nutenkupplung nach unten (D), um die Befestigungsplatte von der Halterung zu losen (E).
  • Seite 45 DIE HALTERUNG AN DER LUFTUNG ANBRINGEN Funktioniert mil alien LOftungsarten (A). Rotieren Sie die Halterung• (B), um die Uiftungsklemmen auf die LOftungsschlitzen, je nach LOftungsrichtung, auszurichten (C). ° *Hinweis: Die LOftungshalterung rotiert 360...
  • Seite 46 DRAHTLOSES = =i! LADEN = � Stecken Sie die Magnethalterung mil dem mitgelieferten Micro-USB zu USB-Kabel und das 12V-Netzteil, wie abgebildet, in die 12V-Steckdose lhres Fahrzeugs (A und B). Optional: Befestigen Sie die mitgelieferten Heftklammern (C) am Armaturenbrett oder der Bedienkonsole, um das Kabel zu sichern. Die LED-Anzeige (D) an der Halterung leuchtet wie folgt auf: •=i•...
  • Seite 47 Magnethalterung setzen, richten Sie die Ober- und Unterseite der Magnetflache auf der Ruckseite des Gerats auf die Ober- und Unterseite des Magnetbereichs an der Halterung aus. Fiir vollstiindige Garantiedetails, besuchen Sie uns bitte unter www.scosche.com oder kontaktieren Sie uns unter (800) 363-4490...
  • Seite 48: Fcc-Bestimmungen

    FCC-BESTIMMUNGEN Diese Vorrichtung wurde getestet und entspricht, gemiill Teil 18 der FCC­ Vorschriften, den Grenzwerten eines WPC-Gerats. Diese Grenzwerte sollen vertretbaren Schutz gegen schMliche StOrungen bei Installation in einem Wohngebiet bieten. VORSICHT: Anderungen oder Modifikationen, die nicht ausdrOcklich van der fOr Obereinstimmung verantwortlichen Partei genehmigt sind, kt>nnen dazu fOhren, dass die Betriebserlaubnis fOr dieses Gertlt aufgehoben wird.