Inhaltszusammenfassung für Hobbytech NXT SPIRIT EP 2.0
Seite 1
INSTRUCTION MANUAL • This is not a toy! Not suitable for children under 14 years old without adult supervision. • Ceci n’ e st pas un jouet. Ne convient pas aux enfants de moins de 14 ans sans la surveillance d’un adulte. •...
Seite 2
NOT PROVIDED WITH THE CAR / NON FOURNIS AVEC LE VÉHICULE KN-LP4S5500 HT-560115 KN-130009 KN-LP3S4200 4xAA Alkaline batteries With a Li-Po 4S battery pack, you should use a 15T motor pinion. You can use 2 x 3S Li-Po battery packs. Utilisation en batterie 4S Li-Po : utiliser un pignon moteur 15 dents.
Seite 3
/ receipts. If within the warranty period, a portion of the product fails due to manufacturing defects, then it is within the discretion of Hobbytech to repair it or replace it. The decision to repair or replace the part will be taken by Hobbytech. After the discretion of Hobbytech to repair it or replace it.
Seite 4
IMPORTANT - READ THIS BEFORE RUNNING PLEASE READ ALL INSTRUCTIONS AND FAMILIARIZE YOURSELF WITH THE PRODUCTS AND CONTROL BEFORE OPERATION. This product is not a toy. It is a high performance model product. It is important to familiarize yourself with the model, its manual, and its construction before assembly and operation.
Seite 5
• You can aslo use provided battery foam to change the weigHT-balance of your car (move the battery to the front or to the rear) WARNING: If you change the battery configuration you will have to change your motor gear to prevent any technical problem please check bellow gear ratio chart! Hobbytech SPIRIT NXT EP Buggy ratio chart Motor Gear (T) 11,20 10,40...
Seite 6
TRANSMITTER EVEN IF THIS CAR IS A READY TO RUN KIT, YOU STILL HAVE SOME LITTLE THINGS TO DO TO FAMILIARI ZE WITH YOUR PRODUCT. PLEASE FOLLOW THESE STEPS. Functions Antenna KT2S+ Transmitter Steering Wheel : Control direction (Left / Right) of the RC model.
BIND Pairing your receiver to your KT2S+ Place model on a block to prevent wheels from touching the ground. Connect battery to ESC. Fix the wire correctly with the provided connectors. You must check the signal of transmitter and receiver before you operating it at first.
Seite 8
ABOUT THE RADIO SYSTEM Reversing Trimming KT2S+ features two trimming Reversing is used to change the response direction of steering functions: wheel and throttle trigger. KT2S+ Transmitter features 2 reversing functions: Steering Reverse Steering Trim and Throttle Trim. and Throttle Reverse. Steering Trim Dial: Adjust the Steering Reverse: Reverse the response direction when operating neutral position of steering servo...
BRUSHLESS WATERPROOF ESC - INSTRUCTION MANUAL High power system for RC model can be very dangerous, so we strongly suggest you read this manual carefully. In that KONECT have no control over the correct use, installation, application, or maintenance of our products, no liability shall be assumed nor accepted for any damages, losses or costs resulting from the use of the product.
Note2: If you don’t release the “SET” key after the red LED begins to flash, the ESC will enter the program mode, in such a case, please switch off the ESC and re-calibrate the throttle range again from step A to step D. C) Set the 3 points according to the steps shown as the pictures on the rigHT-side.
PROGRAM THE ESC 1. Program Method Note3: • In the program process, the motor will emit “Beep” tone at the same time when the LED is flashing. • If the “N” is bigger than the number “5”, we use a long time flash and long “Beep---” tone to represent “5”, so it is easy to identify the items of the big number.
2. Programmable Values 2.1. Running Mode: With “Forward Only with Brake” mode, the car can go forward and brake, but cannot go backward, this mode is suitable for competition; “Forward/Reverse with Brake” mode provides backward function, which is suitable for daily training. Note: “Forward/Reverse with Brake”...
Seite 13
GARANTIE DE 90 JOURS MERCI DE LIRE ATTENTIVEMENT LES LIGNES CI-DESSOUS : A partir de la date d’achat, le produit est couvert par une garantie de 90 jours couvrant les composants. Si durant cette période, une des pièces composantes votre produit (hormis les pièces de transmission) possède un défaut de fabrication réellement constaté...
Seite 14
IMPORTANT - LIRE AVANT DE DÉMARRER LIRE CES INSTRUCTIONS ET SE FAMILIARISER AVEC LE PRODUIT AVANT DE S’EN SERVIR. Ce produit n’est pas un jouet. C’est un modèle réduit de haute performance. Il est important de se familiariser avec le modèle, son manuel et sa construction avant l’assemblage et le fonctionnement.
Seite 15
ATTENTION : si vous changez de type de batterie ou le KV du moteur, vous devrez impérativement changer le pignon de votre moteur pour éviter tout risque de détérioration du véhicule et/ou de ses composants. Hobbytech SPIRIT NXT EP Buggy ratio chart Motor Gear (T)
Seite 16
MANUEL D’UTILISATION ÉMETTEUR MANUEL D’UTILISATION distribué par ÉMETTEUR distribué par MÊME SI CE MODÈLE EST LIVRÉ PRÊT-À-ROULER, IL RESTE TOUT DE MÊME CERTAINES OPÉRATIONS À EFFECTUER, EN PROFITER POUR SE FAMILIARISER AVEC VOTRE MODÈLE. SUIVRE LES ÉTAPES PAS À PAS. Fonctions Fonctions Antenne...
Seite 17
CONTRÔLE ET APPAIRAGE DE LA RADIO (BIND) Poser le véhicule sur un bloc pour éviter que les roues ne touchent le sol. Brancher la batterie au contrôleur à l’aide des connecteurs. Vérifier que tous les composants câbles et électroniques sont correctement installés. Il est impératif de contrôler la correcte synchronisation entre l’émetteur et le récepteur avant leur 1ère utilisation.
Seite 18
AU SUJET DU SYSTÈME RADIO Inversion Réglages du neutre (Trim) L’inversion est utilisée pour inverser la commande du volant L’émetteur KT2S+ possède deux de direction et de la gâchette des gaz. fonctions de Trim : L’émetteur KT2S+ possède deux fonctions d’inversion : Trim de direction et Trim des gaz.
Ces contrôleurs haut de gamme spécifiques à la RC peuvent être très dangereux, nous vous recommandons de lire attentivement la notice. Hobbytech ne possède aucun contrôle sur l’utilisation, l’installation ou la maintenance de ses produits et ne couvre pas en garantie les dommages, les pertes et la mauvaise utilisation de celui-ci.
Note2 : Si le bouton “SET” n’est pas relâché lorsque la LED rouge commence à clignoter, le contrôleur entrera en mode programme, dans ce cas, éteignez le contrôleur et recalibrez les courses de gaz en reprenant depuis l’étape A.. C) 3 points de réglages sont à effectuer comme sur le schéma de droite.
Seite 21
PROGRAMMER LE CONTRÔLEUR 1. Méthode de programme Note3 : • Durant la procédure de programmation, le contrôleur émet des “bip” en même temps que la LED clignote. • Si le “N”est plus gros que le chiffre “5”, le contrôleur émet un long bip et un long clignotement qui représente le paramètre n°5.
2. Paramètres programmables 2.1. Mode de fonctionnement : Avec le mode marche avant uniquement (running mode 1), la voiture peut aller en marche avant et freiner, mais ne peut aller en marche arrière, ce mode est destiné à la compétition; le mode réversible permet d’obtenir la marche arrière, mode adapté...
GARANTIEANSPRUCH Mit einem Garantieanspruch -, Reparaturen wenden Sie sich bitte an Ihren Fachhändler. Dieser wird sich mit Hobbytech kurzschließen, um eine sachgerechte Entscheidung zu fällen, die Ihnen schnellst möglich hilft. Für ungültige Garantieansprüche werden Ihnen vor der Rücksendung möglicherweise Bearbeitungskosten in Rechnung gestellt. Vorab berechnet werden notwendige Reparaturen die durch Nachlässigkeit oder Mißbrauch erforderlich sind.
WICHTIG - LESEN SIE DIESE ANLEITUNG VOR DER VERWENDUNG DURCH ! BITTE LESEN SIE ALLE ANWEISUNGEN UND MACHEN SIE SICH MIT DEN PRODUKTEN VOR DER INBETRIEBNAHME VERTRAUT. Dieses Produkt ist kein Spielzeug. Es ist ein hochentwickeltes Hobby Produkt. Es ist wichtig, sich mit dem Modell, dem Handbuch und seiner Konstruktion vor der Montage und dem Betrieb vertraut zu machen.
Seite 25
Batterie nach vorne oder nach hinten) WARNUNG: Wenn Sie die Batterie-Konfiguration ändern, müssen Sie Ihr Motorgetriebe anpassen. Um jegliche technisches Problem zu verweiden überprüfen Sie bitte das Übersetzungsverhältnis unten auf der Tabelle. Hobbytech SPIRIT NXT EP Buggy ratio chart Motor Gear (T) 11,20 10,40...
Seite 26
BENUTZERHANDBUCH SENDER Funktionen Antenne Der Sender KT2S + Umkehr Drehrichtung Umkehr Drehrichtung Lenkrad : Steuert die Lenkrichtung (links/rechts) des Lenkservo Gas/Brems Servo RC-Modells Gashebel : Regelt die Geschwindigkeit & Fahrtrichtung Betriebsanzeige (Vorwärts/Bremse/Rückwärts) des RC-Modells Power Antenne : Sendesignal zum RC-Modell ON / OFF Power ON / OFF : Power AN / AUS des Senders SYNC und Batterie-Anzeige : LED zeigt Synchonisationsstatus und / oder...
EINSCHALTEN DER STROMVERSORGUNG (BIND) Stellen Sie das Fahrzeug auf einen Block, so das die Räder den Boden nicht berühren. Verbinden Sie den Akku zum Regler. Fixieren Sie die Kabel richtig mit dem kleinen vorgesehenen Nylon Wrap. Vor der Inbetriebnahme überprüfen Sie das Signal von Sender und Empfänger.
Seite 28
DAS FUNKSYSTEM Einschalten der Stromversorgung (BIND) Umkehr Wird verwendet um die Bewegungsrichtung Deinen Empfänger mit der KT2S+ Fernsteuerung verbinden der Lenkung oder von Gas & Bremse zu 1. Schalten Sie Fernsteuerung und Empfänger aus. ändern. 2. Drücken und halten Sie den BIND Knopf am Empfänger gedrückt und Die KT2S+ Fernsteuerung verfügt über 2 schalten Sie diesen ein.
BEDIENUNGSANLEITUNG KONECT 150A WASSERFEST Hoch-Leistungssysteme für RC Modelle können sehr gefährlich sein, daher empfehlen wir Ihnen dringend diese Anleitung erst sorgfältig durch zu lesen. Da wir keine Kontrolle über die korrekte Installation, Verwendung, Anwendung und / oder Wartung unserer Produkte haben, übernehmen wir keine Haftung für Schäden, Verluste und / oder Kosten, die sich aus der fehlerhaften Nutzung des Produktes ableiten.
Hinweis 2: Wenn Sie die „SET“ Taste nicHT-loslassen, sobald das rote LED LicHT-anfängt zu blinken, wird der Regler den Programm Modus eingeben. In diesen Fall schalten Sie den Geschwindigkeitsregler aus und kalibrieren Sie die Gaseinstellung erneut – Punkt A) C) Nun werden die drei Punkte gespeichert: 1) Neutral-Punkt: Gashebel in die Neutral-Position bewegen und gleichzeitig einmal den SETTaster drücken, die grüne...
PROGRAMMIEREN DES GESCHWINDIGKEITSREGLERS 1. Programmier Methode Hinweis 3: • Im Programmablauf wird der Motor «Piep»-Ton gleichzeitig emittiert, wenn das LED blinkt. • Wenn das «N» größer ist als die Zahl «5», wird ein Langzeit Blinken und ein langer «Piep»-Ton verwendet. So ist es einfach, die Positionen der großen Zahl zu identifizieren.
2. Programmierbare Werte 2.1. Fahrmodus: Mit «Vorwärts mit Bremse» Modus, kann das Auto vorwärts fahren und bremsen. Es kann nicHT-rückwärts fahren, dieser Modus eignet sich für den Wettbewerb. Der «Vorwärts / Rückwärts mit Bremse» Modus bietet auch die rückwärts Funktion die sich für das tägliche Training eignet.
Seite 33
ATENCION : • Este coche no es un juguete. El comprador de este producto reconoce y comprende que asume la responsabilidad sobre los danos personales o materiales que pueda causar por El uso de este producto. • El usuario es el unico responsable del correcto uso de este producto. El fabricante o el vendedor no tienen ninguna responsabilidad sobre los posibles danos producidos por su mal uso.
Seite 34
IMPORTANTE - LEER ANTES DE ARRANCAR LEER ESTAS INSTRUCCIONES Y ACOSTUMBRARSE CON LOS PRODUCTOS ANTES DE UTILIZARLOS. Este producto no es un juguete es un modele reduzido y hay que aprender poco a poco bajo los consejos de un adulto. CUIDADO Antes de danar a personas o a objetos utilizar el modelo teledirigido de manera responsable como esta detaillado mas lejos Estos modelos pueden alcanzar una velocidad de mas de 40KM/H.
Seite 35
ATENCION: Si se cambia la configuracion de bateria tendria que cambiar el pinion del motor. Para que se encuentra problemas tecnincos refierese al table de « Gear ratio » . Hobbytech SPIRIT NXT EP ratio chart Motor Gear (T) 11,20 10,40...
Seite 36
LEER CUIDADOSAMENTE ESTE MANUAL DE INSTRUCCIONES ANTES DE COMENZAR EL RODAJE : FUNCIONES DE LA EMISORA KT2S+ Volante de direccion : Controla la direccion (izquierda/derecha) Antena del modelo Indicador MANUEL D’UTILISATION ÉMETTEUR de marcha Gastillo de los gases : Controla la velocidad y la direccion Power (Marcha adelantera / Freno / Marcha atras) ON / OFF...
Seite 37
SINCRONISACION EMISORA / RECEPTOR (BIND) Emparejar el emisor con el receptor. (el emparejamiento ya esta efectuado en fabrica). Conectar las baterias LiPo al variador. Asegurarse que todos los componentes electronicos y cables estan instalados correctamente.. Asegurarse de la buena sincronización de la emisora y del receptor antes de su primera utilizacion.
Seite 38
AJUSTES DE LA RADIO Invertir Trimming Invertir boton esta utilizado para cambiar el sentido del servo de direccion. Utilizar el trim de aceleracion “Throttle” para KT2S+ emisora viene con 2 tipos de inversion. ajustar si no obtiene la posicion neutral Servo de direccion y servo de gaz y freno Inversion del servo de direccion: Inverte la direccion cuando el volante de la emisora gira izquierda, la ruedas giran derecha.
CONTROLADOR ELECTRÓNICO DE VELOCIDAD 150 BRUSHLESS MANUAL DE UTILIZACIÓN Sistema de alta potencia para RC, puede ser muy peligroso, por favor, lea atentamente este manual. KONECT no tiene control sobre el uso correcto de esta instalación, aplicación o mantenimiento de productos, no se asume responsabilidad ni daños, pérdidas o gastos derivados de la utilización del producto.
Nota 2: Si no liberan la tecla «SET» tan pronto como el LED rojo comienza a parpadear, el variador entrará en el modo de programa, en este caso, por favor apague el variador y vuelve a empezar desde el paso A al D. C) Establecer los 3 puntos en función de los pasos mostrados en las imágenes en el lado derecho.
Seite 41
PROGRAMACIÓN DEL VARIADOR 1. Métodos de Programación Nota 3 : • En el proceso del programa, cuando el LED parpadea, el motor emite un tono «Beep» al mismo tiempo • Si el número «N» es más grande que el «5», se utiliza un flash de tiempo y tono «bip» largo para representar a «5», por lo que es fácil de identificar los elementos con número de serie más grande.
Seite 42
2. Explicación de cada elemento programable 2.1. Modo de ejecución: Con «Adelante con freno», el coche puede ir hacia adelante y frenar, pero no puede ir hacia atrás, este modo es adecuado para la competición. «Adelante / atrás con freno» proporciona la función de marcha atrás, que es adecuada para el entrenamiento diario.
REFERENCE GUIDE PARTS NAME PARTS NAME PARTS NAME ITEM ITEM ITEM SPIRIT NXT EP 2.0 green body F / R Body Mount Ball end CA-292 STR-032 STR-088 Carrosserie SPIRIT NXT EP 2.0 verte Supports de carrosserie STR8 Boules de tringlerie de direction STR8 ROCKET 1/8 Pre glued Tyres on white spokes wheels Front suspension arm holder Screw Set...
OPTION PARTS CA-290 CA-291 HT-501500 HT-510007G Carrosserie Buggy Spirit 2019 non peinte Carrosserie NXT GP 2.0 orange Rondelle d’aileron 7075T6 allégée en alu 7075T6 Palonnier Spirit en alu bras simple ORANGE 2019 Spirit clear Body NXT GP 2.0 orange body traité...
Seite 47
Support amortisseur avant carbone universel 1/8 Support amortisseur arrière carbone universel 1/8 STRX-315 Front shock tower holder STRX-316 Rear shock tower holder hobbytech hobbytech Universal 1/8 HT Carbon fiber front Shock Tower Universal 1/8 HT Carbon fiber rear Shock Tower...
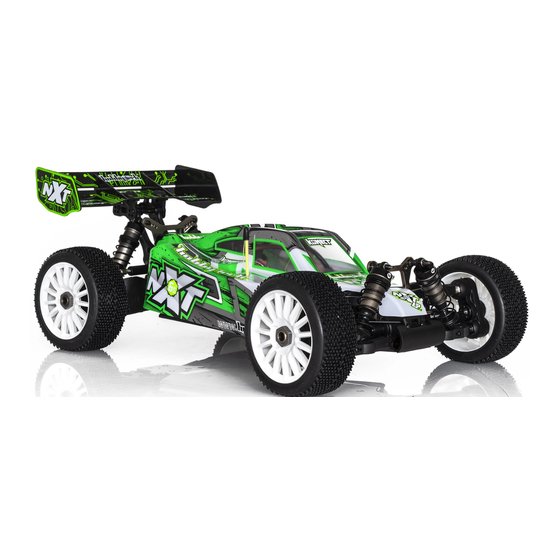
Seite 50
General information Specification are subject to change without notice. Spezifikation können ohne vorherige Ankündigung ändern. Photograph shows model after assembly and painting. Effektive Abbildung zeigt das Modell in Montage und Lackierung. Les spécificités peuvent changer sans information préalable. El fabricante puede modificar los kits sin previsio aviso.