Inhaltsverzeichnis
Werbung
Verfügbare Sprachen
Verfügbare Sprachen
Quicklinks
Werbung
Inhaltsverzeichnis

Inhaltszusammenfassung für Peak Controlmini
- Seite 1 Controlmini DE Kurzanleitung EN Short Guide...
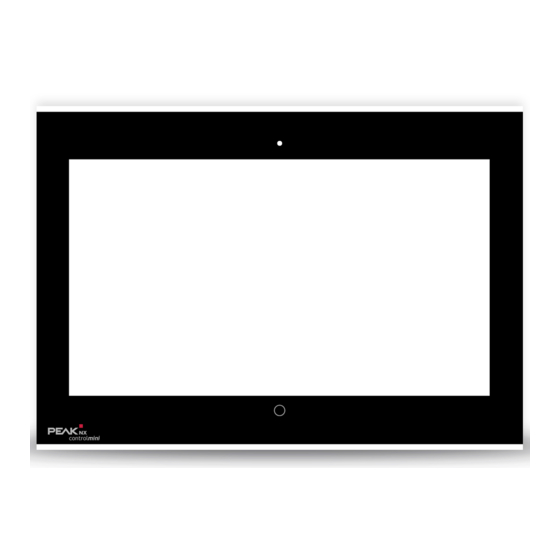
- Seite 2 DE Controlmini, Kurzanleitung Touchpanel-Elemente Position Beschreibung 4 x Aufnahme für Frontglas Ein/Aus-Taster 4 x Schraubenaufnahme zur Befestigung des Panels Lauter/Leiser-Taster Mikrofon WLAN-Antenne Kamera 2 x USB 2.0 Touchscreen Windows Homebutton...
-
Seite 3: Paneleinbau Und -Installation
Hinweis: Nehmen Sie keine eigenmächtigen Reparaturen oder Änderungen am Gerät vor! Lieferumfang ■ Controlmini Panel ■ Kurzanleitungen zur Inbetriebnahme von Panel und Software ■ USB-Stick: YOUVI Basic Software und Controlmini Handbuch ■ Netzwerkverbinder ■ Netzwerk Patchkabel ■ Touchpen ■ Reinigungstücher für den Touchscreen... - Seite 4 DE Controlmini, Kurzanleitung Schäden am Panel vermeiden! ■ Das Panel darf nur im Querformat und parallel zur Wand eingebaut werden, um eine Belüftung des Computers im Panel durch Konvektion zu gewährleisten. Vorbereitung Hinweis: Wir empfehlen das Panel eigens abzusichern, da dieses in seltenen Fällen komplett vom Stromnetz genommen werden muss.
- Seite 5 DE Controlmini, Kurzanleitung Stellen Sie eine Aussparung von H x B x T: 194 x 252 x 50 mm in der Wand her. Nutzen Sie dazu die mitgelieferte Schablone. Die Unterputzdose muss später bündig mit der Wand sein. Drücken Sie je nach Kabellage die kreisförmigen Bleche oben oder unten aus der Dose heraus und setzen Sie die mitgelieferten Würgenippel ein, um eine Beschädigung des...
-
Seite 6: Panel Anschließen Und Montieren
DE Controlmini, Kurzanleitung Panel anschließen und montieren Ethernet-Leitung an das Panel anschließen. KNX-Leitung mit den Farben Rot (+) und Schwarz (–) in die KNX-Anschlussklemme 1, siehe Beschriftung auf dem Panel, schieben. Hinweis: Es wird empfohlen ein 24 V DC Netzteil für die Hutschiene (PNX-019-A18-00039) zu verwenden. -
Seite 7: Bedienung
Textfeld getippt wird. Hinweis: Im Auslieferungszustand meldet sich das Panel automatisch mit dem Benutzer namen Controlmini ohne Passwort an. Nach dem Login können in den Windows Einstellungen jederzeit weitere Benutzer hinzugefügt oder weitere Einstellungen geändert werden. Einschalten ■... - Seite 8 DE Controlmini, Kurzanleitung dieses vorsichtig vom Panel nach vorne wegziehen (Magnethalterung). ■ Der Ein/Aus-Taster (siehe Touchpanel-Elemente Position Nr. 2) ist nun zugänglich. ■ Ein/Aus-Taster drücken. Das Betriebssystem fährt hoch. Ausschalten ■ Im Windows-Startbildschirm auf das Windows-Logo tippen und das Ein/Aus-Symbol anwählen.
-
Seite 9: Technischer Support
DE Controlmini, Kurzanleitung Technischer Support Sollten Probleme mit Ihrem Controlmini auftreten, kontaktieren Sie bitte unser PEAKnx Support Team: Mail: support@peaknx.com Support Ticket erstellen: support.peaknx.com Tel.: +49-6151-279 1825... - Seite 10 Punkt zur Verfügung stellen. Dabei wird großen Wert auf die Langlebigkeit der Produkte und das qualitative Zusammenspiel von Design und Funktionalität gelegt. Als neuester Geschäftsbereich der PEAK-Firmengruppe mit Sitz in Darmstadt greift PEAKnx auf mehr als 25 Jahre Erfahrung im Hard- und Softwarebereich zurück. Durch ein breit aufgestelltes Netzwerk an zertifizierten Partnern bietet PEAKnx darüber hinaus auch die...
- Seite 11 EN Controlmini, Short Guide Controlmini EN Short Guide...
- Seite 12 EN Controlmini, Short Guide Touch panel elements Position Description 4 x Intake for glass cover On/Off button 4 x screw holes for fixing the panel Volume up/down button Microphone WLAN antenna Camera 2 x USB 2.0 Touchscreen Windows Homebutton...
- Seite 13 Do not carry out any unauthorized repairs or changes to the unit! Delivery ■ Controlmini panel ■ Brief instructions for commissioning the panel and software ■ USB flash drive: YOUVI Basic software package, Controlmini user manual ■ Network connector ■ Network patch cable ■ Touchpen ■...
- Seite 14 EN Controlmini, Short Guide Avoid damage to the panel! ■ The panel may only be installed in landscape format and parallel to the wall to ensure ventilation of the computer in the panel by convection. Preparation Note: We recommend hedging the panel, since in rare cases the panel must be taken completely from the power supply.
- Seite 15 EN Controlmini, Short Guide Make a recess of H x W x D: 194 x 252 x 50 mm in the wall. Therefore, use the template provided. The flush-mounted box must later be flush with the wall. Depending on the cable position, press the circular plates at the top or bottom out of the box and insert the supplied self-sealing grommets to prevent damage to the cable.
- Seite 16 EN Controlmini, Short Guide Plug the KNX cable with the colors red (+) and black (-) into the KNX-terminal 1, as indicated on the panel. Note: It is recommended to use a 24 V DC power supply unit for the DIN rail (PNX-019-A18-00039).
-
Seite 17: Operation
Note: In the delivery state, the panel automatically logs on with the user name Controlmini without a password. After the Login, additional users can be added at any time or further settings may be changed in the Windows Settings. -
Seite 18: Technical Support
Everything else about the start with YOUVI can be found in the also delivered short guide of the YOUVI. Technical Support If you experience problems with your Controlmini, please contact our PEAKnx Support Team: Mail: support@peaknx.com Create a Support Ticket: support.peaknx.com... - Seite 19 Great importance is attached to the longevity of the products and the qualitative inter- action of design and functionality. As the newest division of the PEAK group headquartered in Darmstadt, Germany, PEAKnx can draw from more than 25 years of experience in hardware and software development.
- Seite 20 www.peaknx.com...