RaidSonic ICY BOX IB-2242U2K Handbuch
Verfügbare Sprachen
Verfügbare Sprachen
Quicklinks

Verwandte Anleitungen für RaidSonic ICY BOX IB-2242U2K


Inhaltszusammenfassung für RaidSonic ICY BOX IB-2242U2K
- Seite 1 Manual IB-2242U2K 4x 2.5" U.2 SSD Backplane Handbuch IB-2242U2K 4x 2,5" U.2 SSD Backplane...
- Seite 4 Sicherheitshinweise IB-2242U2K Zur Vermeidung körperlicher Schäden, sowie von Sach-, Geräteschäden und Datenver- lust beachten Sie bitte folgende Hinweise: Warnstufen Signalwort und Sicherheitszeichen kennzeichnen die Warnstufe und geben einen sofortigen Hinweis auf Wahrscheinlichkeit, Art und Schwere der Folgen, wenn die Maßnahmen zur Vermeidung der Gefahr nicht befolgt werden.
- Seite 5 Batterien nicht im normalen Hausmüll oder dem Gelben Sack entsorgt werden. Wenn Sie dieses Produkt und ggf. enthaltene Batterien entsorgen möchten, bringen Sie diese bitte zur Verkaufsstelle zurück oder zum Recycling-Sammelpunkt Ihrer Gemeinde. Bei Fragen kontaktieren Sie gerne unseren Support unter support@raidsonic.de oder besuchen Sie unsere Internetseite www.raidsonic.de.
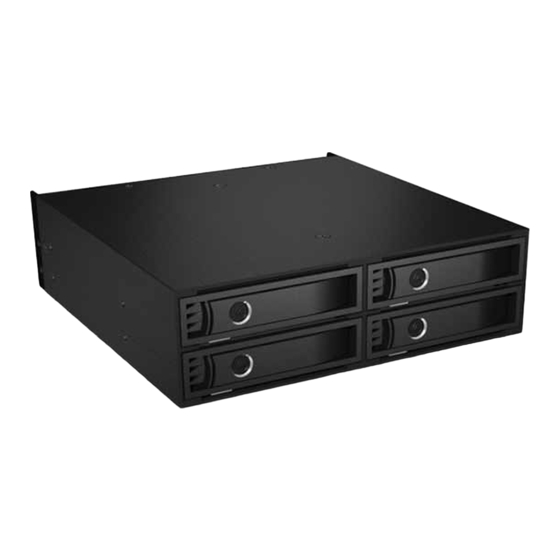
- Seite 6 Manual IB-2242U2K Product overview / Produktübersicht Front view / Frontansicht LED indicator/ LED Anzeige Lock/ Schloss Tray release latch/ Schachtverriegelung Tray door/ Schachttür Back view / Rückansicht Fan Switch/ Lüftungsschalter Fan/ Lüfter SATA power port/ SATA Stromanschluss Mini SAS HD port/ Mini SAS HD Anschluss Lock / Schloss Unlock /Offen Lock / Geschlossen...
- Seite 10 Handbuch IB-2242U2K Verpackungsinhalt 1x IB-2242U2K, 8x Rahmenschrauben, 16x Festplattenschrauben, 2x Schlüssel, 1x Handbuch *Kabel sind nicht im Lieferumfang enthalten! Hauptmerkmale • Hostanschluss: 4x U.2 / Mini SAS HD (SFF-8643) • Unterstützt U.2 (SFF-8639) SSD, bis zu 32 Gbit/s • Vollaluminium und Metall Backplane für 5,25" Schacht •...
- Seite 11 Handbuch IB-2242U2K Hardware Installation Bitte schalten Sie den PC und alle anderen angeschlossenen Peripheriegeräte aus! Ziehen Sie das Netzkabel von der Rückseite des PCs ab und entfernen Sie die Abdeckung Ihres PCs. Entfernen Sie nun das Panel des verfügbaren 5,25" Schachts. Schieben Sie vorsichtig die Backplane in den Schacht und befestigen Sie diese mit 2 Schrauben auf jeder Seite.
- Seite 12 Handbuch IB-2242U2K Anschließend bringen Sie die PC Abdeckung wieder an und stecken das Netzkabel des PCs an. Die Backplane ist nun betriebsbereit. Hinweis: Eine neue SSD muss im Betriebssystem erst initialisiert, partitioniert und formatiert werden, um vom System erkannt und angezeigt zu werden. Laufwerksinstallation Achtung! Der Host muss die HotPlug Funktion unterstützen, um die HotSwap-Funktion für die U.2 SSD zu unterstützen.