Herunterladen Inhalt Inhalt Diese Seite drucken

Werbung

Verfügbare Sprachen
  • DE

Verfügbare Sprachen

  • DEUTSCH, seite 1

Werbung

Inhaltsverzeichnis
loading

Inhaltszusammenfassung für auna Clubmaster DJ 10035261

  • Seite 3: Inhaltsverzeichnis

    Sehr geehrter Kunde, wir gratulieren Ihnen zum Erwerb Ihres Gerätes. Lesen Sie die folgenden Hinweise sorgfältig durch und befolgen Sie diese, um möglichen Schäden vorzubeugen. Für Schäden, die durch Missachtung der Hinweise und unsachgemäßen Gebrauch entstehen, übernehmen wir keine Haftung. Scannen Sie den folgenden QR-Code, um Zugriff auf die aktuellste Bedienungsanleitung und weitere Informationen rund um das Produkt zu erhalten:...
  • Seite 4: Technische Daten

    TECHNISCHE DATEN Artikelnummer 10035261 Stromversorgung 100-240 V ~ 50/60 Hz Leistungsaufnahme 120 W Standby-Stromverbrauch < 0.5 W USB-Ausgang 5 V / 200 mA 1 x 8" Subwoofer 1 x 8" Mitteltonbereich Lautsprecher-Treiber 1 x 1" Hochtöner 1 x Kompressionstreiber Tieftöner 2 Ohm Lautsprecher-Impedanz Mittelbereich 3 Ohm x1 Kompressionstreiber 6 Ohm...
  • Seite 5: Sicherheitshinweise

    SICHERHEITSHINWEISE Allgemeine Hinweise • Blitzschlag - Wenn Sie das Gerät länger nicht benutzen oder es gewittert, ziehen Sie den Stecker aus der Steckdose der trennen Sie das Gerät vom Antennenanschluss. Dadurch werden Schäden am Produkt durch Blitzschlag und Überspannung vermieden. •...
  • Seite 6: Lieferumfang

    LIEFERUMFANG...
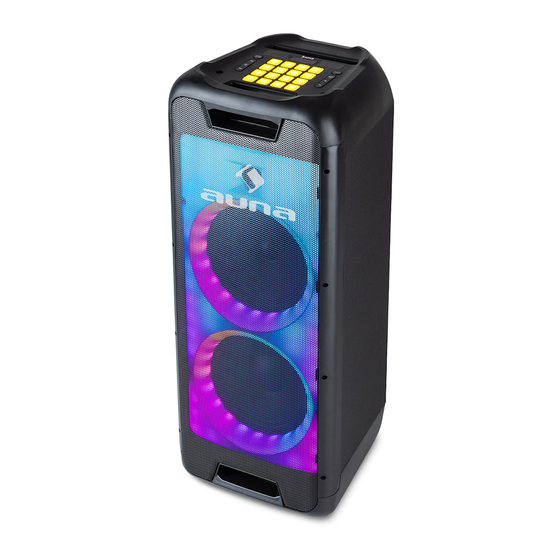
  • Seite 7: Geräteübersicht

    GERÄTEÜBERSICHT Display: Zeigt den aktuellen zustand an. STANDBY/LIGHT SHOW: Einmal drücken, um den Show-Modus LED1 > LED2 > LED3 , LED4 > OFF auszurufen. Gedrückt halten, um den Standby- Modus zu aktivieren oder zu deaktivieren. VORWÄRTS-Taste: Drücken, um den nächsten Titel abzuspielen. PLAY/PAUSE/TWS-Taste: Drücken, um die Musik anzuhalten und fortzusetzen.
  • Seite 8 Stromanschluss Mikrofonanschluss Gitarrenschluss Line-in-Anschluss: Schließen Sie das Gerät über ein Cinch-Audiokabel an die Audioausgangsbuchsen eines analogen Geräts an. Betriebsleuchte USB-Anschluss: Zum Anschluss eines USB-Speichermediums und zum Laden von Geräten. Strom-Wahlschalter: Zur Auswahl von DC, AC oder OFF. AC-Modus: Der Lautsprecher ist an und der Akku wird geladen. DC-Modus: der Lautsprecher arbeitet im Akkubetrieb.
  • Seite 9: Anschlüsse Und Verbindungen

    ANSCHLÜSSE UND VERBINDUNGEN Stromanschluss BT-Verbindung...
  • Seite 10 USB-Anschluss Line-in-Anschluss...
  • Seite 11 Anschluss für Mikrofon/Gitarre TWS-Verbindung (True Wireless Stereo)
  • Seite 12: Fernbedienung

    FERNBEDIENUNG...
  • Seite 13 Wiederholungsfunktion im Drücken, um eine der folgenden USB-Modus auswählen. Quellen zu wählen: USB, LINE, BT Mit den Nummerntasten können Sie einen Titel im USB-Modus Treble-Effekt Treble-Effekt direkt auswählen. Um erhöhen. beispielsweise Titel 12 auszuwählen, drücken Sie zuerst auf 1 und dann auf 2. Light Show auswählen: LED1 >...
  • Seite 14: Bedienung

    BEDIENUNG BT-Verbindung Schalten Sie die Lautsprecher ein und wählen Sie durch Drücken der Taste SOURCE den BT-Modus aus. 2. Schalten Sie die BT-Funktion Ihres Mobiltelefons ein, um nach BT- Geräten zu suchen. Wählen Sie [Clubmaster Go] aus dem Trefferliste aus. Wählen Sie [OK] oder [JA], um dieses Gerät mit Ihrem Mobiltelefon zu koppeln.
  • Seite 15: Zustände Der Betriebsleuchte Und Der Anzeigen

    ZUSTÄNDE DER BETRIEBSLEUCHTE UND DER ANZEIGEN Gerät aus Grün (durchgehend) Gerät an Rot (durchgehend) Standby BT (durchgehend) Verbunden BT (blinkt) Getrennt X.OF X-Bass aus X.ON X-Bass an T.OF TWS aus T.ON TWS an Show Light aus LED1, LED2, LED3, LED4 Show Light an DJ-Modus aus Drums...
  • Seite 16: Hinweise Zur Entsorgung

    HINWEISE ZUR ENTSORGUNG Befindet sich die linke Abbildung (durchgestrichene Mülltonne auf Rädern) auf dem Produkt, gilt die Europäische Richtlinie 2012/19/EU. Diese Produkte dürfen nicht mit dem normalen Hausmüll entsorgt werden. Informieren Sie sich über die örtlichen Regelungen zur getrennten Sammlung elektrischer und elektronischer Gerätschaften.
  • Seite 17 Dear Customer, Congratulations on purchasing this device. Please read the following instructions carefully and follow them to prevent possible damages. We assume no liability for damage caused by disregard of the instructions and improper use. Scan the QR code to get access to the latest user manual and more product information.
  • Seite 18: Technical Data

    TECHNICAL DATA Item number 10035261 Power supply 100-240 V ~ 50/60 Hz Power consumption 120 W Standby power consumption < 0.5 W USB output 5 V / 200 mA 1 x 8" Subwoofer 1 x 8" Midrange Speaker driver 1 x 1" Tweeter 1 x Compression driver Woofer 2 Ohm Speaker impedance...
  • Seite 19: Safety Instructions

    SAFETY INSTRUCTIONS General information • Lightning - If you are not going to use the device for a long time or if there is a storm, disconnect the plug from the electrical outlet and disconnect the device from the antenna connector. This will avoid damage to the product that may be caused by lightning or overvoltage.
  • Seite 20: Scope Of Delivery

    SCOPE OF DELIVERY...
  • Seite 21: Device Overview

    DEVICE OVERVIEW Display: Shows the current status. STANDBY/LIGHT SHOW: Press once to enter the show mode LED1 > LED2 > LED3 , LED4 > OFF Press and hold to activate or deactivate the standby mode. FORWARD button: Press to play the next track. PLAY/PAUSE/TWS button: Press to pause and resume music.
  • Seite 22 Power connection Microphone connection Guitar end Line-in connection: Connect the device to the audio output jacks of an analog device using a RCA audio cable. Power light USB port: For connecting a USB storage device and charging devices. Power Selector Switch: To select DC, AC or OFF. AC mode: The speaker is on and the battery is charging.
  • Seite 23: Terminals And Connections

    TERMINALS AND CONNECTIONS Power connection BT Connection...
  • Seite 24 USB Connection Line-in Connection...
  • Seite 25 Connection for Microphone/Guitar TWS-Connection (True Wireless Stereo)
  • Seite 26: Remote Control

    REMOTE CONTROL...
  • Seite 27 Select repeat function in USB Press to select one of the mode. following sources: USB, LINE, BT Use the number buttons to directly select a track in USB Treble Effect Increase Treble mode. For example, to select Effect. track 12, press 1 and then press 2.
  • Seite 28: Operation

    OPERATION BT connection Turn on the speakers and select BT mode by pressing the SOURCE button. 2. Turn on the BT function of your mobile phone to search for BT devices. Select [Clubmaster Go] from the hit list. Select [OK] or [YES] to pair this device with your mobile phone.
  • Seite 29: States Of The Operating Light And The Display

    STATES OF THE OPERATING LIGHT AND THE DISPLAY From Device off Green (continuous) Device on Red (continuous) Standby BT (continuous) Connected BT (flashing) Separate X.OF X-Bass off X.ON X-Bass on T.OF TWS off T.ON TWS on Show Light off LED1, LED2, LED3, LED4 Show Light on DJ mode off Drums...
  • Seite 30: Hints On Disposal

    HINTS ON DISPOSAL According to the European waste regulation 2012/19/ EU this symbol on the product or on its packaging indicates that this product may not be treated as household waste. Instead it should be taken to the appropriate collection point for the recycling of electrical and electronic equipment.
  • Seite 31 Estimado cliente: Le felicitamos por la adquisición de este producto. atentamente siguiente manual siga cuidadosamente las instrucciones de uso con el fin de evitar posibles daños. La empresa no se responsabiliza de los daños ocasionados por un uso indebido del producto o por haber desatendido las indicaciones de seguridad.
  • Seite 32: Datos Técnicos

    DATOS TÉCNICOS Número de artículo 10035261 Fuente de alimentación 100-240 V ~ 50/60 Hz El consumo de energía 120 W Consumo de energía en espera < 0.5 W Salida USB 5 V / 200 mA 1 subwoofer de 8 pulgadas 1 x 8"...
  • Seite 33: Indicaciones De Seguridad

    INDICACIONES DE SEGURIDAD Indicaciones generales • Relámpago - Si no va a utilizar el aparato durante un periodo largo de tiempo o si hay una tormenta eléctrica, desenchufe el aparato de la toma de corriente y desconecte el conector de antena. De este modo, protegerá...
  • Seite 34: Contenido Del Envío

    CONTENIDO DEL ENVÍO...
  • Seite 35: Descripción Del Producto

    DESCRIPCIÓN DEL PRODUCTO Pantalla: Muestra el estado actual. STANDBY/LUZ: Presione una vez para entrar en el modo de espectáculo LED1 > LED2 > LED3 , LED4 > APAGADO Manténgalo pulsado para activar o desactivar el modo de espera. Botón FORWARD: Presione para reproducir la siguiente pista. Botón PLAY/PAUSE/TWS: Presione para pausar y reanudar la música.
  • Seite 36 Conexión a la corriente Conexión del micrófono Entrada de la guitarra Conexión de entrada de línea: Conecte la unidad a las tomas de salida de audio de un dispositivo analógico mediante un cable de audio RCA. Luz de operación Puerto USB: Para conectar un dispositivo de almacenamiento USB y dispositivos de carga.
  • Seite 37: Entradas Y Conexiones

    ENTRADAS Y CONEXIONES Conexión a la corriente Conexión BT...
  • Seite 38 Entrada USB Conexión Línea de entrada...
  • Seite 39 Entrada para micrófono/guitarra Conexión TWS (True wireless stereo)
  • Seite 40: Mando A Distancia

    MANDO A DISTANCIA...
  • Seite 41 Seleccione la función de Pulse para seleccionar una de las repetición en el modo USB. siguientes fuentes: USB, LINE, BT Puede utilizar las teclas numéricas para seleccionar una pista en el modo USB. Efecto Treble Aumentar el Por ejemplo, para seleccionar efecto Treble.
  • Seite 42: Funcionamiento

    FUNCIONAMIENTO Conexión BT Encienda los altavoces y seleccione el modo BT pulsando el botón SOURCE. Encienda la función BT de su teléfono móvil para buscar dispositivos BT. Selecciona [Clubmaster Go] de la lista de aciertos. Seleccione [OK] o [SÍ] para emparejar esta unidad con su teléfono móvil. Cuando [BT] se muestra continuamente en la pantalla, los dos dispositivos se emparejan con éxito.
  • Seite 43: Significado De Los Símbolos Y Las Luces

    SIGNIFICADO DE LOS SÍMBOLOS Y LAS LUCES Apago Dispositivo apagado Verde (continuo) Dispositivo encendido Rojo (continuo) Standby BT (continuo) Conectado BT (intermitente) Desconectado X.OF X-Bass apagado X.ON X-Bass encendido T.OF TWS apagado T.ON TWS encendido Apago Show Light apagado LED1, LED2, LED3, LED4 Show Light encendido Apago DJ-Modus apagado...
  • Seite 44: Retirada Del Aparato

    RETIRADA DEL APARATO Si el aparato lleva adherida la ilustración de la izquierda (el contenedor de basura tachado) entonces rige la normativa europea, directiva 2012/19/UE. Este producto no debe arrojarse a un contenedor de basura común. Infórmese sobre las leyes territoriales que regulan la recogida separada de aparatos eléctricos y electrónicos.
  • Seite 45 Cher client, Toutes nos félicitations pour l’acquisition de ce nouvel appareil. Veuillez lire attentivement les instructions suivantes de branchement et d’utilisation afin d’éviter d’éventuels dommages. Le fabricant ne saurait être tenu pour responsable des dommages dus au non-respect des consignes de sécurité et à la mauvaise utilisation de l’appareil.
  • Seite 46: Fiche Technique

    FICHE TECHNIQUE Numéro d'article 10035261 Alimentation 100-240 V ~ 50/60 Hz Consommation 120 W Consommation en veille < 0.5 W Sortie USB 5 V / 200 mA 1 x subwoofer de 8" 1 x médium de 8" Eléments de l'enceinte 1 x tweeter de 1"...
  • Seite 47: Consignes De Sécurité

    CONSIGNES DE SÉCURITÉ Consignes générales • Foudre - Si vous n‘utilisez pas l‘appareil pendant une longue période ou s‘il y a de l‘orage, débranchez la fiche de la prise et débranchez l‘antenne de l‘appareil. Cela évite d‘endommager le produit à cause de la foudre et des surtensions.
  • Seite 48: Contenu De L'emballage

    CONTENU DE L‘EMBALLAGE...
  • Seite 49: Aperçu De L'appareil

    APERÇU DE L‘APPAREIL Ecran : affiche l'état actuel. STANDBY/LIGHT SHOW: Appuyez une fois pour appeler le mode show LED1> LED2> LED3, LED4> OFF. Appuyez et maintenez pour activer ou désactiver le mode veille. AVANCE : appuyez pour lire le titre suivant. PLAY/PAUSE/TWS : Appuyez pour mettre en pause et reprendre la musique.
  • Seite 50 Prise d'alimentation Prise micro Prise guitare Prise Line-in : branchez l'appareil aux prises de sortie audio d'un appareil analogique à l'aide d'un câble audio RCA. Témoin de marche Port USB : Pour connecter un support de stockage USB et pour charger des appareils.
  • Seite 51: Branchements Et Connexions

    BRANCHEMENTS ET CONNEXIONS Alimentation Connexion BT...
  • Seite 52 Port USB Prise Line-in...
  • Seite 53 Prise micro /guitare Connexion TWS (True Wireless Stereo)
  • Seite 54: Télécommande

    TÉLÉCOMMANDE...
  • Seite 55 Sélectionnez la fonction de Appuyez pour choisir une des répétition en mode USB. sources suivantes : USB, LINE, BT Avec les touches numériques, vous pouvez sélectionner directement une piste en Effet des aigus Augmente mode USB. Par exemple, l'effet des aigus. pour sélectionner la piste 12, appuyez d'abord sur 1 puis sur 2.
  • Seite 56: Utilisation

    UTILISATION Connexion BT Allumez les enceintes et sélectionnez le mode BT en appuyant sur SOURCE. 2. Activez la fonction BT de votre téléphone mobile pour rechercher des appareils BT. Sélectionnez [Clubmaster Go] dans la liste des résultats. Sélectionnez [OK] ou [OUI] pour coupler cet appareil avec votre téléphone mobile.
  • Seite 57: État Des Voyants De Fonctionnement Et Des Témoins

    ÉTAT DES VOYANTS DE FONCTIONNEMENT ET DES TÉMOINS Eteint Appareil éteint Vert (fixe) Appareil allumé Rouge (fixe) Veille BT (fixe) connecté BT (clignotant) déconnecté X.OF X-Bass désactivée X.ON X-Bass activée T.OF TWS désactivé T.ON TWS activé Désactivé Show Light désactivé LED1, LED2, LED3, LED4 Show Light activé...
  • Seite 58: Conseils Pour Le Recyclage

    CONSEILS POUR LE RECYCLAGE Le pictogramme ci-contre apposé sur le produit signifie que la directive européenne 2012/19/UE s‘applique (poubelle à roues barrée d’une croix). Ces produits ne peuvent être jetés dans les poubelles domestiques courantes. Renseignez-vous concernant les règles appliquées pour la collecte d’appareils électriques et électroniques.
  • Seite 59 Gentile cliente, La ringraziamo per aver acquistato il dispositivo. La preghiamo di leggere attentamente le seguenti istruzioni per l’uso e di seguirle per evitare possibili danni tecnici. Non ci assumiamo alcuna responsabilità per danni scaturiti da una mancata osservazione delle avvertenze di sicurezza e da un uso improprio del dispositivo.
  • Seite 60: Dati Tecnici

    DATI TECNICI Numero articolo 10035261 Alimentazione 100-240 V ~ 50/60 Hz Potenza assorbita 120 W Consumo energetico in standby < 0,5 W Uscita USB 5 V/200 mA 1 x subwoofer da 8” 1 x gamma di tonalità medie da 8” Driver altoparlanti 1 x tweeter da 1”...
  • Seite 61: Avvertenze Di Sicurezza

    AVVERTENZE DI SICUREZZA Avvertenze generali • Colpo di fulmine – Se il dispositivo non viene utilizzato o c’è un temporale, staccare la spina dalla presa di corrente e scollegare il dispositivo dalla connessione dell’antenna. In questo modo si evitano danni al dispositivo dovuti a colpi di fulmine o sovratensione. •...
  • Seite 62: Volume Di Consegna

    VOLUME DI CONSEGNA...
  • Seite 63: Descrizione Del Dispositivo

    DESCRIZIONE DEL DISPOSITIVO Display: mostra lo stato attuale. STANDBY/LIGHT SHOW: premere una volta per accedere alla modalità Show LED1 > LED2 > LED3 > LED4 > OFF. Tenere premuto per attivare o disattivare la modalità standby. AVANTI: premere per riprodurre il titolo successivo. PLAY/PAUSE/TWS: premere per mettere in pausa e proseguire l’ascolto.
  • Seite 64 Connessione di alimentazione Connessione microfono Connessione chitarra Connessione Line-in: collegare il dispositivo alla connessione di uscita audio di un dispositivo analogico tramite cavo audio RCA. Spie di funzionamento Connessione USB: per collegare un supporto USB e per caricare dispositivi. Interruttore di selezione della corrente: per scegliere DC, AC o OFF. Modalità...
  • Seite 65: Connessioni E Collegamenti

    CONNESSIONI E COLLEGAMENTI Connessione di alimentazione Connessione BT...
  • Seite 66 Connessione USB Connessione Line-in...
  • Seite 67 Connessione per microfono/chitarra Collegamento TWS (True Wireless Stereo)
  • Seite 68: Telecomando

    TELECOMANDO...
  • Seite 69 Premere per selezionare una Selezionare la funzione di delle seguenti fonti: USB, LINE, ripetizione in modalità USB. Con i tasti numerici è possibile selezionare direttamente un titolo in Aumentare l’effetto treble. modalità USB. Ad esempio, per selezionare il titolo 12, premere prima 1 e poi 2.
  • Seite 70: Utilizzo

    UTILIZZO Collegamento BT Accendere gli altoparlanti e selezionare BT premendo SOURCE. 2. Accendere il BT sullo smartphone per cercare dispositivi BT. Selezionare e [Clubmaster Go] a dalla lista per procedere all’accoppiamento. Selezionare e [Ok] o e [Sì] per collegare il dispositivo allo smartphone. Quando lo schermo mostra continuamente e [BT], i dispositivi sono collegati.
  • Seite 71: Stati Delle Spie Di Funzionamento E Delle Indicazioni

    STATI DELLE SPIE DI FUNZIONAMENTO E DELLE INDICAZIONI Dispositivo spento Verde (continua) Dispositivo acceso Rossa (continua) Standby BT (continua) Connesso BT (lampeggiante) Disconnesso X.OF X-Bass spento X.ON X-Bass acceso T.OF TWS spento T.ON TWS acceso Show Light acceso LED1, LED2, LED3, LED4 Show Light spento Modalità...
  • Seite 72: Smaltimento

    SMALTIMENTO Se sul prodotto è presente la figura a sinistra (il cassonetto dei rifiuti mobile sbarrato), si applica la direttiva europea 2012/19/UE. Questi prodotti non possono essere smaltiti con i rifiuti normali. Informarsi sulle disposizioni vigenti in merito alla raccolta separata di dispositivi elettrici ed elettronici. Non smaltire i vecchi dispositivi con i rifiuti domestici.

Inhaltsverzeichnis