Herunterladen Inhalt Inhalt Diese Seite drucken

Werbung

Verfügbare Sprachen

Verfügbare Sprachen

INSTRUCTIONS
MODE D'EMPLOI
BEDIENUNGSANLEITUNG
CBG DIAL GAUGE
COMPARATEUR CBG
CBG MESSUHR
E
F
D

Werbung

Inhaltsverzeichnis
loading

Inhaltszusammenfassung für Primatek S Dial WORK CBG

  • Seite 1 CBG DIAL GAUGE COMPARATEUR CBG CBG MESSUHR INSTRUCTIONS MODE D’EMPLOI BEDIENUNGSANLEITUNG...
  • Seite 2 No. 0 No. 0 (0,4x2,5mm) Installing and replacing the battery (or Power cable) Mise en place et remplacement de la batterie (ou câble Power) Einbau und Austausch von Batterie (oder Netzkabel) Battery / batterie / batterie : lithium 3V, type CR2032...
  • Seite 3 (4x) M2 L 3.5mm Diagram for rear fixings Schéma de fixation arrière Schema für die Befestigung hinten...
  • Seite 4 1 + 2 56 1 + 2 56 thou 0. . .8 TO L PRESET µm TO L MIN MAX PRESET 0. . .8 TO L MIN MAX PRESET...
  • Seite 5 Description 1. MODE button 19. Lower limit exceeded 2. CLEAR button 20. Upper limit exceeded 3. “ Favourite ” button 21. Tolerance indicators 4. Preset Master button 22. Analogue scale lower limit Ø8 or 3/8” 23. Analogue scale upper limit 5.
  • Seite 6 1 . Operating features of the instrument The instrument has two operating modes: First level functions (direct access) and Second level functions. In MODE addition to the configuration functions, available access to display tolerances settings (see chaps. 3 and 4) The «favourite»...
  • Seite 7 3. First level functions Each short press on gives direct access to the First level functions : MODE MODE CLEAR Choice of reference (REF1 to REF4) rEF1 rEF4 MODE Inputting a Preset value (see chap. 6) -000. 0 00 PRESET MODE Tolerance display (inputting tolerance limits, see chap.
  • Seite 8 4. Second level functions Prolonged pressure (>2s) on gives access to the Second level functions. Then, each short press on MODE MODE accesses the required function : MODE ModE dELtA MODE Units selection (mm or Inch) CLEAR Inch Unit MINMAX MODE MODE Choice of resolution 0.01...
  • Seite 9 5. Inputting (or modifying) tolerance limits The tolerance limits are defined by introducing lower and upper intervals, compared to the nominal rating. CLEAR ..... Input the nominal value (see chap. 6) Note 1 : ..... Input the lower tolerance limit - If no tolerance limits have been (see chap.
  • Seite 10 6. Entering a numeric value To enter or modify a numeric value (Preset, nominal ratings, tolerance intervals) : Increase of the selected digit CLEAR Selection of the next digit Save the value MODE thou TO L MINMAX PRESET µm...
  • Seite 11 7. Bluetooth configuration (depending on model) ® The connection procedure has been designed to be simple and is signalled by the following three states: Symbol off ....disconnected mode Symbol blinking..advertising mode Symbol on....connected mode The following options can be selected to control the Bluetooth module.
  • Seite 12 Connection : 1° Activate Bluetooth compatible software and hardware (Master : PC, Display Unit). ® 2° Start the instrument. By default the Bluetooth module is active and the instrument is available for connection (advertising ® mode). 3° If no connnection is established during the advertisement period reactivate the Bluetooth module using the bt / On ®...
  • Seite 13: Bluetooth ® Specifications

    7.1 Bluetooth ® specifications Frequency Band 2.4GHz (2.402 - 2.480GHz) Modulation GFSK (Gaussian Frequency Shift Keying) Max Output Power Class 3: 1mW (0dBm) Open space: up to 15m Range Industrial environment: 1-5m Continuous : up to 2 months (Always connected with 4 values /sec) Battery life Saver : up to 5 months (The instrument sends value only when the position has changed) Blind/Push : up to 7 months (Value is sent from the instrument (button) or requested from the computer)
  • Seite 14 8. Favourite key The «favourite» key gives direct access to a predefined function, and can be configured according to the needs of the user. In order to assign a function to the «favourite» key, give a prolonged press on , and then select the required function : Data Unit...
  • Seite 15 Note : a function can also be assigned via RS232 using the command <FCT + Function No.> example : Change of Unit = <FCT6>, Changing resolution: = <FCT7> 9 Adjustment of the instrument - Beforehand, input the dimension of the standard master in the Preset value (see chap. 3) - Reset the measurement value by a short press on Clear - Make a standard measurement (going through the turnaround point) - Adjust the instrument by pressing Preset Master button (>2s)
  • Seite 16 10. Switching off The dial gauge goes automatically into stand-by if not used for 10 minutes, unless Auto OFF mode has been turned off (see Chap. 4, Second level functions) CLEAR 123.456 Stand-by mode can be forced by a prolonged press (> 2 sec) on CLEAR >2s In stand-by mode, the value of the origin is retained by the sensor (SIS mode), and the instrument automatically restarts...
  • Seite 17 12. Personalising the instrument Access to the functions of your instrument can be personalised, for more information see manufacturer’s website (requires you to connect your instrument via a Proximity or Power RS / USB cable). Possibilities: - Enable or disable the required functions - Modify access to the Second level functions (direct access) 12.1 Application with MAX value measurement Activate the mode Int-Ext Max by sending the command CFGCBGMAX (see chap.
  • Seite 18 14. List of the main commands Selection and configuration Interrogation FCT0 ...9...A...F Assign «favourite» function FCT? «favourite» function active? MM / IN Change measurement unit UNI? Measurement unit active? KEY0 / KEY1 Lock / unlock keypad KEY? Keypad locked? PRE [+/-]xxx.xxx Modify preset value PRE? Preset value?
  • Seite 19 15. Specifications Measurement range : 12.5mm 25mm Max error (10µm Resolution) : 10µm 10µm (±1 digit) Max error (1µm Resolution) 3µm 4µm Max error (0.1µm Resolution) : 1.8µm 2.2µm Repeatability : 2µm Weight : 119g 123g Measurement force (standard) : 0.65-0.9N 0.65-1.15N Max.
  • Seite 20 1 + 2 56 1 + 2 56 thou 0. . .8 TO L PRESET µm TO L MIN MAX PRESET 0. . .8 TO L MIN MAX PRESET...
  • Seite 21 Description 1. Bouton MODE 19. Dépassement de la limite inférieur 2. Bouton CLEAR 20. Dépassement de la limite supérieur 3. Bouton “ Favoris ” 21. Indicateur des tolérances 4. Bouton Preset Master 22. Limite inférieur échelle analogique Ø8 ou 3/8” 23.
  • Seite 22 1. Les fonctionnalités de l’instrument L’instrument possède 2 modes de travail :fonctions premier niveau (avec accès direct) et fonctions second MODE niveau. En plus des fonctions de configuration, vous pouvez accéder à l’affichage des Tolérances. (voir chap. 3 et 4) Le bouton «favori»...
  • Seite 23 3. Fonctions premier niveau Chaque pression courte sur permet un accès direct aux fonctions premier niveau : MODE MODE CLEAR Choix de la référence (REF1 à REF4) rEF1 rEF4 MODE Introduction d’une valeur de Preset (voir chap. 6) -000. 0 00 PRESET MODE Affichage des tolérances (introduction des limites de...
  • Seite 24 4.fonctions second niveau Une pression longue (>2s) sur permet d’accéder auxfonctions second niveau. Puis, chaque pression courte sur MODE MODE accède à la fonction souhaitée : MODE ModE dELtA MODE Sélection de l’unité (mm ou Inch) CLEAR Unit Inch MINMAX MODE MODE Choix de la résolution 0.01...
  • Seite 25 5. Introduction (ou modification) des limites de tolérances Les limites de tolérances sont définies en introduisant l’écart inférieur et supérieur, par rapport à la cote nominale. CLEAR ..... Introduire la valeur nominale (voir chap. 6) Note 1 : ..... Introduire la limite de tolérance inférieure - Si aucune limites de tolérance (voir chap.
  • Seite 26 6. Introduction d’une valeur numérique Pour introduire ou modifier une valeur numérique (Preset, cote nominale ou écarts de tolérances) : Incrémentation du digit sélectionné CLEAR Sélection du prochain digit Sauve la valeur MODE thou TO L MINMAX PRESET µm...
  • Seite 27 7. Configuration Bluetooth (selon modèle) ® La procédure de connexion a été pensée au plus simple et se distingue par les 3 états ci-dessous: Symbole éteint ..mode déconnecté. Symbole clignote ..mode découverte. Symbole allumé ..mode connecté. Les options suivantes peuvent être sélectionnées pour contrôler le module Bluetooth ®...
  • Seite 28 - Remarque: Les informations d’appairage Bluetooth sont effacées lorsque le profil est modifié. ® Connexion : 1° S’assurer que l’application et le matériel Bluetooth compatibles sont actifs (PC, unité de mesure). ® 2° Démarrer l’instrument. Par défaut le module Bluetooth est actif et l’instrument est connectable (mode découverte).
  • Seite 29 7.1 Spécification Bluetooth ® Bande de fréquence 2.4GHz (2.402 - 2.480GHz) Modulation GFSK (Gaussian Frequency Shift Keying) Puissance de sortie max. Classe 3: 1mW (0dBm) Espace ouvert : jusqu’à 15m Portée Environnement industriel : 1-5m Continuous : Jusqu’à 2 mois - Toujours connecté avec 4 valeurs /sec. Saver : jusqu’à...
  • Seite 30 8. Touche favori La touche «favori» permet l’accès direct à une fonction prédéfinie et peut être configurée selon les besoins de l’utilisateur. Pour attribuer une fonction à la touche «favori», effectuer une pression longue (>2s) sur , puis sélectionner la fonction souhaitée : Envoi de Unit...
  • Seite 31 Remarque : l’attribution de la fonction peut également se faire par RS 232, avec la commande <FCT + N° de fonction> exemple : Changement d’unité = <FCT6>, changement de résolution = <FCT7> 9 Réglage de l’instrument - Au préalable, il faut introduire la dimension de l’étalon dans la valeur du Preset (voir chap. 3) - Faire un Reset de la valeur mesurée par une pression courte sur Clear - Effectuer une mesure de l’étalon (en passant par le point de rebroussement) - Ajuster l’instrument en pressant sur le bouton Preset Master (>2s)
  • Seite 32 10. Extinction Le comparateur se met automatiquement en stand-by après 10 minutes de non utilisation, sauf si le mode Auto OFF est désactivé (voir chap.4, fonctions second niveau) CLEAR 123.456 Vous pouvez forcer le mode stand-by, par pression longue (>2s) sur CLEAR >2s En mode stand-by, la valeur d’origine est conservée par le capteur (mode SIS), et l’instrument redémarre automatique-...
  • Seite 33 12. Personnalisation de l’instrument Il est possible de personnaliser l’accès aux fonctions de votre instrument, pour plus d’information voir site-web du fabricant (nécessite une connexion de votre instrument, via un câble Proximity ou Power RS / USB). Possibilités : - Désactiver ou activer les fonctions souhaitées - Modifier l’accès auxfonctions second niveau ( mise en accès direct) 12.1 Application avec mesure sur la valeur MAX Activer le mode Int-Ext Max avec la commande CFGCBGMAX (voir chap.
  • Seite 34 14. Liste des commandes principales Sélection et configuration Interrogation FCT0 ...9...A...F Attribution fonction «favori» FCT? Fonction «favori» active? MM / IN Changement unité de mesure UNI? Unité de mesure active? KEY0 / KEY1 Active / désactive le blocage clavier KEY? Blocage clavier? PRE [+/-]xxx.xxx Modification valeur de preset...
  • Seite 35 15. Spécifications Etendue de mesure : 12.5mm 25mm Erreur max (résolution 10µm) : 10µm 10µm (±1 digit) Erreur max (résolution 1µm) : 3µm 4µm Erreur max (résolution 0.1µm) : 1.8µm 2.2µm Répétabilité : 2µm Poids : 119g 123g Force de mesure (standard) : 0.65-0.9N 0.65-1.15N Vitesse max.
  • Seite 36 1 + 2 56 1 + 2 56 thou 0. . .8 TO L PRESET µm TO L MIN MAX PRESET 0. . .8 TO L MIN MAX PRESET...
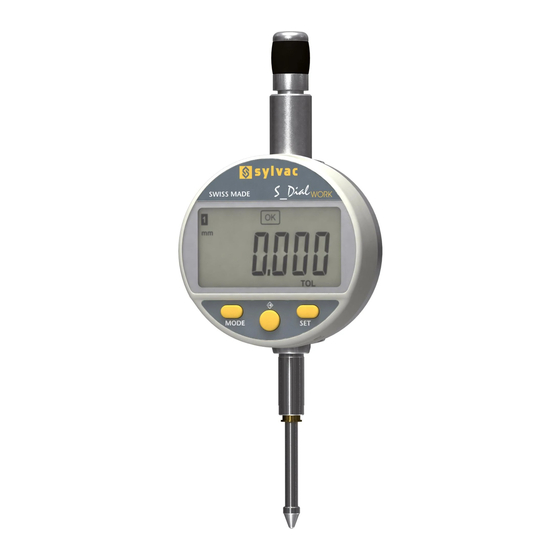
  • Seite 37 Beschreibung 1. MODE-Taste 19. Unterer Grenzwert unterschritten 2. SET-Taste 20. Oberer Grenzwert überschritten 3. Favoriten-Taste 21. Toleranzanzeiger 4. Preset Master-Taste 22. Unterer Grenzwert Strichskala Ø8 oder 3/8” 23. Oberer Grenzwert Strichskala 5. Einspannschaft 24. REF Aktiv (1-4) 6. Kugeltaster Ø2 / M2.5 oder 4-48-UNF 25.
  • Seite 38: Funktionalitäten Des Instruments

    1. Funktionalitäten des Instruments: Das Instrument verfügt über zwei Betriebsarten: die Funktionen der ersten Ebene (mit direktem Zugang) und MODE die Funktionen der zweiten Ebene. Neben den Konfigurationsfunktionen hat man Zugriff auf die Toleranzan- zeige. (siehe Kap. 3 und 4). Mit der Taste „Favoriten“...
  • Seite 39 3. Funktionen erste Ebene Jede kurze Betätigung von ermöglicht einen direkten Zugriff auf die Funktionen der ersten Ebene : MODE MODE CLEAR Wahl der Referenz (REF1 zu REF4) rEF1 rEF4 MODE Eingabe des Presetwertes (siehe Kap. 6) -000. 0 00 PRESET MODE Anzeige der Toleranzen...
  • Seite 40 4. Funktionen zweite Ebene Eine lange Betätigung (>2s) von ermöglicht es, auf die Funktionen der zweiten Ebene zuzugreifen. MODE Anschließend führt jede kurze Betätigung von zur gewünschten Funktion : MODE MODE ModE dELtA MODE Wahl der Einheit (mm oder Inch) CLEAR Unit Inch...
  • Seite 41 5. Eingeben (oder Ändern) von Toleranzgrenzen Toleranzgrenzen werden durch die Eingabe von oberen und unteren Abweichungen gegenüber dem Nominalwert festgelegt. CLEAR ..... Den Nominalwert eingeben (siehe Kap. 6) Anmerkung 1 : ..... Die untere Toleranzgrenze eingeben - Falls keine Toleranzgrenzen (siehe Kap.
  • Seite 42 6. Eingabe von Ziffernwerten Zum Eingeben oder Ändern eines Ziffernwerts (Preset, Nominalwert, Toleranzabweichung oder Multiplikationsfaktor) : Erhöhung des gewählten Werts CLEAR Wahl des nächsten Werts Speichern des gewünschten Werts MODE thou TO L MINMAX PRESET µm...
  • Seite 43 7. Bluetooth -Konfiguration (je nach Modell) ® Der Verbindungsaufbau ist ganz einfach und wird in 3 Zuständen angezeigt : Kein Symbol ..keine Verbindung Blinkendes Symbol ..bereit zur Verbindung Stehendes Symbol ..Verbindung hergestellt Zur Konfiguration des Bluetooth -Moduls stehen die folgenden Optionen zur Verfügung: ®...
  • Seite 44: Verbindungsaufbau

    Anmerkung: - Beim Wechsel des Profils wird die Bluetooth -Kopplung aufgehoben. ® Verbindungsaufbau : 1° Stellen Sie sicher, dass die Bluetooth Anwendung und das Gerät kompatibel und aktiv sind (PC, Messeinheit). ® 2° Schalten Sie das Instrument ein. Die Bluetooth -Funktion ist standardmässig aktiviert und das Instrument kann verbunden ®...
  • Seite 45: Technische Daten Der Bluetooth

    7.1 Technische Daten der Bluetooth -Funktion ® Frequenzband 2.4GHz (2.402 - 2.480GHz) Modulation GFSK (Gaussian Frequency Shift Keying) Max. Ausgangsleistung Klasse 3: 1mW (0dBm) Im Freien: bis 15 m Reichweite Industrieumgebung: 1-5 m Continuous : bis zu 2 Monaten (Immer verbunden mit 4 Werten /sek). Saver : bis zu 5 Monaten (Das Gerät sendet die Werte nur wenn die Position geändert hat).
  • Seite 46 8. Favoriten-Taste Die „Favoriten-Taste“ ermöglicht den direkten Zugriff auf eine zuvor bestimmte Funktion und kann entsprechend der Bedürf- nisse des Nutzers konfiguriert werden. Um der „Favoriten-Taste“ eine Funktion zuzuordnen, muss man lange auf drücken und dann die gewünschte Funktion wählen : Datenübertra- Unit 0 dAtA...
  • Seite 47 Anmerkung : Die Zuordnung der Funktion kann auch durch RS 232 erfolgen, mit der Steuerung <FCT + Funktions-Nr.> Beispiel : Masseinheit = <FCT6>, Auflösung wechseln = <FCT7> 9 Justieren des Geräts - Zuvor muss das Maß des Standards im Wert des Presets eingetragen werden (siehe Kapitel 3) - Vor jedem Messen den Messwert durch kurzes Betätigen der Taste Clear zurücksetzen.
  • Seite 48 10. Ausschalten Die Messuhr stellt sich nach 10 Minuten Nichtgebrauch automatisch auf Stand-By, außer wenn die Betriebsart Auto OFF deaktiviert ist (siehe Kap. 4, Funktionen zweiten Ebene). CLEAR 123.456 Stand-By-Funktion durch langes Betätigen (>2s) von erzwingen. CLEAR >2s Im Stand-By-Modus wird der Referenzwert vom Sensor (SIS Modus) beibehalten und das Instrument startet automatisch mit einer Bewegung des Messeinsatzes sowie über RS, Bluetooth Antrag oder eine Taste drücken .
  • Seite 49: Personalisierung Des Instruments

    12. Personalisierung des Instruments Es ist möglich, den Zugriff auf die Funktionen Ihres Instruments mit Hilfe der kostenlosen Software zu personalisieren. Weitere Informationen finden Sie auf der Webseite des Herstellers (erfordert den Anschluss Ihres Instruments mit einem Proximity-Kabel oder RS / USB Power). Möglichkeiten: - die Deaktivierung oder Aktivierung der erwünschten Funktionen - die Änderung des Zugriffs auf die fortgeschrittenen Funktionen (Schaffung eines direkten Zugriffs)
  • Seite 50 14. Liste der wesentlichen Steuerbefehle Auswahl un Konfiguration Abfragen FCT0 ...9...A...F Zuordnung der Funktion „Favorit“ FCT? Funktion „Favorit“ aktiv? MM / IN Wechsel der Masseinheit UNI? Masseinheit aktiv KEY0 / KEY1 Aktiviert / Deaktiviert die Tastatursperre KEY? Tastatursperre? MUL [+/-]xx.xxxx Andern des Multiplikator MUL? Multiplikator Wert...
  • Seite 51: Technische Daten

    15. Technische Daten Messbereich : 12.5mm 25mm Fehlergrenze (Ziffernschrittwert 10µm) : 10µm 10µm (±1 digit) Fehlergrenze (Ziffernschrittwert 1µm) 3µm 4µm Fehlergrenze (Ziffernschrittwert 0.1µm) : 1.8µm 2.2µm Wiederholbarkeit : 2µm Gewicht : 119g 123g Messkraft (Standard) : 0.65-0.9N 0.65-1.15N Maximale Verstellgeschwindigkeit : 1.7m/s Anzahl der Messungen pro Sekunde : Messung: 20 Mess/s...
  • Seite 52 Notes / Notes / Aufzeichnungen...
  • Seite 53 Notes / Notes / Aufzeichnungen...
  • Seite 54: Certificate Of Conformity

    CERTIFICATE OF CONFORMITY We certify that this instrument has been manufactured in accordance with our Quality Standard and tested with reference to masters of certified traceability by the National Office of Metrology. CERTIFICAT DE CONFORMITE Nous certifions que cet instrument a été fabriqué et contrôlé selon nos normes de qualité et en référence avec des étalons dont la traçabilité...
  • Seite 55: Calibration Certificate

    Calibration certificate Because we make our instruments in batches, you may find that the date on your calibration certificate is not current. Please be assured that your instruments are certified at point of production and then held in stock in our warehouse in accordance with our Quality Management System ISO 9001.
  • Seite 56 The Bluetooth word mark and logos are registered trademarks owned by the Bluetooth SIG, Inc. and any use of such ® ® marks by Sylvac is under license. Other trademarks and trade names are those of their respective owners. U.S./Canada Certification Sylvac m.n.: S_Dial WORK This device contains...
  • Seite 57: Radiofrequency Radiation Exposure Information

    NOTICE : This device complies with Part 15 of the FCC Rules and with RSS-210 of Industry Canada. Operation is subject to the following two conditions. (1) this device may not cause harmful interference, and (2) this device must accept any interference received, including interference that may cause undesired operation. NOTE : This equipment has been tested and found to comply with the limits for a Class A digital device, pursuant to Part 15 of the FCC Rules.
  • Seite 58 Brazil Certification Description : This module is based on Nordic Semiconductor nRF8001 μBlue Bluetooth Low Energy Platform. The nRF8001 is a ® single chip transceiver with an embedded baseband protocol engine, suitable for ultra-low power wireless applications conforming to the Bluetooth Low Energy Specification contained within v4.0 of the overall Bluetooth specification.
  • Seite 59 South Korea certification MSIP-CRM-iNs-ISP091201 Japan certification Taiwan certification 警語 經型式認證合格之低功率射頻電機,非經許可,公司、商號或使用者均不得擅自變更 頻率、加大功率或變更原設計之特性及功能。 低功率射頻電機之使用不得影響飛航安全及干擾合法通信;經發現有干擾現象時,應 立即停用,並改善至無干擾時方得繼續使用。 前項合法通信,指依電信法規定作業之無線電通信。低功率射頻電機須忍受合法通 信或工業、科學及醫療用電波輻射性電機設備之干擾。...
  • Seite 60 Changes without prior notice Sous réserve de toute modification Änderungen vorbehalten Firmware : 4.10-E - 11.07.2019 Edition : 2019.08 - 681.289.08...

Diese Anleitung auch für:

8056317

Inhaltsverzeichnis