Keter FACTOR 6x3 Gebrauchsanleitung
Vorschau ausblenden
Andere Handbücher für FACTOR 6x3:
- Gebrauchsanleitung (15 Seiten) ,
- Gebrauchsanleitung (28 Seiten) ,
- Montageanleitung (28 Seiten)
Quicklinks
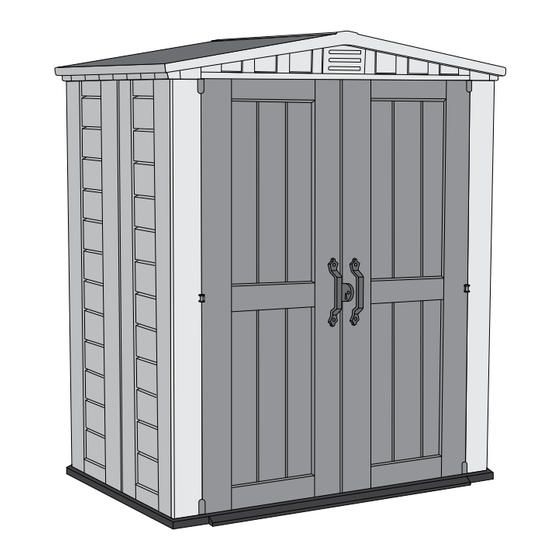
FACTOR 6x3
USER MANUAL | MODE D'EMPLOI | MANUAL DEL USUARIO | GEBRAUCHSANLEITUNG |
GEBRUIKSHANDLEIDING | MANUALE PER L'UTENTE | MANUAL DO UTILIZADOR
WARRANTY ACTIVATION
US, Canada:
Tel: +1-888-374-4262
Fax: +1-317-575-4502
UK: Tel: +44-121-506-0008
Fax: 44-121-422-0808
Spain: Tlf: 34-949-277-421
Fax: 34-949-348-976
Other European Countries:
Tel: +31-8847-22277, Fax: +31-1612-27002
Thank you for your purchase of the Keter shed. In order to activate your warranty,
please log onto our website and fill in the form under warranty activation.
SKU: 17197903
WWW.KETER.COM

Verwandte Anleitungen für Keter FACTOR 6x3


Inhaltszusammenfassung für Keter FACTOR 6x3
- Seite 1 Spain: Tlf: 34-949-277-421 Fax: 34-949-348-976 Other European Countries: Tel: +31-8847-22277, Fax: +31-1612-27002 Thank you for your purchase of the Keter shed. In order to activate your warranty, WARRANTY ACTIVATION please log onto our website and fill in the form under warranty activation.
- Seite 2 SITE PREPARATION | PRÉPARATION DU SITE | PREPARACIÓN DEL LUGAR | VORBEREITUNG DES AUFSTELLUNGSORTES | VOORBEREIDING VAN HET TERREIN | PREPARAZIONE DEL LUOGO DI MONTAGGIO | PREPARAÇÃO DO LOCAL Level the ground surface | Égalisez la surface du sol | Nivele la superficie del suelo | Ebnen Sie die Bodenoberfläche | Maak de bodem vlak | Livella la superficie del terreno | Nivele a superfície do solo Recommendation: Construct a wooden or concrete base as a foundation | Recommandation: fabriquez une base en bois ou en béton en guise de fondation | Recomendación: construya una base de madera o de cemento a modo de cimiento |...
- Seite 3 BEFORE STARTING ASSEMBLY | AVANT DE COMMENCER LE MONTAGE | ANTES DE EMPEZAR EL ARMADO | VOR MONTAGEBEGINN | VOORDAT U BEGINT TE MONTEREN | PRIMA DI INIZIARE IL MONTAGGIO | ANTES DE INICIAR A MONTAGEM Read the care and safety guidelines at the end of this manual | Review all assembly instructions | Assemble all the parts according to the directions in this manual.
- Seite 4 SHED PARTS | PIÈCES DE L’ABRI | PARTES DEL COBERTIZO | TEILE DES SCHUPPENS | ONDERDELEN VAN HET SCHUURTJE | COMPONENTI DEL DEPOSITO ATTREZZI | PEÇAS DO ABRIGO Remove all parts from the package(s) and spread them out on a clean work surface | Code letters are imprinted on each part for easy identification | Retirez toutes les pièces du/des paquet(s) et étalez-les sur une surface de travail propre | Des lettres sont imprimées sur chaque pièce pour une identification facile | Saque todas las piezas del paquete o paquetes y póngalas sobre una superficie de trabajo limpia | El código de letras está...
- Seite 5 WALL PARTS | PIÈCES DU CONTOUR | PARTES DE LAS PAREDES | WANDELEMENTE | MUURONDERDELEN | PARTI DELLA PARETE | PAINÉIS LATERAIS FO/O(X4) CS3(X2) SP(X2) CS(X1) DOOR PARTS | PIÈCES DE LA PORTE | TÜRELEMENTE | PARTES DE LA PUERTA | DEURONDERDELEN | PARTI DELLA PORTA | PEÇAS DAS PORTAS DS(X2) DH1(X1)
- Seite 6 FLOOR ASSEMBLY | MONTAGE DU SOL | ARMADO DEL PISO | MONTAGE DER BODENPLATTE | VLOERMONTAGE | MONTAGGIO DEL PAVIMENTO | MONTAGEM DO PISO F6*3(X1) F6*3 • DOOR / FRONT • PORTE / L'AVANT • TÜRE / VORDERSEITE • PUERTA / PARTE DELANTERA •...
- Seite 7 CS3(X1) CLICK CO(X3) WA(X3) FO/O(X1) FO/O...
- Seite 8 SP(X1) • This side out • Côté Extérieur • Cara exterior • Diese Seite nach aussen • Deze kant buiten • Lato rivolto verso l'esterno • Este lado para fora CS(X1) CLICK CLICK...
- Seite 9 SP(X1) CO(X3) WA(X3) FO/O(X1) FO/O...
- Seite 10 CS3(X1) CLICK CO(X3) WA(X3) FO/O(X1) FO/O...
- Seite 11 RD3(X2) WA(X4) CO(X4)
- Seite 12 DOOR ASSEMBLY | MONTAGE DE LA PORTE | ARMADO DE LA PUERTA | MONTAGE DER TÜR | DEURMONTAGE | MONTAGGIO DELLA PORTA | MONTAGEM DA PORTA FP1(X2) FP2(X2) FFD(X2) HG(X4) DX463(X2) DX463 DX463...
- Seite 13 (X2) CLICK 90º ROOF ASSEMBLY | MONTAGE DU TOIT | ARMADO DEL TECHO | DACHMONTAGE | DAKMONTAGE | MONTAGGIO DEL TETTO | MONTAGEM DO TELHADO KETER CO(X4) WA(X4) RF3(X1)
- Seite 14 CO(X4) WA(X4) RB3(X1) CLICK B3(X1) SC9(X4)
- Seite 15 TL3(X2) SC9(X10) Faible Bajo Niedrig Laag Bassa Baixa...
- Seite 16 SC9(X10) ASSEMBLY REQUIRES TWO PEOPLE | LE MONTAGE DOIT ÊTRE EFFECTUÉ PAR DEUX PERSONNES | SE NECESITAN DOS PERSONAS PARA ARMARLO | ZWEI PERSONEN ZUR MONTAGE NOTWENDIG | MONTAGE VEREIST TWEE PERSONEN | MONTAGGIO RICHIEDE DUE PERSONE | A MONTAGEM EXIGE DUAS PESSOAS Faible Bajo Niedrig...
- Seite 17 SC9(X2) ST(X2) DS(X2)
- Seite 18 s26b(X4) IH(X2) s26b s26b...
- Seite 19 DH(X1) • Left • Gauche • Izquierdo • Verließ • Links • Sinistra • Esquerdo FML(X1) SC5(X2) • Left • Gauche • Izquierdo • Verließ • Links • Sinistra • Esquerdo...
- Seite 20 FLA(X2) SCW8(X4) • Left SCW8 • Gauche • Izquierdo • Verließ • Links • Sinistra • Esquerdo SCW8 SC15(X4) • Left • Gauche • Izquierdo • Verließ • Links • Sinistra SC15 • Esquerdo...
- Seite 21 DH2(X1) • Right • Droit • Derecho • Richtig • Rechts • Destra • Direito FMR(X1) SC5(X2) • Right • Droit • Derecho • Richtig • Rechts • Destra • Direito...
- Seite 22 SC15(X6) • Right • Droit • Derecho • Richtig • Rechts • Destra • Direito SC15...
- Seite 23 OPTION | OPCIÓN | OPTIE | OPZION | OPÇÃOE Use wooden planks as shelves (wooden planks not included). Utilisez des planches de bois comme étagères (planches de bois non fournies). Utilice tablas de madera como estantes (tablas de madera no incluidas). Verwenden Sie Holzbretter als Regale (die Holzbretter sind nicht enthalten).
- Seite 24 OPTION | OPCIÓN | OPTIE | OPZION | OPÇÃOE SECURING THE SHED TO A FOUNDATION Affix the shed to the foundation by drilling holes in the shed floor at the pre-marked locations and screwing it into the foundation using appropriate screws (screws not included). FIXER L’ABRI SUR UNE FONDATION Fixez l’abri à...
- Seite 25 CARE AND SAFETY GUIDELINES • The shed is intended for storage purposes only. It is not designed for habitation. • It is strongly recommended to secure the shed to an immovable object or anchor to the ground by drilling holes in the shed floor (at the pre-marked locations) and inserting proper screws into the ground (screws are not included).
- Seite 26 • Tragen Sie eine Schutzbrille und befolgen Sie bei Verwendung von Elektrowerkzeugen immer die Anweisungen des Herstellers. • Reinigen Sie den Schuppen mit einem Gartenschlauch und einem milden Reinigungsmittel. Verwenden Sie auf keinen Fall eine harte Bürste und Scheuer - oder Entfettungsmittel sowie Öl- oder Acetonhaltige Reinigungsmittel, da diese Flecken verursachen oder den Schuppen beschädigen könnten. •...
- Seite 27 Keter no se hace responsable por ningún daño realizado por terceros o daños o pérdida de objetos dentro o cerca de la cobertizo. Al entregar el ticket o factura de compra y prueba del presunto fallo del producto, y sujeto a informar del fallo de manera puntual, Keter, a su discreción, reemplazará...
- Seite 28 O seu abrigo Keter (“o Produto”) foi fabricado manualmente a partir de materiais recicláveis de qualidade superior sob controlo e supervisão rigorosos. Em caso de ocorrência de algum problema com o Produto, por favor, faça a sua reclamação para o serviço de apoio ao cliente Keter no nosso site (www.keter.com) ou por telefone.