Herunterladen Inhalt Inhalt Diese Seite drucken
Royal N-RVL 1200 Originalbetriebsanleitung

Royal N-RVL 1200 Originalbetriebsanleitung

Elektro-vertikutierer und rasenlüfter

Werbung

Verfügbare Sprachen

Verfügbare Sprachen

Anleitung_N-RVL_1200_SPK7:_
Originalbetriebsanleitung
Elektro-Vertikutierer und Rasenlüfter
Original operating instructions
Electric Scarifier and Lawn Aerator
Mode d'emploi d'origine
Scarificateur électrique et motobineuse
j
Originální návod k obsluze
Elektrický vertikutátor a
provzdušňovač trávníku
Art.-Nr.: 34.205.04
26.10.2009
15:24 Uhr
Seite 1
I.-Nr.: 01029
1200
N-RVL

Werbung

Inhaltsverzeichnis
loading

Inhaltszusammenfassung für Royal N-RVL 1200

  • Seite 1 Anleitung_N-RVL_1200_SPK7:_ 26.10.2009 15:24 Uhr Seite 1 Originalbetriebsanleitung Elektro-Vertikutierer und Rasenlüfter Original operating instructions Electric Scarifier and Lawn Aerator Mode d’emploi d’origine Scarificateur électrique et motobineuse Originální návod k obsluze Elektrický vertikutátor a provzdušňovač trávníku 1200 Art.-Nr.: 34.205.04 I.-Nr.: 01029 N-RVL...
  • Seite 2 Anleitung_N-RVL_1200_SPK7:_ 26.10.2009 15:25 Uhr Seite 2...
  • Seite 3 Anleitung_N-RVL_1200_SPK7:_ 26.10.2009 15:25 Uhr Seite 3...
  • Seite 4 Anleitung_N-RVL_1200_SPK7:_ 26.10.2009 15:25 Uhr Seite 4...
  • Seite 5 Anleitung_N-RVL_1200_SPK7:_ 26.10.2009 15:25 Uhr Seite 5...
  • Seite 6 Anleitung_N-RVL_1200_SPK7:_ 26.10.2009 15:25 Uhr Seite 6...
  • Seite 7 Anleitung_N-RVL_1200_SPK7:_ 26.10.2009 15:25 Uhr Seite 7 Vor Inbetriebnahme Bedienungsanleitung und Sicherheitshinweise lesen und beachten. Read and follow the operating instructions and safety information before using for the first time. Avant la mise en service, lisez le mode d’emploi et les consignes de sécurité...
  • Seite 8: Inhaltsverzeichnis

    Anleitung_N-RVL_1200_SPK7:_ 26.10.2009 15:25 Uhr Seite 8 Inhaltsverzeichnis Seite: 1. Allgemeine Sicherheitsvorschriften 2. Aufbauübersicht und Lieferumfang 3. Beschreibung der Hinweis-Logos 4. Bestimmungsgemäße Verwendung 5. Zusammenbau des Gerätes 6. Einstellung der Arbeitstiefe 7. Wechseln der Walze 8. Inbetriebnahme 9. Hinweise zum richtigen Arbeiten 10.
  • Seite 9: Allgemeine Sicherheitsvorschriften

    Anleitung_N-RVL_1200_SPK7:_ 26.10.2009 15:25 Uhr Seite 9 Verpackung: 6. Überzeugen Sie sich davon, dass alle Schutz- Das Gerät befindet sich in einer Verpackung um vorrichtungen montiert sind und einwandfrei Transportschäden zu verhindern. Diese Verpackung funktionieren. ist Rohstoff und ist somit wieder verwendbar oder 7.
  • Seite 10 Anleitung_N-RVL_1200_SPK7:_ 26.10.2009 15:25 Uhr Seite 10 geführt und an die Schalter/Steckerkombination keit sein oder mit diesem Material überzogen angesteckt wer-den. Prüfen Sie vor Gebrauch sein. die Leitung auf Be-schädigungen und Alterung. 37. Achten Sie darauf, dass Sie Bahnen vermeiden, Benutzen Sie das Gerät nie mit abgenutzten welche die freie Bewegung des Verlängerungs- oder beschädigten Leitungen.
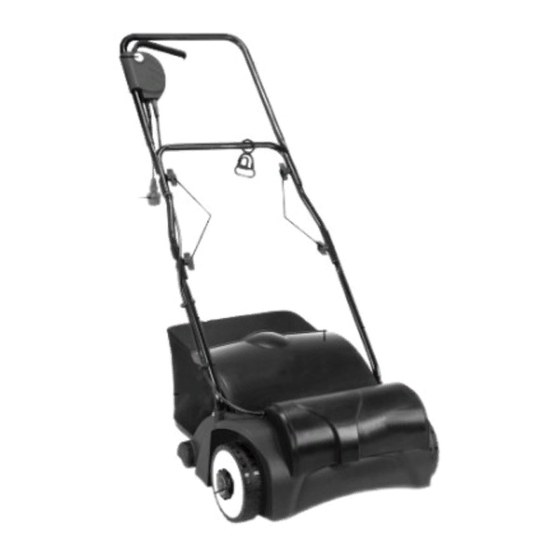
  • Seite 11: Aufbauübersicht Und Lieferumfang

    Anleitung_N-RVL_1200_SPK7:_ 26.10.2009 15:25 Uhr Seite 11 2. Aufbauübersicht und Lieferumfang tumsperiode. Bitte beachten Sie, dass unsere Geräte bestim- (siehe Bild 1+2) mungsgemäß nicht für den gewerblichen, handwerk- lichen oder industriellen Einsatz konstruiert wurden. 1. Ein/Aus-Schalthebel Wir übernehmen keine Gewährleistung, wenn das 2.
  • Seite 12: Zusammenbau Des Gerätes

    Anleitung_N-RVL_1200_SPK7:_ 26.10.2009 15:25 Uhr Seite 12 Das Gerät ist für die private Benutzung im Haus- und Montage des oberen Schubbügels Hobbygarten geeignet. (siehe Bild 7-9) Oberen Schubbügel (Abb. 1/Pos. 5) so positio- Als Geräte für den privaten Haus- und Hobbygarten nieren, dass die Löcher des oberen Schubbügels werden solche angesehen, deren jährliche Benut- mit den Löchern des unteren Schubbügels über-...
  • Seite 13: Wechseln Der Walze

    Anleitung_N-RVL_1200_SPK7:_ 26.10.2009 15:25 Uhr Seite 13 7. Wechseln der Walze (siehe Bild zum Hang. Hänge über 15 Grad Schräge dürfen mit dem Gerät 17-20) aus Sicherheitsgründen nicht vertikutiert werden. Achtung! Üben Sie besondere Vorsicht beim Rückwärtsbe- Unbedingt Handschuhe tragen! wegen und beim Ziehen des Gerätes, Stolpergefahr! Verwenden Sie nur originale Walzen, da andernfalls Funktionen und Sicherheit unter Umständen nicht 9.
  • Seite 14: Wartung, Pflege Und Lagerung

    Anleitung_N-RVL_1200_SPK7:_ 26.10.2009 15:25 Uhr Seite 14 anschlussleitung immer im schon bearbeiteten 12. Technische Daten Rasen liegt, damit die Geräteanschlussleitung nicht vom Gerät überfahren und damit zerstört wird. Netzspannung: 230V ~ 50Hz Leistungsaufnahme: 1200 W 10. Wartung, Pflege und Lagerung Arbeitsbreite: 31 cm Anzahl der Messer: 8 Doppelmesser...
  • Seite 15: Fehlersuchplan

    Anleitung_N-RVL_1200_SPK7:_ 26.10.2009 15:25 Uhr Seite 15 13. Fehlersuchplan Fehler Mögliche Ursachen Beseitigung Motor läuft nicht an a) Kein Strom im Stecker a) Leitung und Sicherung überprüfen b) Kabel defekt b) überprüfen c) Schalter / Steckerkombination c) durch Kundendienst- defekt werkstatt d) Anschlüsse am Motor oder d) durch Kundendienst- Kondensator gelöst...
  • Seite 16 Anleitung_N-RVL_1200_SPK7:_ 26.10.2009 15:25 Uhr Seite 16 Table of contents Page 1. General safety regulations 2. Equipment layout and items supplied 3. Description of the warning logos 4. Intended use 5. Assembling the equipment 6. Setting the working depth 7. Changing the roller 8.
  • Seite 17: General Safety Regulations

    Anleitung_N-RVL_1200_SPK7:_ 26.10.2009 15:25 Uhr Seite 17 Packaging fitting or dismantling the spike drum. 10. Examine the site where you want to use the The unit is supplied in packaging to prevent it from scarifier and remove all objects which could be being damaged in transit.
  • Seite 18: Equipment Layout And Items Supplied

    Anleitung_N-RVL_1200_SPK7:_ 26.10.2009 15:25 Uhr Seite 18 24. If the scarifier strikes a foreign body, examine the bypassed. machine for signs of damage and carry out any 44. Make regular checks on the grass collecting necessary repairs before restarting and device for wear or damaged parts. continuing to work with the scarifier.
  • Seite 19: Intended Use

    Anleitung_N-RVL_1200_SPK7:_ 26.10.2009 15:25 Uhr Seite 19 4. Intended use The power cables must, at the very minimum, be of type HO5RN-F and 3-stranded. The cable type must be printed somewhere on the power cable. Only The equipment can be used both as a scarifier and purchase power cables that are marked as such! an aerator depending on the intended use.
  • Seite 20: Assembling The Equipment

    Anleitung_N-RVL_1200_SPK7:_ 26.10.2009 15:25 Uhr Seite 20 5. Assembling the equipment 6. Adjusting the scarifier depth (see Fig. 14) The equipment is delivered unassembled. The grass basket and the complete push bar must be The scarifier depth is adjusted at both front wheels assembled and mounted before using the via the adjustment mechanism.
  • Seite 21: Tips For Proper Working

    Anleitung_N-RVL_1200_SPK7:_ 26.10.2009 15:25 Uhr Seite 21 Always fasten the ejector flap carefully. The flap flips the power outlet. Scarify away from the power outlet back to the “Closed” position by the tension springs! and cable, making sure that the power cable always Always ensure that a safe distance (provided by the trails in the already scarified grass so that the long handles) is maintained between the user and...
  • Seite 22: Technical Data

    Anleitung_N-RVL_1200_SPK7:_ 26.10.2009 15:25 Uhr Seite 22 12. Technical data Mains voltage: 230V ~ 50Hz Power input: 1200 W Working width: 31 cm Number of blades: 8 double blades Number of claws: Scarifying depth: -3 / 3 / 7 / 9 mm sound pressure level: 85 dB(A) sound power level:...
  • Seite 23: Troubleshooting Guide

    Anleitung_N-RVL_1200_SPK7:_ 26.10.2009 15:25 Uhr Seite 23 13. Troubleshooting guide Fault Possible causes Rectification Motor does not start a) No electricity in plug a) Check line and fuse b) Cable defective b) Check c) Switch, switch/plug block c) Have machine checked by defective a customer service center d) Connections to motor...
  • Seite 24 Anleitung_N-RVL_1200_SPK7:_ 26.10.2009 15:25 Uhr Seite 24 Table des matières Page 1. Consignes de sécurité générales 2. Conception et volume de livraison 3. Description des logos de remarques 4. Utilisation conforme à l’affectation 5. Assemblage de l’appareil 6. Réglage de la profondeur de travail 7.
  • Seite 25: Consignes De Sécurité Générales

    Anleitung_N-RVL_1200_SPK7:_ 26.10.2009 15:26 Uhr Seite 25 Emballage : 6. Assurez-vous que tous les dispositifs de protection sont bien montés et qu’ils fonctionnent L’appareil se trouve dans un emballage permettant tous impeccablement. d’éviter les dommages dus au transport. Cet 7. N’utilisez pas l’appareil si vous êtes fatigué(e). emballage est en matière naturelle et recyclable et 8.
  • Seite 26 Anleitung_N-RVL_1200_SPK7:_ 26.10.2009 15:26 Uhr Seite 26 l’emploi, le câble quant à d’éventuels C.P.V. souple ou autres matériaux thermoplasti- endommagements et usures. N’utilisez jamais le ques de la même solidité ou être revêtues de ce scarificateur lorsque les conduites sont usées ou matériau.
  • Seite 27: Conception Et Volume De Livraison

    Anleitung_N-RVL_1200_SPK7:_ 26.10.2009 15:26 Uhr Seite 27 2. Conception et volume de livraison l’oxygénation. Aérez en fonction des besoins pendant toute la période de croissance. (voir figures 1+2) Veillez au fait que nos appareils, conformément au 1. Touche de commutation marche/arrêt règlement, n’ont pas été...
  • Seite 28: Assemblage De L'appareil

    Anleitung_N-RVL_1200_SPK7:_ 26.10.2009 15:26 Uhr Seite 28 que des lignes de raccordement dûment marquées! 5. Assemblage de l’appareil Les fiches et prises d’accouplement aux lignes de raccordement doivent être en caoutchouc et être L’appareil est livré démonté. Il faut monter le panier protégées contre les éclaboussures d’eau.
  • Seite 29: Réglage De La Profondeur De Travail

    Anleitung_N-RVL_1200_SPK7:_ 26.10.2009 15:26 Uhr Seite 29 6. Réglage de la profondeur du que le rouleau à lame ne tourne pas et que l’appareil est déconnecté. scarificateur (voir figure 14) Attention ! N’ouvrez jamais le clapet d’éjection On règle la profondeur du scarificateur avec le lorsque le moteur est encore en marche.
  • Seite 30: Maintenance, Entretien Et Entreposage

    Anleitung_N-RVL_1200_SPK7:_ 26.10.2009 15:26 Uhr Seite 30 terre et d’herbe. Les dépôts de terre rendent le A la fin de la saison, effectuez un contrôle général de processus de démarrage plus difficile et altèrent la l’appareil et retirez tous les dépôts accumulés. qualité.
  • Seite 31: Plan De Recherche Des Erreurs

    Anleitung_N-RVL_1200_SPK7:_ 26.10.2009 15:26 Uhr Seite 31 13. Plan de recherche des erreurs Erreur Causes probables Elimination Le moteur ne démarre pas a) Pas de courant dans la fiche a) Contrôler la ligne et le fusible b) Câble défectueux b) Contrôler c) Combinaison interrupteur-fiche c) par atelier de service clientèle défectueuse...
  • Seite 32 Anleitung_N-RVL_1200_SPK7:_ 26.10.2009 15:26 Uhr Seite 32 Obsah: Strana 1. Všeobecné bezpečnostní předpisy 2. Přehled konstrukčního provedení a rozsah dodávky 3. Popis štítků s pokyny 4. Použití podle účelu určení 5. Montáž přístroje 6. Nastavení pracovní hloubky 7. Výměna válce 8. Uvedení do provozu 9.
  • Seite 33: Všeobecné Bezpečnostní Předpisy

    Anleitung_N-RVL_1200_SPK7:_ 26.10.2009 15:26 Uhr Seite 33 Balení: 8. Při montáži nebo demontáži válce je třeba Přístroj je uložen v balení, aby bylo zabráněno dodržovat pokyny. poškození při přepravě. Toto balení je surovina a tím 9. Překontrolujte terén, kde má být přístroj použit, znovu použitelné...
  • Seite 34: Dodávky

    Anleitung_N-RVL_1200_SPK7:_ 26.10.2009 15:26 Uhr Seite 34 22. Při startování motoru nesmí být přístroj motor prostý trávy, listí a mechu. nakloněn, leda že je třeba při tomto procesu 41. Z bezpečnostních důvodů vyměňte přístroj nadzvednout. V tomto případě ho opotřebované nebo poškozené díly. nakloňte pouze tak dalece, jak je to 42.
  • Seite 35: Popis Štítků S Pokyny

    Anleitung_N-RVL_1200_SPK7:_ 26.10.2009 15:26 Uhr Seite 35 3. Popis štítků s pokyny (viz obr. 3) - trhliny způsobené stárnutím izolace - zalomená místa způsobená neodborným upevněním nebo vedením napájecího vedení. A = Pozor! Takováto poškozená napájecí vedení jsou Před uvedením do provozu přečíst návod k používána, i když...
  • Seite 36: Montáž Přístroje

    Anleitung_N-RVL_1200_SPK7:_ 26.10.2009 15:26 Uhr Seite 36 5. Montáž přístroje 6. Nastavení pracovní hloubky (viz obr. 14) Přístroj je při expedici demontován. Sběrací koš a kompletní rukojeť musí být před použitím stroje Hloubka vertikutování se nastaví nastavovacím namontovány. Dodržujte návod k použití krok za mechanismem na obou předních kolečkách.
  • Seite 37: Pokyny Ke Správnému Pracování

    Anleitung_N-RVL_1200_SPK7:_ 26.10.2009 15:26 Uhr Seite 37 Pozor! a dbejte na to, aby napájecí vedení přístroje vždy Nikdy neotvírejte vyhazovací klapku, když motor leželo na již hotové části trávníku, aby nebylo ještě běží. Rotující válec může způsobit zranění. přístrojem přejeto. Vyhazovací klapku vždy pečlivě upevněte. Tato je tažnou pružinou vrácena do polohy „zavřeno“! Musí...
  • Seite 38: Technická Data

    Anleitung_N-RVL_1200_SPK7:_ 26.10.2009 15:26 Uhr Seite 38 12. Technická data Síťové napětí: 230 V~ 50 Hz Příkon: 1200 W Šířka záběru: 31 cm Počet nožů: 8 dvoustranných nožů Počet drápů: Nastavení hloubky: -3 / 3 / 7 / 9 mm Hladina akustického tlaku L 85 dB (A) Hladina akustického výkonu L 99 dB (A)
  • Seite 39: Vyhledávání Poruch

    Anleitung_N-RVL_1200_SPK7:_ 26.10.2009 15:26 Uhr Seite 39 13. Plán vyhledávání poruch Porucha Možná příčina Odstranění Motor nenaskočí a) Žádný proud v zástrčce a) Vedení a pojistky překontrolovat b) Kabel defektní b) Překontrolovat c) Kombinace vypínač-zástrčka c) Zákaznický servis defektní d) Přípojky na motoru nebo d) Zákaznický...
  • Seite 40: Konformitätserklärung

    EÚ a noriem pre výrobok og standarder for artikkel A a cikkekhez az EU-irányvonal és Normák szerint a E Lýsir uppfyllingu EU-reglna og annarra staðla vöru következő konformitást jelenti ki Elektro-Vertikutierer und Rasenlüfter N-RVL 1200 (Royal) 2006/95/EC 2006/42/EC 98/37/EC 2006/28/EC...
  • Seite 41 Anleitung_N-RVL_1200_SPK7:_ 26.10.2009 15:26 Uhr Seite 41 k Nur für EU-Länder Werfen Sie Elektrowerkzeuge nicht in den Hausmüll! Gemäß europäischer Richtlinie 2002/96/EG über Elektro- und Elektronik-Altgeräte und Umsetzung in nationales Recht müssen verbrauchte Elektrowerkzeuge getrennt gesammelt werden und einer umweltgerechten Wiederverwertung zugeführt werden. Recycling-Alternative zur Rücksendeaufforderung: Der Eigentümer des Elektrogerätes ist alternativ anstelle Rücksendung zur Mitwirkung bei der sachge- rechten Verwertung im Falle der Eigentumsaufgabe verpflichtet.
  • Seite 42 Anleitung_N-RVL_1200_SPK7:_ 26.10.2009 15:26 Uhr Seite 42 j Pouze pro členské země EU Nedávejte elektrické nářadí do domácího odpadu. Podle Evropské směrnice 2002/96/EG o starých elektrických a elektronických přístrojích (WEEE) a podle národního práva musí být použité elektrické nářadí odděleně skladováno a odevzdáno k ekologické recyklaci.
  • Seite 43 Anleitung_N-RVL_1200_SPK7:_ 26.10.2009 15:26 Uhr Seite 43 Der Nachdruck oder sonstige Vervielfältigung von Dokumentation und Begleitpapieren der Produkte, auch auszugsweise ist nur mit aus- drücklicher Zustimmung der ISC GmbH zulässig. The reprinting or reproduction by any other means, in whole or in part, of documentation and papers accompanying products is permitted only with the express consent of ISC GmbH.
  • Seite 44 Anleitung_N-RVL_1200_SPK7:_ 26.10.2009 15:26 Uhr Seite 44 EH 10/2009 (01)

Diese Anleitung auch für:

34.205.04

Inhaltsverzeichnis