Herunterladen Inhalt Inhalt Diese Seite drucken
Klarstein Ice Volcano 2G Bedienungsanleitung
Vorschau ausblenden Andere Handbücher für Ice Volcano 2G:

Werbung

Verfügbare Sprachen
  • DE

Verfügbare Sprachen

  • DEUTSCH, seite 1
Ice Volcano 2G
Eiswürfelmaschine
Ice Cube Maker
Máquina de hielo
Machine à glaçons
Fabbricatore di cubetti di ghiaccio
IJsblokjesmachine
Ledomat
10030844 10030848 10030849

Werbung

Inhaltsverzeichnis
loading

Inhaltszusammenfassung für Klarstein Ice Volcano 2G

  • Seite 1 Ice Volcano 2G Eiswürfelmaschine Ice Cube Maker Máquina de hielo Machine à glaçons Fabbricatore di cubetti di ghiaccio IJsblokjesmachine Ledomat 10030844 10030848 10030849...
  • Seite 3: Inhaltsverzeichnis

    Sehr geehrter Kunde, wir gratulieren Ihnen zum Erwerb Ihres Gerätes. Lesen Sie die folgenden Hinweise sorgfältig durch und befolgen Sie diese, um möglichen Schäden vorzubeugen. Für Schäden, die durch Missachtung der Hinweise und unsachgemäßen Gebrauch entstehen, übernehmen wir keine Haftung. Scannen Sie den folgenden QR-Code, um Zugriff auf die aktuellste Bedienungsanleitung und weitere Informationen rund um das Produkt zu erhalten:...
  • Seite 4: Sicherheitshinweise

    SICHERHEITSHINWEISE • Schließen Sie das Gerät nur an geerdete Steckdosen an, die der Spannung des Geräts entsprechen. • Wenn Sie das Gerät bewegen benutzen Sie die Griffe. • Stellen Sie das Gerät auf einen ebenen Untergrund. • Benutzen Sie das Gerät nur in Innenräumen. •...
  • Seite 5 WARNUNG Gefahr durch Feuer/brennbare Materialien. Bitte beachten Sie die örtlichen Vorschriften zur Entsorgung von Geräten mit brennbaren Kältemitteln und Gasen. • Halten Sie Lüftungsöffnungen im Gerätegehäuse frei von Hindernissen. • Beschädigen Sie nicht den Kältemittelkreislauf. • Verwenden Sie keine mechanischen Vorrichtungen oder andere Mittel, um den Auftauprozess oder den Eisgewinnungsprozess zu beschleunigen •...
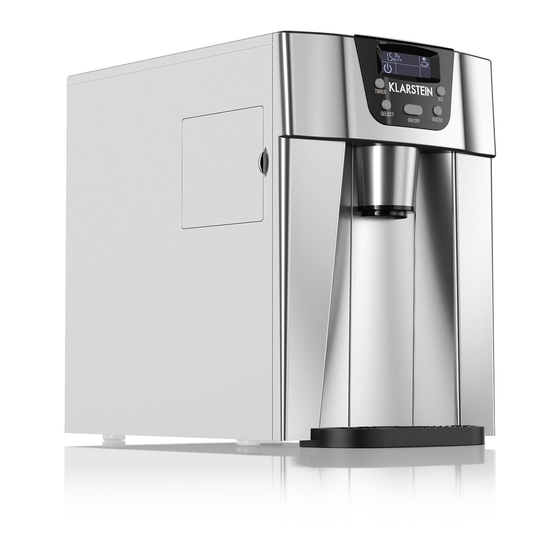
  • Seite 6: Geräteübersicht

    GERÄTEÜBERSICHT Wasser-Tropfwanne Eiswürfel-Druckfeder Abdeckung der Tropfwanne und Bedienfeld Auflage für den Eiswürfelbehälter Wasserablauf-Stopfen Vernebler Luftauslass Seitentür Oberes Fenster Wassertank und MAX-Anzeige...
  • Seite 7 A Display Timer/Durchlaufzeit- Anzeige Eiswürfelgröße: klein Eiswürfelgröße: groß Eiswürfelherstellung: Es werden Eiswürfel produziert. Wasserauslass: Das Wasser wird gerade abgelassen. Fehlercode 1, 2 oder 3 Zu wenig Wasser: Erscheint die Anzeige muss Wasser nachgefüllt werden. Gerät ist voll mit Eiswürfeln AN/AUS-Anzeige: Wir das Gerät ausgeschaltet blinkt die Anzeige, wird das Gerät eingeschaltet...
  • Seite 8: Inbetriebnahme Und Bedienung

    INBETRIEBNAHME UND BEDIENUNG Vor dem ersten Betrieb • Entfernen Sie das gesamte Verpackungsmaterial und überprüfen Sie ob die Lieferung vollständig ist. Sollten Teile fehlen, wenden Sie sich umgehend an unseren Kundendienst. • Entfernen Sie alle Aufkleber und Klebestreifen. Öffnen Sie das transparente Fenster, und entnehmen Sie die Zubehörteile.
  • Seite 9 3. Drücken Sie auf die ON/OFF-Taste am Bedienfeld, um die Eiswürfelherstellung zu starten. Das Symbol leuchtet nun dauerhaft im Display. Gleichzeitig beginnt das Symbol zu blinken. Als Grundeinstellung für die Eiswürfelgröße ist „groß“ eingestellt. Falls Sie die Größe ändern möchten, drücken Sie auf die SELECT-Taste und wählen Sie zwischen großen Eiswürfeln oder kleinen Eiswürfeln Falls die Eiswürfel immer noch nicht die gewünschte Größe haben, können Sie die...
  • Seite 10 So zapfen Sie Wasser ab 8. Die voreingestellte Fließzeit beträgt 10 Sekunden. Stellen Sie einen Becher unter den Wasserauslass und drücken Sie einmal auf die WATER-Taste. Das Wasser fließt mittig aus dem Wasserauslass, das Symbol erscheint im Display und im Timerfeld erscheint die Anzeige [10 S].
  • Seite 11 Time einschalten Drücken Sie zuerst auf die TIMER-Taste, die voreingestellte Zeit beträgt 1 Stunde und wird im Timerfeld im Display angezeigt. Drücken Sie auf die SELECT-Taste, um die gewünschte zeit einzustellen. Jedes Mal wenn Sie auf die SELECT-Taste drücken wird die Zeit um eine halbe Stunde erhöht.
  • Seite 12: Fehlerbehebung

    FEHLERBEHEBUNG Fehler Mögliche Ursache Lösung Zu wenig Wasser im Tank. Schalten Sie das Gerät Das Symbol erscheint aus, füllen Sie Wasser und der Pfeil blinkt. nach und schalten Sie das Gerät danach wieder ein. Zu viele Eiswürfel im Entfernen Sie alle Das Symbol erscheint Innenraum.
  • Seite 13: Reinigung Und Pflege

    Fehler Mögliche Ursache Lösung Es befinden Sich Eiswürfel Der Ausgabeschacht für Lassen Sie die ICE-Taste im gerät, aber sie werden die Eiswürfel ist blockiert. los und drücken Sie sie nicht ausgegeben, wenn nach 3 Sekunden erneut. Sie auf die ICE-Taste drücken.
  • Seite 14: Hinweise Zur Entsorgung

    HINWEISE ZUR ENTSORGUNG Befindet sich die linke Abbildung (durchgestrichene Mülltonne auf Rädern) auf dem Produkt, gilt die Europäische Richtlinie 2012/19/EU. Diese Produkte dürfen nicht mit dem normalen Hausmüll entsorgt werden. Informieren Sie sich über die örtlichen Regelungen zur getrennten Sammlung elektrischer und elektronischer Gerätschaften.
  • Seite 15: Technical Data

    Dear Customer, Congratulations on purchasing this equipment. Please read this manual carefully and take care of the following hints to avoid damages. Any failure caused by ignoring the items and cautions mentioned in the instruction manual is not covered by our warranty and any liability. Scan the QR code to get access to the latest user mannual and other information about the product CONTENT...
  • Seite 16: Safety Instructions

    SAFETY INSTRUCTIONS • Check that the mains voltage corresponds to the rating of the appliance before operating. • Use handles or knobs when moving. Place on a flat stable surface for use. Do not use outdoors. • Do not use near or in the immediate vicinity of a bath or swimming pool or any source of liquid.
  • Seite 17 WARNING Danger from fi re/fl ammable materials. Please observe the local regulations for the disposal of units with fl ammable refrigerants and gases. • Keep ventilation openings in the unit housing free of obstacles. • Do not damage the refrigerant circuit. •...
  • Seite 18: Product Overview

    PRODUCT OVERVIEW Water drip tray Ice cube pushing spring Water drip tray cover and support Control Panel of the ice-cube container Water drain plug Evaporator Hot Air outlet Side door Water reservoir and the MAX Top window level...
  • Seite 19 A Display TIMER setting delay time Ice-cube size displaying: Small size. Ice-cube size displaying: Large size. Ice-cube obtaining symbol: with this symbol, the ice- cube will be pushed out. Water dispensing symbol: with this symbol, water is flowing out now. Error code.
  • Seite 20: Use And Operation

    USE AND OPERATION Before first Use • Remove the exterior and interior packaging, Then check all the accessories are included. If any parts are missing, please contact our customer service. • Remove all the tapes on the unit. Open the transparent window, take out the accessory parts inside.
  • Seite 21 3. Press “ON/OFF” button on the control panel to begin the ice making cycle. After this, the symbol will change to light on always in LCD display window, and symbol will flash on in the mean time. The default size of ice-cube is Large. If you want to select the size of the ice cube, just press the “SELECT”...
  • Seite 22 How to dispense the water 8. Default time of water flowing: 10 S. Put your water cup on drip tray, press the “WATER” button once on control panel (Button C in above illustration), the water will flow out from middle water tap, and the symbol will light on and the “10 S”...
  • Seite 23 How to set the timer Press the TIMER button first, the default delay time is 1.0 hour displayed delay time in LCD display window, then press the SELECT button to select your desired delay time. Each press SELECT button one time, the delay time will increase 0.5 hour, but if you always press the SELECT button, the delay time will change very quickly.
  • Seite 24 TROUBLESHOOTING Problem Possible Cause Solution Lack of Water. Stop the ice maker, fill symbol is lightening on water, and press “ON/ and the arrow flashes. OFF” button again to restart the unit. There is too much ice. Suggest you to obtain the symbol is lightening ice-cube.
  • Seite 25: Cleaning And Care

    Problem Possible Cause Solution There are ice-cube inside Moving shaft for the Ice- Release the button for the unit, but can’t dispense cube is blocked. ice-cube for 3 seconds, the ice-cube when you then again push the “ICE” push the “ICE” button. button.
  • Seite 26: Hints On Disposal

    HINTS ON DISPOSAL According to the European waste regulation 2012/19/EU this symbol on the product or on its packaging indicates that this product may not be treated as household waste. Instead it should be taken to the appropriate collection point for the recycling of electrical and electronic equipment.
  • Seite 27: Datos Técnicos

    Estimado cliente: Le felicitamos por la adquisición de este producto. Lea atentamente el siguiente manual y siga cuidadosamente las instrucciones de uso con el fin de evitar posibles daños. La empresa no se responsabiliza de los daños ocasionados por un uso indebido del producto o por haber desatendido las indicaciones de seguridad.
  • Seite 28: Indicaciones De Seguridad

    INDICACIONES DE SEGURIDAD • Conecte el aparato solamente a tomas de corriente con toma de tierra que se adecuen a la tensión del mismo. • Si desea desplazar el aparato, utilice las asas. • Coloque el aparato en una superficie plana y estable. •...
  • Seite 29 ADVERTENCIA Peligro por fuego/materiales infl amables. Tenga en cuenta las normas locales para la eliminación de aparatos que contengan refrigerantes y gases infl amables. • Mantenga las aberturas de ventilación de la carcasa del aparato libres de obstáculos. • No dañar el circuito de refrigeración. •...
  • Seite 30: Visión General Del Aparato

    VISIÓN GENERAL DEL APARATO Bandeja antigoteo Resorte para los cubitos Cubierta de la bandeja antigoteo y soporte para el recipiente de Panel de control los cubitos Tapón del desagüe Pulverizador Salida de aire Puerta lateral Depósito de agua e indicador Ventana superior...
  • Seite 31 A Display Temporizador / tiempo configurado Tamaño de los cubitos de hielo: pequeño Tamaño de los cubitos de hielo: grande Fabricación de los cubitos de hielo: se producen cubitos de hielo. Desagüe: el agua está saliendo. Código de error 1, 2 o 3 Agua insuficiente: el indicador muestra que debe añadir agua.
  • Seite 32: Puesta En Marcha Y Uso

    PUESTA EN MARCHA Y USO Antes del primer uso • Retire todo el material de embalaje y compruebe que el envío esté completo. Si falta alguna pieza, contacte directamente con nuestro servicio de atención al cliente. • Retire todos los adhesivos. Abra la ventana transparente y retire los accesorios. •...
  • Seite 33 3. Pulse el botón ON/OFF en el panel de control para iniciar la producción de cubitos de hielo. El símbolo se ilumina permanentemente en el display. Simultáneamente, el símbolo comienza a parpadear. Como configuración estándar para el tamaño de los cubitos, aparece seleccionado «grande». Si desea cambiar el tamaño, pulse SELECT y escoja entre el tamaño grande y el pequeño...
  • Seite 34 Cómo dispensar el agua 8. El tiempo de flujo predeterminado es de 10 segundos. Coloque un recipiente sobre la bandeja antigoteo y pulse el botón WATER una vez. El agua fluirá por el grifo central, el símbolo aparece en el display y en el panel del temporizador aparece el indicador [10 S].
  • Seite 35 Activar el temporizador Pulse primero el botón TIMER, el tiempo predeterminado es de 1 hora y se mostrará en el campo del tempo- rizador. Pulse el botón SELECT para ajustar el tiempo como desee. Cada vez que pulse el botón SELECT, el tiempo aumentará media hora. Mantenga pulsado el botón SELECT para configurar el tiempo más rápidamen- te.
  • Seite 36: Resolución De Problemas

    RESOLUCIÓN DE PROBLEMAS Problema Posibles causas Solución Agua insuficiente en el Apague el aparato, Aparece el símbolo depósito. llene agua y vuelva a la flecha parpadea. encenderlo. Demasiados cubitos en el Retire todos los cubitos u Aparece el símbolo recipiente. obstáculos del interior y [F] parpadea.
  • Seite 37: Limpieza Y Cuidado

    Problema Posibles causas Solución Si hay cubitos de hielo en El orificio de salida para Suelte el botón ICE y man- el interior pero no pueden los cubitos está bloque- téngalo pulsado durante 3 extraerse, pulse el botón ado. segundos. ICE.
  • Seite 38: Retirada Del Aparato

    RETIRADA DEL APARATO Si el aparato lleva adherida la ilustración de la izquierda (el contenedor de basura tachado) entonces rige la normativa europea, directiva 2012/19/UE. Este producto no debe arrojarse a un contenedor de basura común. Infórmese sobre las leyes territoriales que regulan la recogida separada de aparatos eléctricos y electrónicos.
  • Seite 39: Fiche Technique

    Cher client, Toutes nos félicitations pour l’acquisition de ce nouvel appareil. Veuillez lire attentivement les instructions suivantes de branchement et d’utilisation afin d’éviter d’éventuels dommages. Le fabricant ne saurait être tenu pour responsable des dommages dus au non-respect des consignes de sécurité et à la mauvaise utilisation de l’appareil.
  • Seite 40: Consignes De Sécurité

    CONSIGNES DE SÉCURITÉ • Brancher uniquement l’appareil à une prise de terre dont la tension correspond à celle de l’appareil. • Utiliser les poignées pour déplacer l’appareil. • Placer l’appareil sur une surface plane. • Utiliser l’appareil uniquement en intérieur. •...
  • Seite 41 MISE EN GARDE Danger d‘incendie/de matières infl ammables. Veuillez respecter les réglementations locales concernant l‘élimination des appareils contenant des fl uides frigorigènes et des gaz infl ammables. • Veillez à ce que les ouvertures de ventilation dans le boîtier de l‘appareil soient libres d‘obstacles.
  • Seite 42: Aperçu De L'appareil

    APERÇU DE L‘APPAREIL Bac de récupération de l’eau Ressort à pression pour glaçons Couvercle du bac de récupération et support pour le Panneau de commande récipient à glaçons Bouchon d’évacuation de l’eau Nébuliseur Sortie d’air Porte latérale Réservoir d’eau et indicateur Trappe du haut...
  • Seite 43 A Affichage Affichage du minuteur/ cycle Taille des glaçons : petit Taille des glaçons : grand Fabrication de glaçons : les glaçons sont en cours de fabrication. Sortie d’eau : de l’eau est en train d’être évacuée. Message d’erreur 1, 2, 3 Trop peu d’eau : si cette image s’affiche, il est nécessaire de rajouter de...
  • Seite 44: Mise En Marche Et Utilisation

    MISE EN MARCHE ET UTILISATION Avant la première utilisation • Retirer tous les éléments d’emballage et vérifier que le contenu de l’emballage est au complet. Si des pièces sont manquantes, contacter immédiatement le service client. • Retirer tous les autocollants et les rubans adhésifs. Ouvrir la porte transparente et sortir tous les accessoires.
  • Seite 45 3. Appuyer sur la touche ON/OFF du panneau de commande pour démarrer la fabrication de glaçons. Le symbole ls’allume en continu sur l’afficheur. Dans le même temps, le symbole se met à clignoter. L’appareil règle par défaut la taille des glaçons sur « grand ». Pour modifier la tailler des glaçons, appuyer sur la touche SELECT et choisir entre grands glaçons ou petits glaçons .
  • Seite 46 Comment faire couler de l’eau 8. La durée d’écoulement par défaut de l’eau est de 10 secondes. Placer un gobelet sous la sortie d’eau et appuyer une fois sur la touche WATER. L’eau s’écoule au milieu de l’évacuation d’eau, le symbole s’affiche à...
  • Seite 47 Allumer le minuteur Appuyer tout d’abord sur la touche TIMER, la durée par défaut est de 1 heure et s’affiche à l’écran dans le champ du minuteur. Appuyer sur la touche SELECT pour régler le temps souhaité. Chaque pression sur la touche SELECT augmente la durée d’une heure.
  • Seite 48: Résolution Des Problèmes

    RÉSOLUTION DES PROBLÈMES Problème Cause possible Solution Pas assez d’eau dans le Éteindre l’appareil, remplir Le symbole s’affiche et réservoir. le réservoir d’eau puis la flèche clignote. rallumer l’appareil. Trop de glaçons dans Retirer tous les glaçons ou Le symbole s’affiche et l’appareil.
  • Seite 49: Nettoyage Et Entretien

    Problème Cause possible Solution L’appareil contient des La fente d’éjection des Relâchez la touche ICE et glaçons mais ne les éjecte glaçons est bloquée. appuyer dessus de nou- pas lorsque la touche ICE veau après 3 secondes. est appuyée. Le cycle de fabrication des La température ambiante Utiliser l’appareil unique- glaçons s’effectue jusqu’au...
  • Seite 50: Conseils Pour Le Recyclage

    CONSEILS POUR LE RECYCLAGE Le pictogramme ci-contre apposé sur le produit signifie que la directive européenne 2012/19/UE s‘applique (poubelle à roues barrée d’une croix). Ces produits ne peuvent être jetés dans les poubelles domestiques courantes. Renseignez- vous concernant les règles appliquées pour la collecte d’appareils électriques et électroniques.
  • Seite 51: Dati Tecnici

    Gentile cliente, La ringraziamo per aver acquistato il dispositivo. La preghiamo di leggere attentamente le seguenti istruzioni per l’uso e di seguirle per evitare possibili danni tecnici. Non ci assumiamo alcuna responsabilità per danni scaturiti da una mancata osservazione delle avvertenze di sicurezza e da un uso improprio del dispositivo.
  • Seite 52: Avvertenze Di Sicurezza

    AVVERTENZE DI SICUREZZA • Leggere attentamente tutte le istruzioni e conservare il presente libretto per consultazioni future. • Per garantire il corretto funzionamento, il dispositivo deve essere collegato ad una presa dotata di messa a terra. Consultare un elettricista se non si è sicuri che la presa a disposizione corrisponda ai requisiti richiesti.
  • Seite 53 AVVERTENZA Pericolo di incendio/materiali infi ammabili. Osservare le norme locali per lo smaltimento di apparecchi contenenti refrigeranti e gas infi ammabili. • Mantenere libere da ostacoli le aperture di ventilazione nell‘alloggiamento dell‘apparecchio. • Non danneggiare il circuito frigorifero. • Non utilizzare dispositivi meccanici o altri mezzi per accelerare lo sbrinamento o il recupero del ghiaccio.
  • Seite 54: Panoramica Del Dispositivo

    PANORAMICA DEL DISPOSITIVO Molla a compressione cubetti di Vaschetta raccogligocce ghiaccio Coperchio vaschetta raccogligocce e supporto Pannello dei comandi contenitore cubetti Tappo scarico acqua Evaporatore Uscita aria Sportello laterale Serbatoio acqua e spia livello Finestra superiore...
  • Seite 55 A Display Timer/indicatore tempo Grandezza cubetti: piccolo Grandezza cubetti: grande Produzione cubetti di ghiaccio: vengono prodotti i cubetti di ghiaccio Uscita acqua: l´acqua viene rilasciata Errore codice 1, 2 o 3 Troppa poca acqua: se la spia si accende, aggiungere acqua Contenitore cubetti pieno: il contenitore è...
  • Seite 56: Messa In Funzione E Utilizzo

    MESSA IN FUNZIONE E UTILIZZO Avvertenze per il primo utilizzo • Rimuovere completamente il materiale di imballaggio e verificare che tutti i componenti siano inclusi nella consegna. In caso manchino dei componenti, rivolgersi al servizio clienti. • Rimuovere tutti gli adesivi. Aprire la finestra trasparente e togliere gli accessori. •...
  • Seite 57 3. Premere il tasto ON/OFF sul pannello dei comandi per avviare la produzione dei cubetti di ghiaccio. Il simbolo rimane acceso sul display. Contemporaneamente il simbolo inizia a lampeggiare. L´impostazione predefinita per la grandezza dei cubetti è “grande”. Per modificare la grandezza premere il tasto SELECT e scegliere tra cubetti grandi o piccoli .
  • Seite 58 Far defluire l´acqua 8. Il tempo predefinito per il deflusso dell´acqua è di 10 secondi. Mettere un recipiente sotto l´apposita uscita dell´acqua e premere una volta il tasto WATER. L´acqua scorre al centro dall´apposita uscita, il simbolo appare sul display e sul display del timer appare [10 S].
  • Seite 59 Accendere il timer Premere per prima cosa il tasto TIMER, il tempo predefinito è di 1 ora e appare sul display del timer. Premere il tasto SELECT per impostare il tempo desiderato. Ogni volta che si preme il tasto SELECT, il tempo aumenta di mezz´ora. Tenere premuto il tasto SELECT per impostare il tempo più...
  • Seite 60: Risoluzione Degli Errori

    RISOLUZIONE DEGLI ERRORI Problema Possibile Causa Possibile soluzione L´acqua nel serbatoio è Spegnere il dispositivo e Appare il simbolo e la troppa poca. aggiungere l´acqua. Ora freccia lampeggia. accendere di nuovo il dispositivo. Troppi cubetti di ghiaccio Rimuovere tutti i cubetti Appare il simbolo nel contenitore.
  • Seite 61: Pulizia E Manutenzione

    Problema Possibile Causa Possibile soluzione Ci sono cubetti di ghiaccio L´uscita dei cubetti di Rilasciare il tasto ICE e nel dispositivo ma non ghiaccio è bloccata. premerlo di nuovo dopo 3 fuoriescono nonostante si secondi. premi il tasto ICE. Il ciclo del ghiaccio è in La temperatura ambiente o Utilizzare il dispositivo funzione ma non viene...
  • Seite 62: Smaltimento

    SMALTIMENTO Se sul prodotto è presente la figura a sinistra (il cassonetto dei rifiuti mobile sbarrato), si applica la direttiva europea 2012/19/UE. Questi prodotti non possono essere smaltiti con i rifiuti normali. Informarsi sulle disposizioni vigenti in merito alla raccolta separata di dispositivi elettrici ed elettronici. Non smaltire i vecchi dispositivi con i rifiuti domestici.
  • Seite 63: Technische Gegevens

    Geachte klant, Wij feliciteren u met de aankoop van uw apparaat. Lees de volgende instructies zorgvuldig door en volg ze op om mogelijke schade te voorkomen. Wij zijn niet aansprakelijk voor schade als gevolg van het negeren van de gebruiksaanwijzing en oneigenlijk gebruik. Scan de volgende QR-code om toegang te krijgen tot de meest recente bedieningsinstructies en verdere informatie over het product: INHOUDSOPGAVE...
  • Seite 64: Veiligheidsinstructies

    VEILIGHEIDSINSTRUCTIES • Sluit het apparaat alleen aan op geaarde stopcontacten die overeenkomen met de spanning van het apparaat. • Gebruik de handgrepen bij het verplaatsen van het apparaat. • Plaats het apparaat op een vlakke ondergrond. • Gebruik het apparaat alleen binnenshuis. •...
  • Seite 65 WAARSCHUWING Gevaar door brandgevaarlijke/brandbare materialen. Neem de plaatselijke voorschriften voor de afvoer van brandbare koudemiddelen en gassen in acht. • Houd de ventilatieopeningen in de behuizing van het apparaat vrij van obstakels. • Beschadig het koelmiddelcircuit niet. • Gebruik geen mechanische apparaten of andere middelen om het ontdooiproces of het ijsherstelproces te versnellen.
  • Seite 66: Overzicht Apparaat

    OVERZICHT APPARAAT Lekbak Drukveer ijsblokjes Afdekking lekbak en ondergrond Bedieningspaneel voor de ijsemmer Waterafvoerstop Vernevelaar Luchtafvoer Zijdeur Bovenste venster Watertank en MAX indicator...
  • Seite 67 A Display Timer / doorlooptijd IJsblokjesformaat: klein IJsblokjesformaat: groot IJsblokjesproductie: in productie Waterafvoer: wordt afgevoerd Foutmelding: 1, 2 of 3 Te weinig water: water navullen s v p 8 Apparaat is vol met ijsblokjes Aan / Uit weergave: Wanneer het apparaat wordt uitgeschakeld knippert de melding Wanneer het ap- paraat...
  • Seite 68: Ingebruikname En Bediening

    INGEBRUIKNAME EN BEDIENING Voor het eerste gebruik • Verwijder al het verpakkingsmateriaal en verzeker uzelf ervan dat de levering compleet is. Als er onderdelen ontbreken wendt u zich per omgaande tot onze klantenservice. • Verwijder alle stickers en kleefstrips. Open het transparante venster en neem de accessoires uit.
  • Seite 69 2. Steek de stekker in het stopcontact. In het display knippert het symbool 3. Druk de ON/OFF toets op het bedieningsdisplay om de ijsblokjesproductie te starten. Het symbool knippert nu continue in het display. Tegerlijkertijd begint het symbool te knipperen. Als basisinstelling voor de ijsblokjes is het formaat “groot”...
  • Seite 70 Zo tapt u water af 8. De vooraf ingestelde doorstroomtijd is 10 seconden. Plaats een beker onder de waterafvoer en druk eenmaal op de WATER toets. Het water stroomt in het midden uit de waterafvoer, het symbool verschijnt in het display en in de timersectie verschijnt de weergave [10 S].
  • Seite 71 Timer inschakelen Druk eerst op de TIMER toets, de vooraf ingestelde tijd is 1 uur en wordt in de timersectie weergegeven. Druk op de SELECT toets om de gewenste tijd in te stellen. Elk keer wanneer u op de SELECT toets drukt wordt de tijd met een half uur verlengd. Houdt de SELECT toets ingedrukt wanneer u de tijd sneller wilt verlengen.
  • Seite 72: Foutmeldingen En Oplossingen

    FOUTMELDINGEN EN OPLOSSINGEN Probleem Mogelijke oorzaak Oplossing Te weinig water in de tank. Schakel het apparaat uit Het symbool verschijnt en vul water bij. Schakel en de pijl knippert. het apparaat daarna weer in. Te veel ijsblokjes in het Verwijder alle ijsblokjes of Het symbool interieur hindernissen uit het interi-...
  • Seite 73: Reiniging En Onderhoud

    Probleem Mogelijke oorzaak Oplossing Er zitten ijsblokjes in het De afvoerschacht voor de Laat de ICE toets los apparaat maar ze worden ijsblokjes is geblokkeerd en druk na 3 seconden niet afgegeven wanneer u opnieuw op de ICE toets drukt De ijscyclus loopt door De omgevingstem-peratu- Gebruik het apparaat...
  • Seite 74: Instructies Voor Afvoer

    INSTRUCTIES VOOR AFVOER Wanneer het hier links afgebeelde symbool zich op het product bevindt (doorgestreepte vuilcontainer op wielen) dan geldt de Europese richtlijn 2012/19/EU. Deze producten mogen niet met het reguliere huisvuil worden afgevoerd. Informeer naar de correcte regeling aangaande de gescheiden inzameling van elektrische en elektronische apparaten in uw gemeente.
  • Seite 75: Technická Data

    Vážený zákazníku, Blahopřejeme vám k zakoupení zařízení. Pečlivě si přečtěte následující pokyny a postupujte podle nich, abyste zabránili možnému poškození. Nepřebíráme žádnou odpovědnost za škody způsobené nedodržením pokynů a nesprávným použitím. Chcete-li získat přístup k nejnovějšímu manuálu a dalším informacím o produktu, naskenujte následující kód QR: OBSAH Bezpečnost 76 Přehled přístroje 78...
  • Seite 76 BEZPEČNOST • Přístroj připojujte pouze k uzemněným zásuvkám, které odpovídají napětí přístroje. • Při pohybu používejte rukojeti. • Umístěte přístroj na rovný povrch. • Používejte přístroj pouze uvnitř. • Nepoužívejte přístroj v blízkosti vany nebo bazénu. • Odpojte zástrčku ze zásuvky, pokud ji nepoužíváte. •...
  • Seite 77 VAROVÁNÍ Nebezpečí požáru / hořlavých materiálů. Dodržujte místní předpisy pro likvidaci zařízení s hořlavými chladivy a plyny. • Udržujte větrací otvory v krytu přístroje bez překážek. • Nepoškozujte okruh chladiva. • Nepoužívejte žádná mechanická zařízení nebo jiné prostředky k urychlení procesu rozmrazování...
  • Seite 78: Přehled Přístroje

    PŘEHLED PŘÍSTROJE Odkapávací miska na vodu Tlačná pružina na kostky ledu Kryt odkapávací misky a podložka pro nádobu na ledové Obslužný panel kostky Zátka odtoku vody Rozprašovač Výpusť vzduchu Boční dvířka Horní okénko Nádrž na vodu a max...
  • Seite 79 A Displej Časovač / Ukazatel času během Velikost ledových kostek: malé Velikost ledových kostek: velké Výroba ledových kostek: Ledové kostky se vyrábějí. Odtok vody: Voda se právě vypouští. Kód chyby 1,2 nebo 3 Příliš málo vody: Pokud se objeví tento ukazatel, voda se musí...
  • Seite 80: Uvedení Do Provozu A Obsluha

    UVEDENÍ DO PROVOZU A OBSLUHA Před první provozem: • Odstraňte švetok obalový materiál a zkontrolujte, zda je dodávka úplná. Pokud by chyběly části, obraťte se okamžitě na naši zákaznickou službu. • Odstraňte nálepky a lepicí pásky. Otevřete průhledné okénko a vyberte příslušenství.
  • Seite 81 3. Stiskněte tlačítko ON / OFF na obslužném panelu, abyste spustili výrobu ledových kostek. Symbol nyní svítí trvale na displeji. Zároveň začne blikat symbol Jako základní nastavení pro velikost ledových kostek je nastaveno „velké“. V případě, že byste chtěli velikost změnit, stiskněte tlačítko SELECT a zvolte mezi velkými ledovými kostkami nebo malými ledovými kostkami .
  • Seite 82 Takto odčerpáte vodu 8. Přednastavený čas výtoku je 10 sekund. Postavte sklenici pod výpusť vody a stiskněte jednou tlačítko WATER. Voda teče centrálně z výpusti vody, symbol se objeví na displeji a v poli časovače se objeví ukazatel (10S). Poté, co uběhlo 10 sekund, zmizí...
  • Seite 83 Zapnutí časovače Stiskněte nejprve tlačítko TIMER, přednastavený čas je 1 hodina a ukáže se v poli časovače na displeji. Stiskněte tlačítko SELECT, abyste nastavili požadovaný čas. Pokaždé, když stisknete tlačítko SELECT, zvýší se čas o půl hodiny. Držte tlačítko SELECT stisknuté, abyste představili čas rychleji.
  • Seite 84: Řešení Problémů

    ŘEŠENÍ PROBLÉMŮ Problém Možná příčina Řešení Příliš mnoho ledových Vypněte přístroj, doplňte Symbol se objeví a kostek v nádrži. vodu a zapněte potom šipka bliká přístroj znovu. Příliš mnoho ledových Odstraňte všechny ledové Symbol se objeví a kostek ve vnútor.priestore kostky nebo překážky bliká...
  • Seite 85: Čištění A Péče

    Problém Možná příčina Řešení V přístroji se nachá- Výpustná šachta pro ledo- Uvolněte tlačítko ICE a zejí kostky, ale nejsou vé kostky je blokována. stiskněte ho znovu po 3 vypouštěny, když stisknete sekundách. tlačítko ICE. Cyklus výroby ledu Teplota okolí nebo vody Používejte přístroj v probíhá, ale není...
  • Seite 86 LIKVIDACE Pokud se nachází obrázek vlevo (přeškrtnutá nádoba na odpadky na kolech) na výrobku, platí Evropská směrnice 2002/96/ EU. Tyto výrobky nemohou likvidovat s normálním domovním odpadem. Informujte se o místních předpisech o odděleném sběru elektrických a elektronických zařízení. Orientujte se podle místních předpisů a nelikvidujte staré přístroje přes komunální...

Diese Anleitung auch für:

1003084410030848100308495303084952030844

Inhaltsverzeichnis