Herunterladen Diese Seite drucken
Kicker QSS65 Benutzerhandbuch

Kicker QSS65 Benutzerhandbuch

Qss component system
Vorschau ausblenden Andere Handbücher für QSS65:

Werbung

Verfügbare Sprachen

Verfügbare Sprachen

QSS
QSS COMPONENT SYSTEM
QSS65 | QSS67
Owner's Manual | English
Manual del Propietario | Español
SISTEMA DE ALTAVOCES COMPONENTES QSS
Benutzerhandbuch | Deutsch
QSS-KOMPONENTENSYSTEM
Manuel d'utilisation | Française
SYSTÈME À COMPOSANTS QSS
2014 QSS Multilingual Rev C.indd 1
COMPONENT SYSTEM
9/24/2013 2:31:40 PM

Werbung

loading

Inhaltszusammenfassung für Kicker QSS65

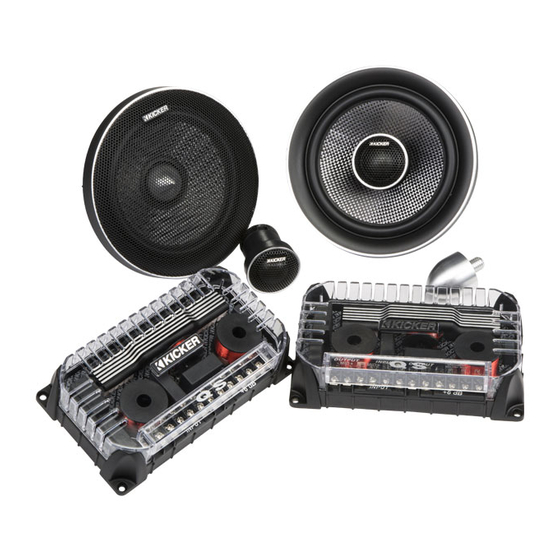
  • Seite 1 COMPONENT SYSTEM QSS COMPONENT SYSTEM QSS65 | QSS67 Owner’s Manual | English Manual del Propietario | Español SISTEMA DE ALTAVOCES COMPONENTES QSS Benutzerhandbuch | Deutsch QSS-KOMPONENTENSYSTEM Manuel d’utilisation | Française SYSTÈME À COMPOSANTS QSS 2014 QSS Multilingual Rev C.indd 1 2014 QSS Multilingual Rev C.indd 1...
  • Seite 2 Purchase Date: Speaker Serial Number: The KICKER QSS-series component systems offer unmatched audio fi delity for vehicle applications. Whether you’re confi guring the ultimate multi-speaker and subwoofer surround system or simply upgrading from dull, lifeless factory speakers, the QSS component systems deliver the most pleasing full-range sound on the market today! Key features of...
  • Seite 3 CONFIGURATION Before mounting and wiring the QSS component system, determine which confi guration you will use for the speakers and crossover. QSS Speaker ADVANTAGES CONSIDERATIONS Confi gurations Coaxial great for space-limited applications high frequencies may not be as or when separate tweeter mounting prominent | tweeter output may is not possible need to be increased at crossover...
  • Seite 4 Step 1 Fig. 1 Confi guring the QSS for Coaxial Operation coaxial mounting adapter Step 7 tweeter post Steps 2–6 tweeter tweeter lead wires Fig. 2 QSS crossover INPUT jumper. Install only for 2-way confi gurations; do not install if bi-amping. tweeter output-level jumpers.
  • Seite 5 CROSSOVER CONFIGURATION The KICKER QSS crossover can be confi gured as a conventional 2-way crossover by installing the included INPUT jumper into the - MID + -TW + input terminals as shown in Fig. 2. In this confi guration, the amplifi ed signal from your source unit or amplifi er should be wired to the + and - terminals indicated on the INPUT jumper.
  • Seite 6 Pro Tip: Looking for the next step in audio performance from your QSS components? Upgrade to a KICKER IQ or KX 4 or 5-channel amplifi er for each QSS component system you have installed to take full advantage of the QSS’s bi-amping capabilities. With a dedicated amplifi er channel for each tweeter and each midrange driver, you’ll have a more effi...
  • Seite 7 WOOFER MOUNTING The KICKER QSS components are designed for free-air applications and do not require a sealed enclosure for optimum performance. It is important to isolate the sound coming from the front of the speaker from the sound radiating from the back of the speaker. This is most easily accomplished by mounting the speakers in a vehicle’s factory locations or in a location with a semi-isolated rear chamber...
  • Seite 8: Tweeter Mounting

    Trim the mounting nut legs at the score lines to accommodate thicker panels. tweeter fl ush ring panel mounting nut Fig. 4 Flush Mounting the Tweeter tweeter front angle ring back angle ring panel mounting nut rounded surface inset surface Fig.
  • Seite 9 CROSSOVER MOUNTING Mount the crossover in a location that is easy to access for wiring and tweeter output level adjustment. Make sure that the crossover will not be exposed to water. The bottom of the car door is not a good location.
  • Seite 10 Note: All specifi cations and performance fi gures are subject to change. Please visit www.kicker.com for the most current information. To get the best performance from your new KICKER speakers, we recommend using genuine KICKER accessories and wiring. Please allow two weeks of break-in time for the speakers to reach optimum performance.
  • Seite 11 ACOUSTICS LIMITED WARRANTY When purchased from an Authorized KICKER Dealer, KICKER warrants this product to be free from defects in material and workmanship under normal use for a period of ONE (1) YEAR from date of original purchase. If this product is identifi...
  • Seite 12 Número de modelo del altavoz: Los sistemas de componentes de la serie QSS de KICKER ofrecen una fi delidad de audio inigualable para aplicaciones para vehículos. Ya sea para confi gurar el último sistema de sonido envolvente con altavoces múltiples y subwoofer o simplemente para mejorar la versión de parlantes aburridos y sin vida de fábrica, los sistemas de componentes QSS brindan el sonido de gama completa más placentero del...
  • Seite 13 CONFIGURACIÓN Antes de montar y realizar el cableado del sistema de componentes QS, determine qué confi guración utilizará para los altavoces y el crossover. Confi guraciones de VENTAJAS CONSIDERACIONES los altavoces QS Coaxial Excelente para aplicaciones con Es posible que las frecuencias altas espacio limitado o cuando no es posible no sean tan prominentes | Es posible el montaje del tweeter por separado...
  • Seite 14 Paso 1 Fig. 1 Confi guración de QSS para el funcionamiento coaxial adaptador de montaje coaxial Paso 7 base del tweeter Pasos 2 a 6 tweeter cables de alimentación del tweeter Fig. 2 crossover QS puente INPUT (entrada) Instalar sólo para confi guraciones de 2 vías;...
  • Seite 15 CONFIGURACIÓN DEL CROSSOVER El crossover QSS de KICKER se puede confi gurar como un crossover convencional de 2 vías si se instala el puente INPUT (entrada) en las terminales de entrada - MID + - TW + como se muestra en la Fig. 2.
  • Seite 16 Consejo profesional: ¿Busca mejorar el rendimiento de audio de sus componentes QSS? Actualice cada sistema de componentes QSS que tenga instalado en un amplifi cador de 4 canales KICKER IQ o KX para aprovechar al máximo la capacidad de biamplifi cación de QSS. Con un canal amplifi cador dedicado para cada tweeter y cada excitador de alcance medio, tendrá...
  • Seite 17 MONTAJE DEL WOOFER Los altavoces componentes Kicker QSS han sido diseñados específi camente para montarlos en aplicaciones al aire libre. Estos altavoces no necesitan caja sellada para dar un rendimiento óptimo. Es importante separar el sonido radiado por delante del sonido radiado por detrás del excitador. Esta separación se logra normalmente instalando el excitador en una ubicación de altavoz preestablecida de...
  • Seite 18 Recorte los tramos de la tuerca de montaje por las líneas de las ranuras para adaptarlo a paneles más gruesos. tweeter anillo al ras panel tuerca de montaje Fig. 4 Montaje al ras del tweeter tweeter anillo angular delantero anillo angular trasero panel tuerca de montaje superfi...
  • Seite 19 MONTAJE DEL CROSSOVER Monte el crossover en una ubicación que sea de fácil acceso para realizar el cableado y ajustar el nivel de salida del tweeter. Asegúrese de que el crossover no quede en un lugar que se pueda mojar. La parte inferior de la puerta del automóvil no es una buena ubicación.
  • Seite 20 MONTAJE DE LA REJILLA Snap-on parrilla o-anillo de compensación si se desea Gire el anillo del ajuste parrilla / hacia la izquierda para eliminar 2014 QSS Multilingual Rev C.indd 20 2014 QSS Multilingual Rev C.indd 20 9/24/2013 2:32:01 PM 9/24/2013 2:32:01 PM...
  • Seite 21 QSS67 / QSS65 Autorisierter KICKER-Händler: Kaufdatum: Lautsprecher-Modellnummer: Die KICKER QSS-Komponentenserie bietet in Fahrzeugen eine unübertroffene Klangtreue. Unabhängig davon, ob Sie das Multi-Speaker- Subwoofer-Surroundsystem neu einbauen oder einfach nur aufrüsten, die QSS-Komponentensysteme bieten die beste Klangpalette, die derzeit erhältlich ist. Frequenzweiche Tieftöner...
  • Seite 22 ANORDNUNG Bevor Sie das QSS-Komponentensystem einbauen und verkabeln, sollten Sie die Anordnung der Lautsprecher und der Frequenzweiche festlegen. QSS-Lautsprech- VORTEILE HINWEISE eranordnung Koaxial Bestens geeignet für Einbauten mit Hochfrequenzen treten mögli- beschränktem Platz oder wenn ein cherweise nicht ganz hervor | getrennter Einbau der Hochtöner Hochtönerausgabe kann eine Ver- nicht möglich ist...
  • Seite 23 0 dB FREQUENZWEICHEN-ANORDNUNG Die KICKER QSS-Frequenzweiche kann als konventionelle 2-Wege-Frequenzweiche durch die Installation der beigefügten EINGANGS-Brücke in die Klemmen - MID + -TW + eingestellt werden, so wie in Abb. 2 dargestellt. In diesem Fall muss das Signal, das von der Quelle oder dem Verstärker kommt, mit den + und –...
  • Seite 24 Tipp: Sind Sie auf der Suche nach der nächsthöheren Audioleistung Ihrer QSS-Komponenten? Dann rüsten Sie jede Ihrer eingebauten QSS-Komponenten mit einem KICKER IQ oder KX 4-Channel Amplifi er auf, um die Vorteile von QSS-Bi-Amping voll ausnutzen zu können. Durch den Verstärkerkanal, der jedem Hoch- und Mitteltöner zugeordnet ist, verfügen Sie über ein wesentlich effi...
  • Seite 25 Frequenzweiche in bi-amp-Anordnung Zwei Kanäle pro Komponentenset • Für den Stereobetrieb sind mindestens vier Verstärkerkanäle erforderlich (Es werden nur zwei Kanäle dargestellt). - OUT TW - -MID+ -TW+ -MID+ -TW+ LEFT OUTPUT AUSGANG Verstärker / Quelle (muss über mindestens vier Kanäle verfügen) 2014 QSS Multilingual Rev C.indd 25 2014 QSS Multilingual Rev C.indd 25...
  • Seite 26 WOOFER-EINBAU Ihre Kicker QSS-Komponenten sind speziell für den Einbau in nicht geschlossenen Gehäusen gedacht. Die Lautsprecher benötigen kein geschlossenes Gehäuse, um optimale Leistung zu bieten. Es ist wichtig, den vorne aus dem Treiber austretenden Schall vom Schall zu trennen, der von der Rückseite des Treibers kommt.
  • Seite 27 Kürzen Sie die Beinchen der Befestigungsmuttern an den markierten Linien ab, um diese an dickere Verkleidungen anzupassen. Hochtöner Ring für bündigen Einbau Verkleidung Befestigungsmutter Abb. 4 Bündiger Einbau des Hochtöners Hochtöner Vorderer Winkelring Hinterer Winkelring Verkleidung Befestigungsmutter Abgerundete Oberfl äche Einsatz Abb.
  • Seite 28 CROSSOVER-EINBAU Bauen Sie die Frequenzweiche an einem leicht zugänglichen Ort für Verkabelung und Einstellung des Hochtönerausgangspegels ein. Stellen Sie dabei sicher, dass die Frequenzweiche vor Wasser geschützt ist. Der untere Teil der Tür ist kein geeigneter Ort. Wenn die Frequenzweiche in die Fahrzeugtür eingebaut werden muss, treffen Sie entsprechende Vorsichtsmaßnahmen, da sich im unteren Teil der Tür Wasser ansammeln kann.
  • Seite 29 GRILLEINBAU Snap-on Kühlergrill oder Trimm-Ring, falls gewünscht Drehen grille / Trimm-Ring gegen den Uhrzeigersinn entfernen 2014 QSS Multilingual Rev C.indd 29 2014 QSS Multilingual Rev C.indd 29 9/24/2013 2:32:02 PM 9/24/2013 2:32:02 PM...
  • Seite 30 QSS COMPONENT SYSTEM Notice d’Utilisation MODÈLE : QSS67 / QSS65 Revendeur agréé KICKER : Purchase Date : Numéro de modèle haut-parleur : Les systèmes composants de la série KICER QSS offrent une fi délité audio inégalée pour les applications automobiles. Que vous confi guriez le système d’ambiance haut de gamme avec multiples haut-parleurs et subwoofer ou que vous vous contentiez d’une mise à...
  • Seite 31 CONFIGURATION Avant de monter et de câbler le système composant QS, déterminer la confi guration à utiliser pour les haut-parleurs et le fi ltre passif. Confi gurations AVANTAGES REMARQUES Haut-parleur QS Coaxiale Idéal pour des applications Les hautes fréquences ne sont confi...
  • Seite 32 CROSSOVER CONFIGURATION Le fi ltre passif KICKER QSS peut être confi guré en tant que fi ltre passif conventionnel à 2 voies en installant la jarretière d’ENTRÉE fournie dans les bornes d’entrée - MID + -TW + comme le montre la Figure 2.
  • Seite 33 Astuce de pro : vous-voulez optimiser encore les performances audio de vos composants QSS ? Adoptez un amplifi cateur 4 canaux KICKER IQ ou KX pour chaque système composant QSS installé afi n de tirer le meilleur parti des capacités de bi-amplifi cation de QSS. Avec un canal amplifi cateur dédié...
  • Seite 34 Filtre passif en confi guration bi-ampli Deux canaux défi nis par composant • Au moins quatre canaux amplifi cateurs sont requis pour une exploitation stéréo (seuls deux canaux sont représentés) - OUT TW - -MID+ -TW+ -MID+ -TW+ LEFT OUTPUT SORTIE amplifi...
  • Seite 35 MONTAGE DU WOOFER Les composants Kicker QSS ont été spécialement conçus pour un montage sans enceinte. Leur fonctionnement optimal ne nécessite pas d’enceinte close. Il est important d’isoler le son sortant par l’avant du haut-parleur et le son diffusé à l’arrière du haut-parleur. En général, cette isolation est obtenue en installant le haut-parleur dans un emplacement standard ou dans un emplacement pourvu d’une...
  • Seite 36 Couper les ailettes des écrous de montage jusqu’aux lignes striées pour s’adapter aux panneaux plus épais. tweeter bague affl eurante panneau écrou de montage Fig. 4 Montage encastré du tweeter tweeter bague angulaire avant bague angulaire arrière panneau écrou de montage surface arrondie surface encastrée Fig.
  • Seite 37 MONTAGE DU FILTRE PASSIF Monter le fi ltre passif dans un emplacement facile d’accès pour le câblage et le réglage de niveau de sortie du tweeter. S’assurer que le fi ltre passif n’est pas exposé à l’eau. Le bas de la porte du véhicule n’est pas un bon endroit.
  • Seite 38 MONTAGE DE LA GRILLE Snap-on grille ou garniture torique si désiré Tournez grille / garniture torique vers la gauche pour supprimer 2014 QSS Multilingual Rev C.indd 38 2014 QSS Multilingual Rev C.indd 38 9/24/2013 2:32:04 PM 9/24/2013 2:32:04 PM...
  • Seite 39: International Warranty

    Sea precavido cuando controle el volumen. La frase “combustible para vivir la vida Livin’ Loud™ a todo volumen” se refi ere al entusiasmo por la vida que la marca Kicker de estéreos de automóvil representa y a la recomendación a nuestros clientes de que vivan lo mejor posible (“a todo volumen”) en todo sentido.
  • Seite 40 ©2013 Stillwater Designs 2014 QSS Multilingual Rev C.indd 40 2014 QSS Multilingual Rev C.indd 40 9/24/2013 2:32:05 PM 9/24/2013 2:32:05 PM...

Diese Anleitung auch für:

Qss67