Herunterladen Inhalt Inhalt Diese Seite drucken
Inhaltsverzeichnis

Werbung

Verfügbare Sprachen
  • DE

Verfügbare Sprachen

  • DEUTSCH, seite 23
User Manual
Nebula Cosmos Max

Werbung

Inhaltsverzeichnis
loading

Inhaltszusammenfassung für Anker Nebula Cosmos Max

  • Seite 1 User Manual Nebula Cosmos Max...
  • Seite 2 English Deutsch Español Français Italiano Nederlands Português 日本語 한국어 ‫ة ي ِ ب َ ر َعل‬...
  • Seite 3: Inhaltsverzeichnis

    Table of Contents Safety Instructions What’s Included Overview Getting Started Nebula App Settings Using Nebula Cosmos Max Specifications Troubleshooting Notice Trademarks Warranty...
  • Seite 4: Safety Instructions

    Safety Instructions Read all instructions before you use this device. Do not make any changes or create settings that are not described in this manual. If physical injury, loss of data or damage is caused by failure to follow instructions, the warranty does not apply. Setup •...
  • Seite 5 • Before you make or change any connections, ensure that all devices are disconnected from the power outlet. • Never touch the power cable or the power connector with wet hands. Hearing Safety • To prevent hearing damage, do not listen for extended periods at high volume. Set the volume to a safe level.
  • Seite 6: What's Included

    What’s Included Control Overview 1. Front View Camera for Autofocus Lens Speaker 2. Rear View Power Button • Press to power on • Press and hold to power off DC Input HDMI Input Port • Connect to a playback device USB-A Port •...
  • Seite 7: Top View

    3. Top View Tripod socket 4. Bottom View Adjust Focus Navigation Back Power On / Off Press to activate Google Assistant Confirm the selected content Home System Settings Volume Up / Down Remote Control: Nebula RC Model: D0413 5. LED Indicator LED Status Description Solid red...
  • Seite 8: Getting Started

    Getting Started 1. Placement Place this device on a stable, flat surface, and squarely point it to face the projection surface. For best results, the projection surface should be white and flat. The distance between this device and the projection surface must be a minimum of 31 inches (0.8 meters) and a maximum of 157 inches (3.98 meters) to get a projection image from 30 to 150 inches.
  • Seite 9: Get Started

    ② To replace the battery, unlock and open the battery compartment, insert a new battery matching the polarity (+/-) as indicated, and then close and lock the battery compartment. 3. Get Started ① Connect Nebula Cosmos Max to a power outlet using the provided power adapter.
  • Seite 10 ② Press to turn on the projector. ③ Angle the device towards a suitable projection surface or wall.The built-in autofocus automatically adjusts the protector's image focus. Or you can press on the remote control to manually adjust the focus. ④ When using for the first time, follow the on-screen instructions to complete the basic set-up.
  • Seite 11: Nebula App

    ① Download the Nebula Connect app from the App Store (iOS devices) or Google Play (Android devices). Nebula Connect ② Enable Bluetooth on your smartphone and select [Nebula Cosmos Max ] as the device to be connected. ③ Open the Nebula Connect app and follow the on-screen instructions to complete the connection setup.
  • Seite 12: Settings

    Settings Go through the setup process when you turn on Nebula Cosmos Max for the first time. 1. Network This device can be connected to the Internet via a wireless (Wi-Fi) connection. ① On the home page, select > [Network & Internet] and press ②...
  • Seite 13 [Auto]: Automatically detects whether the projector is inverted. Automatically switch between these options. [Front Projection]: The projector is located in front of the projection surface. [Rear Projection]: The projector is located behind the projection surface. [Projector Mode] [Inverted Front Projection]: The projector is hanging from the ceiling in an upside down position.
  • Seite 14 [Language] Select the on-screen language. [Keyboard] Select the keyboard language type. [Sound] Select the audio output source and sound format. [Storage] Check the device storage and removable storage. [Reset] All data from your device’s internal storage will be erased. [Date & Time] [Automatic date &...
  • Seite 15: Using Nebula Cosmos Max

    Two HDMI devices can be connected to the projector simultaneously to stream video at 4K@60 fps. To play from HDMI playback devices: ① Connect Nebula Cosmos Max to an HDMI playback device with an HDMI cable (not included). • It will automatically start HDMI playback once connected to an HDMI playback...
  • Seite 16 2. Play from a USB Drive With Nebula Cosmos Max , you can enjoy music, video, and pictures that are stored on a USB drive. To play from a USB drive: ① Download the ES File Explorer from Google Play.
  • Seite 17 To talk to the Google Assistant: ① Make sure you’ve followed the steps in the section “Connect Bluetooth Accessories” to connect your remote control to Nebula Cosmos Max . Once connected, the LED indicator on the remote control turns solid red.
  • Seite 18: Specifications

    Specifications Specifications and design are subject to change without notice. Power supply: 19V 9.47A Power consumption: < 180W Standby power consumption: < 0.5W Display technology: UHD 3840 × 2160p DLP Light source: RGB LED Projection image size: 30-150 inch Resolution: 1920 × 1080p Brightness: 1500 ANSI Lumens Contrast ratio: 1000:1 Throw ratio: 1.2...
  • Seite 19: Troubleshooting

    Troubleshooting ① Fail to turn on the projector with the remote control? • Press on the projector to turn it on. • When powered off, you cannot use the remote control to turn it on. ② The remote control doesn’t work? •...
  • Seite 20: Notice

    This product complies with the radio interference requirements of the European Community. Declaration of Conformity Hereby, Anker Innovations Limited. declares that this device is in compliance with the essential requirements and other relevant provisions of Directive 2014/53/EU. For the Declaration of Conformity, visit the Web site www.SeeNebula.com...
  • Seite 21 Telephone:1-800-988-7973 모델명 : D2150 인증번호 : R-C-AIl-D2150 제품명 :  특정소출력 무선기기 ( 무선데이터통신시스템용 무선기기 ) 제조자및제조국가 : Anker Innovations Limited 제조국 : 중국 CHINA 제조년월 : 2020.05 해당 무선설비는 운용 중 전파혼신 가능성이 있음 . 해당 무선설비는 전파혼신 가능성이 있으므로 인명안전과 관련된...
  • Seite 22: Trademarks

    제조국 : 중국 CHINA 제조년월 : 2020.05 해당 무선설비는 운용 중 전파혼신 가능성이 있음 . 해당 무선설비는 전파혼신 가능성이 있으므로 인명안전과 관련된 서비스는 할수 없음 . Trademarks HDMI, and HDMI logo and High-Definition Multimedia Interface are trademarks or registered trademarks of HDMI licensing LLC in the United States and other countries. The Bluetooth®...
  • Seite 23 Inhaltsverzeichnis Sicherheitsinformationen Im Lieferumfang Übersicht Erste Schritte Nebula App Einstellungen Verwenden des Nebula Cosmos Max Technische Daten Fehlerbehebung...
  • Seite 24: Sicherheitsinformationen

    Sicherheitsinformationen Lesen Sie alle Anweisungen sorgfältig durch, bevor Sie dieses Gerät verwenden. Nehmen Sie keine Änderungen oder Einstellungen vor, die nicht in diesem Handbuch beschrieben sind. Wenn Personenschäden, Datenverluste oder Schäden auf eine Missachtung der Anweisungen zurückzuführen sind, gilt keine Gewährleistung. Einrichtung •...
  • Seite 25 • Trennen Sie das Gerät bei Gewittern oder längerer Nichtverwendung vom Stromnetz. • Vor dem Herstellen oder Ändern von Verbindungen stellen Sie bitte sicher, dass alle Geräte vom Stromnetz getrennt sind. • Berühren Sie niemals das Netzkabel oder den Netzanschluss mit feuchten Händen. Schutz des Gehörs •...
  • Seite 26: Im Lieferumfang

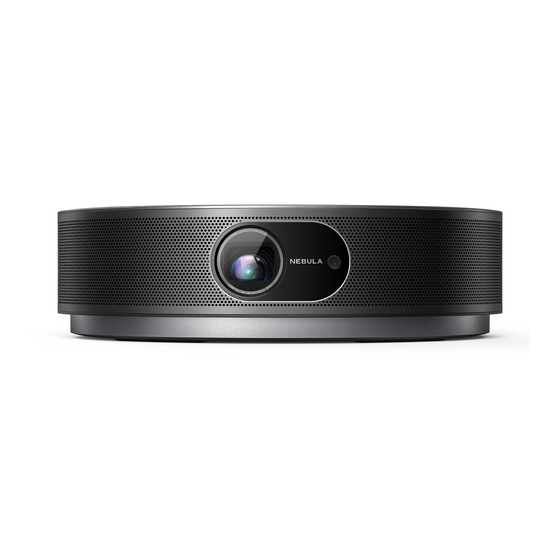
    IM LIEFERUMFANG Cosmos Adattatore Fernbedienung 2 x AAA Batterien Übersicht 1. Vorderseite Kamera für Auto-Fokus Objektiv Lautsprecher 2. Rückseite Ein-/Aus-Taste • Zum Einschalten drücken • Zum Ausschalten drücken und gedrückt halten GS-Eingang HDMI Eingangsanschluss • Zum Anschließen eines Wiedergabegeräts USB-A-Anschluss •...
  • Seite 27: Unterseite

    3. Oberseite Stativgewinde 4. Unterseite Fokus anzupassen Navigation Zurück Ein- / Ausschalten Zum Aktivieren von Google Assistant drücken Bestätigen Sie den ausgewählten Inhalt Home Systemeinstellungen Lauter / leiser Fernbedienung: Nebula RC Modell: D0413 5. LED-Anzeige LED-Status Beschreibung Leuchtet rot Betrieb im Projektor-Modus...
  • Seite 28: Erste Schritte

    Erste Schritte 1. Platzierung Stellen Sie das Gerät auf eine stabile, ebene Oberfläche und richten Sie es senkrecht zur Projektionsfläche aus. Die besten Ergebnisse erzielen Sie mit einer weißen, ebenen Projektionsfläche. Der Abstand zwischen dem Gerät und der Projektionsfläche muss mindestens 0,8 ...
  • Seite 29 Sie eine neue Batterie ein. Achten Sie dabei auf die richtige Ausrichtung der Pole (+/-) entsprechend den Markierungen. Schließen und verriegeln Sie das Batteriefach anschließend wieder. 3. Erste Schritte ① Schließen Sie den Nebula Cosmos Max über das mitgelieferte Netzteil an die Steckdose...
  • Seite 30 ② Drücken Sie , um den Projektor auszuschalten. ③ Richten Sie das Gerät auf eine geeignete Projektionsfläche oder Wand aus. Die integrierte Autofokus-Funktion ermöglicht es Ihrem Projektor, automatisch zu fokussieren. Oder Sie können auf der Fernbedienung drücken, um den Fokus manuell einzustellen.
  • Seite 31: Nebula App

    Befolgen Sie die Anweisungen, um den Vorgang abzuschließen. ① Überspringen Sie die Schritte zur schnellen Einrichtung. ② Verbinden Sie den Nebula Cosmos Max mit dem Netzwerk. ③ Melden Sie sich mit Ihrem Google-Konto an. Nach Abschluss der Einrichtung wird der Nebula Cosmos Max von Android TV gesteuert.
  • Seite 32: Einstellungen

    Einstellungen Nehmen Sie nach dem erstmaligen Einschalten des Nebula Cosmos Max die Einrichtung vor. 1. Netzwerk Sie können mit diesem Gerät über ein WLAN eine Verbindung zum Internet herstellen. ① Wählen Sie auf der Homepage > [Netzwerk & Internet] und drücken Sie ②...
  • Seite 33 [Autom]: Erkennt automatisch, ob der Projektor invertiert ist. Wechselt automatisch zwischen diesen Optionen. [Frontprojektion]: Der Projektor befindet sich vor der Projektionsfläche. [Rückprojektion]: Der Projektor befindet sich hinter der Projektionsfläche. [Modus „Projektor“] [Invertierte Frontprojektion]: Der Projektor hängt in umgedrehter Position von der Decke. Das Bild wird um 180 Grad gedreht.
  • Seite 34: Verwenden Des Nebula Cosmos Max

    Projektor angeschlossen werden, um Video mit 4K@60 fps zu streamen. Abspielen über HDMI-Wiedergabegeräte: ① Verbinden Sie den Nebula Cosmos Max über ein HDMI-Kabel (im Lieferumfang enthalten) mit einem HDMI-Wiedergabegerät. • Die HDMI-Wiedergabe wird automatisch gestartet, sobald das Gerät an ein HDMI-...
  • Seite 35: Wiedergabe Über Ein Usb-Laufwerk

    2. Wiedergabe über ein USB-Laufwerk Sie können mit dem Nebula Cosmos Max Musik, Videos und Bilder wiedergeben, die auf einem USB-Laufwerk gespeichert sind. Wiedergabe über ein USB-Laufwerk: ① Laden Sie den ES File Explorer von Google Play herunter. ② Stecken Sie ein USB-Gerät in den USB-Anschluss ein.
  • Seite 36: Verwenden Von Google-Funktionen

    ② Wählen Sie das Gerät „D2150“ aus, an das übertragen werden soll. • Dieser Projektor spiegelt den Bildschirm des angeschlossenen Mobiltelefons oder Computers wider. • Stellen Sie sicher, dass der Nebula Cosmos Max und Ihr Smartphone im selben WLAN-Netzwerk miteinander verbunden sind. • Aufgrund urheberrechtlicher Beschränkungen ist Screencast für manche Inhalte nicht verfügbar.
  • Seite 37: Technische Daten

    Technische Daten Änderungen der technischen Daten und des Designs ohne Vorankündigung vorbehalten. Stromversorgung: 19V 9.47A Stromverbrauch: < 180W Standby-Leistungsaufnahme: < 0,5 W Display-Technologie: UHD 3840 × 2160p DLP Lichtquelle: RGB-LED Projektionsbild-Größe: 30–150 Zoll Auflösung: 1920 × 1080p Helligkeit: 1500  ANSI-Lumen Kontrastverhältnis: 1000:1 Projektionsverhältnis: 1.2 Projektionsentfernung: 0,8m bis 3,98m CPU: Quad Core ARM Cortex-A55...
  • Seite 38: Fehlerbehebung

    Fehlerbehebung ① Der Projektor lässt sich nicht mit der Fernbedienung einschalten? • Halten Sie auf dem Projektor gedrückt, um ihn einzuschalten. • Wenn er ausgeschaltet ist, können Sie ihn nicht mit der Fernbedienung einschalten. ② Die Fernbedienung funktioniert nicht? • Stellen Sie sicher, dass die Batterien bereits in die Fernbedienung eingelegt wurden.
  • Seite 39 Tabla de contenidos Instrucciones de seguridad Contenido Descripción general Primeros pasos Aplicación Nebula Configuración Uso de Nebula Cosmos Especificaciones Solución de problemas...
  • Seite 40: Instrucciones De Seguridad

    Instrucciones de seguridad Lea todas las instrucciones antes de utilizar el dispositivo. No realice cambios ni cree ajustes que no estén descritos en este manual. En caso de que se produzcan lesiones, pérdida de datos o daños por no seguir las instrucciones, no se aplicará la garantía. Configuración •...
  • Seite 41 • Desconecte el dispositivo si hay las tormentas eléctricas o cuando no lo vaya a utilizar durante un periodo de tiempo prolongado. • Antes de realizar o cambiar cualquier conexión, asegúrese de que todos los dispositivos estén desconectados de la toma de corriente. •...
  • Seite 42: Contenido

    Contenido Cosmos Adaptador Controle 2 x AAA Remoto Baterias Descripción general 1. Vista frontal Cámara y enfoque automático Lente Altavoz 2. Vista posterior Botón de encendido • Pulsar para encender • Mantener pulsado para apagar Entrada de CC Puerto de entrada HDMI •...
  • Seite 43: Vista Inferior

    3. Vista superior Toma para trípode 4. Vista inferior Ajustar enfoque Navegación Atrás Encender/Apagar Pulsar para activar el Asistente de Google Confirmar el contenido seleccionado Inicio Configuración del sistema Subir/Bajar volumen Mando a distancia: Nebula RC Modelo: D0413 5. Indicador LED Estado de LED Descripción Rojo fijo...
  • Seite 44: Primeros Pasos

    Primeros pasos 1. Colocación Coloque el dispositivo sobre una superficie plana y estable, totalmente orientado hacia la superficie de proyección. Para obtener los mejores resultados, la superficie de proyección debería ser blanca y plana. La distancia entre el dispositivo y la superficie de proyección debe ser de 0,8 metros como mínimo y 3,98 metros como máximo para obtener una imagen de proyección de entre 30 y 150 pulgadas.
  • Seite 45 ② Para sustituir las pilas, desbloquee y abra el compartimento de las pilas, inserte las pilas nuevas (haciendo coincidir la polaridad [+/-] como se indica) y, a continuación, cierre y bloquee el compartimento. 3. Primeros pasos ① Conecte el proyector Nebula Cosmos a la toma de corriente mediante el adaptador de alimentación incluido.
  • Seite 46 ② Pulse para encender el proyector. ③ Oriente el dispositivo hacia una pared o superficie de proyección adecuada. La función de enfoque automático integrada permite que el proyector active el enfoque automático. También puede pulsar en el mando a distancia para ajustar el enfoque manualmente.
  • Seite 47: Aplicación Nebula

    Aplicación Nebula Para controlar fácilmente este dispositivo, le recomendamos que descargue la aplicación Nebula Connect diseñada para Nebula. Esta aplicación le permite utilizar la pantalla como si fuera un ratón. ① Descargue la aplicación Nebula Connect desde App Store (dispositivos iOS) o Google Play (dispositivos Android). Nebula Connect ②...
  • Seite 48: Configuración

    Configuración Complete el proceso de configuración cuando encienda por primera vez el proyector Nebula Cosmos. 1. Red Es posible conectar el dispositivo a Internet a través de una conexión inalámbrica (Wi- Fi). ① En la página de inicio, seleccione > [Red e Internet] y pulse ②...
  • Seite 49: Otras Configuraciones

    [Automático]: detecta automáticamente si el proyector está invertido. Cambia automáticamente entre estas opciones. [Proyección frontal]: el proyector está situado en frente de la superficie de proyección. [Proyección posterior]: el proyector está situado detrás [Modo de proyector] de la superficie de proyección. [Proyección frontal invertida]: el proyector está colgando del techo en posición invertida.
  • Seite 50: Uso De Nebula Cosmos

    [Idioma] Seleccione el idioma de visualización en pantalla. [Teclado] Seleccione el tipo de idioma del teclado que desea usar. [Sonido] Seleccione la salida de audio y el formato de sonido. Compruebe el almacenamiento del dispositivo y el [Almacenamiento] almacenamiento extraíble. S e b o r r a r á...
  • Seite 51 2. Reproducción desde una unidad USB Con Nebula Cosmos, puede disfrutar de música, vídeos e imágenes almacenados en una unidad USB. Para reproducir desde una unidad USB: ① Descargue ES File Explorer desde Google Play. ② Inserte la unidad USB en el puerto USB. •...
  • Seite 52 4. Uso de Chromecast integrado Puede transmitir fotos, vídeos y música de forma inalámbrica desde un teléfono u ordenador directamente a Nebula Cosmos. ① Reproduzca un clip de vídeo en su teléfono y pulse el icono de transmisión la pantalla de vídeo. ②...
  • Seite 53: Especificaciones

    Especificaciones Las especificaciones y el diseño están sujetos a cambios sin previo aviso. Fuente de alimentación: 19 V 9,47 A Consumo de energía: <180 W Consumo de energía en espera: <0,5 W Tecnología de pantalla: UHD 3840 × 2160p DLP Fuente de luz: LED RGB Tamaño de la imagen proyectada: 30-150 pulgadas Resolución: 1920 × 1080p Brillo: 1500 lúmenes ANSI...
  • Seite 54: Solución De Problemas

    Solución de problemas ① ¿No puede encender el proyector con el mando a distancia? • Mantenga pulsado en el proyector para encenderlo. • Cuando el proyector está apagado, no puede usar el mando a distancia para encenderlo. ② ¿No funciona el mando a distancia? •...
  • Seite 55 Sommaire Consignes de sécurité Contenu Présentation Premiers pas Application Nebula Paramètres Utilisation de Nebula Cosmos Max Spécifications Dépannage...
  • Seite 56: Consignes De Sécurité

    Consignes de sécurité Veuillez lire toutes les instructions avant d'utiliser cet appareil. N'apportez pas de modifications et ne procédez pas à des configurations qui ne sont pas décrites dans ce manuel. Si des dommages corporels, des pertes de données ou des dommages sont causés par le non-respect des instructions, la garantie ne s'applique pas.
  • Seite 57 • Avant de réaliser une connexion ou d'en modifier une, s'assurer que tous les appareils sont débranchés de la prise d'alimentation. • Ne jamais toucher le cordon d'alimentation ou le connecteur d'alimentation avec les mains mouillées. Protection de l'audition • Pour éviter tout dommage auditif, ne pas écouter à un volume élevé pendant une période prolongée.
  • Seite 58: Contenu

    CONTENU Cosmos Adaptatrice Télécom- 2 x AAA mande Batteries Présentation 1. Vue avant Caméra pour mise au point automatique Objectif Enceinte 2. Vue arrière Bouton d'alimentation • Appuyez pour allumer • Maintenez enfoncé pour éteindre Entrée CC Port d'entrée HDMI • Connecter à un périphérique de lecture Port USB Type-A •...
  • Seite 59: Vue De Dessous

    3. Vue de dessus Attache pour trépied 4. Vue de dessous Ajuster la mise au point Navigation Arrière Marche/arrêt Appuyer pour activer l'Assistant Google Confirmer le contenu sélectionné Accueil Paramètres du système Augmenter/diminuer le volume Télécommande : Télécommande Nebula Modèle : D0413 5.
  • Seite 60: Premiers Pas

    PREMIERS PAS 1. Placement Placer cet appareil sur une surface plane et stable et le diriger directement vers la surface de projection. Pour de meilleurs résultats, la surface de projection doit être plane et de couleur blanche. La distance entre cet appareil et la surface de projection doit être au minimum de 31 ...
  • Seite 61: Pour Démarrer

    ② Pour remplacer les piles, déverrouiller et ouvrir le compartiment à piles, insérer une nouvelle pile en respectant la polarité (+/-) indiquée, puis fermer et verrouiller le compartiment à batterie. 3. Pour démarrer ① Brancher Nebula Cosmos Max à la prise de courant à l'aide de l'adaptateur électrique fourni.
  • Seite 62 ② Appuyer sur pour allumer le projecteur. ③ Orienter l'appareil vers un mur ou une surface de projection appropriée. La fonction de mise au point automatique intégrée permet à votre projecteur de régler la mise au point automatiquement. Ou vous pouvez appuyer sur sur la télécommande pour ajuster manuellement la mise au point.
  • Seite 63: Application Nebula

    ① Téléchargez l'application Nebula Connect depuis l'App Store (appareils iOS) ou Google Play (appareils Android). Nebula Connect ② Activez le Bluetooth sur le smartphone et sélectionnez [Nebula Cosmos Max ] dans la liste des périphériques à connecter. ③ Ouvrez l'application Nebula Connect et suivez les instructions à l'écran pour terminer la configuration de la connexion.
  • Seite 64: Paramètres

    Paramètres Suivez le processus de configuration lors de la première mise sous tension du Nebula Cosmos Max . 1. Réseau Cet appareil peut être connecté à Internet via une connexion sans fil (Wi-Fi). ① Sur la page d'accueil, sélectionnez > [Réseau et Internet] et appuyez sur ②...
  • Seite 65 [Auto]  : Détecte automatiquement si le projecteur est retourné. Bascule automatiquement entre les options suivantes. [Projection avant]  : Le projecteur est situé en face de la surface de projection. [Projection arrière] : Le projecteur est situé derrière la surface de projection. [Mode projecteur] [Projection avant retournée] : Le projecteur est suspendu au plafond, à...
  • Seite 66: Utilisation De Nebula Cosmos Max

    4K@à 60 images par seconde. Lecture depuis des dispositifs de lecture HDMI ① Connecte Nebula Cosmos Max à un dispositif de lecture HDMI avec un câble HDMI (non fourni). • La lecture via HDMI commence automatiquement lors de la première connexion à...
  • Seite 67 2. Lecture à partir d'une clé USB Avec Nebula Cosmos Max , vous pouvez lire de la musique, des vidéos et des images stockées sur une clé USB.
  • Seite 68 ④ Appuyez sur pour arrêter la lecture. 3. Connecter des accessoires Bluetooth Vous pouvez connecter des périphériques Bluetooth à Nebula Cosmos Max . ① Sur la page d'accueil, sélectionnez > [Télécommandes et accessoires] et appuyez sur ② Sélectionnez Ajouter des accessoires.
  • Seite 69 ② Sélectionnez le périphérique « D2150 » sur lequel vous souhaitez diffuser. • Ce projecteur répliquera l'écran du téléphone ou de l'ordinateur connecté. • Veillez à ce que le Nebula Cosmos Max et votre téléphone soient connectés au même réseau sans fil.
  • Seite 70: Spécifications

    Spécifications Les spécifications et la conception sont susceptibles d'être modifiées sans préavis. Alimentation : 19 V 9,47 A Consommation : < 180 W Consommation en veille : < 0,5 W Technologie d'affichage : DLP FHD 3840 × 2160p Source de lumière : LED RGB Taille d'image projetée : 30 à 150 pouces Résolution : 1920 x 1080 p Luminosité : 1500 lumens ANSI Rapport de contraste : 1000:1...
  • Seite 71: Dépannage

    Dépannage ① Vous ne parvenez pas à mettre sous tension le projecteur avec la télécommande ? • Appuyez sur sur le projecteur pour le mettre sous tension. • Lorsqu'il est éteint, vous ne pouvez pas utiliser la télécommande pour allumer l'appareil. ②...
  • Seite 72 Indice Informazioni sulla sicurezza Contenuto della confezione Panoramica Per iniziare App Nebula Impostazioni Utilizzo di Nebula Cosmos Max Specifiche Risoluzione dei problemi...
  • Seite 73: Informazioni Sulla Sicurezza

    Informazioni sulla sicurezza Leggere tutte le istruzioni prima di utilizzare il dispositivo. Non apportare modifiche, né creare impostazioni che non siano descritte nel presente manuale. La garanzia non si applica in caso di lesioni personali, perdite di dati o danni causati dal mancato rispetto delle istruzioni.
  • Seite 74 • Scollegare questo dispositivo in caso di temporali o se rimane inutilizzato per un lungo periodo di tempo. • Prima di effettuare o modificare i collegamenti, assicurarsi che tutti i dispositivi siano scollegati dalla presa di corrente. • Non toccare mai il cavo di alimentazione o il connettore di alimentazione con le mani bagnate.
  • Seite 75: Contenuto Della Confezione

    CONTENUTO DELLA CONFEZIONE Cosmos Adapter Telecomando 2 x AAA Batterie Panoramica 1. Vista anteriore Telecamera per la messa a fuoco automatica Lente Altoparlanter 2. Vista posteriore Tasto di accensione • Premere per accendere il dispositivo • Tenere premuto per spegnere il dispositivo Ingresso CC Porta di ingresso HDMI •...
  • Seite 76: Vista Dall'alto

    3. Vista dall’alto Attacco per treppiede 4. Vista dal basso Regolazione della messa a fuoco Navigazione Parte posteriore Accensione/spegnimento Premere per attivare l’Assistente Google Conferma del contenuto selezionato Base di ricarica Impostazioni di sistema Aumento/Diminuzione del volume Telecomando: Nebula RC Modello: D0413 5.
  • Seite 77: Per Iniziare

    Per iniziare 1. Posizionamento Posizionare il dispositivo su una superficie piana e stabile, puntandolo esattamente verso la superficie di proiezione. Per ottenere risultati ottimali, la superficie di proiezione deve essere bianca e piana. La distanza tra questo dispositivo e la superficie di proiezione deve essere di minimo 0,8 metri e di massimo 3,98 metri per ottenere un’immagine di proiezione da 20 a 100 pollici.
  • Seite 78 ② Per sostituire le batterie, sbloccare e aprire il vano batterie, inserire quelle nuove facendo corrispondere la polarità (+/-) come indicato, quindi chiudere il coperchio. 3. Per iniziare ① Collegare Nebula Cosmos Max a una presa di corrente utilizzando il l’adattatore di alimentazione fornito.
  • Seite 79 ② Premere una volta per accendere il proiettore. ③ Orientare il dispositivo verso una superficie di proiezione o una parete adatta. La funzione di messa a fuoco automatica integrata consente al proiettore di attivare la messa a fuoco automatica. In alternativa, tenere premuto sul telecomando per regolare manualmente la messa a fuoco.
  • Seite 80: App Nebula

    ① Scaricare l’app Nebula Connect dall’App Store (dispositivi iOS) o da Google Play (dispositivi Android). Nebula Connect ② Abilitare il Bluetooth sullo smartphone e selezionare [Nebula Cosmos Max ] come dispositivo che si desidera connettere. ③ Aprire l’app Nebula Connect e seguire le istruzioni visualizzate sullo schermo per completare la configurazione della connessione.
  • Seite 81: Impostazioni

    Impostazioni Quando si accende Nebula Cosmos Max per la prima volta, eseguire tutti i passaggi della procedura di configurazione. 1. Rete Il dispositivo può essere connesso a Internet tramite una connessione wireless (Wi-Fi). ① Nella pagina Home, selezionare > [Rete e Internet] e premere ②...
  • Seite 82 [Automatica]: Consente di rilevare automaticamente se il proiettore è invertito. Consente di passare automaticamente tra queste opzioni. [Proiettore frontale]: il proiettore si trova davanti alla superficie di proiezione. [Proiettore posteriore]: il proiettore si trova dietro la [Modalità proiettore] superficie di proiezione. [Proiettore frontale capovolto]: il proiettore è appeso al soffitto in posizione capovolta.
  • Seite 83: Utilizzo Di Nebula Cosmos Max

    Utilizzo di Nebula Cosmos Max 1. Riproduzione da dispositivi di riproduzione HDMI Nebula Cosmos Max può essere collegato a vari dispositivi di riproduzione HDMI, ad esempio TV box, TV stick, lettori DVD, decoder digitali, console per videogiochi o altri dispositivi.Due dispositivi HDMI possono essere collegati contemporaneamente al proiettore per lo streaming video in 4K@60 fps.
  • Seite 84 2. Riproduzione da un’unità USB Con Nebula Cosmos Max , è possibile ascoltare musica e guardare foto e video memorizzati su un’unità USB.
  • Seite 85 ③ Selezionare i video o le foto che si desidera riprodurre dall’unità USB, quindi premere ④ Premere per interrompere la riproduzione. 3. Collegamento di accessori Bluetooth È possibile collegare dispositivi Bluetooth al proiettore Nebula Cosmos Max . ① Nella pagina Home, selezionare > [Telecomandi e accessori] e premere ② Selezionare Aggiungi accessori.
  • Seite 86 Per parlare con Assistente Google: ① Assicurarsi di aver seguito i passaggi descritti nella sezione “Collegamento di accessori Bluetooth” per collegare il telecomando a Nebula Cosmos Max . Una volta eseguito il collegamento, l’indicatore LED sul telecomando diventerà di color rosso fisso.
  • Seite 87: Specifiche

    Specifiche Le specifiche e il design sono soggetti a modifiche senza preavviso. Alimentazione: 19 V 9,47 A Consumo energetico: < 180 W Consumo energetico in standby: < 0,5 W Tecnologia display: DLP UHD3840x2160P Sorgente luminosa: LED RGB Dimensioni immagine di proiezione: 30-150” Risoluzione: 1920 × 1080p Luminosità: 1500 ANSI lumen Rapporto di contrasto: 1000:1 Rapporto di proiezione: 1,2...
  • Seite 88: Risoluzione Dei Problemi

    Risoluzione dei problemi ① Impossibile accendere il proiettore con il telecomando? • Tenere premuto sul proiettore per accenderlo. • Quando il dispositivo è spento, non è possibile utilizzare il telecomando per accenderlo. ② Il telecomando non funziona? • Assicurarsi che le batterie siano già installate nel telecomando. •...
  • Seite 89 Inhoudsopgave Veiligheidsinstructies Wat zit er in de doos? Overzicht Aan de slag Nebula-app Instellingen De Nebula Cosmos Max gebruiken Specificaties Problemen oplossen...
  • Seite 90: Veiligheidsinstructies

    Veiligheidsinstructies Lees alle instructies voordat u dit apparaat gebruikt. Breng geen wijzigingen aan en maak geen instellingen die niet in deze handleiding worden beschreven. Indien lichamelijk letsel, het verlies van gegevens of schade wordt veroorzaakt door het niet opvolgen van instructies, is de garantie niet van toepassing. Instellen •...
  • Seite 91 • Zorg er voordat u aansluitingen maakt of wijzigt voor dat alle apparaten zijn losgekoppeld van het lichtnet. • Raak het netsnoer en de voedingsaansluiting nooit met natte handen aan. Gehoorbescherming • Luister niet gedurende langere perioden op een hoog volume om gehoorbeschadiging te voorkomen.
  • Seite 92: Wat Zit Er In De Doos

    WAT ZIT ER IN DE DOOS? Cosmos Adapter Afstands- 2 x AAA bediening Batterijen Overzicht 1. Vooraanzicht Camera voor automatisch scherpstellen Lens Luidspreker 2. Achteraanzicht Aan/uit-knop • Druk om in te schakelen • Houd ingedrukt om uit te schakelen Voedingsingang HDMI-ingangspoort •...
  • Seite 93: Onderaanzicht

    3. Bovenaanzicht Statiefaansluiting 4. Onderaanzicht Scherpstelling aanpassen Navigatie Terug In-/uitschakelen Druk om Google Assistent te activeren Geselecteerde inhoud bevestigen Start Systeeminstellingen Volume omhoog / omlaag Afstandsbediening: Nebula RC Model: D0413 5. Led-indicatielampje Led-status Beschrijving Brandt rood Gebruik in de projectormodus...
  • Seite 94: Aan De Slag

    AAN DE SLAG 1. Plaatsing Plaats dit apparaat op een stabiel, vlak oppervlak en richt het recht op het projectieoppervlak. Voor de beste resultaten moet het projectieoppervlak wit en vlak zijn. De afstand tussen dit apparaat en het projectieoppervlak moet minimaal 0,8 meter en maximaal 3,98 meter bedragen voor een projectiebeeld van 30 tot 150 inches.
  • Seite 95 ② Als u de batterijen wilt vervangen, ontgrendel en open het batterijvak dan, plaats de nieuwe batterijen in de juiste richting (+/-), zoals aangegeven in het vak, en sluit het batterijvak. 3. Aan de slag ① Sluit de Nebula Cosmos Max aan op het lichtnet met behulp van de meegeleverde voedingsadapter.
  • Seite 96 ② Druk op om de projector in te schakelen. ③ Richt het apparaat op een geschikt projectieoppervlak of een geschikte muur. De ingebouwde automatische scherpstelfunctie stelt uw projector in staat om automatisch scherpstellen in te schakelen. Als alternatief kunt u op op de afstandsbediening drukken om handmatig scherp te stellen.
  • Seite 97: Nebula-App

    ① Download de Nebula Connect-app uit de App Store (iOS-apparaten) of Google Play (Android-apparaten). Nebula Connect ② Schakel Bluetooth in op uw smartphone en selecteer [Nebula Cosmos Max ] als het apparaat om verbinding mee te maken. ③ Open de Nebula Connect-app en volg de instructies op het scherm om het instellen van de verbinding te voltooien.
  • Seite 98: Instellingen

    Instellingen Doorloop het instelproces wanneer u de Nebula Cosmos Max voor het eerst inschakelt. 1. Netwerk Dit apparaat kan via een draadloze (wifi-)verbinding worden verbonden met het internet. ① Selecteer op de startpagina > [Netwerk en internet] en druk op ②...
  • Seite 99 [Automatisch]: Detecteert automatisch of de projector is omgedraaid. Schakel automatisch tussen deze opties. [Projectie voorkant]: De projector bevindt zich voor het projectieoppervlak. [Projectie achterkant]: De projector bevindt zich achter het projectieoppervlak. [Projectormodus] [Omgekeerde projectie voorkant]: De projector hangt ondersteboven aan het plafond. Het beeld wordt 180 graden gedraaid.
  • Seite 100: De Nebula Cosmos Max Gebruiken

    4K@60 fps. Afspelen vanaf HDMI-afspeelapparaten: ① Sluit de Nebula Cosmos Max met een HDMI-kabel (niet meegeleverd) aan op een HDMI-afspeelapparaat. • De Nebula Cosmos Max start het afspelen via HDMI automatisch zodra deze is...
  • Seite 101 2. Afspelen vanaf een USB-stick U kunt de Nebula Cosmos Max gebruiken om te genieten van muziek, video's en afbeeldingen die zijn opgeslagen op een USB-stick.
  • Seite 102 ③ Selecteer video's of foto's die u wilt afspelen van de USB-stick en druk op ④ Druk op om het afspelen te stoppen. 3. Bluetooth-accessoires verbinden U kunt Bluetooth-apparaten verbinden met de Nebula Cosmos Max . ① Selecteer op de startpagina > [Afstandsbedieningen en accessoires] en druk op ② Selecteer Accessoires toevoegen.
  • Seite 103 ② Selecteer het apparaat 'D2150' als apparaat waarnaar u wilt casten. • De projector projecteert het scherm van verbonden telefoon of tablet. • Zorg ervoor dat Nebula Cosmos Max en uw telefoon zijn verbonden met hetzelfde draadloze netwerk. • Bepaalde inhoud is mogelijk niet beschikbaar om te worden gecast vanwege copyrightbeperkingen.
  • Seite 104: Specificaties

    Specificaties Specificaties en ontwerp kunnen zonder voorafgaande kennisgeving worden gewijzigd. Voeding: 19 V 9,47 A Energieverbruik: < 180 W Energieverbruik in stand-bymodus: < 0,5 W Weergavetechnologie: DLP FHD 3840x2160P Lichtbron: RGB-led Grootte projectiebeeld: 30-150 inch Resolutie: 1920 × 1080p Helderheid: 1500 ANSI-lumen Contrastverhouding: 1000:1 Projectieverhouding: 1,2 Projectieafstand: 0,8m tot 3,98m...
  • Seite 105: Problemen Oplossen

    Problemen oplossen ① Lukt het niet om de projector in te schakelen met de afstandsbediening? • Druk op op de projector om de projector in te schakelen. • Als de projector is uitgeschakeld, kunt u de afstandsbediening niet gebruiken om de projector in te schakelen.
  • Seite 106 Índice Instruções de segurança Está incluído Descrição geral Começar Aplicação Nebula Definições Utilizar o Nebula Cosmos Max Especificações Resoluções de problemas...
  • Seite 107: Instruções De Segurança

    Instruções de segurança Leia todas as instruções antes de usar este dispositivo. Não faça alterações e não crie configurações que não estejam descritas neste manual. Se ocorrerem lesões físicas, perda de dados ou danos devido ao incumprimento das instruções, a garantia não será...
  • Seite 108 • Desligue este dispositivo durante a ocorrência de trovoadas ou quando não for utilizado durante um período prolongado. • Antes de efetuar ou alterar quaisquer ligações, certifique-se de que todos os dispositivos estão desligados da tomada elétrica. • Nunca toque no cabo de alimentação ou no conetor de alimentação com as mãos molhadas.
  • Seite 109: Está Incluído

    ESTÁ INCLUÍDO Cosmos Adaptador Controle 2 x AAA Remoto Baterias Descrição geral 1. Vista frontal Câmara para a Focagem automática Lente Altifalante 2. Vista traseira Botão para ligar/desligar • Premir para ligar • Premir continuamente para desligar Entrada de CC Porta de entrada HDMI •...
  • Seite 110: Vista Superior

    3. Vista superior Ficha para tripé 4. Vista inferior Ajustar a focagem Navegação Voltar Ligar/desligar Premir para ativar o Google Assistente Confirmar o conteúdo selecionado Página inicial Definições do sistema Aumentar/Diminuir volume Telecomando: Nebula RC Modelo: D0413 5. Indicador LED Estado do LED Descrição Vermelho sólido...
  • Seite 111: Preparar O Telecomando

    COMEÇAR 1. Localização Coloque este dispositivo numa superfície estável e plana, e aponte-o diretamente para a superfície de projeção. Para obter os melhores resultados, a superfície de projeção deve ser branca e plana. A distância entre este dispositivo e a superfície de projeção deve ter um mínimo de 0,8 metros e um máximo de 3,98 metros para obter uma imagem entre 30 e 150 polegadas.
  • Seite 112: Começar

    ② Para substituir as pilhas, destranque e abra o compartimento das pilhas, insira as novas pilhas, correspondendo a polaridade (+/-) indicada e, em seguida, feche e tranque o compartimento das pilhas. 3. Começar ① Ligue o Nebula Cosmos Max à tomada elétrica utilizando o adaptador de alimentação fornecido.
  • Seite 113 ② Prima para ligar o projetor. ③ Incline o dispositivo em direção a uma superfície ou parede de projeção adequada. A função de focagem automática permite que o seu projetor efetue a focagem automática. Ou poderá premir no telecomando para ajustar manualmente a focagem.
  • Seite 114: Aplicação Nebula

    ① Transferir a aplicação Nebula Connect a partir da App Store (dispositivos iOS) ou da Google Play (dispositivos Android). Nebula Connect ② Ative o Bluetooth no seu smartphone e selecione [Nebula Cosmos Max ] como o dispositivo a ligar. ③ Abra a aplicação Nebula Connect e siga as instruções no ecrã para concluir a configuração da ligação.
  • Seite 115: Definições

    Definições Efetue o processo de configuração quando ligar o Nebula Cosmos Max pela primeira vez. 1. Rede Este dispositivo pode ser ligado à internet através de uma ligação sem fios (Wi-Fi). ① Na página inicial, selecione > [Rede & Internet] e prima ②...
  • Seite 116 [Auto]: deteta automaticamente se o projetor está invertido. Alterne automaticamente entre estas opções. [Projeção frontal]: o projetor encontra-se em frente à superfície de projeção. [Projeção traseira]: o projetor encontra-se atrás da superfície de projeção. [Modo de projetor] [Projeção frontal invertida]: o projetor encontra-se pendurado no teto e numa posição invertida.
  • Seite 117: Utilizar O Nebula Cosmos Max

    4K@60 fps. Para reproduzir a partir de dispositivos de reprodução HDMI: ① Ligue o Nebula Cosmos Max a um dispositivo de reprodução por HDMI com um cabo HDMI (não incluído). • A reprodução HDMI será automaticamente iniciada logo que um dispositivo de...
  • Seite 118 2. Reproduzir a partir de uma unidade USB Com o Nebula Cosmos Max , pode desfrutar de música, vídeos e imagens que estão guardadas numa unidade USB.
  • Seite 119 ③ Selecione os vídeos ou fotografias da unidade USB que pretende reproduzir e prima ④ Prima para parar a reprodução. 3. Ligar acessórios por Bluetooth Pode ligar dispositivos por Bluetooth ao Nebula Cosmos Max . ① Na página inicial, selecione > [Telecomandos & Acessórios] e prima ② Selecione Adicionar acessórios.
  • Seite 120 Para falar com o Assistente do Google: ① Certifique-se de que seguiu os passos na secção “Ligar acessórios por Bluetooth” para ligar o telecomando ao Nebula Cosmos Max . Uma vez ligado, o indicador LED no telecomando fica vermelho estático.
  • Seite 121: Especificações

    Especificações As especificações e a conceção estão sujeitas a alteração sem aviso prévio. Fonte de alimentação: 19V 9,47A Consumo de energia: < 180W Consumo de energia no modo de espera: < 0,5W Tecnologia do ecrã: DLP UHD3840x2160P Fonte de luz: LED RGB Tamanho da imagem de projeção: 30-150 polegadas Resolução: 1920 ×...
  • Seite 122: Resoluções De Problemas

    Resolução de problemas ① Não consegue ligar o projetor com o telecomando? • Prima o botão no projetor para o ligar. • Se não estiver ligado, não conseguirá utilizar o telecomando para ligá-lo. ② O telecomando não funciona? • Certifique-se de que as pilhas estão instaladas no telecomando. •...
  • Seite 123 目次 安全にご使用いただくために パッケージ内容 概要 はじめに Nebula Connect アプリ 設定 Nebula Cosmos Max を使用する 製品の仕様 トラブルシューティング...
  • Seite 124 安全にご使用いただくために 本製品を使用する前に、すべての指示をお読みください。 このマニュアルで説明さ れていない変更または設定は行わないでください。 指示に従わなかったことが原因 で怪我、データの損失、破損が発生しても、保証の対象になりません。 セットアップ • 火災および / または感電のリスクを軽減するため、本製品を雨や湿気にさらさな いでください。 花びんなど液体の入った物を本製品の上に置かないでください。 • 火災が発生する危険があるため、本製品をテーブルクロスやカーペットなどの上 で使用しないでください。 • 本製品をほこりや汚れが付きやすい場所や、強い磁場を発生する機器の近くに置 かないでください。 • 過熱を防ぐため、換気を妨げたり換気口をふさいだりしないでください。 • 本製品は決して狭いスペースに置かないでください。 本製品の周囲に換気のため のスペースを常に十分に確保してください。 • 本製品が直射日光、熱、急激な温度変化、湿気に過度にさらさないよう、保護し てください。 極端な温度を避けてください。 本製品とアクセサリの適正な動作 温度および保管温度は 0 ~ 35° C です。 • 本製品を長時間使用していると、表面が高温になる場合があります。 その際は直 ちにシャットダウンし、電源アダプタをはずしてください。 本製品の温度が下が ったことを確認して、使用を再開してください。...
  • Seite 125 再生時の安全性 • 聴覚の損傷を防ぐため、長時間、大音量で聴かないように注意してください。 音 量は適切なレベルに設定してください。 充電 • 電源アダプタのタイプは HKA18019095-6C 、 出力電圧 / 電流は DC 19V / 9.47A です。 電源アダプタは本製品の近くに置いて、すぐ利用できるようにしてください。 • この電源アダプタは屋内使用専用です。 • 本製品を使用する際は、 風通しのよい標準室温 (5 ~ 25° C) の場所に置いてください。 • 本製品は USB 2.0 以降にのみ接続できます。 クリーニング • 糸くずの出ない柔らかい布を使用してください。 クリーニングに液体、気体、可 燃性の洗浄剤を使用しないでください。 • レンズのコーティング膜の損傷を防ぐため、いかなるレンズクリーニング用洗浄 液も使用しないでください。...
  • Seite 126 パッケージ内容 電源アダプタ リモコン クイックスタ 単4形電池 Cosmos Max 本体 ートガイド 概要 1. 正面図 オートフォーカス用カメラ レンズ スピーカー 電源ボタン 2. 背面図 • このボタンを押すと、電源がオン になります • このボタンを長押しすると、電源 がオフになります DC ジャック HDMI 入力ポート • HDMI 再生機器に接続します USB-A ポート • USB フラッシュドライブに接続し ます 光デジタル出力端子 • 光デジタル音声ケーブルを使用し て、...
  • Seite 127 3. 底面図 三脚用ソケット 4. リモコン 焦点調整 ナビゲーションボタン 戻る 電源のオン / オフ Google アシスタント呼び出し 決定 ホーム システム設定 音量アップ / ダウン リモコン:Nebula RC モデル:D0413 5. LED インジケーター LED ステータス 説明 赤色で点灯 プロジェクターモードで動作中...
  • Seite 128 はじめに 1. 配置 本製品を安定した平らな面に置いて、投影面にまっすぐに向けます。 投影面が白く て平らな場合に、最もきれいに映ります。 本製品と投影面との間は、0.58 ~ 3.98m ほど距離をとる必要があります。これにより、30 ~ 150 インチでの投影が可能です。 • 本製品を投影面に向けて傾ける必要はありません。 自動台形補正 機能を使用して、投影画像を補正できます。 • 投影画像の大きさは、本製品と投影面との距離によって決まりま す。 最もきれいに映像を映すには、本製品と投影面の距離を 1.6 ~ 3.98m の範囲にしてください。 • 本製品はマウント ( 別売り ) を使用して、天井に取り付けることも できます。 2. リモコンの準備 リモコンには単 4 形電池が 2 本付属しています。 ① 初めて使用する場合は、電池ケースを下にスライドして開き、単 4 形電池を 2 本 入れます。...
  • Seite 129 ② 電池を交換するときには、プラスとマイナスのマーク ( + / - ) に合わせて新しい電 池を挿入し、電池ケースを閉じます。 3. はじめに ① 付属の電源ケーブル / アダプタを使用して、本製品をコンセントに接続します。...
  • Seite 130 ② を押して、プロジェクターの電源をオンにします。 ③ 本製品を適切な投影面または壁に向けます。 オートフォーカス機能により、本製 品は自動で焦点の調整ができます。 リモコンの を押して、手動で焦点を調整す ることもできます。 ④ 初めて使用する際は、画面の指示に従って基本設定を完了させてください。...
  • Seite 131 Nebula Connect アプリ 本製品の操作にあたっては、Nebula Connect アプリをダウンロードすることをおす すめします。 このアプリでは、スマートフォンを使用して本製品を操作できます。 ① App Store (iOS 機器の場合 ) または Google Play (Android 機器の場合 ) から Nebula Connect アプリをダウンロードします。 Nebula Connect ② スマートフォンで Bluetooth を有効にし、接続先デバイスとして [Nebula Cosmos Max ] を選択します。 ③ Nebula Connect アプリを開き、画面の指示に従って、接続の設定を完了します。 本製品で Android TV を使用する...
  • Seite 132 設定 Nebula Cosmos Max を初めて起動するときは、初回セットアップを完了させてくだ さい。 1. Wi-Fi ネットワーク 本製品は、ワイヤレス (Wi-Fi) 接続を使用してインターネットに接続できます。 ① ホーム画面から > [ ネットワークとインターネット ] を選択し、 を押します。 ② 画面の指示に従って、ネットワーク接続を完了させます。 2. Sound オーディオ形式は、[Sound] で変更できます。 ① ホーム画面から > [Sound] を選択し、 を押します。 A u t o c h a n g e d i g i ta l a u d i o デジタルオーディオ形式...
  • Seite 133 [Auto]:本製品の設置状況を自動的に検出します。 投影方式を自動的に切り替えます。 [ 前面への投影 ]:プロジェクターが投影面の前にある設 定です。 [ リア ( 背面 ) への投影 ]:プロジェクターが投影面の背 後にある設定です。 [ プロジェクターモード ] [ 天井への設置 / 前面への投影 ]:プロジェクターが天井 から逆さまに吊り下がっている設定です。 画像が 180° 回転します。 [ 天井への設置 / リア ( 背面 ) への投影 ]:プロジェクタ ーが投影面の背後で天井から逆さまに吊り下がっている 設定です。 画像が 180°回転し、左右が反転します。 [ 写真の設定 ] [ 標準...
  • Seite 134 時刻を手動で設定します。 [ タイムゾーンの設定 ] タイムゾーンを設定します。 24 時間表示の使用 ] 24 時間表示を有効 / 無効にします。 Nebula Cosmos Max を使用する 1. HDMI 再生機器からの再生 本製品は、 TV ボックス、 TV スティック、 DVD プレーヤー、 セットトップボックス (STB)、 ゲームコンソールなど、さまざまな HDMI 再生機器に接続することができます。 HDMI 再生機器から映像を再生するには: ① HDMI ケーブル ( 別売り ) を使用して、本製品を HDMI 再生機器に接続します。...
  • Seite 135 2. USB ドライブから再生する 本製品では、USB ドライブに保存されている音楽、ビデオ、画像を再生することが できます。 USB ドライブから再生するには: ① Google Play から「ES File Explorer」をダウンロードします。 ② USB ポートに USB ドライブを挿入します。 • USB フォルダが ES File Explorer に表示されます。 ③ USB ドライブから再生したいビデオ / 写真を選択し、 を押します。 ④ を押すと、再生が停止します。 3. Bluetooth アクセサリを接続する Bluetooth 機器を本製品に接続できます。 ① ホーム画面から >...
  • Seite 136: Built-In を使用する

    4. Chromecast Built-in を使用する スマートフォン / コンピューターから直接、本製品に写真、ビデオ、音楽をワイヤレ スでキャスト ( 送信 ) できます。 ① お使いのスマートフォンで映像を再生し、画面のキャストアイコン をタップします。 ② キャスト先のデバイス「D2150」を選択します。 • 本製品にスマートフォン / コンピューターの画面がミラーリングされます。 • ミラーリングを使用する際は、本製品とお使いのスマートフォン / コン ピュータを同じ Wi-Fi ネットワークに接続してください。 • コンテンツによっては、著作権上の制限により、スクリーンキャスト を利用できない場合があります。 その場合は、本製品にインストール されている同じアプリで、該当するコンテンツを再生できます。 5. Google 機能を使用する 本製品は Google アシスタント機能をサポートしています。 ワイヤレス (Wi-Fi) 接続 を使用すると、オンラインサービスにアクセスしたり、映画、音楽、写真を表示ま...
  • Seite 137 仕様 本製品の仕様およびデザインは予告なく変更されることがあります。 電源:19V 9.47A 消費電力:180W 未満 スタンバイ時消費電力:0.5W 未満 表示技術:DLP FHD3840 x 2160P 光源:RGB LED 投影画像サイズ:30 ~ 150 インチ 解像度:3840 × 2160p 輝度:1500 ANSI ルーメン コントラスト比:1000:1 スローレシオ:1.2 投影距離:0.58 m ~ 3.98 m CPU:クアッドコア ARM Cortex-A55 OS:Android TV 9.0 RAM:2 GB DDR ROM:16 GB eMMC スピーカードライバー:10W x 4 Wi-Fi:IEEE802.11a/b/g/n/ac デュアル周波数...
  • Seite 138 • 本製品を少し動かしてオートフォーカスを有効にしてください。 • を押して、焦点を手動で調整します。 ④ Wi-Fi ネットワークに接続できない • 利用可能なネットワークのリストを更新し、接続をやり直してください。 • ワイヤレスルーターまたは本製品を再起動し、接続をやり直してください。 ⑤ ファームウェアを更新するには? • 新しいバージョンが検出されると、再起動して更新を指示するダイアログが表示 されます。画面の指示に従ってファームウェアを更新してください。 保証内容 最大 24 ヶ月保証 ご購入日から 18 ヶ月以内に製品不具合が生じた場合は、弊社カスタマーサポートで 確認後、迅速に同一の製品と交換致します ( ただし、説明書の通りに製品をご使用い ただいた場合に限ります ) 。また Anker Japan 公式ストアに会員登録をしていただ くと、保証期間が 24 ヶ月まで延長されます ( 登録無料 ) 。 製品の不具合の場合、返送にかかる送料も弊社が負担致しますが、保証の適用はご 購入いただいた国内のみになります。...
  • Seite 139 목차 안전 지침 제품 구성 개요 시작하기 Nebula 앱 설정 Nebula Cosmos Max 사용 사양 문제 해결...
  • Seite 140: 안전 지침

    안전 지침 이 장치를 사용하기 전에 모든 지침을 읽으십시오 . 이 매뉴얼에 기재되지 않은 설정을 임의 로 변경하거나 생성하지 마십시오 . 지침을 준수하지 않아 신체적 상해나 데이터 손실 또는 손상이 발생할 경우 보증이 적용되지 않습니다 . 조립 • 화재나 감전의 위험을 줄이려면 장치를 비 또는 습기에 노출시키지 마십시오 . 화병과 같 이...
  • Seite 141 청력 보호 • 높은 볼륨으로 장시간 들을 경우 청력이 손상될 수 있습니다 . 볼륨을 안전한 수준으로 설 정하십시오 . 충전 • 충전기 유형은 출력 전압 / 전류가 DC 19V/2A 인 HKA18019095-6C 입니다 . 충전기는 장치 주변에 설치해야 하며 쉽게 접근할 수 있어야 합니다 . •...
  • Seite 142: 제품 구성

    제품 구성 Cosmos 어댑터 리모콘 2 x AAA 배터리 개요 1. 정면 자동 포커스용 카메라 렌즈 스피커 2. 후면 전원 버튼 • 버튼을 누르면 전원이 켜짐 • 버튼을 길게 누르면 전원이 꺼짐 DC 입력 HDMI 입력 포트 • 재생 장치에 연결 USB-A 포트...
  • Seite 143 3. 상단 삼각대 소켓 4. 하단 포커스 조정 탐색 뒤로 전원 켜기 / 끄기 버튼을 눌러서 Google Assistant 활성화 선택한 콘텐츠 확인 홈 시스템 설정 볼륨 높이기 / 줄이기 리모컨 : Nebula RC 모델 : D0413 5. LED 표시등 LED 상태 설명...
  • Seite 144: 시작하기

    시작하기 1. 배치 장치를 평평한 표면에 올려놓고 투사면을 향하도록 위치를 정확히 맞춥니다 . 최상의 결과를 얻으려면 투사면이 흰색 평면이어야 합니다 . 장치와 투사면 간의 거리는 최소 0.8 미터 (31 인 치 ), 최대 3.98 미터 (157 인치 ) 를 두어야 하며 , 이 경우 투영 이미지의 크기는 30 ~ 150 인 치입니다...
  • Seite 145 ② 배터리를 교체하려면 배터리함의 잠금을 해제한 후 열어서 새 배터리를 극 (+/-) 에 맞게 삽입한 후 배터리함을 닫고 잠급니다 . 3. 시작하기 ① 제공된 전원 어댑터를 사용하여 Connect Nebula Cosmos Max 를 전원 콘센트에 연결합 니다 .
  • Seite 146 ② 을 눌러서 프로젝터의 전원을 켭니다 . ③ 투사면 또는 벽을 향해 장치의 각도를 맞춥니다 . 자동 포커스 기능이 내장되어 있어 프로 젝터를 자동 포커스 위치에 맞출 수 있습니다 . 또는 리모컨에서 을 눌러 포커스를 수동 으로 조정할 수도 있습니다 . ④...
  • Seite 147: Nebula 앱

    ① App Store(iOS 기기 ) 또는 Google Play(Android 기기 ) 에서 Nebula Connect 앱을 다 운로드합니다 . Nebula Connect ② 스마트폰의 Bluetooth 를 활성화하고 [Nebula Cosmos Max ] 를 선택하여 장치를 연결합 니다 . ③ Nebula Cosmos Max 앱을 열고 화면의 지침에 따라 연결 설정을 완료합니다 .
  • Seite 148 설정 Nebula Cosmos Max 를 처음 실행하면 설정 프로세스가 진행됩니다 . 1. 네트워크 무선 (Wi-Fi) 연결을 통해 장치를 인터넷에 연결할 수 있습니다 . ① 홈페이지에서 > [ 네트워크 및 인터넷 ] 을 선택한 후 를 누릅니다 . ② 화면의 지침에 따라 네트워크 연결을 완료합니다 .
  • Seite 149 [ 자동 ]: 프로젝터의 반전 여부를 자동으로 감지합니다 . 이들 옵션 간에 자동으로 전환이 이루어집니다 . [ 전면 투영 ]: 프로젝터가 투영 화면 앞에 위치해 있습니다 . [ 후면 투영 ]: 프로젝터가 투영 화면 뒤에 위치해 있습니다 . [ 프로젝터 모드 ] [ 반전된...
  • Seite 150: Nebula Cosmos Max 사용

    1. HDMI 재생 장치에서 재생하기 Nebula Cosmos Max 는 TV 박스 , TV 스틱 , DVD 플레이어 , 셋탑 박스 (STB), 게임 기기 또 는 기타 기기 등 다양한 종류의 HDMI 재생 장치에 연결됩니다 . 두 개의 HDMI 장치를 프로젝...
  • Seite 151 2. USB 드라이브에서 재생하기 Nebula Cosmos Max 에서는 USB 드라이브에 저장된 음악 파일이나 동영상 , 또는 사진을 감상할 수 있습니다 . USB 드라이브에서 재생하는 방법은 다음과 같습니다 . ① Google Play 에서 ES File Explorer( 파일 탐색기 ) 를 다운로드합니다 .
  • Seite 152 니다 . 5. Google 기능 활용하기 Nebula Cosmos Max 는 Google 기능도 함께 지원합니다 . 무선 네트워크에 연결되면 온라 인 서비스에 액세스할 수 있으며 영화나 음악 , 또는 사진을 감상하거나 인터넷 검색이 가능합 니다 . 사전 설치된 앱과 별도로 Google Play 에서 다른 앱을 설치하여 Google Assistant 에...
  • Seite 153 사양 사양 및 디자인은 사전 통지 없이 변경될 수 있습니다 . 전력 : 19V 9.47A 소비 전력 : < 180W 대기 소비 전력 : < 0.5W 디스플레이 기술 : DLP UHD3840x2160P 광원 : RGB LED 투영 이미지 크기 : 30~150 인치 해상도...
  • Seite 154: 문제 해결

    문제 해결 ① 리모컨으로 프로젝터의 전원을 켤 수 없으면 • 프로젝터에서 을 눌러 전원을 켜십시오 . • 전원이 꺼져 있는 경우 리모컨을 사용하여 전원을 켤 수 없습니다 . ② 리모컨이 작동하지 않습니다 . • 리모컨에 배터리가 장착되어 있는지 확인합니다 . •...
  • Seite 155 ‫جدول المحتويات‬ ‫إرشادات السالمة‬ ‫اللوازم المض م ّنة‬ ‫نظرة عامة‬ ‫بدء االستخدام‬ Nebula ‫تطبيق‬ ‫اإلعدادا ت‬ Nebula Cosmos Max ‫استخدام‬ ‫المواصفات‬ ‫استكشاف األخطاء وإصالحها‬...
  • Seite 156 ‫إرشادات السالمة‬ ‫اقرأ كل اإلرشادات قبل استخدام هذا الجهاز. ال تقم بإجراء أي تغييرات أو إعدادات غير موضحة في هذا الدليل. في حالة‬ .‫وقوع إصابة جسدية، أو فقدان بيانات، أو حدوث ضرر بسبب عدم اتباع اإلرشادات؛ فلن ينطبق الضمان‬ ‫اإلعداد‬ ‫لتقليل خطر نشوب حريق و/أو حدوث صدمة كهربائية، ال تعرّ ض الجهاز للمطر أو الرطوبة. ال ينبغي وضع أي‬ .‫أجسام مملوءة بالسوائل، مثل المزهريات، على هذا الجهاز‬ .‫ال تضع هذا الجهاز على أسطح ناعمة كمفارش المائدة أو السجاد، وإال فقد يتعرض الجهاز لخطر الحريق‬ .‫ال تضع هذا الجهاز في مناطق معرضة للغبار، والتراب، أو بالقرب من أي جهاز يولد مجا ال ً مغناطيس ي ًا قو ي ًا‬ .‫لمنع السخونة الزائدة، ال تغلق فتحات التهوية أو تس د ّ ها‬ .‫ال تضع مطل ق ً ا هذا الجهاز في مساحة ض ي ّقة. واحرص دائ م ًا على تأمين مساحة كافية حول الجهاز لضمان التهوية‬ ‫احرص على حماية هذا الجهاز من التعرض المفرط ألشعة الشمس المباشرة والسخونة وتق ل ّ بات درجات الحرارة‬ ‫الكبيرة والرطوبة. تجنب درجات الحرارة القصوى. تتراوح درجة حرارة التشغيل والتخزين المناسبة لهذا الجهاز‬ .‫وملحقاته ما بين 0 درجة فهرنهايت إلى 59 درجة فهرنهايت / 0 درجة مئوية إلى 53 درجة مئوية‬ ‫عندما يتم تشغيل هذا الجهاز لوقت طويل، قد يصبح سطحه ساخ ن ً ا. في حال حدوث ذلك، أوقف تشغيله على الفور‬ .‫وافصل الشاحن. استأنف التشغيل بعد أن يبرد هذا الجهاز‬ .‫احمل الجهاز بحذر دائ...
  • Seite 157 ‫سالمة السمع‬ ‫لمنع إلحاق الضرر بالسمع، ال تستمع إلى الموسيقى لفترات زمنية طويلة على مستويات صوت عالية. اضبط مستوى‬ .‫الصوت على مستوى آمن‬ ‫الشحن‬ ‫ مع جهد/تيار إخراج التيار المستمر 91 فولت/74.9 أمبير. يجب تركيب‬HKA18019095-6C ‫نوع الشاحن هو‬ .‫الشاحن بالقرب من هذا المنتج وفي مكان يسهل الوصول إليه‬ .‫هذا الشاحن مصمم لالستخدام الداخلي فقط‬ ‫أثناء الشحن، ض َ ع هذا الجهاز في بيئة تتم ي ّز بدرجة حرارة الغرفة القياسية (تتراوح ما بين 5 درجات و52 درجة‬ .‫مئوية /14 درجة فهرنهايت إلى 77 درجة فهرنهايت الموص َ بها) وبالتهوية الجيدة‬ .‫ من اإلصدار 0.2 أو أي إصدار الحق فقط‬USB ‫بسبب المواد المستخدمة في الهيكل، يجب توصيل الجهاز بواجهة‬ ‫التنظيف‬ ‫استخدم قطعة قماش ناعمة وخالية من الوبر. ال تستخدم مطل ق ً ا المنظفات السائلة، أو الغازية، أو القابلة لالشتعال‬ .‫بسهولة لغرض التنظيف‬ .‫ال تستخدم مادة تنظيف سائلة لتنظيف العدسة، وذلك لتج ن ّ ب إلحاق الضرر بغشاء التغليف الموجود على العدسة‬ .‫استخدم أوراق تنظيف العدسات لتنظيف العدسة‬ ‫اإلصالحات‬ .‫ال تقم بإجراء أي تصليحات في هذا الجهاز بنفسك. قم بإصالحه لدى مركز الخدمة المعتمد فقط‬ .‫قد تتسبب الصيانة غير الصحيحة بإصابات أو تلحق ضررً ا بهذا الجهاز‬ .‫أوكل كل أعمال الصيانة لفريق الخدمة المؤ ه ّل‬ ‫تحذير‬ .‫قد تنبعث من هذا الجهاز إشعاعات بصرية خطيرة‬ .‫ال تح د ّ ق في أشعة التشغيل. فقد يؤذي الضوء الساطع عي ن َ يك‬...
  • Seite 158 ‫اللوازم المض م ّ نة‬ Cosmos 2 x AAA ‫مكحتلا زاهج يئابرهك كرتشم‬ ‫تايراطبلا‬ ‫نظرة عامة‬ ‫المنظر األمامي‬ ‫ الكاميرا الخاصة بالتركيز التلقائي‬ ‫ العدسة‬ ‫ مكبر الصوت‬ ‫المنظر الخلفي‬ ‫زر التشغيل‬ ‫اضغط للتشغيل‬ ‫اضغط مع االستمرار إليقاف التشغيل‬ ‫إدخال التيار المستمر‬ HDMI ‫منفذ إدخال‬ ‫التوصيل بجهاز التشغيل‬ A ‫ من نوع‬USB ‫منفذ‬ USB ‫التوصيل بمحرك فالش‬ ‫منفذ الصوت البصري‬ ‫قم بالتوصيل بجهاز صوت باستخدام‬ ‫كبل بصري‬...
  • Seite 159 ‫المنظر العلوي‬ ‫مقبس ثالثي‬ ‫المنظر السفلي‬ ‫ضبط التركيز‬ ‫التنقل‬ ‫الجهة الخلفية‬ ‫للتشغيل / إيقاف التشغيل‬ Google ‫اضغط لتنشيط مساعد‬ ‫تأكيد المحتوى المحدد‬ ‫ الرئيسية‬ ‫إعدادات النظام‬ ‫رفع مستوى الصوت / خفضه‬ Nebula RC :‫جهاز التح ك ّ م عن ب ُعد‬ D0413 :‫الموديل‬ LED ‫مؤشر‬ ‫الوصف‬ LED ‫حالة مؤشر‬ .‫التشغيل في وضع البروجيكتور‬ ‫أحمر ثابت‬...
  • Seite 160 ‫بدء االستخدام‬ ‫مكان وضع الجهاز‬ ‫ضع هذا الجهاز على سطح ثابت ومسط ّ ح وضعه مباشرة لمواجهة سطح اإلسقاط. للحصول على أفضل النتائج، يجب أن‬ )‫يكون سطح العرض أبيض اللون ومسط ّ حً ا. يجب أن تكون المسافة بين هذا الجهاز وسطح اإلسقاط 13 بوصة (8.0 متر‬ .‫كحد أدنى و751 بوصة (89.3 متر) كحد أقصى للحصول على صورة إسقاط بين 03 إلى 051 بوصة‬ ‫ليس ضرور ي ًا أن تميل الجهاز باتجاه سطح المسقط. يمكنك تصحيح صورة المسقط بواسطة‬ .‫ميزة تصحيح المحور المض م ّنة‬ ،‫تح د ّ د المسافة بين الجهاز وسطح المسقط حجم صورة المسقط. للحصول على أفضل نتيجة‬ .‫اضبط البروجيكتور على بعد مسافة تتراوح بين 36 إلى 401 بوصة‬ .‫يمكنك أي ض ًا تثبيت البروجيكتور على السقف‬ ‫تحضير جهاز التح ك ّ م عن ب ُ عد‬ .AAA ‫يأتي جهاز التح ك ّ م عن ب ُعد مزوّ د ً ا ببطاريتين بحجم‬ .AAA ‫① لالستخدام ألول مرة، مرر لفتح حجرة البطارية، وقم بتركيب بطاريتين من نوع‬...
  • Seite 161 ،‫② الستبدال البطارية، قم بإلغاء قفل حجرة البطارية وفتحها، أدخل بطارية جديدة تتوافق مع القطبية (+/-) كما هو مب ي ّن‬ .‫ثم أغلق حجرة البطارية وأقفلها‬ ‫بدء االستخدام‬ .‫ بمخرج الطاقة باستخدام محول الطاقة المتوفر‬Nebula Cosmos Max ‫① قم بتوصيل‬...
  • Seite 162 .‫ لتشغيل البروجيكتور‬ ‫②اضغط‬ ‫③ وجّ ه الجهاز نحو سطح إسقاط أو حائط مناسب. تتيح وظيفة ضبط التركيز التلقائي المدمجة للبروجيكتور تشغيل ضبط‬ .‫ على جهاز التحكم عن بعد لضبط التركيز يدو ي ًا‬ ‫التركيز التلقائي. أو يمكنك الضغط على‬ .‫④ عند االستخدام ألول مرة، اتبع اإلرشادات التي تظهر على الشاشة إلكمال اإلعداد األساسي‬...
  • Seite 163 Nebula ‫تطبيق‬ ‫. باستخدام هذا‬Nebula Connect ،‫ المخصص‬Nebula ‫للتحكم في هذا الجهاز بسهولة، نوصي بتنزيل تطبيق‬ .‫التطبيق ، يمكنك استخدام الشاشة كماوس‬ Google Play ‫) أو‬iOS ‫ (لألجهزة التي تعمل بنظام‬App Store ‫ من‬Nebula Connect ‫① قم بتنزيل تطبيق‬ .)Android ‫(لألجهزة التي تعمل بنظام‬ Nebula Connect .‫ ] ليتم توصيل الجهاز‬Nebula Cosmos Max[ ‫ على هاتفك الذكي، وحدد‬Bluetooth ‫② قم بتمكين‬ .‫ واتبع اإلرشادات التي تظهر على الشاشة إلكمال إعداد االتصال‬Nebula Connect ‫③ افتح التطبيق‬ ™Android TV ‫ باستخدام‬Nebula Cosmos Max ‫تشغيل‬ .‫اتبع اإلرشادات التي تظهر على الشاشة إلكمال عملية اإلعداد‬ ‫خيار 1 اإلعداد السريع‬ .Android ‫ بسرعة باستخدام هاتف‬Android TV ‫ اتباع اإلرشادات إلعداد‬Android ‫يمكن لمستخدمي هاتف‬ Nebula Cosmos Max ‫خيار 2 إعداد‬ .‫، اتبع التعليمات إلكمال العملية‬iOS ‫لمستخدمي‬ .‫① تخطي إجراء اإلعداد السريع‬ .‫ بالشبكة‬Nebula Cosmos Max ‫② و ص ّل‬ .‫ الخاص بك‬Google ‫③ سجّ ل الدخول باستخدام حساب‬...
  • Seite 164 ‫اإلعدادات‬ .‫ للمرة األولى‬Nebula Cosmos Max ‫استكمل عملية اإلعداد عند تشغيل‬ ‫الشبكة‬ .)Wi-Fi( ‫يمكن توصيل هذا الجهاز باإلنترنت عبر اتصال السلكي‬ . ‫> [الشبكة واإلنترنت] واضغط على‬ ‫① في القائمة الرئيسية، حدد‬ .‫② اتبع اإلرشادات التي تظهر على الشاشة إلكمال اتصال الشبكة‬ ‫الصوت‬ .‫يمكن تغيير تنسيق الصوت عبر إعدادات الصوت‬ . ‫> [إعدادات الصوت] واضغط على‬ ‫① في القائمة الرئيسية، حدد‬ PCM ‫تمكين تغيير تنسيق الصوت الرقمي التلقائي أو تعطيله بين‬ ‫تغيير تنسيق الصوت الرقمي تلقائ ي ًا‬ RAW‫و‬ HDMI .‫ ضمن هذا الخيار‬CEC ‫ كمصدر اإلدخال. يمكنك أي ض ًا تغيير إعدادات‬HDMI 1/2 ‫اختر‬ . ‫] واضغط على‬HDMI[ > ‫① من الصفحة الرئيسية، حدد‬ CEC ‫ لتغيير إعدادات‬Enter ‫اضغط على زر‬ CEC ‫إعدادات‬ ‫البروجيكتور‬ . ‫> [إعدادات البروجيكتور] واضغط على‬ ‫① من القائمة الرئيسية، حدد‬...
  • Seite 165 .‫[تلقائي]: يكتشف تلقائ ي ًا ما إذا كان البروجيكتور معكوس‬ .‫التبديل تلقائ ي ًا بين هذه الخيارات‬ .‫[اإلسقاط األمامي]: عند وضع البروجيكتور أمام سطح اإلسقاط‬ .‫[اإلسقاط الخلفي]: عند وضع البروجيكتور خلف سطح اإلسقاط‬ ]‫[وضع البروجيكتور‬ ‫[اإلسقاط األمامي المعكوس]: عندما يتدلى البروجيكتور من السقف‬ .‫رأ س ًا على عقب. يتم تدوير الصورة بمعدل 081 درجة‬ ‫[اإلسقاط الخلفي المعكوس]: عندما يتدلى البروجيكتور من السقف‬ ‫رأ س ًا على عقب خلف سطح اإلسقاط. يتم تدوير الصورة بمعدل‬ .‫081 درجة وعكسها أفق ي ًا‬ [‫[ةروصلا تادادعإ‬ [‫[بتكملا[ / [مليف[ / [يسايق‬ [‫[ةروصلا عضو‬ ‫ ،ناولألا عوطس ةجرد فلتخت ،فلتخم عضو ديدحت دنع :ةظحالم‬ ‫.ةمدقتملا ناولألا تادادعإو ،نيابتلاو‬ ‫ %001و 0 نيب نوللا عوطس ةجرد طبضا‬ [‫[عوطسلا‬ ‫%001و 0 نيب نوللا نيابت ةجرد طبض‬ ‫[نيابتلا‬ ‫ةمدقتم تادادع‬ ‫ اماغو ،هباستكاو ،هجردتو ،نوللا عبشت طبضا‬...
  • Seite 166 [‫[تحديد المنطقة الزمنية‬ .‫لتمكين تنسيق 42 ساعة أو تعطيله‬ [‫استخدام تنسيق 42 ساعة‬ Nebula Cosmos Max ‫استخدام‬ HDMI ‫التشغيل من أجهزة التشغيل المزو ّ دة بـ‬ TV ‫، أو‬TV box ‫ المختلفة مثل‬HDMI ‫ بأجهزة التشغيل المزوّ دة بـ‬Nebula Cosmos Max ‫يمكن توصيل جهاز‬ ‫)، أو وحدات التحكم باأللعاب، أو أجهزة أخرى.يمكن توصيل‬STB( ‫، أو جهاز فك التشفير‬DVD ‫، أو مشغل‬stick .‫ بالبروجيكتور في الوقت نفسه لبث الفيديو بمعدل 4 كيلو@لكل 06 إطارً ا في الثانية‬HDMI ‫جهازين‬ :HDMI ‫للتشغيل من أجهزة التشغيل المزوّ دة بـ‬ .)‫ (غير مضمن‬HDMI ‫ باستخدام كبل‬HDMI ‫ بجهاز تشغيل مزوّ د بـ‬Nebula Cosmos Max ‫① قم بتوصيل‬ .HDMI ‫ تلقائ ي ً ا بمجرد التوصيل بجهاز تشغيل مزوّ د بـ‬HDMI ‫سيبدأ تشغيل‬...
  • Seite 167 USB ‫التشغيل من محر ّ ك أقراص‬ ‫ ، يمكنك االستمتاع بالموسيقى ومقاطع الفيديو والصور المخز ّ نة على محرّ ك‬Nebula Cosmos Max ‫مع جهاز‬ .USB ‫أقراص‬ :USB ‫للتشغيل من محرّ ك أقراص‬ .Google Play ‫ من‬ES File Explorer ‫① قم بتنزيل‬ .USB ‫ في مأخذ‬USB ‫② أدخل محرّ ك أقراص‬ .ES File Explorer ‫ على‬USB ‫سيظهر مجلد‬ ‫ الذي تريد تشغيله، ثم اضغط على‬USB ‫③ حدد مقاطع الفيديو أو الصور من محرك أقراص‬ .‫④ اضغط على إليقاف التشغيل‬ Bluetooth ‫توصيل ملحقات‬ . Nebula Cosmos Max ‫ بجهاز‬Bluetooth ‫يمكنك توصيل أجهزة‬ . ‫ > [أجهزة التحكم عن بعد وملحقاتها] واضغط على‬ ‫① في الصفحة الرئيسية، حدد‬ .‫② حدد إضافة ملحقات‬ .‫سيبدأ جهاز العرض هذا في البحث عن الملحقات‬ .‫③ قم بإقران البروجيكتور بالجهاز الذي تريد توصيله‬ .Bluetooth ‫④ اتبع اإلرشادات التي تظهر على الشاشة إلكمال اتصال‬ ‫ الخاصة بك، تأكد من أن جهاز التح ك ّ م عن ب ُعد والبرجيكتور الخاص بك في‬Bluetooth ‫مالحظة: قبل إقران أجهزة‬...
  • Seite 168 .‫على شاشة الفيديو‬ ‫① قم بتشغيل مقطع فيديو على هاتفك، ثم اضغط فوق رمز العرض‬ .‫" الذي تريد العرض عليه‬D2150" ‫② حدد الجهاز‬ .‫سيعكس الربوجيكتور هذا شاشة الهاتف أو الكمبيوتر المتصل‬ .‫ وهاتفك متصلين على نفس الشبكة الالسلكية‬Nebula Cosmos Max ‫تأكد من أن‬ ‫قد ال تتوفر بعض المحتويات للعرض جرّ اء القيود المتعلقة بحقوق النشر. في هذه الحالة، يمكنك بث‬ . Nebula Cosmos Max ‫المحتوى عبر التطبيق نفسه المثبت في‬ Google ‫استمتع بميزات‬ ‫. عندما تتصل بشبكة السلكية، يصبح بإمكانك الوصول إلى‬Google ‫ أي ض ًا ميزات‬Nebula Cosmos Max ‫يدعم‬ ‫الخدمات عبر اإلنترنت واالستمتاع باألفالم والموسيقى والصور والتص ف ّ ح عبر اإلنترنت. باإلضافة إلى التطبيقات المثبتة‬ ‫ لتنفيذ مهام‬Google ‫ والتحدث إلى مساعد‬Google Play ‫مسب ق ً ا، يمكنك أي ض ًا تثبيت أي تطبيقات أخرى من متجر‬ .‫معينة‬ :Google ‫للتحدث إلى مساعد‬ ‫" لتوصيل جهاز التحكم عن بعد بجهاز‬Bluetooth ‫① تأكد من اتباع الخطوات الموضحة في قسم "توصيل ملحقات‬ .‫ في جهاز التحكم عن بعد إلى اللون األحمر‬LED ‫ . بمجرد االتصال، يتحول مؤشر‬Nebula Cosmos Max .Google ‫ في جهاز التحكم عن ب ُعد للتحدث إلى مساعد‬...
  • Seite 169 ‫المواصفات‬ .‫إن المواصفات والتصميم عرضة للتغيير من دون إشعار‬ ‫74.9 أمبير‬ ‫مصدر الطاقة: 91 فولت‬ ‫استهالك الطاقة: < 081 واط‬ ‫استهالك الطاقة في وضع االستعداد: < 5.0 واط‬ DLP UHD3840x2160P :‫تقنية الشاشة‬ )‫ (اللون األحمر واألخضر واألزرق‬RGB ‫ يدعم‬LED ‫المصدر الضوئي: ضوء‬ ‫حجم صورة العرض: من 03 إلى 051 بوصة‬ ‫الد ق ّ ة: 0291 × 0801 بكسل‬ ‫السطوع: 0051 آنسي لومن‬ 1000:1 :‫مع د ّ ل التباين‬ 1,2 :‫مع د ّ ل اإلسقاط‬ ‫مسافة اإلسقاط: 8.0 متر إلى 89.3 متر‬ Cortex-A55 ‫): ذراع رباعي النواة‬CPU( ‫وحدة المعالجة المركزية‬ Android TV 9.0 :‫نظام التشغيل‬ DDR ‫ جيجابايت‬RAM(: 2( ‫ذاكرة الوصول العشوائي‬ ‫ سعة 8 جيجابايت‬ROM(: eMMC( ‫ذاكرة القراءة فقط‬ 4 × ‫برامج تشغيل مك ب ّر الصوت: 01 واط‬ ‫ تردد مزدوج 4.2 جيجا/5 جيجا‬Wi-Fi: IEEE802.11a/b/g/n/c/ac ‫اتصال‬ Bluetooth: V4.2 ‫إصدار‬ USB: FAT32 / NTFS / exFAT ‫نظام ملفات‬ ‫الحرارة الموص َ بها: من 14 إلى 59 درجة فهرنهايت / من 5 إلى 53 درجة مئوية‬ )‫الرطوبة النسبية: من %51 إلى %58 (من دون تكاثف‬ ‫درجة حرارة وحدة التخزين ورطوبتها: < 941 درجة فهرنهايت / 56 درجة مئوية، < %09 رطوبة‬ ‫األبعاد(الطول*العمق): 053 ×...
  • Seite 170 ‫استكشاف األخطاء وإصالحها‬ ‫① هل فشل تشغيل البروجيكتور باستخدام جهاز التحكم عن بعد؟‬ .‫ على البروجيكتور لتشغيله‬ ‫اضغط على‬ .‫عندما يكون الجهاز متوق ف ً ا عن التشغيل، ال يمكنك استخدام جهاز التح ك ّ م عن ب ُعد لتشغيله‬ ‫② هل تعط ّ ل جهاز التح ك ّ م عن ب ُعد؟‬ .‫تأكد من أنّ البطارية مر ك ّ بة مسب ق ً ا في جهاز التح ك ّ م عن ب ُعد‬ .‫استبدل البطاريات‬ ‫③ هل الصورة غير واضحة؟‬ .‫انقل البروجيكتور قلي ال ً لجذب التركيز التلقائي‬ .‫ لضبط التركيز يدو...
  • Seite 172 +20 8000000826 (Egypt) Sun-Thu 7:00 - 15:30 (GMT+2) ©Anker Innovations Limited. All rights reserved. NEBULA and the NEBULA logo are trademarks of Anker Innovations Limited, registered in the United States and other countries. All other trademarks are the property of their respective owners.

Diese Anleitung auch für:

Nebula cosmos

Inhaltsverzeichnis