Inhaltsverzeichnis
Werbung
Verfügbare Sprachen
Verfügbare Sprachen
Werbung
Inhaltsverzeichnis

Verwandte Anleitungen für Bowers & Wilkins CT Serie


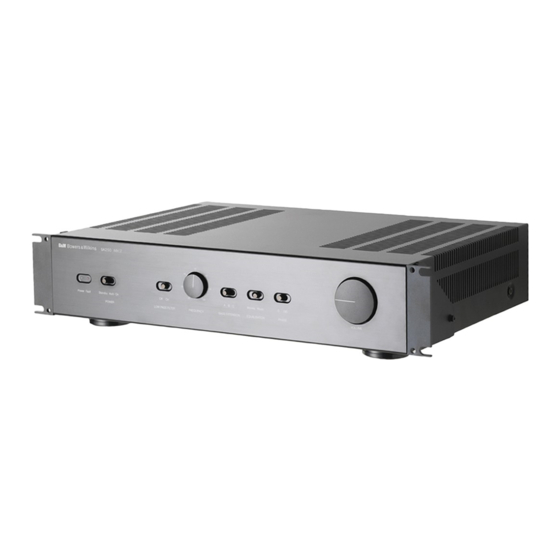
Inhaltszusammenfassung für Bowers & Wilkins CT Serie
- Seite 1 Custom Theatre SA1000 CT SW10 CT SW12 CT SW15 Installation and Setup Manual...
- Seite 2 Figure 1 OUTPUT SA1000 SA1000 000-0000000 Figure 2 Ring Insert + Chuck Bushing Neutrik Speakon Connector ® ® NL2FC Housing Insert Chuck Bushing Neutrik Speakon Connector ® ® NL4FC CT SW10/12/15 SA1000 SA1000 000-0000000 NL2FC NL4FC...
- Seite 3 SA1000 CT Subwoofer #1 CT Subwoofer #2 Figure 4 CT Subwoofer #1 CT Subwoofer #2 SA1000 AC 230V ~ 50/60Hz POWER: 300W SA1000 Serial No. 000-0000000 1. Ground 2. (+) 3. (-)
- Seite 4 Figure 5 CT SW12 CT SW15 CT SW10 SA1000...
-
Seite 5: Inhaltsverzeichnis
Contents Русский English Installation and Setup Manual ....3 Limited Warranty...8 ....61 Français ....68 Manuel d'utilisation "esky et de réglage ....9 Návod k obsluze Garantie limitée...16 a instalaci ....70 Deutsch Záruka .......76 Bedienungsanleitung Polski für die Installation und das Setup....17 Instrukcja instalacji i ustawie◊... -
Seite 6: English
English 17. The mains plug of the power supply cord shall remain readily operable. Installation and 18. Do not expose batteries to excessive heat such as sunshine, fire or the like. Setup Manual The lightning flash with arrowhead symbol within an equilateral triangle, is intended to alert the user to the Important Safety Instructions presence of uninsulated “dangerous... -
Seite 7: Environmental Information
cathode ray tube televisions or computer The CT SW10, 12 and 15, and the SA1000 dual monitors, audio and video tapes and swipe cards) subwoofer amplifier are designed both for Home within 0.5m (2 feet) of the appliance. The Theatre installations and to augment the bass appliance may cause distortion of cathode ray performance of ‘full range’... - Seite 8 be set and the less hard the subwoofer has to work; into the threaded holes in the handles. If you do not but there is a down side. Subwoofers positioned near use the handles, use the rubber hole plugs supplied corners often generate more low-frequency room with the bracket hardware to fill the exposed holes.
-
Seite 9: Connecting The Subwoofer
Status Indicator: Illuminates to indicate the amplifier is Connect the signal input to the subwoofer amplifier switched on. using either the RCA phono or XLR options. A second subwoofer amplifier can be daisy-chained from the Fault Indicator: Illuminates to indicate a fault condition. first by connecting to either the RCA phono or XLR Connecting the Subwoofer output sockets. -
Seite 10: Fine Tuning
Home Theatre Settings FILTER is switched off (or set to maximum), because the processor provides all the filtering for any speakers Set the VOLUME control initially to the 9 o’clock set to “small”. However, the position of the PHASE position. switch must still be assessed. -
Seite 11: Limited Warranty
The EQUILISATION switch alters the subwoofer bass directly onto the product. Test a small area first, as roll-off alignment appropriate to MOVIE or MUSIC some cleaning products may damage some of the listening. The MOVIE position gives a “drier” alignment, surfaces. -
Seite 12: Français
This guarantee complements any national/regional Français law obligations of dealers or national distributors and does not affect your statutory rights as a customer. Manuel d’utilisation et How to claim repairs under warranty de réglage Should service be required, please follow the following procedure: If the equipment is being used in the country of IMPORTANTES INSTRUCTIONS... - Seite 13 Un contrôle impératif est nécessaire si l’appareil a remplacement des fusibles internes ne peut être été endommagé, pour quelque cause que ce soit effectué que par un technicien qualifié. Les valeurs – y compris câble ou prise d’alimentation secteur, correctes des fusibles de remplacement sont si du liquide ou des objets sont tombés à...
- Seite 14 dans plus de 60 pays dans le monde entier, par Cinema préexistantes, éventuellement personnalisées, l’intermédiaire de distributeurs spécialement près des autres enceintes, encastrées dans des sélectionnés ; ceux-ci pourront vous aider à résoudre meubles ou posées sur le sol. d’éventuels problèmes ignorés par votre revendeur. Si le subgrave doit être installé...
- Seite 15 salle étant très différente d’une autre. Vous devrez Poignées rack du SA1000 explorer une grande variété d’emplacements avant de Les supports latéraux sont fournis avec des poignées, faire votre choix définitif. Utiliser un extrait musical qui peuvent être installées ou non, au choix de avec un instrument grave montant et descendant la l’utilisateur.
- Seite 16 Filtre (filter) : règle la fréquence de coupure du filtre une méthode simple et rapide de branchement, à passe-bas du subgrave. partir de simple fil nu, mais les prises Speakon représentent une méthode de connexion plus sûre et Passe-bas activé/désactivé (Low-pass In/Out) : Active plus fiable.
-
Seite 17: Réglages Fins
en mode de veille (Standby). L’indicateur lumineux Le subgrave et l’amplificateur de subgrave ne sont devient rouge. Dès qu’un signal est détecté à l’entrée, pas des maillons agréés THX ® . Si vous utilisez un l’amplificateur de subgrave se rallume processeur agréé... - Seite 18 éventuellement de leur section grave reproduite Enfin, choisissez la fréquence de coupure du filtre également par le subgrave. La commande LOW-PASS passe-bas LOW-PASS FREQ afin d’obtenir la FILTER est donc désactivée sur celui-ci, car c’est le transition la plus douce possible entre le subgrave et processeur qui se charge de son paramétrage correct, les enceintes satellites.
-
Seite 19: Garantie Limitée
initiale. Si l’enceinte a été stockée dans un Cette garantie limitée est valide pour une période de environnement de faible température, ses composants cinq ans à compter de la date d’achat ou une période amortissants et les suspensions des haut-parleurs de deux ans pour les composants électroniques, y vont demander un peu de temps avant de retrouver compris les haut-parleurs amplifiés. -
Seite 20: Bedienungsanleitung Für Die Installation Und Das Setup
Deutsch sind, das Gerät Regen oder Feuchtigkeit ausge- setzt war, das Gerät nicht ordnungsgemäß funktioniert bzw. eine deutliche Leistungsminde- Bedienungsanleitung rung aufweist oder wenn das Gerät hingefallen ist bzw. beschädigt wurde. für die Installation 15. In das Gerät dürfen keine Spritzer gelangen. Stellen Sie keine mit Flüssigkeit gefüllten Gegenstände, und das Setup wie z. -
Seite 21: Einleitung
Sie sich diesbezüglich nicht sicher sein, fragen Sie Kartoninhalt Ihren autorisierten Fachhändler oder wenden sich Im Versandkarton des Subwoofers liegen: an die örtliche Stromgesellschaft. 1 Zubehörpaket bestehend aus: 4 x M6-Spikes 24. Vermeiden Sie eine Überlastung der Wandsteck- 4 x M6-Gummifüße dosen, Verlängerungskabel usw., um Feuer oder 4 x Sicherungsmuttern (Schlüsselweite 10 mm) einem elektrischen Schlag vorzubeugen. - Seite 22 Das Ohr nimmt die Quelle zur Wiedergabe von tiefen Abdeckungen Frequenzen kaum wahr, so dass die Positionierung des Die Abdeckungen der CT SW-Subwoofer werden Subwoofers im Vergleich zu den Vollbereichslaut- magnetisch befestigt. Achten Sie darauf, dass die sprechern im Allgemeinen weniger kritisch ist. Die besten Chassis beim Aufsetzen bzw.
-
Seite 23: Anschließen Des Subwoofers
1 x XLR-Eingang: Als symmetrische Alternative zum oben anschließen. Erfolgt der Anschluss nicht korrekt, so kann genannten Cinch-Eingang für den Anschluss an den dies zu einem schlechten Klangbild und Bassverlusten Subwooferausgang eines A/V-Prozessors oder führen. Ist der Stecker wieder zusammengebaut, so kann Vorverstärkers. -
Seite 24: Einstellungen Bei Hifi-Cinema-Anwendungen
Ein- und Ausschalten Eine Einstellung der Tiefpassfrequenz (FREQUENCY) Der Subwooferverstärker sollte nach den anderen ist nicht erforderlich, da das Filter deaktiviert ist. Geräten ein- und vor den anderen Geräten abgeschal- Setzen Sie den EQUALISATION-Schalter auf Movie. tet werden. Der Standby/Auto/On-Schalter und die Weitere Einzelheiten entnehmen Sie bitte dem Status-LED funktionieren folgendermaßen: Abschnitt „Feinabstimmung“. -
Seite 25: Einlaufphase
HiFi-Cinema Subwoofer und den Satellitenlautsprechern Das Subwoofer(LFE)-Signal ist in HiFi-Cinema-Anwen- gewährleistet ist. dungen eher ein separater Kanal als eine Signalerwei- Alle Anwendungen terung zu den Satellitenlautsprechern. Setzen Sie LOW Der BASS EXTENSION-Schalter des Subwooferver- PASS FILTER auf Off (oder auf Maximum), da der stärkers bietet drei Einstellmöglichkeiten. -
Seite 26: Inanspruchnahme Von Garantieleistungen
erforderlich, bis die mechanischen Teile ihre Funktion, Transports und der Installation der Produkte wird wie bei der Konstruktion festgelegt, erfüllen können. von dieser Garantie abgedeckt. Jedoch ist uns schon von längeren Einlaufphasen (bis 2. Diese Garantie gilt nur für Fabrikations- und/oder zu einem Monat) berichtet worden. -
Seite 27: Español
Español problema en el cable o la clavija de alimentación, la entrada de objetos extraños o líquidos en su interior, la exposición a la lluvia o la humedad, una Manual de Instalación caída, etc. y Configuración 15. No exponga este aparato a ningún tipo de goteo ni sapicadura y asegúrese de que nadie coloque objetos que contengan líquidos (vasos, copas, INSTRUCCIONES DE SEGURIDAD... - Seite 28 toma de corriente eléctrica alterna. Tanto el panel Información Relativa a la Protección del Medio Ambiente posterior del aparato como la toma de corriente eléctrica deben estar fácilmente accesibles Los productos B&W han sido diseñados durante el funcionamiento del producto. para satisfacer la normativa internacional relativa a la Restricción del Uso de 23.
- Seite 29 totalidad del equipo. Los pies de goma enroscables se respuesta en graves. Escuche atentamente tanto los suministran para ser colocados en la base del párrafos más intensos como los más tranquilos. subwoofer con la finalidad tanto de proteger el El empleo de varios subwoofers en una misma acabado del mismo como de reducir potenciales instalación puede mejorar las prestaciones sonoras de vibraciones.
- Seite 30 Asas para Montaje en Rack del SA1000 Controles del Amplificador para Subwoofer Los soportes para montaje en rack se suministran de El panel frontal del amplificador para subwoofer serie con asas que pueden ser instaladas o retiradas. SA1000 incluye los siguientes controles: Las asas se instalan insertando dos de los tornillos Volume: Ajusta el nivel de volumen global del Philips largos suministrados de serie en el soporte...
- Seite 31 Conexión del Amplificador para Subwoofer On: Con el conmutador situado en “On”, el amplificador para subwoofer permanecerá plenamente Todas las conexiones deberían realizarse con el activo y el indicador luminoso se pondrá de color equipo desconectado. verde. El amplificador SA1000 incluye en su panel posterior Auto: Con el conmutador situado en “Auto”, el dos pares de terminales de conexión estándar y uno amplificador para subwoofer estará...
- Seite 32 Ajuste inicialmente el conmutador BASS EXTENSION divisor de frecuencias de las cajas acústicas satélites, en la posición A. menor debería ser el valor de la mencionada frecuencia. Ajuste inicialmente el conmutador PHASE en 0º. Para más información, diríjase a la sección “Ajuste El ajuste del parámetro LOW-PASS FREQ es Fino”.
-
Seite 33: Cuidado Y Mantenimiento
Utilizando como guía la lista de ajustes iniciales, Si detecta problemas relacionados con una compruebe en primer lugar la posición del concentración excesiva de graves -es decir si ciertas conmutador PHASE. Elija la posición que proporcione notas bajas son exageradas con respecto a otras- es un sonido más abierto y rico. -
Seite 34: Garantía Limitada
directamente sobre el recinto. Pruebe primero con una e. productos cuyo número de serie haya sido superficie pequeña por cuanto algunos productos de modificado, borrado, retirado o convertido en limpieza pueden dañar ciertas superficies. Evite utilizar ilegible, productos abrasivos o que contengan ácidos, álcalis o si una persona no autorizada ha efectuado alguna agentes antibacterianos. -
Seite 35: Português Guia De Instalação
Português O símbolo do raio com ponta de seta dentro de um triângulo equilátero, destina-se a alertar o utilizador para a Guia de instalação presença de “tensões perigosas” não isoladas no interior da caixa do e configuração equipamento, que podem apresentar um nível suficiente para constituir um risco de choque eléctrico. -
Seite 36: Informação Ambiental
26. Montagem – Não coloque este produto sobre um O CT SW10, 12 e 15, e o amplificador duplo para suporte ou móvel instável. O equipamento pode subwoofer SA1000 foram projectados para cair provocando sérios danos e ferimentos. instalações Home Theater e para aumentar o Qualquer montagem deve respeitar as instruções desempenho de graves de colunas “full range”... - Seite 37 No entanto, ao contrário das colunas de gama Montagem do SA1000 em rack completa o equilíbrio geral do sistema pode ser O SA1000 é fornecido com dois suportes para corrigido com a alteração do nível de volume do montagem em racks normalizadas. Para instalar estes subwoofer.
- Seite 38 A ligação do amplificador de subwoofer ao subwoofer, O amplificador SA1000 possui dois pares de bornes incluindo a utilização de fichas Speakon, é de ligação e uma tomada Neutrik Speakon de 4 pólos pormenorizada nas secções abaixo sobre Ligações. no painel posterior. Os bornes permitem a ligação fácil e rápida de condutores nus, enquanto a tomada Controlos do amplificador de subwoofer Speakon oferece um método de ligação mais seguro e...
- Seite 39 volta novamente a apresentar a cor verde. O Em todos os casos os níveis devem ser ajustados no amplificador volta ao estado de repouso após cerca gerador de ruído interno do controlador para obter de 5 minutos sem sinal de entrada. 75dB SPL (ponderação-C) na posição de audição.
- Seite 40 Os processadores de som surround apresentam A posição MUSIC é adequada para uma linha de normalmente um sinal de ruído calibrado que pode ser graves mais rápida e precisa. usado para ajustar os níveis relativos de todas as A entrada de EGUALIZAÇÃO jack 3.5mm no painel colunas, tornando a tarefa algo mais fácil do que com traseiro, está...
-
Seite 41: Garantia Limitada
Cuidados posteriores de peças que não sejam fabricadas ou autorizadas pela B&W, As superfícies da caixa apenas necessitam normalmente de limpeza do pó. Se pretender usar um c. danos causados por equipamento auxiliar aerossol ou outro produto de limpeza, retire primeiro a inadequado ou defeituoso, grelha, afastando-a da caixa de forma suave. -
Seite 42: Italiano
Italiano 17. La presa di rete del cavo di alimentazione dovrebbe essere sempre accessibile. Manuale di istruzioni 18. Non esponete le batterie a fonti di calore eccessivo come ad esempio raggi del sole diretti, fuoco o similari. Informazioni importanti sulla sicurezza Il fulmine inserito in un triangolo vi 1. -
Seite 43: Informazioni Ambientali
catodico o monitor PC, nastri audio e video e Verificare che siano presenti le seguenti parti nella similari) entro una distanza di 0.5m dall’unità. Il scatola dell’amplificatore: prodotto potrebbe causare distorsioni sullo 1 x cavo di alimentazione schermo di un TV CRT anche oltre questa 1 x connettore Neutrik Speakon quattro poli distanza. - Seite 44 subwoofer è meglio posizionarne uno vicino al fornito con staffe di fissaggio a rack, ma non sono diffusore sinistro ed uno vicino al destro. Posizionare forniti dadi e bulloni. Assicuratevi che, una volta un subwoofer dietro la posizione di ascolto, anche in installato nel rack, l’amplificatore sia ben ventilato e sistemi multicanale surround, normalmente produce che le aperture di ventilazione non siano ostruite.
-
Seite 45: Collegamento Del Subwoofer
Il collegamento dell’amplificatore del subwoofer al L’amplificatore SA1000 dispone di due coppie di subwoofer, incluso l’utilizzo dei connettori Speakon, è terminali per diffusori ed un connettore Neutrik indicato nella sezione Connessioni sotto riportata. speakon quattro poli sul pannello posteriore. I connettori per diffusori permettono una veloce e facile Controlli dell’amplificatore per subwoofer connessione di cavi spellati mentre i connettori... - Seite 46 entra in modalità di attesa: “sleep” e il led indicatore test di rumore interno e le regolazioni di livello dei diventa rosso. Quando viene rilevato un segnale in canali del processore THX ® . In tutti i casi i livelli ingresso, il subwoofer si riaccende automaticamente e dovrebbero essere regolati in modo tale da ottenere il led indicatore diventa verde.
- Seite 47 In genere i processori surround hanno un segnale di Il selettore EQUALISATION agisce sull’allineamento test calibrato che può essere utilizzato per impostare i della curva dei bassi in modo appropriato per la livelli di tutti i diffusori, rendendo il compito in un certo modalità...
-
Seite 48: Riparazioni In Garanzia
Manutenzione d. danni causati da incidenti, fulmini, acqua, fiamme, calore, guerra, disordini pubblici o altra causa al di La superficie deI cabinet solitamente deve essere solo fuori del ragionevole controllo di B&W e dei suoi spolverata. Se volete utilizzare un apposito prodotto ufficiali distributori, spray antistatico per pulirlo, prima rimuovete le griglie tirandole delicatamente verso l’esterno del cabinet. -
Seite 49: Nederlands
Nederlands 17. Wanneer het apparaat in gebruik is, dient of de netstekker of de plug op het apparaat te allen tijde bereikbaar te zijn. Installatie Aanwijzingen 18. Stel batterijen niet bloot aan excessieve warmte zoals zonlicht, vuur en dergelijke. Belangrijk voor uw Veiligheid Het symbool van de bliksemschicht in 1. -
Seite 50: Denk Aan Het Milieu
beeldbuizen vervormen; LCD en plasma-TV’s De CT SW10, 12 en 15 plus de SA1000 dubbele hebben daar geen last van. subwoofer versterker zijn ontwikkeld voor zowel Home Theater installaties als voor het leveren van extra laag 26. Opstelling – plaats het product nooit op een bij breedband luidsprekers in 2-kanalen instabiele stand, driepoot, muurbeugel of tafel. - Seite 51 extra versterking de kamer oplevert, hoe lager het SA1000 Handgrepen volume kan worden ingesteld en hoe minder de De beugels voor rekmontage worden geleverd met subwoofer hoeft te doen; er is echter een handgrepen die desgewenst kunnen worden schaduwzijde. Subwoofers die in of bij een hoek staan aangebracht.
- Seite 52 Bass Extension: kiest uit drie extra bas posities. worden aangesloten. Foutieve aansluiting kan geen kwaad, maar leidt tot verlies aan laag en een minder Movie/Music EQ: biedt aanpassing voor muziek of film goed stereobeeld. Nadat de plug weer is gemonteerd, programmamateriaal.
- Seite 53 De LAAGDOORLAAT FILTER schakelaar afsnijfrequentie van de satelliet luidsprekers. Opmerking: zowel –3 dB als –6 dB gegevens vindt u De Extra BAS schakelaar bij de technische gegevens van elke B&W luidspreker. De EQUALIZER Wanneer de fabrikant van de satelliet luidspreker alleen de waarde bij –3 dB opgeeft, neemt u de De FASE schakelaar optimale instelling voor de LOW PASS FREQ tussen...
-
Seite 54: Garantie
Vervolgens stelt u het relatieve VOLUME van de omgeving opgeslagen is geweest, zijn de dempende subwoofer versterker ten opzichte van de satellieten materialen en de ophanging wat stug en het duurt naar eigen inzicht in. Gebruik een groot aantal enige tijd voordat zij de juiste mechanische verschillende programma’s om een gemiddelde eigenschappen terug hebben. -
Seite 55: Ελληνικά
Ελληνικά Deze beperkte garantie is geldig voor een periode van vijf jaar vanaf de aankoopdatum of twee jaar voor elektronica, waaronder actieve luidsprekers. Voorwaarden 1. De garantie is beperkt tot de reparatie van de apparatuur. Transport- en andere kosten, eventueel risico voor het verwijderen, vervoeren en installeren van producten vallen niet onder deze garantie. - Seite 56 (Σηµείωση: Στην Ελλάδα οι κοινές οικιακές πρίζες δεν δέχονται φις µε π λωση ή µε γείωση. Το πιθαν τερο είναι τι η συσκευή σaς έχει παραδοθεί µε ένα απλ φις δύο ακίδων για εναλλασσ µενο ρεύµα, το οποίο µπορείτε να συνδέσετε...
- Seite 57 Πληροφορίες σχετικά µε την προστασία του περιβάλλοντος Περιεχ µενα συσκευασίας Εισαγωγή Εγκατάσταση και τοποθέτηση του subwoofer...
- Seite 58 Ελεύθερα µαγνητικά πεδία Γρίλιες Εγκατάσταση του ενισχυτή του subwoofer...
- Seite 59 Τοποθέτηση του SA1000 σε rack Χειρολαβές Πλήκτρα λειτουργίας ενισχυτή Ρυθµίσεις εσωτερικών διακοπτών "jumper" του ενισχυτή Υποδοχές συνδέσεων του ενισχυτή Σύνδεση του subwoofer...
- Seite 60 Ρύθµιση και χρήση του ενισχυτή Πριν ακούσετε το σύστηµά σας Σύνδεση του ενισχυτή Ενεργοποίηση / Απενεργοποίηση Auto:...
- Seite 61 Standby: Χρήση των πλήκτρων του ενισχυτή Ρυθµίσεις για στερεοφωνικά συστήµατα Ρυθµίσεις για συστήµατα οικιακού κινηµατογράφου Τελικές ρυθµίσεις Συστήµατα οικιακού κινηµατογράφου...
- Seite 62 Για λες τις εφαρµογές Στερεοφωνικά συστήµατα...
- Seite 63 Περίοδος προσαρµογής ροι της εγγύησης Φροντίδα του ηχείου...
-
Seite 64: Русский
Русский Πώς να απαιτήσετε επισκευή στα πλαίσια της εγγύησης Важные инструкции по безопасности... - Seite 65 ПРЕДОСТЕРЕЖЕНИЕ: Для снижения опасности возгорания или поражения электрическим током не подвергайте данный аппарат воздействию дождя или влаги.
- Seite 66 Введение Установка и размещение сабвуфера Информация по защите окружающей среды Содержание упаковки...
- Seite 67 Монтаж SA1000 в стойку Ручки для SA1000 Установка внутренних перемычек EQ в сабвуферном усилителе Подсоединение сабвуферного усилителя Рассеянное магнитной поле Защитные решетки Установка сабвуферного усилителя...
- Seite 68 Органы управления сабвуферным Подсоединение сабвуферного усилителя усилителем Подсоединение сабвуфера Настройка сабвуферного усилителя и управление им Перед прослушиванием...
- Seite 69 Настройка домашнего театра Включение и выключение Auto: Standby: Настройка сабвуферного усилителя с помощью органов управления Настройка 2-канальной аудио системы...
- Seite 70 2-канальная аудио система Точная настройка Домашний театр Для всех ситуаций...
- Seite 71 Уход за колонками Прогрев и приработка Условия гарантии...
- Seite 72 Куда обратиться за гарантийным обслуживанием...
-
Seite 73: Návod K Obsluze A Instalaci
15. Nevystavujte tento p_ístroj pá_e #i vod>, a "esky celkov> omezte riziko polití tekutinou (nestavte na n>j vázy s vodou, jenã by se mohly Návod k obsluze p_evrhnout apod.). 16. Pro úplné odpojení od napájení, odpojte ze a instalaci zásuvky napájecí kabel. 17. -
Seite 74: Obsah Balení
kabelÅ s mnoha zásuvkami. Mohlo by dojít k Obsah balení poãáru #i úrazu el. proudem. Zkontrolujte, zda balení subwooferu obsahuje: 1 balí#ek p_íslu|enství zahrnující: 25. Magnetické vyza_ování – tento v≥robek 4 x hroty M6 produkuje stálé magnetické pole. Neumist’ujte 4 x pryãové noãi#ky M6 proto p_edm>ty které... - Seite 75 volba umíst>ní subwooferu aã tak kritická, jako v Instalace subwooferového zesilova#e p_ípad> klasick≥ch, plnorozsahov≥ch reprosoustav. Subwooferov≥ zesilova# SA1000 je navrãen pro Nicmén> nejlep|ího v≥sledku se v>t|inou dosáhne, instalaci do standardního 19” racku. Je tedy je-li subwoofer umíst>n mezi pravou a levou p_ední dodáván v#etn>...
- Seite 76 1 x XLR v≥stup: Alternativní symetrick≥ v≥stup pro kabel s nízkou induktancí, aby se nezhor|ila p_ipojení vstupu dal|ího zesilova#e. reprodukce vy||ích frekvencí. 2 x 3.5mm Jack Trigger vstupy: Vstupy 12V spínání P_ipojení subwooferového zesilova#e umoã[ují automatizované ovládání funkce standby Ve|kerá zapojení provád>jte pouze tehdy, jsou-li (zapínání...
- Seite 77 pohotovostního reãimu a indikátor za#ne svítit modech. Pro kalibraci úrovn> mÅãe b≥t pouãit #erven>. Jakmile zesilova# na svém vstupu detekuje testovací |umov≥ signál a ovlada#e pro nastavení p_íchozí signál, automaticky se zapne a indikátor úrovn> kanálÅ u THX ® za_ízení. Ve v|ech p_ípadech za#ne op>t svítit zelen>.
- Seite 78 ostatní reprosoustavy fázi signálu, mÅãe b≥t pro 3.5mm vstup Equalisation na zadním panelu je zvuk systému lep|í u subwooferu zvolit variantu navrãen pro p_íjem 12V spínacího signálu, 180°. Poslechn>te si ob> varianty a zvolte tu, p_i umoã[ujícího p_epnutí modu MOVIE/MUSIC do které...
-
Seite 79: Záruka
mÅãe b≥t #i|t>na klasick≥m kartá#em na |aty, e. v≥robní #íslo v≥robkÅ bylo zm>n>no, smazáno, nap_ed je v|ak t_eba ji demontovat od ozvu#nice. odstran>no nebo se stalo ne#iteln≥m, Nikdy se nedot≥kejte membrány reproduktoru, v≥robky byly opravovány neautorizovanou mohlo by dojít k jejímu po|kození. P_ed kaãd≥m osobou. -
Seite 80: Polski
B¡yskawica na trójkƒcie równobocznym Polski oznacza obecno·π wewnƒtrz obudowy, nie zaizolowanego Øród¡a napi∆cia. Instrukcja instalacji Napi∆cie to moÃe byπ niebezpieczne dla zdrowia lub Ãycia ludzkiego. i ustawie◊ Wykrzyknik na tle trójkƒta równobocznego wskazuje na WA…NE INFORMACJE DOTYCZ√CE obecno·π waÃnych uwag uÃytkowych BEZPIECZE÷STWA I OSTRZE…ENIA: w instrukcji do¡ƒczonej do subwoofera. - Seite 81 25. Pola magnetyczne – Produkt generuje Zawarto·π opakowania rozproszone pola magnetyczne poza obudowƒ SprawdØ, czy opakowanie zawiera: kolumny. Zalecamy, aby urzƒdzenia i 1 zestaw akcesoriów zawierajƒcy: podzespo¡y czu¡e na oddzia¡ywanie pola 4 x kolce M6 magnetycznego (takie jak kineskopy telewizorów 4 x gumowe podk¡adki M6 i monitorów komputerowych CRT, twarde dyski 4 x mutry (o przekƒtnej 10mm)
- Seite 82 umiejscowiony jest pomi∆dzy prawym i lewym dostarczany z uchwytami montaÃowymi, ale ·ruby i g¡o·nikiem lub w pobliÃu jednego z nich. Je·li mutry nie sƒ dostarczone. Upewnij si∆, Ãe raz korzystasz z dwóch subwooferów, najlepiej jest zamontowany w stelaÃu, wzmacniacz jest ustawiπ...
- Seite 83 1 x gniazdo wyj·ciowe XLR: alternatywne Pod¡ƒczenie wzmacniacza subwoofera SA1000 zbalansowane gniazdo wyj·ciowe s¡uÃy do pod¡ƒczenia drugie wzmacniacza subwoofera. Wszystkie pod¡ƒczenia powinny byπ wykonywane przy wy¡ƒczonym sprz∆cie. 2 x 3.5mm gniazda wej·ciowe wyzwalacza: wej·cia wyzwalacza 12V, umoÃliwiajƒce zdalne w¡ƒczanie i Wzmacniacz SA1000 zosta¡...
- Seite 84 Auto: Gdy prze¡ƒcznik ustawiony jest w pozycji subwoofera. Oznacza to opcj∆ kontroli subwoofera “Auto“, wzmacniacz b∆dzie poczƒtkowo w pe¡ni we wszystkich trybach ¡ƒcznie z filtrowaniem i gotowy do pracy a dioda b∆dzie paliπ si∆ na ustawieniem poziomów. Do kalibracji poziomów zielono.
-
Seite 85: Piel∆Gnacja
prostszym nià w przypadku ustawienia poziomów b∆dzie prze¡ƒcza¡ pomi∆dzy ustawieniami g¡o·no·ci systemów stereo. JednakÃe, warto jest MOVIE/MUSIC na panelu przednim. Ustawione dostosowaπ ustawienia do osobistych preferencji. odpowiednio, wyj·cie 12V procesora moÃe ¿atwo jest przeoczyπ prawdziwe moÃliwo·ci automatycznie dobraπ idealnƒ prac∆ subwoofera. subwoofera, zw¡aszcza je·li chodzi o efekty Je·li na panelu przednim prze¡ƒcznik jest ustawiony dØwi∆kowe w niskich tonach. -
Seite 86: Gwarancja
takich, które zawierajƒ kwas, sƒ zasadowe lub Ta gwarancja jest dope¡nieniem prawnych antybakteryjne. Nie stosuj ·rodków czyszczƒcych na podstaw udzielania gwarancji, obowiƒzujƒcych g¡o·niki. Maskownica moÃe byπ czyszczona przy na terenie danego kraju i nie narusza uÃyciu normalnej ·cierki, gdy sama maskownica statutowych praw klienta. -
Seite 102: Standards Conformity
STANDARDS CONFORMITY Conforms to ANSI/UL Standard 60065 7th Edition Certified to CAN/CSA Standard C22.2 No. 60065 Complies with Part 15 of the FCC Rules Operation is subject to the following conditions: This device does not cause harmful interference and This device must accept any interference received, including interference that may cause undesired operation. - Seite 103 CT SW10, CT SW12, CT SW15...
-
Seite 104: Technical Specifications
SA1000 Description Dedicated 1000W amplifier for the CT SW Series Functions Front panel controls: rotary volume (line in) Rotary low-pass filter frequency (4th-order Linkwitz, 40Hz - 140Hz) Low-pass filter defeat 2-position switch Phase 0/180 2-position switch Bass extension 3-position switch Movie/music EQ 2-position switch On/auto/standby 3-position switch Status LED... - Seite 105 7575 CTSWxx SA1000 Inside 13/1/09 9:45 Page 102 CT SW10 Technical features Paper/Kevlar cone bass driver ® Description Closed-box subwoofer system with rack-mount amplifier Drive unit ø250mm (10 in) paper/Kevlar cone long-throw ® Frequency range -6dB at 18Hz and 25/140Hz adjustable (EQ at A) Frequency response (±3dB) 26Hz - 40/140Hz adjustable (EQ at A) Bass extension...
- Seite 106 CT SW12 Technical features Paper/Kevlar ® cone bass driver Description Closed-box subwoofer system with rack-mount amplifier Drive unit ø300mm (12 in) paper/Kevlar ® cone long-throw Frequency range -6dB at 17Hz and 25/140Hz adjustable (EQ at A) Frequency response (±3dB) 24Hz - 40/140Hz adjustable (EQ at A) Bass extension -6dB at 17Hz (position A) -6dB at 22Hz (position B)
- Seite 107 CT SW15 Description Closed-box subwoofer system with external rack-mount amplifier Drive unit ø380mm (15 in) paper/Kevlar ® cone long-throw Frequency range -6dB at 16Hz and 25/140Hz adjustable (EQ at A) Frequency response (±3dB) 20Hz - 40/140Hz adjustable (EQ at A) Bass extension -6dB at 16Hz (position A) -6dB at 20Hz (position B)
- Seite 108 B&W Group Ltd. B&W Group (UK Sales) Neutrik and Speakon are registered Dale Road T +44 1903 221 500 trademarks of Neutrik AG. Worthing West Sussex E uksales@bwgroup.com Kevlar is a registered trademark of DuPont. Copyright © B&W Group Ltd. E&OE BN11 2BH England B&W Group North America Printed in China.