Herunterladen Inhalt Inhalt Diese Seite drucken
WOXTER Domotify Handbuch

WOXTER Domotify Handbuch

Feuchte- und temperatursensor
Vorschau ausblenden Andere Handbücher für Domotify:

Werbung

Verfügbare Sprachen
  • DE

Verfügbare Sprachen

  • DEUTSCH, seite 22
manual de usuario
>> Sensor de Humedad
y Temperatura
y Temperatura
domotify
by woxter

Werbung

Inhaltsverzeichnis
loading

Inhaltszusammenfassung für WOXTER Domotify

  • Seite 1 >> Sensor de Humedad y Temperatura y Temperatura domotify by woxter...
  • Seite 2 APP Domotify. zados a través de la APP Domotify. A través de la aplicación podrá ver la A través de la aplicación podrá ver la temperatura y humedad actuales así...
  • Seite 3: Configuración Rápida

    Estado de la luz indicadora: Restablecer los valores predeterminados: La luz verde parpadea una vez. Configuración rápida 1. El sensor de humedad y temperatura debe ser utilizado e incorporado a través del dispositivo de enlace “Domoti- fy Gateway”. Antes de ir al siguiente paso, ejecute la APP y confirme que el Gateway se encuenta en línea y confi-...
  • Seite 4 2. Para introducir la pila, abra la tapa trasera del dispositivo. Una vez encendido, el Gateway encontrará el dispositivo de manera automática. Si no lo encuentra, inserte un pasador en el agujero RESET (situado en la parte derecha) durante 2 segundos.
  • Seite 5 3. Después del emparejamiento, haga clic en el detector y entre en la interfaz del dispositivo. Español woxter.es...
  • Seite 6 4. En la aplicación saldrá un registro detallado de las condiciones ambienta- les de la sala donde se encuentre el dispositivo. 5. Si desea cambiar la unidad de tempe- ratura a centígrados o Farenheit lo podrá hacer desde los ajustes generales de la aplicación.
  • Seite 7 6. Retire el papel adhesivo del soporte siguiendo la flecha. A continuación, cuelgue el sensor como indica la fotografía que se muestra a continuación. Español woxter.es...
  • Seite 8 Si tiene algún problema con este produc- to, le recomendamos lea primero detalladamente este manual o bien acuda a nuestra página web www.woxter.es, donde podrá acceder a “Preguntas frecuentes sobre el producto”, “Resolución de problemas”, “Actualizaciones”, “Manuales”, etc. Si el problema persiste o desea realizar cualquier otro trámite que estime...
  • Seite 9 3. Woxter, en ningún caso, se hace responsable de los discos o datos contenidos en nuestros diferentes soportes “ópticos” o “magnéticos”, siendo el usuario el único responsable de los mismos.
  • Seite 10 SI NECESITA INFORMACIÓN MÁS DETA- LLADA SOBRE NUESTRAS CONDICIONES DE GARANTÍA DIRÍJASE A: www.woxter.es Requisito técnico de seguridad: El adaptador de alimentación es el dispositivo de desconexión de equipo. La base de toma de corriente debe estar cerca del equipo y ser fácilmente...
  • Seite 11 Considere su reciclaje siguiendo las pautas del fabricante. Con este gesto, ayudará a reducir los riesgos para su salud y a preservar el medioambiente. Si tiene cualquier duda, consulte con su ayuntamiento o distribuidor para solicitar las precisio- nes esenciales en materia de reciclaje de su antiguo dispositivo.
  • Seite 12 / humidity value and the initial value above 2ºC or 5%, it will send a message to the synchronized smartphones through the Domotify APP. Through the application you can see the current temperature and humidity as well as the history of the last hours. A very useful tool to achieve a healthier environment for your family.
  • Seite 13: Quick Configuration

    Quick configuration 1. The humidity and temperature sensor must be used and incorporated through the "Domotify Gateway" link device. Before going to the next step, run the APP and confirm that the Gateway is online and configured. Scan the QR code to...
  • Seite 14 2. To insert the battery, open the back cover of the device. Once powered on, the Gateway will find the device auto- matically. If you can not find it, insert a pin in the RESET hole (located on the right side) for 2 seconds.
  • Seite 15 3. After pairing, click on the detector and enter the device interface. English woxter.es...
  • Seite 16 4. In the application, a detailed record of the environmental conditions of the room where the device is located will appear. 5. If you want to change the temperature unit to centigrade or Fahrenheit, you can do it from the general settings of the application.
  • Seite 17 6. Remove the adhesive paper from the holder following the arrow. Then hang the sensor as indicated in the picture shown below. English woxter.es...
  • Seite 18 Guarantee and security If you have any problems with this product, we recommend you read this manual in detail first or go to our website www.woxter.es, where you can access "Frequently asked questions about the product", "Troubleshooting", "Updates", "Manuals", etc.
  • Seite 19 / or transport damage, obvious signs of improper handling, misuse, dirt. , etc. 3. Woxter, in any case, is responsible for the discs or data contained in our different "optical" or "magnetic" media, with the user being solely responsible for them.
  • Seite 20 IF YOU NEED MORE DETAILED INFORMA- TION ABOUT OUR GUARANTEE CONDI- TIONS, GO TO: www.woxter.es Technical safety requirement: The power adapter is the device discon- nect device. The socket outlet must be close to the equipment and easily accessible.
  • Seite 21 If you have any ques- tions, check with your municipality or distributor to request the essential details regarding recycling of your old device.Nº REI- RPA 1201-RD.106/2008. English woxter.es...
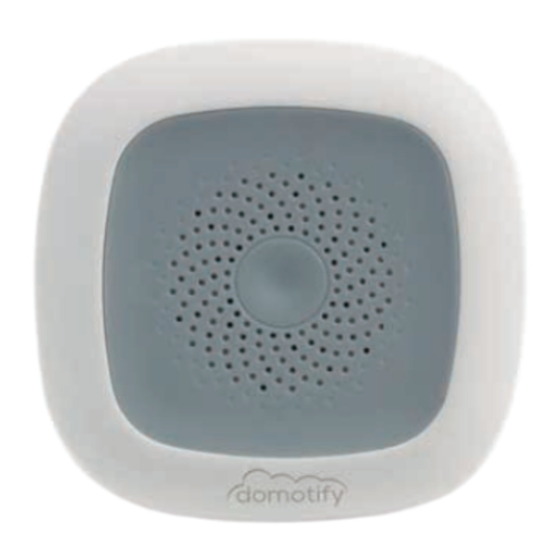
  • Seite 22 Deutsch domotify by woxter Eigenschaften Der intelligente Feuchte- und Tempera- tursensor ist ein internetbasiertes Alarmgerät für die Sicherheit zu Hause. Verwenden Sie eine drahtlose Verbin- dung, um mit dem Smart Gateway "Gateway" zu kommunizieren. Wenn der Sensor eine Abweichung zwischen dem aktuellen Temperatur- / Feuchtewert und dem Anfangswert über 2 °...
  • Seite 23 Licht blinkt einmal. Schnelle Konfiguration 1. Der Feuchte- und Temperatursensor muss über das Verbindungsgerät "Domotify Gateway" verwendet und eingebaut werden. Bevor Sie mit dem nächsten Schritt fortfahren, führen Sie die APP aus und vergewissern Sie sich, dass das Gateway online und konfiguriert ist.
  • Seite 24 2. Öffnen Sie zum Einlegen des Akkus die hintere Abdeckung des Geräts. Nach dem Einschalten findet das Gateway das Gerät automatisch. Wenn Sie es nicht finden können, stecken Sie einen Stift für 2 Sekun- den in das RESET-Loch (auf der rechten Seite).
  • Seite 25 3. Klicken Sie nach dem Pairing auf den Detektor und geben Sie die Geräteober- fläche ein. woxter.es Deutsch...
  • Seite 26 4. In der Anwendung wird eine detaillierte Aufzeichnung der Umgebungsbedingun- gen des Raums angezeigt, in dem sich das Gerät befindet. 5. Wenn Sie die Temperatureinheit in Celsius oder Fahrenheit ändern möch- ten, können Sie dies in den allgemeinen Einstellungen der Anwendung tun.
  • Seite 27 6. Entfernen Sie das Klebepapier gemäß Pfeil von der Halterung. Hängen Sie dann den Sensor wie in der Abbildung unten gezeigt auf. woxter.es Deutsch...
  • Seite 28 Der Sensor verwendet CR2450 3v-Knopf- batterien. Ersetzen Sie sie bei Bedarf. Garantie und Sicherheit Wenn Sie Probleme mit diesem Produkt haben, empfehlen wir Ihnen, dieses Handbuch zuerst im Detail zu lesen oder besuchen Sie unsere Website www.wox- ter.es, wo Sie auf "Häufig gestellte Fragen...
  • Seite 29: Garantiebedingungen

    Verpackungs- und / oder Transportschäden, offensichtli- che Anzeichen unsachgemäßer Handhabung, Missbrauch, Schmutz auftreten. usw. 3. Woxter ist in jedem Fall für die Daten- träger oder Daten verantwortlich, die in unseren verschiedenen "optischen" oder "magnetischen" Datenträgern enthalten sind, wobei der Benutzer dafür allein verantwortlich ist.
  • Seite 30 Änderungen ohne vorherige Ankündi- gung vorbehalten. WENN SIE WEITERE INFORMATIONEN ÜBER UNSERE GARANTIEBEDINGUNGEN BENÖTIGEN, GEHEN SIE ZU: www.woxter.es Technische Sicherheitsanforderung: Das Netzteil ist das Gerät zum Trennen des Geräts. Die Steckdose muss sich in der Nähe des Geräts befinden und leicht zugänglich sein.
  • Seite 31 Abfällen deponiert werden können häuslich. Erwägen Sie das Recycling gemäß den Richtlinien des Herstellers. Mit dieser Geste werden die Risiken für Ihre Gesundheit reduziert und die Umwelt geschont. Wenn Sie Fragen haben, wenden Sie sich an Ihre Gemeinde oder Ihren Vertriebshänd-...
  • Seite 32: Caractéristiques

    / humidité et la valeur initiale supérieure à 2ºC ou à 5%, il envoie un message aux smartphones synchronisés via l'application Domotify. Grâce à l'application, vous pouvez voir la température et l'humidité actuelles ainsi que l'historique des dernières heures. Un outil très utile pour créer un environne-...
  • Seite 33: Configuration Rapide

    Configuration rapide 1. Le capteur d'humidité et de tempéra- ture doit être utilisé et intégré via le dispositif de liaison "Domotify Gateway". Avant de passer à l'étape suivante, exécutez l'application et vérifiez que la passerelle est en ligne et configurée.
  • Seite 34 2. Pour insérer la batterie, ouvrez le capot arrière de l'appareil. Une fois sous tension, la passerelle trouvera automa- tiquement le périphérique. Si vous ne le trouvez pas, insérez une épingle dans le trou RESET (situé à droite) pendant 2 secondes.
  • Seite 35 3. Une fois le couplage effectué, cliquez sur le détecteur et entrez dans l'interface du périphérique. woxter.es Français...
  • Seite 36 4. Dans l'application, un enregistrement détaillé des conditions environnementa- les de la pièce dans laquelle se trouve l'appareil apparaît. 5. Si vous souhaitez modifier l'unité de température en degrés Celsius ou Fahrenheit, vous pouvez le faire à partir des paramètres généraux de l'application.
  • Seite 37 6. Retirez le papier adhésif du support en suivant la flèche. Ensuite, suspendez le capteur comme indiqué par la photo ci-dessous. woxter.es Français...
  • Seite 38 Si vous rencontrez des problèmes avec ce produit, nous vous recommandons de lire ce manuel en détail ou d’aller sur notre site Web www.woxter.es, où vous pouvez accéder aux "Questions fréquemment posées sur le produit", "Dépannage", "Mises à jour", "Manuels", etc.
  • Seite 39 (abus, chocs, chutes), d'emballage et / ou de transport inadéquats, de signes évidents de mauvaise manipulation, de mauvaise utilisation, de saleté. etc. 3. Dans tous les cas, Woxter est respon- sable des disques ou des données contenus dans nos différents supports "optiques" ou "magnétiques", l'utilisateur étant seul responsable de ceux-ci.
  • Seite 40 SI VOUS AVEZ BESOIN D'INFORMATIONS PLUS DÉTAILLÉES SUR NOS CONDITIONS DE GARANTIE, ALLEZ À: www.woxter.es Exigence de sécurité technique: L'adaptateur d'alimentation est le périphérique de déconnexion de périphérique. La prise de courant doit être proche de l'équipement et facile- ment accessible.
  • Seite 41 Envisagez de recycler selon les directives du fabricant. Ce geste contribuera à réduire les risques pour votre santé et à préserver l’environne- ment. Si vous avez des questions, adressez-vous à votre municipalité ou à votre distributeur pour obtenir les informations essentielles concernant le recyclage de votre ancien appareil.
  • Seite 42 / umidità e il valore iniziale superiore a 2ºC o 5%, invierà un messaggio agli smartphone sincronizzati tramite l'APP Domotify. Attraverso l'applicazione è possibile visualizzare la temperatura e l'umidità correnti nonché la cronologia delle ultime ore. Uno strumento molto utile per raggiungere un ambiente più...
  • Seite 43: Configurazione Rapida

    Configurazione rapida 1. The humidity and temperature sensor must be used and incorporated through the "Domotify Gateway" link device. Before going to the next step, run the APP and confirm that the Gateway is online and configured.
  • Seite 44 2. Per inserire la batteria, aprire il coperchio posteriore del dispositivo. Una volta acceso, il gateway troverà il dispositivo automaticamente. Se non riesci a trovarlo, inserisci uno spillo nel foro RESET (situato sul lato destro) per 2 secondi. Una volta trovato, fai clic su sensore di umidità...
  • Seite 45 3. Dopo l'associazione, fare clic sul rilevatore e accedere all'interfaccia del dispositivo. woxter.es Italiano...
  • Seite 46 4. Nell'applicazione, verrà visualizzata una registrazione dettagliata delle condizioni ambientali della stanza in cui si trova il dispositivo. 5. Se si desidera modificare l'unità di temperatura in gradi centigradi o in gradi Fahrenheit, è possibile farlo dalle impos- tazioni generali dell'applicazione.
  • Seite 47 6. Rimuovere la carta adesiva dal supporto seguendo la freccia. Quindi appendere il sensore come indicato nella figura sotto. woxter.es Italiano...
  • Seite 48 Garanzia e sicurezza In caso di problemi con questo prodotto, si consiglia di leggere questo manuale in dettaglio prima o visitare il nostro sito Web www.woxter.es, dove è possibile accedere alle "Domande frequenti sul prodotto", "Risoluzione dei problemi", "Aggiornamenti", "Manuali", ecc.
  • Seite 49 / o danni di trasporto, segni evidenti di uso improprio, uso improprio, sporcizia. ecc. 3. Woxter, in ogni caso, è responsabile per i dischi o i dati contenuti nei nostri diversi supporti "ottici" o "magnetici", di cui l'utente è...
  • Seite 50 SE AVETE BISOGNO DI ULTERIORI INFOR- MAZIONI DETTAGLIATE SULLE NOSTRE CONDIZIONI DI GARANZIA, VAI A: www.woxter.es Requisiti tecnici di sicurezza: L'alimentatore è il dispositivo di discon- nessione del dispositivo. La presa deve essere vicina all'apparecchio e facilmente accessibile.
  • Seite 51 Considerare il riciclaggio secondo le linee guida del produttore. Con questo gesto, contribuirà a ridurre i rischi per la salute e preservare l'ambiente. In caso di domande, rivolgersi al proprio comune o distributore per richiedere i dettagli essenziali relativi al riciclaggio del vecchio dispositivo.
  • Seite 52 / umidade e o valor inicial acima de 2ºC ou 5%, ele enviará uma mensa- gem para os smartphones sincronizados por meio do aplicativo Domotify. Através da aplicação, você pode ver a tempera- tura atual e umidade, bem como a história das últimas horas.
  • Seite 53: Configuração Rápida

    Configuração rápida 1. O sensor de umidade e temperatura deve ser usado e incorporado através do dispositivo de link "Domotify Gateway". Antes de ir para a próxima etapa, execute o APP e confirme se o Gateway está on-line e configurado.
  • Seite 54 2. Para inserir a bateria, abra a tampa traseira do dispositivo. Depois de ligado, o gateway localizará o dispositivo automaticamente. Se não conseguir encontrá-lo, insira um pino no orifício RESET (localizado no lado direito) por 2 segundos. Uma vez encontrado, clique no sensor de umidade e temperatura e escolha "link".
  • Seite 55 3. Após o emparelhamento, clique no detector e entre na interface do dispositivo. woxter.es Portuguese...
  • Seite 56 4. Na aplicação, um registro detalhado das condições ambientais da sala onde o dispositivo está localizado aparecerá. 5. Se você quiser alterar a unidade de temperatura para centígrado ou Fahrenheit, você pode fazê-lo a partir das configurações gerais do aplicativo.
  • Seite 57 6. Remova o papel adesivo do suporte seguindo a seta. Em seguida, pendure o sensor conforme indicado na imagem mostrada abaixo. woxter.es Portuguese...
  • Seite 58 Garantia e segurança Se você tiver algum problema com este produto, recomendamos que você leia este manual detalhadamente primeiro ou visite nosso site www.woxter.es, onde você pode acessar "Perguntas freqüen- tes sobre o produto", "Solução de proble- mas", "Atualizações", "Manuais", etc.
  • Seite 59 (abuso, pancadas, quedas), embalagem inadequada e / ou danos no transporte, sinais óbvios de manuseio inadequado, uso incorreto, sujeira. etc. 3. A Woxter, em qualquer caso, é responsável pelos discos ou dados contidos em nossas diferentes mídias "ópticas" ou "magnéticas", com o usuário sendo o único responsável por elas.
  • Seite 60 SE VOCÊ PRECISAR DE MAIS INFOR- MAÇÕES DETALHADAS SOBRE NOSSAS CONDIÇÕES DE GARANTIA, IR PARA: www.woxter.es Requisito de segurança técnica: O adaptador de energia é o dispositivo de desconexão do dispositivo. A tomada deve estar perto do equipamento e ser de fácil acesso.
  • Seite 61 Com este gesto, ajudará a reduzir os riscos para a sua saúde e preservar o meio ambiente. Se você tiver alguma dúvida, consulte o seu município ou distribuidor para solicitar os detalhes essenciais sobre a recicla- gem do seu dispositivo antigo.
  • Seite 62: Declaración De Conformidad

    15- 28918 Leganés- Madrid- España, CIF: B85036887 Fabricado en China DECLARA QUE ESTE SENSOR: Domotify Sensor de humedad y tempe- ratura. Cumple con las disposiciones de la Directiva 2014/53/EU relativa a la armonización de las legislaciones de los Estados miembros sobre la comerciali- zación de equipos radioeléctricos y...
  • Seite 63 Controla tu hogar desde tu smartphone, sencilla y cómodamente...
  • Seite 64 Sensor de CO Sensor de Sensor de Humo Temperatura Sensor de Botón SOS Botón SOS Botón SOS Sensor de Inundación Gateway Sensor de Puertas Sensor de y Ventanas Movimiento Enchufe Enchufe Inteligente Inteligente Cámara Wi-Fi Cámara Wi-Fi Cámara Wi-Fi Cámara Wi-Fi con visión con visión con visión...
  • Seite 65 woxter.es/domotify...
  • Seite 66 woxter.es...

Inhaltsverzeichnis