Werbung
Quicklinks
Werbung

Verwandte Anleitungen für Fisher-Price Little People J8999


Inhaltszusammenfassung für Fisher-Price Little People J8999
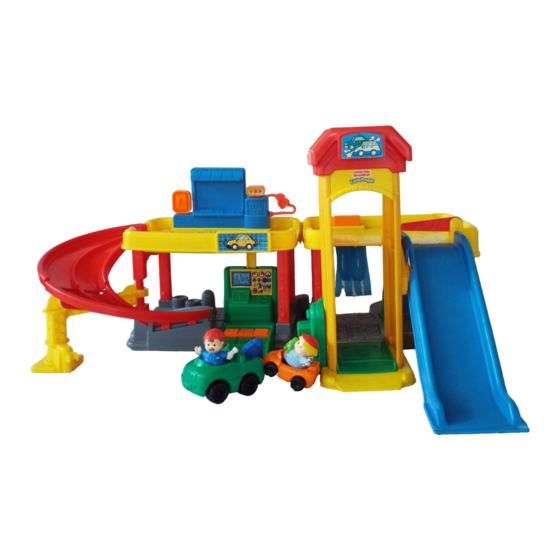
- Seite 1 J8999 www.fisher-price.com...
- Seite 2 G Consumer Information F Service consommateurs D Verbraucherinformation N Consumenteninformatie I Informazioni per l’Acquirente E Servicio de atención al consumidor K Forbrugeroplysninger P Informação ao Consumidor T Yhteystiedot M Forbrukerinformasjon s Konsumentinformation R ¶ÏËÚÔÊÔڛ˜ ÁÈ· ÙÔÓ ∫·Ù·Ó·ÏˆÙ‹ G • Please keep this instruction sheet for future reference, as it contains CANADA important information.
- Seite 3 G CAUTION F MISE EN GARDE D VORSICHT N WAARSCHUWING I AVVERTENZA E PRECAUCIÓN K ADVARSEL P ATENÇÃO T HUOMAUTUS M FORSIKTIG s VIKTIGT R ΠΡΟΣΟΧΗ G This product contains small parts in its unassembled state. Adult assembly is required. F Le produit non assemblé...
- Seite 4 G Parts F Pièces D Teile N Onderdelen I Componenti E Piezas K Dele P Peças T Osat M Deler s Delar R ª¤ÚË G Tool Chest F Boîte à outils D Werkzeugkasten N Gereedschapskist G News Stand I Carrello porta-attrezzi F Kiosque E Caja de herramientas D Zeitungskiosk...
- Seite 5 G Gate F Barrière G Post D Schranke G #6 x 1,3 cm ( ") Screw – 8 1 ⁄ F Poteau N Slagboom Shown Actual Size D Pfeiler I Sbarra F Vis n° 6 x 1,3 cm - 8 N Paaltje E Barrera Taille réelle...
- Seite 6 G • Position the lift on a flat surface. Note the locations of the bottom slots and the upper tabs on the lift. • Hold the base at an angle. While making sure the upper tabs on the lift fit into the grooves in the base , insert the tabs on the base into the bottom slots on the lift .
- Seite 7 G • Fit the lift roof on the lift. G • Turn the garage on its side on a flat surface, as shown. • Insert four #6 x 1,3 cm (½") screws into the lift roof and tighten. • Fit the connectors on the end of the ramp into the holes on the top of the base.
- Seite 8 G • "Snap" the tabs on the lower track into the slots in the base. F • Enclencher les languettes de la piste inférieure dans les fentes de la base. D • Die Laschen des unteren Auffahrtteils durch die Schlitze der Basis stecken. N •...
- Seite 9 G • Press the clamp on the track support onto the base column. • Rotate the track support so that the holes in the support fit over the pegs on the lower track. F • Fixer la pince du support de piste à la colonne de la base. •...
- Seite 10 D • Die Werkstatt wie dargestellt auf eine ebene Oberfläche auf die Seite legen. s • Lägg garaget på sidan på en plan yta enligt bilden. • “Knäpp” fast de rektangulära anslutningarna på det övre spåret i hålen • Die rechteckigen Verbindungsstücke am oberen Auffahrtteil in die Löcher am Oberteil der Basis einrasten lassen.
- Seite 11 G • Tip the lift handle and fit the hooked tab through the channel in the side of the lift . • Slide the lift handle down and "snap" the tab on the handle into the slot in the lift . F •...
- Seite 12 G • To attach the post, turn the garage over so the bottom is facing you. • Align the holes in the post with the pegs, as shown. • Insert two 1,3 cm (½") screws into the post and tighten. •...
- Seite 13 G • "Snap" the vacuum into the base. G • "Snap" the tool chest into the base. F • Enclencher l’aspirateur dans la base. F • Enclencher la boîte à outils dans la base. D • Die Staubsaugeranlage in der Basis einrasten lassen. D •...
- Seite 14 G Battery Installation F Installation des piles D Einlegen der Batterien N Het plaatsen van de batterijen I Come Inserire le Pile E Colocación de las pilas K Isætning af batterier P Instalação das Pilhas T Paristojen asennus M Innsetting av batterier s Batteriinstallation R ∆ÔÔı¤ÙËÛË ª·Ù·ÚÈÒÓ G Battery Compartment Door F Couvercle du compartiment des piles 1,5V x 3...
- Seite 15 N • De batterijhouder bevindt zich op de bovenste verdieping van de garage. • Draai de schroef in het batterijklepje los en verwijder het klepje. • Plaats drie “AA” (LR6) alkalinebatterijen. Tip: Wij adviseren het gebruik van alkalinebatterijen; deze gaan langer mee.
- Seite 16 G Battery Safety Information F Mises en garde au sujet des piles D Batteriesicherheitshinweise N Batterij-informatie I Norme di Sicurezza per le Pile E Información de seguridad acerca de las pilas K Information om sikker brug af batterier P Informação Sobre Pilhas T Tietoa paristojen turvallisesta käytöstä...
- Seite 17 P Em circunstâncias excepcionais, as pilhas podem derramar fluido s Under exceptionella förhållanden kan batterierna läcka vätska som kan passível de causar queimaduras químicas ou danos no produto. orsaka kemiska brännskador eller förstöra produkten. För att undvika Para evitar o derrame de fluido: batteriläckage: •...
- Seite 18 G • Before applying labels, wipe the surface of the toy with a clean, dry cloth to remove dust or oils. • For best results, avoid repositioning a label once it has been applied. • Apply labels as shown in the illustration. F •...
- Seite 19 G Fun sounds all around the garage! F Des sons amusants partout dans le garage ! D Lustige Geräusche erklingen rund um die Autowerkstatt! N Overal in de garage grappige geluidjes! I Allegri suoni in tutto il garage! E ¡Un garaje lleno de divertidos sonidos! K Sjove lyde rundt omkring i garagen! P Sons divertidos por toda a garagem! T Hauskoja ääniä...
- Seite 20 Fisher-Price, Inc., a subsidiary of Mattel, Inc., East Aurora, New York 14052, U.S.A. ©2006 Mattel, Inc. Tous droits réservés. ® et ™ désignent des marques déposées de Mattel, Inc. aux É.-U. Fisher-Price, Inc., une filiale de Mattel, Inc., East Aurora, New York 14052, É. -U. PRINTED IN CHINA/IMPRIMÉ EN CHINE...