Herunterladen Inhalt Inhalt Diese Seite drucken
Inhaltsverzeichnis

Werbung

Verfügbare Sprachen
  • DE

Verfügbare Sprachen

  • DEUTSCH, seite 35
1760/IR500

Werbung

Inhaltsverzeichnis
loading

Inhaltszusammenfassung für Beta 1760/IR500

  • Seite 1 1760/IR500...
  • Seite 2: Inhaltsverzeichnis

    Contenuto 1. Descrizione 2. Caratteristiche 3. Sicurezza 4. Misura Distanza / Misura Superficie / Area Rapporto (D / S) 5. Specifiche tecniche 6. Descrizione del pannello 7. Descrizione dello schermo LCD 8. Operazione di misurazione 9. Dichiarazione di conformità CE 10.
  • Seite 3: Descrizione

    1. Descrizione Grazie per l'acquisto del termometro IR. Questo strumento è in grado di misurare la temperatura senza contatto (infrarossi) con il semplice tocco di un pulsante. Il puntatore laser integrato aumenta la precisione del bersaglio mentre i comodi pulsanti si combinano per un funzionamento comodo ed ergonomico.
  • Seite 4: Caratteristiche

    2. Caratteristiche 1) Giunzione di rilevamento rapido 2) Misure precise senza contatto 3) Mirino laser doppio 4) Superficie piatta unica, design moderno dell'alloggiamento 5) Data Hold automatico 6) Interruttore ° C / ° F 7) Retroilluminazione LCD...
  • Seite 5: Sicurezza

    3. Sicurezza 1) Usare estrema cautela quando il raggio laser è acceso. 2) Non lasciare che il raggio entri nell'occhio, nell'occhio di un'altra persona o nell'occhio di un animale. 3) Fare attenzione a non lasciare che il raggio su una superficie riflettente colpisca l'occhio.
  • Seite 6 4. Misura Distanza / Misura Rapporto superficie / area (D / S) Per ottenere misurazioni accurate, l'obiettivo deve essere più grande dell'area di misurazione del termometro. La temperatura misurata è la temperatura media dell'area misurata. Più piccolo è il bersaglio, minore deve essere la distanza di misurazione tra termometro e l'oggetto obiettivo.
  • Seite 7: Specifiche Tecniche

    5. Specifiche tecniche Gamma temperatura -50 a 500°C (-22 a 932°F) Risoluzione display Emissività Regolabile 0,1 a 1 Precisione -50 a 20°C ±3°C 20 a 500°C ±2% o 2°C 8 – 14um Risposta spettrale 12 : 1 Risoluzione ottica (D:S) Circa 10 secondi Auto spegnimento 0 a 50°C...
  • Seite 8: Descrizione Del Pannello

    6. Descrizione del pannello 1) Sensore a infrarossi 2) Pulsante accensione / misura 3) Laser 4) Coperchio della batteria 5) Pulsante Su 6) Pulsante Imposta (tasto MAX \ MIN) 7) Tasto luce laser / retroilluminazione 8) Pulsante giù...
  • Seite 9: Descrizione Dello Schermo Lcd

    7. Descrizione dello schermo LCD 1) Simbolo di scansione 2) Simbolo di conservazione dei dati 3) Simbolo accensione / spegnimento laser 4) L'area visualizzata del valore della temperatura corrente 5) Simbolo e valore dell'emissività 6) Simbolo ° C / ° F 7) Simbolo di batteria 8) Simbolo MAX / MIN Premere il pulsante SET per ottenere il simbolo MAX \ MIN modificato...
  • Seite 10: Operazione Di Misurazione

    8. Operazione di misurazione 1) Tenere lo strumento per l'impugnatura e puntare verso la superficie da misurare. 2) Tirare e tenere premuto il grilletto per accendere lo strumento e iniziare il test. Il display si accenderà se la batteria è in buone condizioni. Sostituire la batteria se il display non si accende.
  • Seite 11: Dichiarazione Di Conformità Ce

    Quando il laser è acceso, l'icona del laser apparirà sul display LCD oltre la temperatura. 9. Dichiarazione di conformità CE Il prodotto 1760/IR500 risponde alla direttiva di compatibilità elettromagnetica EMC 2014/30/EU e alla direttiva RoHS 2011/65/EU emanate dalla commissione della Comunità Europea.
  • Seite 12: Sostituzione Della Batteria

    10. Sostituzione della batteria 1) Poiché la carica della batteria non è sufficiente, sul display LCD viene visualizzato il simbolo di potenza inferiore, è necessaria la sostituzione con una nuova batteria di tipo 9V. 2) Aprire il coperchio della batteria, estrarre la batteria dallo strumento e sostituire con una nuova batteria da 9 Volt e riposizionare il coperchio della batteria.
  • Seite 13 Contents 1. Description 2. Features 3. Safety 4. Measurement Distance / Measurement Surface / Area Ratio (D/S) 5. Specifications 6. Panel Description 7. LCD Screen Description 8. Measurement Operation 9. EC declaration of conformity 10. Battery replacement...
  • Seite 14: Description

    1. Description Thank you for purchase of the IR Thermometer. This is capable of non- contact (infrared) temperature measurements at the touch of a button. The built-in laser pointer increases target accuracy while handy push- buttons combine for convenient, ergonomic operation. The Non-contact lnfrared Thermometer can be used to measure the temperature of objects' surface that is improper to be measured by traditional (contact) thermometer (such as moving object, the surface...
  • Seite 15: Features

    2. Features 1) Rapid detection junction 2) Precise non contact measurements 3) Dual laser sighting 4) Unique flat surface, modern housing design 5) Automatic Data Hold 6) °C/°F Switch 7) LCD backlight.
  • Seite 16: Safety

    3. Safety 1) Use extreme caution when the laser beam is turned on. 2) Do not let the beam enter your eye, another person's eye or the eye of an animal. 3) Be careful not to let the beam on a reflective surface strike your eye. 4) Do not allow the laser light beam impinge on any gas which can explode.
  • Seite 17: Measurement Distance / Measurement Surface / Area Ratio (D/S)

    4. Measurement Distance / Measurement Surface / area ratio (D/S) To achieve accurate measurements, the target must be larger than the thermometer's measuring area. The measured temperature is the average temperature of the area measured. The smaller the target the smaller the measurament distance between thermometer and target object has to be.
  • Seite 18: Specifications

    5. Specifications Temperature range -22 to 932°F (-50 to 500°C) Display resolution Emissivity Adjustable 0.1 to 1 Accuracy 58 to 68°F ±5.4°F 68 to 932°F ±2% o 3.6°F 8 – 14um Spectral response 12 : 1 Optical resolution (D:S) Auto power off About in 10s 32 to 122°F Operation temperature...
  • Seite 19: Panel Description

    6. Panel Description 1) Infrared Sensor 2) Power on/Measure button 3) Laser 4) Battery cover 5) Up button 6) Set (MAX \ MIN Change) button 7) Laser/ Back light Button 8) Down button...
  • Seite 20: Lcd Screen Description

    7. LCD Screen Description 1) Scan symbol 2) Data hold symbol 3) Laser On/Off symbol 4) The displayed area of current temperature value 5) Emissivity symbol and value 6) °C/°F symbol 7) Battery power symbol 8) MAX / MIN symbol Press SET Button that you can get MAX \ MIN Symbol changed freely , the max and min data will show on the local H in the screen .
  • Seite 21: Measurement Operation

    8. Measurement Operation 1) Hold the meter by its Handle Grip and point lt toward the surface to be measured. 2) Pull and hold the trigger to turn the meter on and begin testing. The display will light if the battery is in good condltion. Replace the battery if the display does not light.
  • Seite 22: Ec Declaration Of Conformity

    Press the " SET " button once. Switch on/off laser and backlight After turn on the instrument, press the Laser/ Backlight button once to turn off the laser pointer .Press the laser/ Backlight button again to turn off the backlight. Press the Laser/ Backlight button for the third time to turn on the laser pointer, Press the Laser/Backlight button or the third time to turn on the backlight.
  • Seite 23: Battery Replacement

    10. Battery replacement 1) As battery power is not sufficient, LCD will display the lower power symbol, replacement with one new battery type 9V is required. 2) Open battery cover, take out the battery from instrument and replace wilh a new 9-Volt battery and place the battery cover back...
  • Seite 24 Contenu 1. Description 2. Caractéristiques 3. Sécurité 4. Rapport distance / surface de mesure / surface (D / S) 5. Spécifications 6. Description du panneau 7. Description de l'écran LCD 8. Opération de mesure 9. Déclaration de conformité CE 10. Remplacement de la batterie...
  • Seite 25: Description

    1. Description Merci d’avoir acheté le thermomètre infrarouge. Ceci est capable de mesurer la température sans contact (infrarouge) en appuyant simplement sur un bouton. Le pointeur laser intégré augmente la précision de la cible, tandis que des boutons-poussoirs pratiques se combinent pour une utilisation pratique et ergonomique.
  • Seite 26: Caractéristiques

    2. Caractéristiques 1) Jonction de détection rapide 2) Mesures précises sans contact 3) Double visée au laser 4) Surface plane unique, conception de logement moderne 5) Conservation automatique des données 6) Commutateur C / ° F 7) Rétroéclairage de l'écran LCD.
  • Seite 27: Sécurité

    3. Sécurité 1) Soyez extrêmement prudent lorsque le faisceau laser est allumé. 2) Ne laissez pas le faisceau pénétrer dans vos yeux, ceux d’une autre personne ou ceux de un animal. 3) Veillez à ne pas laisser le faisceau sur une surface réfléchissante heurter votre œil.
  • Seite 28 4. Distance de mesure / rapport surface / surface de mesure (D / S) Pour obtenir des mesures précises, la cible doit être plus grande que la surface de mesure du thermomètre. La température mesurée est la température moyenne de la surface mesurée. Plus la cible est petite, plus la distance de mesure entre le thermomètre est petite et l'objet cible doit être.
  • Seite 29: Spécifications

    5. Spécifications Écart de température -50 to 500°C (-22 to 932°F) Résolution d’affichage Émissivité Adjustable 0.1 to 1 Précision -50 a 20°C ±3°C 20 a 500°C ±2% o 2°C 8 – 14um Reponse spectrale Résolution optique (D:S) 12 : 1 Arrèt automatique À...
  • Seite 30: Description Du Panneau

    6. Description du panneau 1) Capteur infrarouge 2) Bouton marche / mesure 3) Laser 4) Couvercle de la batterie 5) Bouton haut 6) Bouton Set (bouton MAX \ MIN) 7) Bouton de lumière laser / arrière 8) Bouton bas...
  • Seite 31: Description De L'écran Lcd

    7. Description de l'écran LCD 1) Symbole de numérisation 2) Symbole de conservation des données 3) Symbole d'activation / désactivation du laser 4) La zone affichée de la valeur de température actuelle 5) Symbole et valeur de l'émissivité 6) Symbole C / ° F 7) Symbole de la batterie 8) Symbole MAX / MIN Appuyez sur le bouton SET pour que le symbole MAX \ MIN soit changé...
  • Seite 32: Opération De Mesure

    8. Opération de mesure 1) Tenez le lecteur par sa poignée et pointez-le vers la surface à mesurer. 2) Appuyez sur la gâchette et maintenez-la enfoncée pour allumer le lecteur et commencer les tests. L'affichage s'allume si la batterie est en bon état.
  • Seite 33: Déclaration De Conformité Ce

    Appuyez sur le bouton "SET" une fois. Allumer / éteindre le laser et le rétroéclairage Une fois l’instrument allumé, appuyez une fois sur le bouton Laser / Backlight pour éteindre le pointeur laser. Appuyez à nouveau sur le bouton Laser / Backlight pour éteindre le rétroéclairage. Appuyez une troisième fois sur le bouton Laser / Rétroéclairage pour activer le pointeur laser, appuyez sur le bouton Laser / Rétro-éclairage ou une troisième fois pour activer le rétroéclairage.
  • Seite 34: Remplacement De La Batterie

    10. Remplacement de la batterie 1) La puissance de la batterie étant insuffisante, l’écran LCD affiche le symbole d’alimentation inférieure, le remplacement par une nouvelle pile de type 9V est nécessaire. 2) Ouvrez le couvercle de la batterie, sortez la batterie de l'instrument et remplacez-la par une nouvelle batterie de 9 volts et replacez le couvercle de la batterie.
  • Seite 35 Inhalt 1. Beschreibung 2. Eigenschaften 3. Sicherheit 4. Messabstand / Messfläche / Flächenverhältnis (D / S) 5. Spezifikationen 6. Panel Beschreibung 7. LCD-Bildschirmbeschreibung 8. Messvorgang 9. EG-Konformitätserklärung 10. Batteriewechsel...
  • Seite 36: Beschreibung

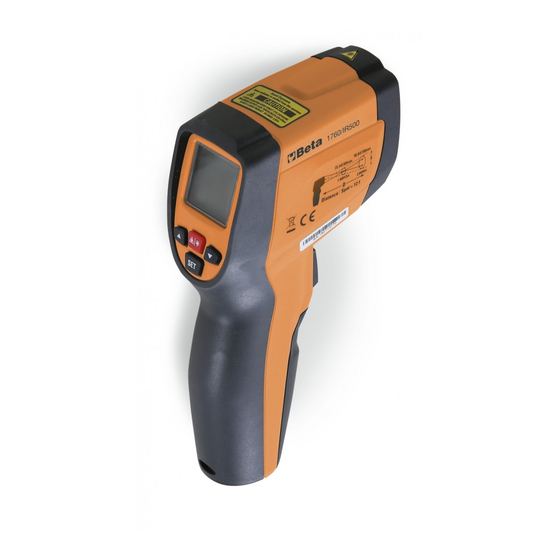
    1. Beschreibung Vielen Dank für den Kauf des IR-Thermometers. Dies ermöglicht berührungslose (Infrarot-) Temperaturmessungen auf Knopfdruck. Der eingebaute Laserpointer erhöht die Zielgenauigkeit, während praktische Drucktasten für eine bequeme, ergonomische Bedienung sorgen. Mit dem berührungslosen Infrarotthermometer kann die Temperatur der Objektoberfläche gemessen werden, deren Messung durch ein herkömmliches (Kontakt-) Thermometer nicht geeignet ist (z.
  • Seite 37: Eigenschaften

    2. Eigenschaften 1) Schnelle Erfassungsstelle 2) Präzise berührungslose Messungen 3) Dual-Laser-Visierung 4) Einzigartige flache Oberfläche, modernes Gehäuse 5) Automatischer Datenhalt 6) ° C / ° F Schalter 7) LCD-Hintergrundbeleuchtung.
  • Seite 38: Sicherheit

    3. Sicherheit 1) Seien Sie äußerst vorsichtig, wenn der Laserstrahl eingeschaltet ist. 2) Lassen Sie den Strahl nicht in Ihr Auge, in das Auge einer anderen Person oder in Ihr Auge eindringen ein Tier. 3) Achten Sie darauf, dass der Strahl auf einer reflektierenden Oberfläche nicht ins Auge fällt. 4) Lassen Sie den Laserlichtstrahl nicht auf ein Gas treffen, das explodieren kann.
  • Seite 39: Messabstand / Messfläche / Flächenverhältnis (D / S)

    4. Messabstand / Messfläche / Flächenverhältnis (D / S) Um genaue Messungen zu erreichen, muss das Ziel größer sein als der Messbereich des Thermometers. Die gemessene Temperatur ist die Durchschnittstemperatur der gemessenen Fläche. Je kleiner das Ziel ist, desto kleiner ist der Messabstand zwischen den Thermometern und Zielobjekt muss sein.
  • Seite 40: Spezifikationen

    5. Spezifikationen Temperaturebereisch -50 to 500°C (-22 to 932°F) Bildschirmauflösung Emissionsgrad Einstellbar 0.1 to 1 Richtigkeit -50 zu 20°C ±3°C 20 zu 500°C ±2% o 2°C 8 – 14um Spektrale antwort Optische Auflösung (D:S) 12 : 1 Etwa in 10s Automatische abschaltung Betriebs-Temperatur 0 zu 50°C...
  • Seite 41: Panel Beschreibung

    6. Panel Beschreibung 1) Infrarotsensor 2) Einschalten / Messtaste 3) Laser 4) Batterieabdeckung 5) Auf-Taste 6) Stellen Sie die Taste (MAX \ MIN) ein 7) Laser / Gegenlicht-Taste 8) Abwärtstaste...
  • Seite 42: Lcd-Bildschirmbeschreibung

    7. LCD-Bildschirmbeschreibung 1) Scansymbol 2) Datenhaltesymbol 3) Laser Ein / Aus-Symbol 4) Der angezeigte Bereich des aktuellen Temperaturwerts 5) Emissivitätssymbol und Wert 6) ° C / ° F Symbol 7) Batteriesymbol 8) MAX / MIN-Symbol Drücken Sie die SET-Taste, um das MAX \ MIN-Symbol frei ändern zu lassen.
  • Seite 43: Messvorgang

    8. Messvorgang 1) Halten Sie das Messgerät am Griff und richten Sie es auf die zu messende Oberfläche. 2) Halten Sie den Auslöser gedrückt, um das Messgerät einzuschalten und den Test zu starten. Das Display leuchtet auf, wenn der Akku in gutem Zustand ist.
  • Seite 44: Eg-Konformitätserklärung

    Halten Sie die "SET" -Taste eine Sekunde lang gedrückt, bis ° C oder ° F angezeigt wird. Temperaturumschaltung Max / Min Drücken Sie einmal die "SET" -Taste. Laser / Hintergrundbeleuchtung ein- / ausschalten Drücken Sie nach dem Einschalten des Instruments einmal die Laser / Backlight-Taste, um den Laserpointer auszuschalten.
  • Seite 45: Batteriewechsel

    10. Batteriewechsel 1) Da die Batterieleistung nicht ausreicht, wird auf dem LCD das Symbol für die geringere Leistung angezeigt. Der Austausch mit einer neuen 9 V- Batterie ist erforderlich. 2) Öffnen Sie die Batterieabdeckung, nehmen Sie die Batterie aus dem Instrument und ersetzen Sie sie durch eine neue 9-Volt-Batterie.
  • Seite 46 Contenido 1. Descripción 2. Características 3. Seguridad 4. Distancia de medición / relación superficie / área de medición (D / S) 5. Especificaciones 6. Descripción del panel 7. Descripción de la pantalla LCD 8. Operación de medición 9. Declaración CE de conformidad 10.
  • Seite 47: Descripción

    1. Descripción Gracias por la compra del termómetro IR. Esto es capaz de realizar mediciones de temperatura sin contacto (infrarrojo) con solo tocar un botón. El puntero láser incorporado aumenta la precisión del objetivo mientras que los prácticos botones se combinan para lograr una operación conveniente y ergonómica.
  • Seite 48: Características

    2. Características 1) Unión de detección rápida 2) Mediciones precisas sin contacto 3) Visor láser dual 4) Superficie plana única, diseño de vivienda moderna. 5) Retención automática de datos 6) ° C / ° F Interruptor 7) Retroiluminación LCD.
  • Seite 49: Seguridad

    3. Seguridad 1) Tenga mucho cuidado al encender el rayo láser. 2) No permita que el rayo entre en su ojo, el ojo de otra persona o el ojo un animal. 3) Tenga cuidado de no dejar que el haz en una superficie reflectante golpee su ojo.
  • Seite 50: Distancia De Medición / Relación Superficie / Área De Medición (D / S)

    4. Distancia de medición / relación de superficie / área de medición (D / S) Para lograr mediciones precisas, el objetivo debe ser más grande que el área de medición del termómetro. La temperatura medida es la temperatura media del área medida. Cuanto menor sea el objetivo, menor será...
  • Seite 51: Especificaciones

    5. Especificaciones Rango de temperatura -50 a 500°C (-22 a 932°F) Resolución de pantalla Emisividad ajustable 0,1 a 1 Precisión -50 a 20°C ±3°C 20 a 500°C ±2% o 2°C 8 – 14um Respuesta espectral Resolución óptica (D:S) 12 : 1 Apagado automático Unos 10 segundos 0 a 50°C...
  • Seite 52: Descripción Del Panel

    6. Descripción del panel 1) Sensor de infrarrojos 2) Botón de encendido / medida 3) Laser 4) Tapa de la batería 5) Botón arriba 6) Botón de ajuste (MAX / MIN) 7) Botón láser / luz de fondo 8) Botón abajo...
  • Seite 53: Descripción De La Pantalla Lcd

    7. Descripción de la pantalla LCD 1) Símbolo de escaneo 2) Símbolo de retención de datos 3) Símbolo de encendido / apagado del láser 4) El área visualizada del valor de temperatura actual 5) Símbolo de emisividad y valor. 6) Símbolo de ° C / ° F 7) Símbolo de energía de la batería 8) Símbolo MAX / MIN Presione el botón SET para que el símbolo MAX \ MIN se modifique...
  • Seite 54: Operación De Medición

    8. Operación de medición 1) Sostenga el medidor por su agarre de manija y apunte hacia la superficie a medir. 2) Presione y mantenga presionado el gatillo para encender el medidor y comenzar la prueba. La pantalla se encenderá si la batería está en buenas condiciones.
  • Seite 55: Declaración Ce De Conformidad

    Presione el botón "SET" una vez. Encender / apagar el láser y la luz de fondo Después de encender el instrumento, presione el botón Láser / Retroiluminación una vez para apagar el puntero láser. Presione nuevamente el botón Láser / Retroiluminación para apagar la retroiluminación.
  • Seite 56: Reemplazo De La Batería

    10. Reemplazo de la batería 1) Como la energía de la batería no es suficiente, la pantalla LCD mostrará el símbolo de menor potencia, se requiere el reemplazo con un nuevo tipo de batería de 9V. 2) Abra la tapa de la batería, saque la batería del instrumento y reemplácela con una nueva de 9 voltios y coloque la tapa de la batería nuevamente...
  • Seite 57 Conteúdo 1. Descrição 2. Recursos 3. Segurança 4. Distância de Medição / Superfície de Medição / Relação de Área (D / S) 5. Especificações 6. Descrição do Painel 7. Descrição da tela LCD 8. Operação de Medição 9. Declaração CE de conformidade 10.
  • Seite 58: Descrição

    1. Descrição Obrigado pela compra do Termômetro Infravermelho. Isso é capaz de medições de temperatura sem contato (infravermelho) com o toque de um botão. O ponteiro laser integrado aumenta a precisão do alvo, enquanto botões de pressão convenientes combinam para operação conveniente e ergonômica.
  • Seite 59: Recursos

    2. Recursos 1) Junção de detecção rápida 2) Medições precisas sem contato 3) Observação a laser dupla 4) Superfície plana única, design de habitação moderna 5) Retenção automática de dados 6) Interruptor de ° C / ° F 7) Luz de fundo do LCD.
  • Seite 60: Segurança

    3. Segurança 1) Tenha muito cuidado quando o raio laser estiver ligado. 2) Não deixe o raio entrar no seu olho, no olho de outra pessoa ou no olho do um animal. 3) Tenha cuidado para não deixar o feixe em uma superfície refletora atingir seu olho.
  • Seite 61: (D / S)

    4. Distância de Medição / Medição Superfície / relação de área (D / S) Para obter medições precisas, o alvo deve ser maior que a área de medição do termômetro. A temperatura medida é a temperatura média da área medida. Quanto menor o alvo, menor a distância de medição entre o termômetro e objeto alvo tem que ser.
  • Seite 62: Especificações

    5. Especificações Faixa de temperatura -50 a 500°C (-22 a 932°F) Resolução de vídeo Ajustável 0.1 a 1 Emissividade Precisão -50 a 20°C ±3°C 20 a 500°C ±2% o 2°C 8 – 14um Resposta espectral Resolução óptica (D:S) 12 : 1 Cerca de 10s Desligamento automatico Temperatura de operação...
  • Seite 63: Descrição Do Painel

    6. Descrição do Painel 1) Sensor Infravermelho 2) Botão Ligar / Medir 3) Laser 4) Tampa da bateria 5) Botão para cima 6) Botão Set (MAX \ MIN) 7) Laser / botão de luz de fundo 8) Botão Down...
  • Seite 64: Descrição Da Tela Lcd

    7. Descrição da tela LCD 1) Símbolo de digitalização 2) Símbolo de retenção de dados 3) Símbolo Laser On / Off 4) A área exibida do valor da temperatura atual 5) Símbolo de emissão e valor 6) Símbolo ° C / ° F 7) Símbolo da bateria 8) Símbolo MAX / MIN Pressione o botão SET para obter o símbolo MAX \ MIN alterado...
  • Seite 65: Operação De Medição

    8. Operação de Medição 1) Segure o medidor pelo seu Handle Grip e aponte para a superfície a ser medida. 2) Puxe e segure o gatilho para ligar o medidor e começar a testar. O visor acenderá se a bateria estiver em boa condição. Substitua a bateria se a tela não acender.
  • Seite 66: Declaração Ce De Conformidade

    Pressione o botão "SET" uma vez. Ligar / desligar o laser e a luz de fundo Depois de ligar o instrumento, pressione o botão Laser / Backlight uma vez para desligar o ponteiro laser. Pressione o botão de laser / luz de fundo novamente para desligar a luz de fundo.
  • Seite 67: Substituição Da Bateria

    10. Substituição da bateria 1) Como a energia da bateria não é suficiente, o LCD exibirá o símbolo de energia mais baixo, a substituição por um novo tipo de bateria 9V é necessária. 2) Abra a tampa da bateria, retire a bateria do instrumento e substitua-a por uma nova bateria de 9 volts e coloque a tampa da bateria de volta...
  • Seite 68 Inhoud 1. Beschrijving 2. Functies 3. Veiligheid 4. Metingsafstand / meetoppervlak / oppervlakteverhouding (D / S) 5. Specificaties 6. Paneelbeschrijving 7. Beschrijving van het LCD-scherm 8. Meting operatie 9. EG-verklaring van overeenstemming 10. Batterij vervangen...
  • Seite 69: Beschrijving

    1. Beschrijving Bedankt voor de aanschaf van de IR-thermometer. Hiermee kunnen niet- contact (infrarood) temperatuurmetingen worden uitgevoerd met één druk op de knop. De ingebouwde laserpointer verhoogt de doelnauwkeurigheid, terwijl handige drukknoppen gecombineerd worden voor een gemakkelijke, ergonomische bediening. De contactloze infraroodthermometer kan worden gebruikt om de temperatuur te meten van het oppervlak van voorwerpen die niet kan worden gemeten door een traditionele (contact) thermometer (zoals een bewegend object, het oppervlak met elektriciteitsstroom of de...
  • Seite 70: Functies

    2. Functies 1) Snelle detectieverbinding 2) Nauwkeurige contactloze metingen 3) Dubbele laserwaarneming 4) Uniek vlak oppervlak, modern behuizingsontwerp 5) Automatische gegevensopslag 6) ° C / ° F Schakelaar 7) LCD-achtergrondverlichting.
  • Seite 71: Veiligheid

    3. Veiligheid 1) Wees uiterst voorzichtig wanneer de laserstraal wordt ingeschakeld. 2) Laat de straal uw oog, iemands oog of het oog van niet binnengaan een dier. 3) Pas op dat de straal op een reflecterend oppervlak niet in de ogen valt.
  • Seite 72 4. Metingsafstand / meting Oppervlakte / oppervlakte-verhouding (D / S) Voor nauwkeurige metingen moet het doelwit groter zijn dan het meetgebied van de thermometer. De gemeten temperatuur is de gemiddelde temperatuur van het gemeten oppervlak. Hoe kleiner het doel, hoe kleiner de meetafstand tussen de thermometer en doelobject moet zijn.
  • Seite 73: Specificaties

    5. Specificaties Temperatuurbereik -50 tot 500°C (-22 tot 932°F) Schermresolutie Emissie Verstelbaar 0.1 tot 1 Nauwkeurigheid -50 tot 20°C ±3°C 20 tot 500°C ±2% o 2°C 8 – 14um Spectrale reactie Optische resolutie (D:S) 12 : 1 About in 10s Automatisch uitschakelen 0 a 50°C Bedrijfstemperatuur...
  • Seite 74: Paneelbeschrijving

    6. Paneelbeschrijving 1) Infrarood sensor 2) Aan / uitknop 3) Laser 4) Batterijdeksel 5) Knop Omhoog 6) Stel in (knop MAX \ MIN) 7) Knop laserlicht / achteruitrijlicht 8) Omlaag-knop...
  • Seite 75: Beschrijving Van Het Lcd-Scherm

    7. Beschrijving van het LCD-scherm 1) Scansymbool 2) Data hold-symbool 3) Laser aan / uit-symbool 4) Het weergegeven gedeelte van de huidige temperatuurwaarde 5) Emissiviteitssymbool en waarde 6) ° C / ° F-symbool 7) Symbool batterijvermogen 8) MAX / MIN-symbool Druk op de SET-knop die u kunt krijgen MAX \ MIN Symbool vrij gewijzigd, de max- en min-gegevens worden weergegeven op de lokale H in het scherm.
  • Seite 76: Meting Operatie

    8. Meting operatie 1) Houd de meter vast aan de handgreep en richt hem naar het te meten oppervlak. 2) Trek aan de trekker en houd deze ingedrukt om de meter in te schakelen en te testen. Het display licht op als de batterij in goede staat verkeert.
  • Seite 77: Eg-Verklaring Van Overeenstemming

    Druk één keer op de knop "SET". Schakel laser en achtergrondverlichting in / uit Nadat u het instrument hebt aangezet, drukt u eenmaal op de Laser / Backlight-knop om de laserpointer uit te schakelen. Druk nogmaals op de laser / Backlight-knop om de achtergrondverlichting uit te schakelen. Druk voor de derde keer op de Laser / Backlight-knop om de laseraanwijzer in te schakelen, druk op de Laser / Backlight-knop of de derde keer om de achtergrondverlichting in te schakelen.
  • Seite 78: Batterij Vervangen

    10. Batterij vervangen 1) Omdat de batterij niet voldoende is, geeft het LCD-scherm het onderste voedingssymbool weer, vervanging met één nieuw batterijtype 9V is vereist. 2) Open het batterijvak, haal de batterij uit het instrument en vervang een nieuwe 9-volt batterij en plaats het batterijklepje terug...
  • Seite 79: Bezpieczeństwo

    Zawartość 1. Opis 2. Funkcje 3. Bezpieczeństwo 4. Odległość pomiaru / pomiar Powierzchnia / Współczynnik powierzchni (D / S) 5. Dane techniczne 6. Opis panelu 7. Opis ekranu LCD 8. Obsługa pomiaru 9. Deklaracja zgodności WE 10. Wymiana baterii...
  • Seite 80 1. Opis Dziękujemy za zakup termometru na podczerwień. Jest to możliwe do bezdotykowego pomiaru temperatury w podczerwieni za naciśnięciem przycisku. Wbudowany wskaźnik laserowy zwiększa dokładność celu, a poręczne przyciski łączą się, by wygodnie i ergonomicznie pracować. Bezdotykowy termometr na podczerwień może być używany do pomiaru temperatury powierzchni przedmiotów, która jest niewłaściwa do zmierzenia za pomocą...
  • Seite 81 2. Funkcje 1) Złącze szybkiego wykrywania 2) Precyzyjne pomiary bezkontaktowe 3) Podwójny celownik laserowy 4) Wyjątkowa płaska powierzchnia, nowoczesny design obudowy 5) Automatyczne zatrzymywanie danych 6) ° C / ° F Przełącznik 7) Podświetlenie LCD.
  • Seite 82 3. Bezpieczeństwo 1) Zachowaj szczególną ostrożność, gdy promień lasera jest włączony. 2) Nie pozwól, aby promień dostał się do oka, oko innej osoby lub oko zwierzę. 3) Uważaj, aby promień na powierzchni odbijającej nie uderzył w twoje oko. 4) Nie pozwól, aby promień lasera padł na jakikolwiek gaz, który może eksplodować.
  • Seite 83 4. Odległość pomiaru / pomiar Stosunek powierzchni do powierzchni (D / S) Aby uzyskać dokładne pomiary, cel musi być większy niż obszar pomiaru termometru. Zmierzona temperatura jest średnią temperaturą mierzonego obszaru. Im mniejszy cel, tym mniejsza odległość pomiaru między termometrem i obiekt docelowy musi być.
  • Seite 84 5. Dane techniczne Zakres temperatury -50 do 500°C (-22 do 932°F) Rozdzielczość wyświetlacza Emisyjność Nastawny 0.1 do 1 Precyzja -50 do 20°C ±3°C 20 do 500°C ±2% o 2°C Odpowiedź spektralna 8 – 14um Rodzielczość optyczna 12 : 1 Automatyczny wyłącznik Około 10 sekund Operacja temperatura 0 do 50°C...
  • Seite 85 6. Opis panelu 1) Czujnik podczerwieni 2) Przycisk włączania / pomiaru 3) Laser 4) Pokrywa baterii 5) Przycisk w górę 6) Ustaw przycisk (przycisk MAX / MIN) 7) Przycisk światła laserowego / tylnego 8) Przycisk w dół...
  • Seite 86 7. Opis ekranu LCD 1) Symbol skanowania 2) Symbol zatrzymania danych 3) Symbol włączania / wyłączania lasera 4) Wyświetlany obszar aktualnej wartości temperatury 5) Symbol emisyjności i wartość 6) ° C / ° F symbol 7) Symbol mocy baterii 8) Symbol MAX / MIN Naciśnij przycisk SET, że możesz swobodnie zmieniać...
  • Seite 87 8. Obsługa pomiaru 1) Przytrzymaj miernik za uchwyt rękojeści i skieruj go w stronę mierzonej powierzchni. 2) Pociągnij i przytrzymaj spust, aby włączyć miernik i rozpocząć testowanie. Wyświetlacz zaświeci się, jeśli akumulator jest w dobrym stanie. Wymień baterię, jeśli wyświetlacz się nie świeci. 3) Zwolnij przycisk wyzwalacza, a na wyświetlaczu pojawi się...
  • Seite 88 Backlight, aby wyłączyć podświetlenie. Naciśnij przycisk Laser / Backlight po raz trzeci, aby włączyć wskaźnik laserowy, naciśnij przycisk Laser / Backlight lub po raz trzeci, aby włączyć podświetlenie. Gdy laser jest włączony, ikona lasera pojawi się na wyświetlaczu LCD nad temperaturą...
  • Seite 89 10. Wymiana baterii 1) Ponieważ moc baterii jest niewystarczająca, wyświetlacz LCD wyświetli symbol niższej mocy, wymagana jest wymiana na nowy typ baterii 9V. 2) Otwórz pokrywę baterii, wyjmij baterię z przyrządu i wymień nową baterię 9-woltową i włóż z powrotem pokrywę baterii...
  • Seite 90 Tartalom 1. Leírás 2. Jellemzők 3. Biztonság 4. Mérési távolság / Mérés Felület / Terület arány (D / S) 5. Műszaki adatok 6. A panel leírása 7. LCD képernyő leírása 8. Mérési művelet 9. EK-megfelelőségi nyilatkozat 10. Az akkumulátor cseréje...
  • Seite 91: Leírás

    1. Leírás Köszönjük, hogy megvásárolta az infravörös hőmérőt. Ez a gomb érintésével érintésmentes (infravörös) hőmérsékletmérésre képes. A beépített lézermutató növeli a cél pontosságát, míg a praktikus nyomógombok kényelmes, ergonomikus működést biztosítanak. A nem érintkező lnfrared hőmérő a tárgyak felületének olyan hőmérsékletének a mérésére használható, amely nem megfelelő...
  • Seite 92: Jellemzők

    2. Jellemzők 1) Gyors felismerési csomópont 2) Pontos nem kontaktusmérések 3) Kettős lézeres észlelés 4) Egyedülálló sík felület, modern ház kialakítás 5) Automatikus adatmegőrzés 6) ° C / ° F Kapcsoló 7) LCD háttérvilágítás.
  • Seite 93: Biztonság

    3. Biztonság 1) Különös óvatossággal járjon el, amikor a lézersugár be van kapcsolva. 2) Ne hagyja, hogy a sugár bejön a szemébe, másik szeme vagy a szeme egy állat. 3) Ügyeljen arra, hogy ne hagyja, hogy a sugár fényvisszaverő felületen szembeforduljon a szemével.
  • Seite 94: Mérési Távolság / Mérés Felület / Terület Arány (D / S)

    4. Mérési távolság / Mérés Felület / Terület arány (D / S) A pontos mérések eléréséhez a célnak nagyobbnak kell lennie, mint a hőmérő mérési területe. A mért hőmérséklet az átlagos hőmérséklet a mért területnek. Minél kisebb a cél, annál kisebb a hőmérő mérési távolsága és célobjektumnak kell lennie.
  • Seite 95: Műszaki Adatok

    5. Műszaki adatok Hőmérséklet tartomány -50 és 500°C (-22 to 932°F) Kijelző felbontása Állítható 0.1 és 1 Emissivity Pontosság -50 és 20°C ±3°C 20 és 500°C ±2% o 2°C 8 – 14um Spectral válasz Optikai felbontás (D:S) 12 : 1 Automatikus kikapcsolás Körülbelül 10s években Működési őmérséklet...
  • Seite 96: A Panel Leírása

    6. A panel leírása 1) Infravörös érzékelő 2) Bekapcsolás / mérés gomb 3) Lézer 4) Akkumulátor fedele 5) Fel gomb 6) Állítsa be (MAX \ MIN) 7) Lézer / hátsó lámpa gomb 8) Le gomb...
  • Seite 97: Lcd Képernyő Leírása

    7. LCD képernyő leírása 1) Szkennelés szimbólum 2) Adattároló szimbólum 3) Lézer be / ki szimbólum 4) Az aktuális hőmérsékleti érték kijelzett területe 5) Emissziós szimbólum és érték 6) ° C / ° F szimbólum 7) Az akkumulátor töltöttségi szintje 8) MAX / MIN szimbólum Nyomja meg a SET gombot, hogy megkapja a MAX \ MIN szimbólumot szabadon megváltoztatva, a max és min adatok a helyi H képernyőn...
  • Seite 98: Mérési Művelet

    8. Mérési művelet 1) Fogja meg a mérőt a fogantyúján és a pontot a mérendő felület felé. 2) Húzza és tartsa lenyomva a ravaszt, hogy bekapcsolja a mérőt, és elkezdje a tesztelést. A kijelző világít, ha az akkumulátor jó állapotban van.
  • Seite 99: Ek-Megfelelőségi Nyilatkozat

    Nyomja meg egyszer a "SET" gombot. Kapcsolja be / ki a lézert és a háttérvilágítást A készülék bekapcsolása után egyszer nyomja meg a Lézer / Háttérfény gombot a lézer mutató kikapcsolásához. A háttérvilágítás kikapcsolásához nyomja meg újra a lézer / háttérvilágítás gombot. A lézer mutató...
  • Seite 100: Az Akkumulátor Cseréje

    10. Az akkumulátor cseréje 1) Mivel az akkumulátor töltöttségi szintje nem elegendő, az LCD kijelzőn megjelenik az alacsonyabb teljesítményszimbólum, a csere egy új, 9V-os típusú elemre van szükség. 2) Nyissa ki az akkumulátor fedelét, vegye ki az akkumulátort a műszerből, és cserélje ki egy új 9 voltos akkumulátort, és tegye vissza az akkumulátorfedelet...
  • Seite 101 INFORMAZIONE AGLI UTENTI / INFORMATION FOR THE USERS / INFORMATIONS POUR LES UTILIZATEURS / INFORMATIONEN FUR DIE BENUTZER / INFORMACION DEL USUARIO / A INFORMACAO DOS UTILIZADORES / INFORMATIE VOOR DE GEBRUIKERS / INFORMACJE DLA UŻYTKOWNIKÓW / A FELHASZNÁLÓK INFORMÁCIÓJA...
  • Seite 102 I – Il simbolo del cassonetto barrato riportato sull’apparecchiatura indica che il prodotto alla fine della propria vita utile deve essere raccolto separatamente dagli altri rifiuti. L’utente dovrà, pertanto, conferire l’apparecchiatura integra dei componenti essenziali giunta a fine vita agli idonei centri di raccolta differenziata dei rifiuti elettrici ed elettronici, oppure riconsegnarla al rivenditore al momento dell’acquisto di nuova apparecchiatura di tipo equivalente.
  • Seite 103 recydage des déchets électroniques et électrotechniques, désigné par vos autorités locales. D – Das Gerat am Ende seiner Lebensdauer von den anderen Abfallen getrennt werden muss. Der Benutzer sollte das Great und alle seine Komponenten zusammen mit einem geeigneten Zentrum des elektronischen und elektrotechnischen Abfallrecyclingzentrum, das von ihren ortlichen Behorden benannt ist, verteilen.
  • Seite 104 componentes em um centro apropriado dereciclagem de residuos eletronicos e elotrotécticos, designado pelas autoridades locais. NL – Aan het einde van zijn levensduur moet het apparaat van het andere afval worden gescheiden. Verzend het apparaat en alle componenten samen naar een centrum voor elektronisch en elektrotechnisch afvalrecycling, aangewezen door uw lokale autoriteiten.

Inhaltsverzeichnis