Philips GC2800 Serie Bedienungsanleitung
Vorschau ausblenden
Andere Handbücher für GC2800 Serie:
- Bedienungsanleitung (15 Seiten) ,
- Bedienungsanleitung (15 Seiten)
Inhaltsverzeichnis
Werbung
Verfügbare Sprachen
Verfügbare Sprachen
Quicklinks
Werbung
Inhaltsverzeichnis

Verwandte Anleitungen für Philips GC2800 Serie


Inhaltszusammenfassung für Philips GC2800 Serie
- Seite 1 GC2800 Series...
-
Seite 5: Inhaltsverzeichnis
EnGlISh 6 DEutSCh 18 Ελληνικα 31 FRançaIS 45 ItalIano 58 nEDERlanDS 71 tüRkçE 84... -
Seite 6: English
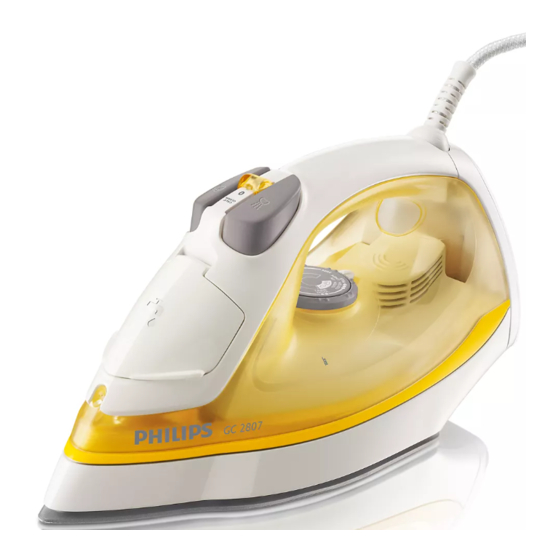
EnGlISh Introduction Congratulations on your purchase and welcome to Philips! To fully benefit from the support that Philips offers, register your product at www.philips. com/welcome. General description (Fig. 1) a Spray nozzle B Cap of filling opening C Spray button 8... -
Seite 7: Electromagnetic Fields (Emf)
If the mains cord is damaged, you must have it replaced by Philips, a service centre authorised by Philips or similarly qualified persons in order to avoid a hazard. -
Seite 8: Before First Use
EnGlISh instructions in this user manual, the appliance is safe to use based on scientific evidence available today. Before first use Remove any sticker or protective foil from the soleplate. Let the iron heat up to maximum temperature and pass the iron over a piece of damp cloth for several minutes to remove any residues from the soleplate. - Seite 9 EnGlISh Fabric type Temperature Steam Steam boost setting setting Wool N.A. Silk N.A. Synthetic fabrics (e.g. N.A. Acrylic, nylon, polyamide, polyester). Check the laundry care label for the required ironing temperature: If you do not know what kind or kinds of fabric an article is made of, determine the right ironing temperature by ironing a part that will not be visible when you wear or use the article.
-
Seite 10: Ironing Without Steam
EnGlISh using the appliance Note: The iron may give off some smoke when you use it for the first time. This stops after a short while. Steam ironing Make sure that there is enough water in the water tank. Set the recommended ironing temperature (see chapter ‘Preparing for use’, ‘Temperature and steam setting table’). - Seite 11 EnGlISh Press and release the steam boost button (Fig. 6). Vertical shot of steam You can also use the steam boost function when you hold the iron in vertical position. This is useful for removing creases from hanging clothes, curtains etc. Hold the iron in vertical position and press and release the steam boost button (Fig.
-
Seite 12: Cleaning And Maintenance
EnGlISh Cleaning and maintenance Cleaning Set the steam control to position 0, remove the plug from the wall socket and let the iron cool down. Wipe flakes and any other deposits off the soleplate with a damp cloth and a non-abrasive (liquid) cleaning agent. To keep the soleplate smooth, avoid hard contact with metal objects. Never use a scouring pad, vinegar or other chemicals to clean the soleplate. - Seite 13 EnGlISh Put the mains plug in an earthed wall socket. Unplug the iron when the temperature light goes out. Hold the iron over the sink. Push the steam control to the Calc- Clean position and hold it. Gently shake the iron to and fro (Fig.
-
Seite 14: Guarantee & Service
Guarantee & service If you need service or information or if you have a problem, please visit the Philips website at www.philips.com or contact the Philips Consumer Care Centre in your country (you find its phone number in the worldwide guarantee leaflet). If there is no Consumer Care Centre in your country, go to your local Philips dealer. - Seite 15 EnGlISh Problem Cause Solution The iron is not hot Set an ironing temperature enough and/or the that is suitable for steam drip-stop function ironing ( 2 to MAX). Put the has been activated. iron on its heel and wait until the temperature light goes out before you start ironing.
- Seite 16 EnGlISh Problem Cause Solution Water droplets You have not Press the cap until you hear a drip on the closed the cap of click. fabric during the filling opening ironing. properly. The set Set an ironing temperature temperature is too that is suitable for steam low for steam ironing ( 2 to MAX).
- Seite 17 EnGlISh Problem Cause Solution Water spots These wet spots Iron wet spots without steam appear on the may be caused by from time to time to dry them. garment during steam that has ironing. condensed onto the ironing board. If the underside of To prevent steam from the ironing board condensing onto the ironing...
-
Seite 18: Deutsch
DEutSCh Einführung Herzlichen Glückwunsch zu Ihrem Kauf und willkommen bei Philips! Um den Support von Philips optimal nutzen zu können, registrieren Sie Ihr Produkt bitte unter www.philips.com/welcome. allgemeine Beschreibung (abb. 1) a Spraydüse B Verschlusskappe der Einfüllöffnung C Sprühtaste 8... -
Seite 19: Warnhinweis
Gerät selbst beschädigt ist oder wenn das Gerät heruntergefallen ist bzw. wenn Flüssigkeit aus dem Gerät austritt. Ist das Netzkabel defekt, darf es nur von einem Philips Service-Center oder einer von Philips autorisierten Werkstatt durch ein Original- Ersatzkabel ausgetauscht werden, um Gefährdungen zu vermeiden. -
Seite 20: Elektromagnetische Felder
DEutSCh Elektromagnetische Felder Dieses Philips Gerät erfüllt sämtliche Normen bezüglich elektromagnetischer Felder (EMF). Nach aktuellen wissenschaftlichen Erkenntnissen ist das Gerät sicher im Gebrauch, sofern es ordnungsgemäß und entsprechend den Anweisungen in dieser Bedienungsanleitung gehandhabt wird. Vor dem ersten Gebrauch Entfernen Sie Aufkleber bzw. Schutzfolie von der Bügelsohle. - Seite 21 DEutSCh Schließen Sie die Verschlusskappe der Einfüllöffnung, bis sie hörbar einrastet. Selecting the temperature and the steam settings Gewebeart Temperatur- Dampfeinstel- Dampfstoß einstellung lung LEINEN Max. & Baumwolle & Wolle k.A. Seide k.A. Synthetikfasern (z. B. k.A. Acryl, Nylon, Polyamid, Polyester) Prüfen Sie das Etikett im Wäsche-/Kleidungsstück auf die erforderliche Bügeltemperatur: Wenn Sie nicht wissen, um welche Art von Gewebe es sich handelt,...
-
Seite 22: Das Gerät Benutzen
DEutSCh Stellen Sie das Bügeleisen senkrecht. Stecken Sie den Netzstecker in eine geerdete Steckdose. Die Temperaturanzeige leuchtet auf. Wenn die Temperaturanzeige erlischt, empfiehlt es sich, noch kurze Zeit zu warten, bevor mit dem Bügeln begonnen wird. Die Temperaturanzeige leuchtet während des Betriebs gelegentlich auf und zeigt an, dass das Gerät auf die erforderliche Temperatur aufgeheizt wird. -
Seite 23: Produktmerkmale
DEutSCh Produktmerkmale Sprühfunktion Sie können die Sprühfunktion bei jeder Temperatur verwenden, um das Wäschestück anzufeuchten. Überprüfen Sie, ob sich genügend Wasser im Wassertank befindet. Betätigen Sie die Sprühtaste mehrmals, um das Wäsche-/ Kleidungsstück anzufeuchten (Abb. 5). Dampfstoß-Funktion Ein kräftiger Dampfstoß hilft bei der Entfernung äußerst hartnäckiger Falten. Die Extra-Dampf-Funktion arbeitet nur bei Temperaturen zwischen 3 und MAX. -
Seite 24: Reinigung Und Wartung
DEutSCh Die rote Kontrollanzeige für die Abschaltautomatik blinkt, um anzuzeigen, dass sich das Bügeleisen automatisch ausgeschaltet hat. (Abb. 8) So heizt sich das Bügeleisen wieder auf: Heben Sie das Bügeleisen an, und bewegen Sie es leicht. The automatic shut-off light stops flashing. Wenn die Temperatur der Bügelsohle unter die eingestellte Bügeltemperatur abgesunken ist, leuchtet die Temperaturanzeige auf. -
Seite 25: Calc-Clean-Funktion
DEutSCh Double active-kalksystem (nur bestimmte Gerätetypen) Hinweis: Refer to chapter ‘General description’ for the specific type numbers. Das Double Active-Kalksystem besteht aus einer Anti-Kalk-Tablette im Wasserbehälter in Kombination mit der Calc-Clean-Funktion. Die Anti-Kalk-Tablette verhindert, dass Kalkablagerungen die Dampfaustrittsdüsen verstopfen. Die Tablette ist dauerhaft aktiv und muss nicht ausgetauscht werden (Abb. -
Seite 26: Aufbewahrung
DEutSCh Lassen Sie den Dampfregler los, sobald der Wasserbehälter vollständig leer ist. Wiederholen Sie das Entkalken, wenn sich noch Kalkablagerungen im Bügeleisen befinden. nach dem Entkalken Stecken Sie den Netzstecker in die Steckdose, lassen Sie das Bügeleisen aufheizen und die Bügelsohle trocknen. Trennen Sie den Netzstecker von der Steckdose, sobald die Temperaturanzeige erlischt. -
Seite 27: Garantie Und Kundendienst
Garantie und kundendienst Benötigen Sie weitere Informationen oder treten Probleme auf, besuchen Sie bitte die Philips Website www.philips.com, oder setzen Sie sich mit einem Philips Service-Center in Ihrem Land in Verbindung (Telefonnummer siehe Garantieschrift). Sollte es in Ihrem Land kein Service-Center geben, wenden Sie sich bitte an Ihren Philips Händler. - Seite 28 DEutSCh Problem Ursache Lösung Der Dampfregler steht Stellen Sie den auf Position “0”. Dampfregler auf Position $ oder & (siehe Kapitel “Das Gerät benutzen”, Abschnitt “Dampfbügeln”). Das Bügeleisen ist nicht Wählen Sie eine heiß genug bzw. die Bügeltemperatur, die für Tropf-Stopp-Funktion das Dampfbügeln geeignet ist ( 2 bis...
- Seite 29 DEutSCh Problem Ursache Lösung Kalkpartikel und Durch hartes Wasser Verwenden Sie einmal Verunreinigungen bilden sich Kalkpartikel oder mehrmals die Calc- treten beim in der Bügelsohle. Clean-Funktion (siehe Bügeln aus der Kapitel “Reinigung und Bügelsohle aus. Wartung”, Abschnitt “Calc-Clean-Funktion”). Die Anzeige am Die Abschaltautomatik Heben Sie das Handstück blinkt...
- Seite 30 DEutSCh Problem Ursache Lösung Sie haben die Stellen Sie den Dampfstoß-Funktion Temperaturregler auf bei einer eine Einstellung zwischen Temperatureinstellung 3 und MAX. unter 3 verwendet. Sie haben die Bügeln Sie eine Zeit lang Dampfstoßfunktion zu mit waagerecht oft innerhalb zu kurzer gehaltenem Bügeleisen weiter, bevor Sie die Zeit verwendet.
-
Seite 31: Ελληνικα
Ελληνικα Εισαγωγή Συγχαρητήρια για την αγορά σας και καλώς ήρθατε στη Philips! Για να επωφεληθείτε πλήρως από την υποστήριξη που παρέχει η Philips, καταχωρήστε το προϊόν σας στην ιστοσελίδα www.philips.com/ welcome. Γενική περιγραφή (Εικ. 1) a Στόμιο ψεκασμού B Καπάκι στομίου πλήρωσης νερού... - Seite 32 συσκευή παρουσιάζει κάποια ορατή φθορά ή αν η συσκευή έχει πέσει κάτω ή έχει διαρροή. Εάν το καλώδιο υποστεί φθορά, θα πρέπει να αντικατασταθεί από ένα κέντρο σέρβις εξουσιοδοτημένο από τη Philips ή από εξίσου εξειδικευμένα άτομα προς αποφυγή κινδύνου. Μην αφήνετε ποτέ τη συσκευή χωρίς επίβλεψη όταν είναι...
-
Seite 33: Πριν Την Πρώτη Χρήση
δεξαμενή νερού. Αυτή η συσκευή προορίζεται για οικιακή χρήση μόνο. ηλεκτρομαγνητικά Πεδία (EMF) Η συγκεκριμένη συσκευή της Philips συμμορφώνεται με όλα τα πρότυπα που αφορούν τα ηλεκτρομαγνητικά πεδία (EMF). Εάν γίνει σωστός χειρισμός και σύμφωνος με τις οδηγίες του παρόντος... - Seite 34 Ελληνικα Σημείωση: Μην γεμίζετε τη δεξαμενή νερού πάνω από την ένδειξη ΜΑΧ. Σημείωση: Αν το νερό βρύσης στην περιοχή σας είναι πολύ σκληρό, σας συνιστούμε να χρησιμοποιήσετε απεσταγμένο νερό. Μην χρησιμοποιήσετε χημικά αφαλατωμένο νερό. Κλείστε το καπάκι στομίου πλήρωσης νερού (“κλικ”). Selecting the temperature and the steam settings Τύπος υφάσματος...
-
Seite 35: Χρήση Της Συσκευής
Ελληνικα θέση (δείτε τον πίνακα ‘Ρυθμίσεις θερμοκρασίας και ατμού’). (Εικ. 4) Ρυθμίστε τον κατάλληλο ατμό (δείτε τον πίνακα ‘Ρυθμίσεις θερμοκρασίας και ατμού’). Σημείωση: Βεβαιωθείτε ότι η ρύθμιση ατμού που επιλέγετε είναι κατάλληλη για την θερμοκρασία σιδερώματος που ρυθμίζετε. Τοποθετήστε το σίδερο όρθιο. Συνδέστε το φις σε πρίζα με γείωση. Η λυχνία θερμοκρασίας ανάβει. Όταν η λυχνία θερμοκρασίας σβήσει, περιμένετε για λίγο πριν αρχίσετε το σιδέρωμα. Κατά τη διάρκεια του σιδερώματος, η λυχνία θερμοκρασίας ανάβει κατά διαστήματα. Αυτό υποδεικνύει ότι το σίδερο θερμαίνεται για να φτάσει στην καθορισμένη θερμοκρασία. Χρήση της συσκευής Σημείωση: Το σίδερο μπορεί να βγάλει λίγο καπνό όταν το χρησιμοποιήσετε... - Seite 36 Ελληνικα Σιδέρωμα χωρίς ατμό Ρυθμίστε το διακόπτη ατμού στη θέση 0 (= χωρίς ατμό) (Εικ. 2). Set the recommended ironing temperature (see chapter ‘Preparing for use’, ‘Temperature and steam setting table’). Χαρακτηριστικά λειτουργία ψεκασμού Μπορείτε να χρησιμοποιήσετε τη λειτουργία ψεκασμού σε οποιαδήποτε θερμοκρασία για να υγράνετε το ύφασμα που θέλετε να σιδερώσετε. Αυτό θα σας βοηθήσει να αφαιρέσετε τις επίμονες τσακίσεις. Βεβαιωθείτε ότι υπάρχει αρκετό νερό στη δεξαμενή νερού. Πιέστε το κουμπί ψεκασμού αρκετές φορές για να υγρανθεί το ύφασμα που θα σιδερώσετε (Εικ. 5). λειτουργία...
-
Seite 37: Καθαρισμός Και Συντήρηση
Ελληνικα η θερμοκρασία είναι πολύ χαμηλή προκειμένου να εμποδίσει το νερό να στάξει από την πλάκα. Όταν συμβεί αυτό, θα ακούσετε ένα κλικ. αυτόματη διακοπή λειτουργίας (μόνο σε συγκεκριμένους τύπους) Η αυτόματη διακοπή λειτουργίας απενεργοποιεί αυτόματα το σίδερο εάν δεν έχει μετακινηθεί για μικρό χρονικό διάστημα. Η κόκκινη λυχνία αυτόματης διακοπής λειτουργίας αναβοσβήνει... - Seite 38 Ελληνικα Καθαρίστε την επάνω πλευρά του σίδερου με ένα υγρό πανί. Ξεπλένετε τακτικά τη δεξαμενή νερού με νερό. Αδειάστε τη δεξαμενή νερού αφού την ξεπλύνετε (Εικ. 9). Σύστημα προστασίας από τα άλατα διπλής ενέργειας (Double-Active Calc System) (μόνο σε συγκεκριμένους τύπους) Σημείωση: Refer to chapter ‘General description’ for the specific type numbers. Το σύστημα διπλής δράσης κατά των αλάτων αποτελείται από μία ταμπλέτα Anti-Calc (κατά των αλάτων) στο εσωτερικό της δεξαμενής νερού...
- Seite 39 Ελληνικα Κρατήστε το σίδερο πάνω από το νεροχύτη. Πιέστε το διακόπτη ρύθμισης ατμού στη θέση Calc-Clean (καθαρισμού αλάτων) και κρατήστε τον εκεί. Ανακινήστε απαλά το σίδερο εμπρός-πίσω. (Εικ. 12) Από την πλάκα του σίδερου θα βγει ατμός και καυτό νερό. Μαζί θα βγούν ακαθαρσία και νιφάδες αλάτων (εάν υπάρχουν). Αφήστε το διακόπτη ρύθμισης ατμού όταν έχει χρησιμοποιηθεί όλο το νερό της δεξαμενής. Επαναλάβετε τη διαδικασία Calc-Clean εάν το σίδερο συνεχίζει να περιέχει ακαθαρσία. Μετά τη διαδικασία Calc-Clean Συνδέστε ξανά το φις στην πρίζα και αφήστε το σίδερο να ζεσταθεί έτσι ώστε να στεγνώσει η πλάκα. Αποσυνδέστε το σίδερο από την πρίζα μόλις σβήσει η λυχνία θερμοκρασίας. Περάστε το σίδερο απαλά πάνω από ένα κομμάτι υφάσματος για να αφαιρέσετε οποιουσδήποτε λεκέδες από νερό έχουν δημιουργηθεί στην πλάκα. αποθήκευση Ρυθμίστε τον διακόπτη ατμού στη θέση 0, αποσυνδέστε το φις από την πρίζα και αφήστε το σίδερο να κρυώσει. Τυλίξτε το καλώδιο γύρω από το χώρο αποθήκευσης καλωδίου (Εικ. 13). Αποθηκεύετε το σίδερο όρθιο, σε ασφαλές και στεγνό μέρος. Περιβάλλον Στο τέλος της ζωής της συσκευής μην την πετάξετε μαζί με τα συνηθισμένα...
-
Seite 40: Εγγύηση & Σέρβις
πρόβλημα, παρακαλούμε επισκεφτείτε την ιστοσελίδα της Philips στη διεύθυνση www.philips.com ή επικοινωνήστε με το Κέντρο Εξυπηρέτησης Καταναλωτών της Philips στη χώρα σας (θα βρείτε το τηλέφωνο στο φυλλάδιο διεθνούς εγγύησης). Εάν δεν υπάρχει Κέντρο Εξυπηρέτησης Καταναλωτών στη χώρα σας, απευθυνθείτε στον... - Seite 41 Ελληνικα Πρόβλημα Αιτία Λύση Ο διακόπτης ατμού Θέστε το διακόπτη ρύθμισης ατμού στη θέση $ ή & έχει ρυθμιστεί στη θέση 0. (δείτε στο κεφάλαιο ‘Χρήση της συσκευής’, ενότητα ‘Σιδέρωμα με ατμό’). Το σίδερο δεν είναι Ρυθμίστε μια θερμοκρασία αρκετά ζεστό και/ή σιδερώματος...
- Seite 42 Ελληνικα Πρόβλημα Αιτία Λύση Νιφάδες Το σκληρό νερό Χρησιμοποιήστε τη αλάτων και δημιουργεί νιφάδες λειτουργία Calc-Clean ακαθαρσία αλάτων στο (καθαρισμού αλάτων) μία ή βγαίνουν από εσωτερικό της περισσότερες φορές [δείτε την πλάκα πλάκας. το κεφάλαιο ‘Καθαρισμός και κατά τη συντήρηση’, ενότητα διάρκεια...
- Seite 43 Ελληνικα Πρόβλημα Αιτία Λύση Έχετε βάλει κάποια Ξεπλύνετε τη δεξαμενή πρόσθετη ουσία νερού και μην βάζετε καμμία μέσα στη δεξαμενή πρόσθετη ουσία. νερού. Χρησιμοποιήσατε Ρυθμίστε το διακόπτη τη λειτουργία θερμοκρασίας σε μια βολής ατμού σε ρύθμιση μεταξύ 3 και ρύθμιση MAX.
- Seite 44 Ελληνικα Πρόβλημα Αιτία Λύση If the underside of Για να αποτρέψετε τη the ironing board is συγκέντρωση ατμού πάνω wet, wipe it dry with στη σιδερώστρα, a piece of dry cloth. χρησιμοποιείτε σιδερώστρα με μεταλλικό πλέγμα.
-
Seite 45: Français
FRançaIS Introduction Félicitations pour votre achat et bienvenue dans l’univers Philips ! Pour profiter pleinement de l’assistance Philips, enregistrez votre produit sur le site à l’adresse suivante : www.philips.com/welcome. Description générale (fig. 1) a Spray B Bouchon de l’orifice de remplissage... - Seite 46 écoule. Si le cordon d’alimentation est endommagé, il doit être remplacé par Philips, un Centre Service Agréé Philips ou un technicien qualifié afin d’éviter tout accident. Ne laissez jamais l’appareil sans surveillance pendant qu’il est branché.
-
Seite 47: Champs Électromagnétiques (Cem)
FRançaIS Champs électromagnétiques (CEM) Cet appareil Philips est conforme à toutes les normes relatives aux champs électromagnétiques (CEM). Il répond aux règles de sécurité établies sur la base des connaissances scientifiques actuelles s’il est manipulé correctement et conformément aux instructions de ce mode d’emploi. - Seite 48 FRançaIS Selecting the temperature and the steam settings Type de tissu Réglage de Réglage de Effet pressing température vapeur puissant Quantité & Coton & Laine S.O. Soie S.O. S.O. Fibres synthétiques (par ex. acrylique, nylon, polyamide, polyester) Consultez l’étiquette de lavage pour vérifier la température de repassage recommandée : Si vous ne connaissez pas la composition du tissu, repassez en commençant par la température la plus basse sur une partie interne de...
-
Seite 49: Utilisation De L'appareil
FRançaIS Branchez le cordon d’alimentation sur une prise secteur mise à la terre. Le voyant de température s’allume. Une fois le voyant de température éteint, patientez un court instant avant de commencer à repasser. Pendant le repassage, le voyant de température s’allume de temps en temps pour indiquer que le fer est en train de chauffer afin de se maintenir à la température sélectionnée. utilisation de l’appareil Remarque : Le fer peut fumer légèrement lors de la première utilisation. Ce phénomène est normal et cesse après un bref instant. Repassage à la vapeur Assurez-vous qu’il y a suffisamment d’eau dans le réservoir. Set the recommended ironing temperature (see chapter ‘Preparing for use’, ‘Temperature and steam setting table’). -
Seite 50: Système Anti-Goutte
FRançaIS Caractéristiques Fonction Spray Vous pouvez utiliser la fonction Spray quelle que soit la température afin d’humidifier l’article à repasser. L’élimination des faux plis est ainsi favorisée. Assurez-vous qu’il y a suffisamment d’eau dans le réservoir. Appuyez à plusieurs reprises sur le bouton du spray afin d’humidifier l’article à repasser (fig. 5). Fonction Jet de vapeur Un jet de vapeur puissant est utile pour enlever les faux plis les plus tenaces. -
Seite 51: Nettoyage Et Entretien
FRançaIS Fonction d’arrêt automatique (certains modèles uniquement) Cette fonction éteint automatiquement le fer s’il reste immobile pendant un certain temps. Le voyant d’arrêt automatique rouge clignote pour indiquer que le fer a été éteint par la fonction d’arrêt automatique. (fig. 8) Pour que le fer se réchauffe, procédez comme suit : Prenez le fer en main et déplacez-le légèrement. The automatic shut-off light stops flashing. Lorsque la température de la semelle est inférieure à la température de repassage réglée, le voyant de température s’allume. Si le voyant de température s’allume lorsque vous reprenez le fer, attendez que celui-ci s’éteigne avant de commencer à repasser. Remarque : S’il reste éteint, la semelle est à bonne température. Vous pouvez commencer le repassage. - Seite 52 FRançaIS Système anticalcaire double action (certains modèles uniquement) Remarque : Refer to chapter ‘General description’ for the specific type numbers. Ce système est constitué d’une tablette anticalcaire située dans le réservoir et de la fonction anticalcaire. La tablette anticalcaire empêche l’accumulation de dépôts sur les évents à...
-
Seite 53: Garantie Et Service
Si vous souhaitez obtenir des informations supplémentaires ou faire réparer l’appareil, ou si vous rencontrez un problème, rendez-vous sur le site Web de Philips à l’adresse www.philips.com ou contactez le Service Consommateurs Philips de votre pays (vous trouverez le numéro de téléphone correspondant sur le dépliant de garantie internationale). - Seite 54 Ce chapitre présente les problèmes les plus courants que vous pouvez rencontrer avec votre appareil. Si vous ne parvenez pas à résoudre le problème à l’aide des informations ci-dessous, contactez le Service Consommateurs Philips de votre pays. Problème Cause Solution Le fer à...
- Seite 55 FRançaIS Problème Cause Solution The steam Vous avez utilisé la Continuez à utiliser le fer en boost function fonction Jet de position horizontale et does not work vapeur trop souvent patientez quelques instants properly. pendant une courte avant d’utiliser de nouveau la période.
- Seite 56 FRançaIS Problème Cause Solution Des gouttes Vous n’avez pas Appuyez sur le bouchon d’eau tombent correctement fermé jusqu’à ce que vous entendiez sur le tissu lors le bouchon de un clic. du repassage. l’orifice de remplissage. La température Sélectionnez une température sélectionnée est de repassage appropriée au trop basse pour le...
- Seite 57 FRançaIS Problème Cause Solution Des gouttes Vous avez mis le fer Videz le réservoir d’eau et d’eau en position réglez la commande de s’écoulent de la horizontale alors vapeur sur la position 0 après semelle après que le réservoir utilisation. Rangez le fer sur le que le fer a d’eau n’était pas talon.
-
Seite 58: Italiano
ItalIano Introduzione Congratulazioni per l’acquisto e benvenuti in Philips! Per trarre il massimo vantaggio dall’assistenza Philips, registrate il vostro prodotto su www. philips.com/welcome. Descrizione generale (fig. 1) a Ugello spray B Tappo del foro di riempimento C Pulsante spray 8... - Seite 59 Nel caso in cui il cavo di alimentazione fosse danneggiato, dovrà essere sostituito presso i centri autorizzati Philips, i rivenditori specializzati oppure da personale debitamente qualificato, per evitare situazioni pericolose.
-
Seite 60: Campi Elettromagnetici (Emf)
ItalIano Campi elettromagnetici (EMF) Questo apparecchio Philips è conforme a tutti gli standard relativi ai campi elettromagnetici (EMF). Se utilizzato in modo appropriato seguendo le istruzioni contenute nel presente manuale utente, l’apparecchio consente un utilizzo sicuro come confermato dai risultati scientifici attualmente disponibili. - Seite 61 ItalIano Selecting the temperature and the steam settings Tipo di tessuto Impostazione Impostazione Colpo di temperatura vapore vapore Lino Sì & Cotone Sì & Lana N.D. Seta N.D. N.D. Tessuti sintetici (es. acrilico, nylon, poliammide, poliestere) Verificate sull’etichetta del capo la temperatura di stiratura richiesta: Se non si conosce il tessuto del capo da stirare, si consiglia di stirare un angolo nascosto per determinare la temperatura più...
-
Seite 62: Modalità D'uso Dell'apparecchio
ItalIano Quando la spia della temperatura si spegne, aspettate qualche minuto prima di iniziare a stirare. Durante la stiratura la spia della temperatura si accende, di quando in quando, per indicare che il ferro si sta riscaldando per mantenersi alla temperatura impostata. Modalità... - Seite 63 ItalIano Verificate il livello di riempimento del serbatoio dell’acqua. Premete più volte il pulsante spray per inumidire il capo da stirare (fig. 5). Colpo di vapore Il potente colpo di vapore consente di eliminare le pieghe più ostinate. La funzione vapore supplementare funziona solo a temperature comprese tra 3 e MAX. Premete e rilasciate il pulsante colpo di vapore (fig. 6).
-
Seite 64: Pulizia E Manutenzione
ItalIano Se la spia arancione si accende dopo aver mosso il ferro, attendete che si spenga prima di iniziare a stirare. Nota Se la spia arancione non si accende dopo aver mosso il ferro, significa che la piastra ha mantenuto la temperatura e che quindi il ferro è pronto per l’uso. - Seite 65 ItalIano fuoriuscita di pezzi di calcare dalla piastra quando stirate), ricordate di usare la funzione Calc-Clean con maggior frequenza. Verificate che l’apparecchio sia scollegato dalla presa di corrente. Impostate il regolatore di vapore in posizione 0. Riempite completamente il serbatoio dell’acqua. Non aggiungete aceto o altri agenti disincrostanti nel serbatoio dell’acqua. Impostate il termostato su MAX (fig. 11). Inserite la spina in una presa di messa a terra.
-
Seite 66: Tutela Dell'ambiente
Per assistenza o informazioni e in caso di problemi, visitate il sito Web Philips all’indirizzo www.philips.com oppure contattate il Centro Assistenza Clienti Philips del vostro paese (per conoscere il numero di telefono consultate l’opuscolo della garanzia). Se nel vostro paese non esiste un Centro Assistenza Clienti, rivolgetevi al vostro rivenditore Philips. - Seite 67 ItalIano Problema Causa Soluzione Il termostato è Impostate il termostato sulla impostato su MIN. posizione richiesta. Il ferro non Non c’è Riempite il serbatoio dell’acqua emette vapore. abbastanza acqua (si veda il capitolo nel serbatoio. “Predisposizione dell’apparecchio”, sezione “Riempimento del serbatoio dell’acqua”).
- Seite 68 ItalIano Problema Causa Soluzione Il ferro non è Selezionate una temperatura abbastanza caldo. indicata per la funzione colpo di vapore (da 3 a MAX). Riponete il ferro in posizione verticale e aspettate che la spia della temperatura si spenga prima di riutilizzare la funzione. Durante la L’acqua dura Utilizzate la funzione Calc-...
- Seite 69 ItalIano Problema Causa Soluzione La temperatura Selezionate una temperatura selezionata è indicata per la stiratura a troppo bassa per la vapore (da 2 a MAX). stiratura a vapore. Riponete il ferro in posizione verticale e aspettate che la spia della temperatura si spenga prima di iniziare a stirare.
- Seite 70 ItalIano Problema Causa Soluzione Durante la These wet spots Iron wet spots without steam stiratura may be caused by from time to time to dry them. rimangono steam that has zone bagnate condensed onto sui tessuti. the ironing board. If the underside of Per evitare che il vapore si the ironing board is condensi sull’asse da stiro,...
-
Seite 71: Nederlands
Inleiding Gefeliciteerd met uw aankoop en welkom bij Philips! Als u volledig wilt profiteren van de ondersteuning die Philips biedt, registreer uw product dan op www.philips.com/welcome. Algemene beschrijving (fig. 1) a Sproeikop B Klepje van vulopening C Sproeiknop 8... - Seite 72 Indien het netsnoer beschadigd is, moet u het laten vervangen door Philips, een door Philips geautoriseerd servicecentrum of personen met vergelijkbare kwalificaties om gevaar te voorkomen. Laat het apparaat nooit onbeheerd achter terwijl het op netspanning is aangesloten.
-
Seite 73: Elektromagnetische Velden (Emv)
Elektromagnetische velden (EMV) Dit Philips-apparaat voldoet aan alle richtlijnen met betrekking tot elektromagnetische velden (EMV). Mits het apparaat op de juiste wijze en volgens de instructies in deze gebruiksaanwijzing wordt gebruikt, is het veilig te gebruiken volgens het nu beschikbare wetenschappelijke bewijs. - Seite 74 nEDERlanDS Selecting the temperature and the steam settings Stofsoort Temperatuurstand Stoomstand Extra stoomstoot Linnen Max. & Katoen & N.V.T. Zijde N.V.T. N.V.T. Synthetische stoffen (bijv. acryl, nylon, polyamide, polyester) Raadpleeg het wasetiket van het te strijken artikel voor de juiste strijktemperatuur: Als u niet zeker weet van welk materiaal het artikel gemaakt is, probeer de gekozen strijktemperatuur dan eerst uit op een plek die niet zichtbaar...
-
Seite 75: Het Apparaat Gebruiken
nEDERlanDS Het temperatuurlampje gaat aan. Wanneer het temperatuurlampje is uitgegaan, wacht dan even voordat u begint te strijken. Tijdens het strijken gaat het temperatuurlampje af en toe aan om aan te geven dat het strijkijzer aan het opwarmen is naar de ingestelde temperatuur. - Seite 76 nEDERlanDS Druk een paar keer op de sproeiknop om de stof vochtig te maken (fig. 5). Stoomstootfunctie Een krachtige stoomstoot helpt hardnekkige kreuken te verwijderen. De extra-stoomfunctie werkt alleen op temperatuurstanden tussen 3 en MAX. Druk op de stoomstootknop en laat deze weer los (fig. 6). Verticale stoomstoot U kunt de stoomstootfunctie ook gebruiken als u het strijkijzer verticaal houdt.
-
Seite 77: Schoonmaken En Onderhoud
nEDERlanDS Gaat het temperatuurlampje branden nadat u het strijkijzer heen en weer hebt bewogen, wacht dan totdat het is uitgegaan voordat u begint te strijken. Opmerking: Gaat het temperatuurlampje niet branden nadat u het strijkijzer heen en weer hebt bewogen, dan heeft de zoolplaat nog de juiste temperatuur en is het strijkijzer klaar voor gebruik. - Seite 78 nEDERlanDS Calc-Clean-functie Gebruik de Calc-Clean-functie om de twee weken. Als het water in uw woongebied erg hard is (d.w.z. wanneer er tijdens het strijken schilfertjes uit de zoolplaat komen), moet u de Calc-Clean-functie vaker gebruiken. Zorg ervoor dat de stekker uit het stopcontact is. Zet de stoomregelaar op stand 0.
-
Seite 79: Garantie & Service
Als u service of informatie nodig hebt of als u een probleem hebt, bezoek dan de Philips-website www.philips.nl, of neem contact op met het Philips Consumer Care Centre in uw land (u vindt het telefoonnummer in het ‘worldwide guarantee’-vouwblad). Als er geen Consumer Care Centre in uw land is, ga dan naar uw Philips-dealer. - Seite 80 nEDERlanDS Probleem Oorzaak Oplossing Stel de temperatuurregelaar temperatuurregelaar in staat op MIN. op de vereiste strijktemperatuur. Het strijkijzer Er zit niet voldoende Vul het waterreservoir produceert geen water in het (zie ‘Het waterreservoir stoom. waterreservoir. vullen’ in hoofdstuk ‘Klaarmaken voor gebruik’).
- Seite 81 nEDERlanDS Probleem Oorzaak Oplossing Het strijkijzer is niet Stel een strijktemperatuur heet genoeg. in waarbij u de stoomstootfunctie kunt gebruiken (3 tot MAX). Plaats het strijkijzer op zijn achterkant en wacht tot het temperatuurlampje is uitgegaan voordat u de stoomstootfunctie gebruikt.
- Seite 82 nEDERlanDS Probleem Oorzaak Oplossing De ingestelde Stel een strijktemperatuur temperatuur is te laag in die geschikt is voor voor stoomstrijken. stoomstrijken ( 2 tot MAX). Plaats het strijkijzer op zijn achterkant en wacht tot het temperatuurlampje is uitgegaan voordat u gaat strijken.
- Seite 83 nEDERlanDS Probleem Oorzaak Oplossing Tijdens het These wet spots may Iron wet spots without strijken ontstaan be caused by steam steam from time to time er natte plekken that has condensed to dry them. op de kleding. onto the ironing board.
-
Seite 84: Türkçe
Giriş Ürünümüzü satın aldığınız için teşekkür ederiz; Philips’e hoş geldiniz! Philips’in sunduğu destekten tam faydalanmak için lütfen ürününüzü şu adresten kaydedin: www.philips.com/welcome. Genel açıklamalar (Şek. 1) a Sprey başlığı B Doldurma ağzı kapağı C Sprey düğmesi 8 D Buhar ayar düğmesi b= Kireç... -
Seite 85: İlk Kullanımdan Önce
Fiş, elektrik kablosu veya cihazın kendisinde gözle görülür bir hasar varsa, cihaz düşmüşse veya cihazda sızıntı varsa, cihazı kullanmayın. Cihazın elektrik kablosu hasarlıysa, bir tehlike oluşturmasını önlemek için mutlaka Philips’in yetki verdiği bir servis merkezi veya benzer şekilde yetkilendirilmiş kişiler tarafından değiştirilmesini sağlayın. Cihaz elektriğe bağlıyken asla gözetimsiz bırakmayın. - Seite 86 tüRkçE Ütünün maksimum sıcaklığa kadar ısınmasını bekleyin ve taban üzerinde kalan tortuyu temizlemek için ütüyü birkaç dakika boyunca nemli bir bez parçası üzerinden geçirin. Cihazın kullanıma hazırlanması Su haznesinin doldurulması Su haznesine parfüm, sirke, kola, kireç çözücü ürünler, ütülemeye yardımcı ürünler, kimsayasl olarak kireçten arındırılmış su ve diğer kimyasal maddeler koymayın. Cihazı kapatarak fişini prizden çekin. Buhar kontrolünü 0 konumuna getirin (= buharsız) (Şek. 2). Doldurma deliğinin kapağını açın. Ütüyü eğin ve su haznesini musluğun altında maksimum seviyeye kadar doldurun (Şek. 3). Dikkat: Su haznesini MAX (MAKSİMUM) seviyesine kadar doldurun. Dikkat: Bulunduğunuz bölgedeki musluk suyu çok sertse saf su kullanmanızı tavsiye ederiz. Kireci kimyasal olarak temizlenmiş su kullanmayın. Doldurma deliğinin kapağını kapatın (‘klik’).
- Seite 87 tüRkçE Kumaş türü Sıcaklık Buhar ayarı Buhar ayarları püskürtme Sentetik kumaşlar (örn. geçersiz akrilik, naylon, polyamid, polyester) Gereken ütüleme sıcaklığını öğrenmek için yıkama talimatları etiketini kontrol edin: Elbisenin ne tür kumaştan yapıldığını bilmiyorsanız, elbiseyi giydiğinizde görünmeyen bir bölümünü ütüleyerek doğru ütüleme sıcaklığını belirleyin. İpek, yünlü...
- Seite 88 tüRkçE Buharlı ütüleme Su haznesinde yeterince su olduğundan emin olun. Set the recommended ironing temperature (see chapter ‘Preparing for use’, ‘Temperature and steam setting table’). Uygun buhar ayarını seçin. Buhar ayarının seçilen ütü sıcaklığına uygun olduğundan emin olun: $ minimum buhar için (sıcaklık ayarları 2ve3). & maksimum buhar için (sıcaklık ayarları 3 - MAX). Dikkat: Ayarlanan sıcaklığa ulaştıktan sonra ütü buhar çıkarmaya başlar. Buharsız ütüleme Buhar kontrolünü 0 konumuna getirin (= buharsız) (Şek. 2). Set the recommended ironing temperature (see chapter ‘Preparing for use’, ‘Temperature and steam setting table’). Özellikler Püskürtme işlevi Püskürtme özelliğini malzemeyi nemlendirmek için her sıcaklıkta kullanabilirsiniz.
- Seite 89 tüRkçE Dikey şok buhar Buhar püskürtme fonksiyonu, ütüyü dik pozisyonda tuttuğunuz zaman da kullanılabilir. Bu işlem askıdaki elbiselerde, perdelerde vb. bulunan kırışıklıkları yok etmek için kullanılır. Ütüyü dik konumda tutun ve buhar püskürtme düğmesine basıp bırakın (Şek. 7). Asla buharı insanlara yöneltmeyin. Damla tıpası Bu ütüde, damlama durdurma özelliği bulunmaktadır: Sıcaklık, suyun tabandan damlamasını engelleyemeyecek kadar düşük olduğunda, ütü buhar üretmeyi otomatik olarak durdurur.
-
Seite 90: Temizlik Ve Bakım
tüRkçE Temizlik ve bakım temizleme Buhar ayar düğmesini 0 konumuna getirin, fişini prizden çekin ve ürünün soğumasını bekleyin. Tortuları ve tabandan çıkan diğer artıkları nemli bir bez ve aşındırıcı olmayan (sıvı) bir temizlik maddesiyle silin. Ütü tabanının düzlüğünü koruması için, metal cisimlerle sert temasından kaçının. Ütü tabanını temizlemek için ovma bezleri, sirke ve başka kimyasallar kullanmayın. Ütünün üst kısmını nemli kumaşla silin. Su haznesini düzenli olarak su ile durulayın. Duruladıktan sonra su haznesini boşaltın (Şek. 9). çift Etkili kireç Sistemi (sadece belirli modellerde) Dikkat: Refer to chapter ‘General description’ for the specific type numbers. Çift Etkili Kireç Sistemi, su haznesinin içindeki bir Kireç Önleyici tablet ve Kireç... - Seite 91 tüRkçE Sıcaklık kadranını MAX ayarına getirin (Şek. 11). Cihazın fişini topraklı prize takınız. Sıcaklık ışığı söndüğünde ütüyü prizden çekin. Ütüyü lavabo üzerinde tutun. Buhar kontrolünü Kireç Temizleme konumuna getirin ve orada tutun. Ütüyü hafifçe aşağı yukarı sallayın. (Şek. 12) Buhar ve kaynar su tabandan dışarı akar. Varsa diğer yabancı maddeler ve tortular da suyla dışarı atılır. Haznenin içindeki tüm su kullanıldıktan hemen sonra buhar kontrolü düğmesini bırakın. Ütüde hala tortu varsa, kireç temizleme işlemini tekrarlayın. Kireç Temizleme işleminden sonra Fişi prize takın ve ütü tabanının kuruması için ütünün ısınmasını bekleyin. Sıcaklık ışığı söndüğünde ütüyü prizden çekin. Tabanda birikmiş olabilecek su lekelerini temizlemek için ütüyü eski bir bez parçası üzerinde hafifçe hareket ettirin. Saklama Buhar ayar düğmesini 0 konumuna getirin, fişini prizden çekin ve ürünün soğumasını bekleyin. Elektrik kablosunu kablo saklama bölümünün etrafına sarın (Şek. 13). Ütüyü arka kısmının üzerinde, kuru ve güvenli bir zeminde saklayın. çevre Kullanım ömrü sonunda, cihazı normal ev atıklarınızla birlikte atmayın; bunun yerine, geri dönüşüm için resmi toplama noktalarına teslim edin.
-
Seite 92: Garanti Ve Servis
Servise ya da daha fazla bilgiye ihtiyaç duyarsanız veya bir sorunla karşılaşırsanız, www.philips.com.tr adresindeki Philips Internet sitesini ziyaret edin veya ülkenizdeki Philips Müşteri Hizmet Merkezi ile iletişim kurun (telefon numarasını dünya çapında geçerli garanti belgesinde bulabilirsiniz). Ülkenizde Müşteri Hizmet Merkezi yoksa, yerel Philips bayisine başvurun. - Seite 93 tüRkçE Sorun Neden Çözüm Ütü yeterince Buharlı ütüleme için uygun bir ütü sıcak değil ve/ sıcaklığını ayarlayın ( 2 - MAX veya damlama- aralığında). Ütüyü arka kısmı durdurucu üzerine yerleştirin ve ütülemeye özelliği aktif hale başlamadan önce sıcaklık lambası getirilmemiş. sönene kadar bekleyin.
- Seite 94 tüRkçE Sorun Neden Çözüm Ütüleme Doldurma Klik sesini duyana kadar kapağı sırasında kumaş deliğinin kapağı basılı tutun. üzerine su uygun şekilde damlıyor. kapatılmamış. Ayarlanan Buharlı ütüleme için uygun bir ütü sıcaklık, buharlı sıcaklığını ayarlayın ( 2 - MAX ütüleme için çok aralığında).
- Seite 95 tüRkçE Sorun Neden Çözüm Ütüleme These wet spots Iron wet spots without steam sırasında kumaş may be caused from time to time to dry them. üzerinde ıslak by steam that noktalar has condensed oluşuyor. onto the ironing board. If the underside Buharın ütü...
- Seite 100 4239.000.7160.1...