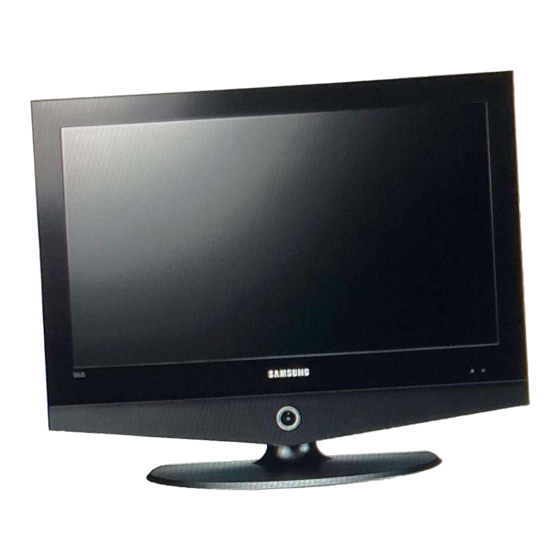
Herunterladen Inhalt Inhalt Diese Seite drucken
Inhaltsverzeichnis

Werbung

Verfügbare Sprachen
  • DE

Verfügbare Sprachen

  • DEUTSCH, seite 55
Contact SAMSUNG WORLD-WIDE
If you have any questions or comments relating to Samsung products,
please contact the SAMSUNG customer care centre.
Country
Customer Care Center
BELGIUM
02 201 2418
CZECH REPUBLIC
844 000 844
DENMARK
38 322 887
FINLAND
09 693 79 554
FRANCE
08 25 08 65 65 (€ 0,15/Min)
GERMANY
01805 - 121213 (€ 0,12/Min)
HUNGARY
06 40 985 985
ITALIA
199 153 153
LUXEMBURG
02 261 03 710
NETHERLANDS
0900 20 200 88 (€ 0.10/Min)
NORWAY
231 627 22
POLAND
0 801 801 881
PORTUGAL
80 8 200 128
RUSSIA
8-800-200-0400
SLOVAKIA
0850 123 989
SPAIN
902 10 11 30
SWEDEN
08 585 367 87
U.K
0870 242 0303
UKRAINE
8-800-502-0000
Web Site
www.samsung.com/be
www.samsung.com/cz
www.samsung.com/dk
www.samsung.com/fi
www.samsung.com/fr
www.samsung.de
www.samsung.com/hu
www.samsung.com/it
www.samsung.lu
www.samsung.com/nl
www.samsung.com/no
www.samsung.com/pl
www.samsung.com/pt
www.samsung.ru
www.samsung.com/sk
www.samsung.com/es
www.samsung.com/se
www.samsung.com/uk
www.samsung.com/ur
BN68-00927H-00
Owner's Instructions
Before operating the unit,
please read this manual thoroughly,
and retain it for future reference.
ON-SCREEN MENUS
PC DISPLAY
PICTURE IN PICTURE (PIP)
TELETEXT
Register your product at www.samsung.com/global/register
LCD TV
LE32R3

Werbung

Inhaltsverzeichnis
loading

Inhaltszusammenfassung für Samsung LE32R3

  • Seite 1 LCD TV LE32R3 Contact SAMSUNG WORLD-WIDE If you have any questions or comments relating to Samsung products, please contact the SAMSUNG customer care centre. Country Customer Care Center Web Site BELGIUM 02 201 2418 www.samsung.com/be CZECH REPUBLIC 844 000 844 www.samsung.com/cz...
  • Seite 2 La visualizzazione prolungata di immagini fisse da videogiochi e PC può causare la visualizzazione di immagini residue parziali. Per evitare questo problema, ridurre la ‘luminosità’ e il ‘contrasto’ mentre si visualizzano immagini fisse. © 2006 Samsung Electronics Co., Ltd. All rights reserved.
  • Seite 3: Inhaltsverzeichnis

    Contents CONNECTING AND PREPARING YOUR TV SETTING THE TIME List of Parts..................2 Setting and Displaying the Current Time ......17 Installing the Stand ............... 2 Setting the Sleep Timer............18 Installing the Wall Mount Kit ..........2 Switching the Television Viewing the Control Panel ............
  • Seite 4: List Of Parts

    Wall Mount items. Contact a technician for assistance when installing the wall mounted bracket. Samsung Electronics is not responsible for any damage to the product or injury to yourself or others if you elect to install the TV on your own.
  • Seite 5: Viewing The Control Panel

    Viewing the Control Panel The product colour and shape may vary depending on the model. SOURCE Toggles between all the available input sources Press to change channels. (TV, Ext.1, Ext.2, AV, S-Video, Component, PC, In the on-screen menu, use the buttons HDMI).
  • Seite 6: Viewing The Connection Panel

    Viewing the Connection Panel [Rear Panel Jacks] Power Input Whenever you connect an external device to your TV, make sure that power on the unit is turned off. When connecting an external device, match the colour of the connection terminal to the cable. English-4...
  • Seite 7 Connecting an Aerial or Cable Television Network To view television channels correctly, a signal must be received by the set from one of the following sources: - An outdoor aerial / A cable television network / A satellite network Connecting HDMI/DVI - Supports connections between HDMI-connection-enabled AV devices (Set-Top Boxes, DVD players, AV receivers and digital TVs).
  • Seite 8: Viewing The Remote Control

    Viewing the Remote Control Television Standby button Selects the PC mode directly Number buttons for direct Automatic Power-off channel access : Next channel One/Two-digit channel selection : Previous channel Selects the TV mode directly Exit the OSD Control the cursor in the menu It display “Channel Manager”...
  • Seite 9: Switching On And Off

    Switching On and Off The mains lead is attached to the rear of your set. Plug the mains lead into an appropriate socket. The standby indicator lights up on the front of the set. Press the button on the front of the set. You also can press the POWER button or the TV button on the remote control to turn the TV on.
  • Seite 10: Storing Channels Automatically

    If you want to reset this feature... Press the MENU button to display the menu. Press the button to select “Setup”, then press the ENTER button. Press the ENTER button again, to select “Plug & Play”. The message to “Start Plug & Play” is displayed. - Storing Channels Automatically - Storing Channels Manually Storing Channels Automatically...
  • Seite 11: Setting The Channel Manager

    Press the button to select “Colour System”, then press the ENTER button. Select the colour standard required by pressing the button then, press the ENTER button. Press the button to select “Sound System”, then press the ENTER button. Select the sound standard required by pressing the button, then press the ENTER button.
  • Seite 12: Activating The Child Lock

    Activating the Child Lock This feature allows you to prevent unauthorized users, such as children, from watching unsuitable programmes by muting out video and audio. Child Lock cannot be released using the buttons on the side. Only the remote control can release the Child Lock setting, so keep the remote control away from children.
  • Seite 13: Assigning Channels Names

    Assigning Channels Names Channel names will be assigned automatically when channel information is broadcast. These names can be changed, allowing you to assign new names. Press the MENU button to display the menu. Press the button to select “Channel”, then press the ENTER button. Press the button to select “Name”, then press the ENTER button.
  • Seite 14: Changing The Picture Standard

    Changing the Picture Standard You can select the type of picture which best corresponds to your viewing requirements. Press the MENU button to display the menu. Press the button to select “Picture”, then press the ENTER button. Press the ENTER button again, to select “Mode”. Press the ENTER button again.
  • Seite 15: Resetting The Picture Settings To The Factory Defaults

    Resetting the Picture Settings to the Factory Defaults You can return to the factory defaults picture settings. To select the desired picture effect, follow the “Changing the Picture Standard” instructions number 1 to 3 on page 12. Press the button to select “Reset”, then press the ENTER button. Press the EXIT button to exit.
  • Seite 16: Dnie Demo (Digital Natural Image Engine)

    DNIe Demo (Digital Natural Image engine) Samsung’s new technology brings you more detailed images with contrast and white enhancement. A new image compensation algorithm gives viewers brighter and clearer images. DNIe technology will match every signal to your eyes. You can see how DNIe improves the picture by setting DNIe Demo mode to On.
  • Seite 17: Changing The Sound Standard

    Press the button to select “Programme” and then press the ENTER button. You can select the channel that you want to view through sub picture by pressing the button. Press the ENTER button. The “Programme” can be active when the sub picture is set to TV. Press the EXIT button to exit.
  • Seite 18: Setting The Trusurround Xt (Srs Tsxt)

    Setting the TruSurround XT (SRS TSXT) TruSurround XT is a patented SRS technology that solves the problem of playing 5.1 multichannel content over two speakers. TruSurround delivers a compelling,virtual surround sound experience through any two-speaker playback system, including internal television speakers. It is fully compatible with all multichannel formats.
  • Seite 19: Listening To The Sound Of The Sub Picture

    Listening to the Sound of the Sub Picture During the PIP features activation, you can listen to the sound of the sub picture. Press the MENU button to display the menu. Press the button to select “Sound”, then press the ENTER button. Press the button to select “Sound Select”, then press the ENTER button.
  • Seite 20: Setting The Sleep Timer

    Setting the Sleep Timer You can select a time period of between 30 and 180 minutes after which the television automatically switches to standby mode. Press the MENU button to display the menu. Press the button to select “Setup”, then press the ENTER button. Press the button to select “Time”, then press the ENTER button.
  • Seite 21: Choosing Your Language

    Choosing Your Language When you start using your set for the first time, you must select the language which will be used for displaying menus and indications. Press the MENU button to display the on-screen menu. Press the button to select “Setup”, then press the ENTER button. Press the button to select “Language”, then press the ENTER button.
  • Seite 22: Using The Energy Saving Feature

    Using the Energy Saving Feature This function adjusts the brightness of the TV so as to reduce power consumption. When you watching TV at night, set the "Energy Saving " mode option to "High" so as to reduce the dazzling of your eyes as well as the power consumption. Press the MENU button to display the on-screen menu.
  • Seite 23: Using The Teletextfeature

    Teletext Decoder Most set channels carry “ Teletext”, pages of written information that provide information such as: Television programme times. News bulletins and Weather forecasts. Sports results. Subtitles for the hard of hearing. The Teletextpages are organized according to six categories: Part Contents Selected page number.
  • Seite 24: Selecting A Specific Teletext Page

    Selecting a Specific Teletext Page Press the number buttons on the remote control to enter the page number directly: Enter the three-digit page number listed in the contents by pressing the corresponding numeric buttons. If the selected page is linked with several secondary pages, the secondary pages are displayed in sequence.
  • Seite 25: Setting Up Your Pc Software (Based On Windows Xp)

    Windows and your particular video card. Even if your actual screens look different, the same, basic set-up information will apply in almost all cases. (If not, contact your computer manu- facturer or Samsung Dealer.) First, click on “Control Panel” on the Windows start menu.
  • Seite 26: Setting The Pc

    Setting the PC Coarse and Fine Tuning of the Image (Image Lock): The purpose of picture quality adjustment is to remove or reduce picture noise. If the noise is not removed by Fine-tuning alone, then adjust the frequency as best as possible (coarse) and Fine-tune again. After the noise has been reduced, re-adjust the picture so that it is aligned on the center of screen.
  • Seite 27: Using The Anti-Theft Kensington Lock

    Using the Anti-Theft Kensington Lock The Kensington lock is a device used to physically fix the system when using it in a public place. The locking device has to be purchased separately. The appearance and locking method may differ from the illustration depending on the manufacturer.
  • Seite 28: Technical And Environmental Specifications

    Technical and Environmental Specifications Model Name LE32R3 Screen Size (Diagonal) 32 inch Power Supply AC 220-240 V 50 Hz Power Consumption 152 W PC Resolution 1360 x 768 @ 60 Hz Sound Output 10 W X 2 Dimension (WxDxH) Body...
  • Seite 29 Table des matières CONNEXION ET PREPARATION DE VOTRE TELEVISEUR REGLAGE DE L’HEURE Liste de pièces ................2 Réglage et affichage de l’heure ..........17 Installation du support ..............2 Réglage de la minuterie de mise en veille ...... 18 Installation du kit de montage mural........2 Marche et arrêt automatique du téléviseur ....
  • Seite 30: Liste De Pièces

    Faites appel à un technicien pour obtenir de l’assistance lors de l’installation du support mural. Samsung Electronics n’est pas responsable de tout dommage au produit ou toute blessure sur vous-même ou une autre personne si vous choisissez d’installer le téléviseur vous-même.
  • Seite 31: Présentation Du Panneau De Commande

    Présentation du panneau de commande La couleur et la forme du produit peuvent varier en fonction du modèle. SOURCE Bascule entre toutes les sources d’entrée Pour changer de canal. disponibles. (TV, Ext.1, Ext.2, AV, S-Vidéo, Composant, Dans le menu à l’écran, utilisez les boutons PC, HDMI).
  • Seite 32: Présentation Du Panneau De Branchement

    Présentation du panneau de branchement [Prises du panneau arrière] [Prises du panneau arrière] Lorsque vous raccordez un appareil externe au téléviseur, assurez-vous que l’appareil est arrêté. Lorsque vous connectez un périphérique externe, faites correspondre les couleurs du terminal de connexion et du câble. Français-4...
  • Seite 33 Branchement à un réseau de télévision câblé ou hertzien Afin d’afficher correctement les canaux de télévision, un signal doit être reçu par le téléviseur/moniteur depuis l’une des sources suivantes: - Une antenne extérieure / Un réseau de télévision câblée / Un réseau satellite Branchement HDMI/DVI - Prend en charge les connexions entre des périphériques audio/vidéo compatibles HDMI (boîtiers décodeurs, lecteurs DVD, récepteurs AV et moniteurs).
  • Seite 34: Présentation De La Télécommande

    Présentation de la télécommande Bouton veille du téléviseur Arrêt automatique Boutons numériques d’accès direct aux : Chaîne suivante chaînes Sélection des effets : Chaîne précédente visuels Permet de quitter le menu à l’écran Sélection de canaux à 1 ou 2 chiffres Déplacement du curseur dans le menu Permet d’accéder directement au mode TV Affiche les informations sur la...
  • Seite 35: Mise En Marche Et Arrêt

    Mise en marche et arrêt Le câble relié au secteur est fixé à l’arrière du téléviseur/moniteur. Relier le câble principal à la prise appropriée. L’indicateur de veille situé à l’avant du téléviseur s’allume. Appuyez sur le bouton à l’avant du téléviseur. POWER Vous pouvez également appuyer sur le bouton ou le bouton TV...
  • Seite 36: Mémorisation Automatique Des Chaînes

    Pour réinitialiser cette fonction… Appuyez sur le bouton MENU pour afficher le menu. Appuyez sur le bouton pour sélectionner “Configuration”, puis sur la touche ENTER Appuyez de nouveau sur le bouton ENTER pour sélectionner “Plug & Play”. Le message "Démarrer Plug & Play" s’affiche. - Mémorisation automatique des chaînes - Mémorisation manuelle des chaînes Mémorisation automatique des chaînes...
  • Seite 37: Réglage De Gestionnaire De Chaînes

    Appuyez sur le bouton pour sélectionner “Système Sonore”, puis sur la touche ENTER. Sélectionnez la norme audio voulue en appuyant de façon répétée sur la touche ou , puis sur la touche ENTER. S’il n’y a aucun son ou si le son est anormal, re-sélectionnez la norme Son requise. Si vous connaissez le numéro de la chaîne à...
  • Seite 38: Activation De La Sécurité Enfant

    Activation de la sécurité enfant Cette fonction vous permet d’empêcher que des utilisateurs non autorisés, tels que des enfants, regardent des programmes inappropriés en désactivant la vidéo et l’audio. La sécurité enfant ne peut pas être désactivée à l’aide des boutons du panneau latéral. La télécommande étant le seul moyen de désactiver la sécurité...
  • Seite 39: Attribution De Noms Aux Canaux

    Attribution de noms aux canaux Les noms de chaînes sont attribués automatiquement lorsque les informations des chaînes sont émises. Ces noms peuvent être changés, vous autorisant à attribuer de nouveaux noms. Appuyez sur le bouton MENU pour afficher le menu. Appuyez sur le bouton pour sélectionner “Canal”, puis sur la touche ENTER.
  • Seite 40: Modification De L'image Standard

    Modification de l’image standard Vous pouvez sélectionner le type d’image qui correspond le mieux à vos exigences d’affichage. Appuyez sur le bouton MENU pour afficher le menu. Appuyez sur le bouton pour sélectionner "Image”, puis sur la touche ENTER. Appuyez de nouveau sur le bouton ENTER pour sélectionner "Mode”. Appuyez sur le bouton ENTER.
  • Seite 41: Rétablir Les Paramètres De Réglage De L'image D'usine

    Rétablir les paramètres de réglage de l’image d’usine. Vous pouvez rétablir les réglages de l’image définis par défaut en usine. Pour sélectionner l’effet visuel souhaité, observez les instructions 1 à 3 dans la section “Modification de l’image standard” à la page 12. Appuyez sur le bouton pour sélectionner “Réinitialiser”, puis sur la touche ENTER.
  • Seite 42: Dnle Démo (Digital Natural Image Engine)

    DNle Démo (Digital Natural Image engine) La nouvelle technologie de Samsung vous apporte des images plus détaillées avec une amélioration des contrastes et des blancs. Le nouvel algorithme de compensation d’images vous donne une image plus lumineuse et plus claire. La technologie DNIe adaptera tous les signaux à votre vue, quels qu’ils soient.
  • Seite 43: Changement De La Norme Son

    Appuyez sur le bouton EXIT pour quitter le menu. Il est possible que l’image affichée dans la fenêtre PIP soit légèrement déformée lorsque vous utilisez la fenêtre principale pour diffuser un jeu vidéo ou du karaoké. Source: Permet de sélectionner la source de l’image secondaire. Intervertir: Pour faire alterner l’image principale et l’image secondaire.
  • Seite 44: Paramétrage De La Technologie Trusurround Xt (Srs Tsxt)

    Paramétrage de la technologie TruSurround XT (SRS TSXT) La technologie TruSurround XT est une technologie SRS brevetée qui répond au problème de lecture des contenus multicanaux 5.1 sur deux haut-parleurs. La technologie TruSurround garantit un son surround virtuel d’une exceptionnelle qualité...
  • Seite 45: Ecoute Du Son Accompagnant L'image Secondaire

    Ecoute du son accompagnant l’image secondaire Lorsque la fonction PIP est activée, vous pouvez écouter le son accompagnant l’image secondaire. Appuyez sur le bouton MENU pour afficher le menu. Appuyez sur le bouton pour sélectionner “Son”, puis sur la touche ENTER. Appuyez sur le bouton pour sélectionner “Sélection du son”, puis sur la touche ENTER.
  • Seite 46: Réglage De La Minuterie De Mise En Veille

    Réglage de la minuterie de mise en veille Vous pouvez sélectionner une durée comprise entre 30 et 180 minutes à l’issue de laquelle le téléviseur passera automatiquement en mode veille. Appuyez sur le bouton MENU pour afficher le menu. Appuyez sur le bouton pour sélectionner “Configuration”, puis sur la touche ENTER.
  • Seite 47: Choix De La Langue

    Choix de la langue Lorsque vous utilisez le téléviseur pour la première fois, vous devez sélectionner la langue utilisée pour afficher les menus et les indications. Appuyez sur le bouton MENU pour afficher le menu affiché à l’écran. Appuyez sur le bouton pour sélectionner “Configuration”, puis sur la touche ENTER.
  • Seite 48: Utilisation De La Fonction D'économie D'énergie

    Utilisation de la fonction d’économie d’énergie Cette fonction règle la luminosité du téléviseur afin de réduire la consommation d’énergie. Lorsque vous regardez la télévision le soir, réglez l’option du mode “Economie d’énergie” sur “Elevée” afin de réduire l’éblouissement ainsi que la consommation.
  • Seite 49: Décodeur Télétexte

    Décodeur télétexte La plupart des chaînes du téléviseur possèdent des pages “télétexte” fournissant des informations telles que : Les horaires des programmes télévisés. Bulletins d’informations et prévisions météo. Des résultats sportifs. Des sous-titres pour les malentendants. Les pages télétextes sont organisées en six catégories Part Table des matières Numéro de la page sélectionnée.
  • Seite 50: Sélection D'une Page Télétexte Spécifique

    Sélection d’une page télétexte spécifique Appuyez sur les touches numériques de la télécommande pour entrer directe- ment le numéro de page: Entrez le numéro de page à trois chiffres figurant dans la table des matières en appuyant sur les boutons numériques correspondants. Si la page sélectionnée est liée à...
  • Seite 51: Paramétrage Du Logiciel Pc (Basé Sur Windows Xp)

    (Si ce n’est pas le cas, contactez le fabricant de votre ordinateur ou un revendeur Samsung.) Cliquez sur “Control Panel” dans le menu Démarrer de Windows.
  • Seite 52: Sélection Du Pc

    Sélection du PC Réglage de base et réglage fin de l’image (Verrouillage Image) : Le but du réglage de la qualité de l’image est d’éliminer ou de réduire le bruit parasite de l’image (défauts). Si le bruit parasite n’est pas éliminé en effectuant uniquement une syntonisation fine, réglez la fréquence du mieux que vous pouvez (approximative) puis effectuez à...
  • Seite 53: Utilisation Du Verrouillage Kensington Antivol

    Utilisation du verrouillage Kensington antivol Le verrou Kensington est un dispositif permettant de fixer le système lorsqu’il est utilisé dans un lieu public. Le dis- positif de verrouillage doit être acheté séparément. Il se peut que l’apparence et la mé thode de verrouillage soient différents de l’illustration en fonction du fabricant.
  • Seite 54: Spécifications Techniques Et Environnementales

    Spécifications techniques et environnementales Modèle LE32R Taille de l’écran (diagonale) pouce Alimentation AC 220-240 V, 50 Hz Consommation 152 W PC Résolution 1360 x 768 @ 60 Hz 10 W X 2 Sortie Dimension (L x P x H) 797 x 99 x 592 mm 797 x 249 x 651 mm Avec support Poids...
  • Seite 55 Inhalt ANSCHLIESSEN UND VORBEREITEN DES EINSTELLEN DER ZEIT FERNSEHGERÄTS Uhrzeit einstellen und anzeigen ......... 17 Lieferumfang ................... 2 Stellen der Einschlafschaltuhr ..........18 Montage des Ständers..............2 Fernseher automatisch ein- und ausschalten....18 Wandhalterung anbringen ........... 2 Bedienfeld ..................3 Anschlussfeld ..................
  • Seite 56: Lieferumfang

    Sie in den Anweisungen, die im Lieferumfang der Wandhalterung enthalten sind. Lassen Sie sich beim Anbringen der Wandmontagehalterung von einem Techniker helfen. Samsung Electronics haftet nicht für Schäden an Gerät oder Personen, wenn die Montage vom Kunden selbst durchgeführt wird.
  • Seite 57: Bedienfeld

    Bedienfeld Die Produktfarbe und -form kann je nach Modell unterschiedlich sein. SOURCE Schaltet zwischen allen verfügbaren Signalquellen um. Kanäle wechseln. (TV, Ext.1, Ext.2, AV, S-Video, Komp., PC, HDMI). Im Bildschirmmenü können Sie die Tasten die Tasten auf der Fernbedienung Im Bildschirmmenü können Sie diese Taste wie die verwenden.
  • Seite 58: Anschlussfeld

    Anschlussfeld [Buchsen an der Rückseite] Netzkabelbuchse Wenn Sie ein externes Gerät an das Fernsehgerät anschließen möchten, muss das Gerät unbedingt ausgeschaltet sein. Achten Sie beim Anschließen von Kabeln an die Ausgänge des Geräts darauf, das die Kabel den entsprechenden farbcodierten Anschlüssen zugeordnet werden.
  • Seite 59 An der Antenne oder am Kabelfernsehnetz anschließen Damit die Fernsehkanäle korrekt empfangen werden, muss der Monitor an eine der folgenden Signalquellen angeschlossen sein: Terrestrische Antenne / Kabelfernsehanschluss / Satellitenempfänger Anschließen von HDMI/DVI-Schnittstellen - Unterstützt Verbindungen zwischen AVGeräten (Settopboxen, DVD-Playern, AVReceivern und Digital-TV-Geräten), die für HDMI-Schnittstellen geeignet sind.
  • Seite 60: Fernbedienung

    Fernbedienung Standby-Taste des Fernsehgeräts Modus PC direkt aufrufen Zifferntasten für direkte Kanalwahl Sleep-Timer aktivieren/stellen Taste zum Auswählen von ein-/zweistel- : Nächster Sender ligen Programmplätzen : Voriger Sender Modus TV direkt aufrufen OSD-Menü ausblenden Den Cursor im Menü Anzeige der “Programmverwaltung” auf dem Bildschirm Anzeigen von Informationen zur aktuel- Lautstärkeverminderung...
  • Seite 61: Ein-Und Ausschalten

    Ein-und Ausschalten Das Netzkabel ist auf der Rückseite des Geräts angeschlossen. Schließen Sie das Netzkabel an eine geeignete Netzsteckdose an. Die Standby-Anzeige auf der Vorderseite des Geräts leuchtet. Drücken Sie auf der Vorderseite des Geräts die Taste Zum Einschalten des Fernsehgeräts können Sie auch die Taste POWER oder die Taste TV auf der Fernbedienung drücken.
  • Seite 62: Kanäle Automatisch Speichern

    So setzen Sie diese Funktion zurück: Drücken Sie die Taste MENU, um das Menü anzuzeigen. Drücken Sie die Taste oder , um “Einstellungen” auszuwählen, und drücken Sie dann die Taste ENTER. Drücken Sie die Taste ENTER erneut, um “Plug & Play” auszuwählen. Die Meldung zum Starten von Plug &...
  • Seite 63: Programmverwaltung

    Drücken Sie die Taste oder , um “Fernsehnorm” auszuwählen, und drücken Sie dann die Taste ENTER. Wählen Sie den erforderlichen Farbstandard aus, indem Sie wiederholt die Taste oder drücken und dann die Taste ENTER drücken. Drücken Sie die Taste oder um “Tonsystem”...
  • Seite 64: Aktivieren Der Kindersicherung

    Aktivieren der Kindersicherung Mit dieser Funktion können Sie nicht autorisierte Benutzer, z. B. Kinder, daran hindern, ungeeignete Programme anzuschauen, indem das Bild blockiert und der Ton stummge- schaltet wird. Die Kindersicherung kann nicht über die Tasten an der Seite aufgehoben werden. Sie kann nur über die Fernbedienung deaktiviert werden.
  • Seite 65: Kanalnamen Zuweisen

    Kanalnamen zuweisen Kanalnamen werden automatisch zugewiesen, sofern Kanalinformormationen ausgestrahlt werden. Diese Namen können geändert werden, so dass Sie neue Namen vergeben können. Drücken Sie die Taste MENU, um das Menü anzuzeigen. Drücken Sie die Taste oder , um “Kanal” auszuwählen, und drücken Sie dann die Taste ENTER. Drücken Sie die Taste oder , um “Name”...
  • Seite 66: Bildstandard Ändern

    Bildstandard ändern Sie können den Bildstandard auswählen, der für Ihre Sehgewohnheiten am besten geeignet ist. Drücken Sie die Taste MENU, um das Menü anzuzeigen. Drücken Sie die Taste oder , um “Bild” auszuwählen, und drücken Sie dann die Taste ENTER. Drücken Sie die Taste ENTER erneut, um “Modus”...
  • Seite 67: Zurücksetzen Der Bildeinstellungen Auf Die Werkseitig Festgelegten Standardwerte

    Zurücksetzen der Bildeinstellungen auf die werkseitig festgelegten Standardwerte Sie können die Einstellungen auf die werkseitig festgelegten Standardbildeins tellungen zurücksetzen. Um den gewünschten Bildeffekt zu erzielen, befolgen Sie die Anweisungen 1 bis 3 unter “Bildstandard ändern” auf Seite 12. Drücken Sie die Taste oder , um “Reset”...
  • Seite 68: Dnie Demo (Digital Natural Image Engine)

    DNIe Demo (Digital Natural Image engine) Die neue Technologie von Samsung garantiert kontrastreiche, detailgetreuere Bilder mit verbesserter Weißdarstellung. Der neue Bildausgleichsalgorithmus sorgt für ein helleres, klareres Bild. Wenn Sie den DNIe Demomodus auf „Ein” stellen, können Sie sich von der Optimierung der Bildwiedergabe durch DNIe überzeugen.
  • Seite 69: Tonwiedergabestandard Ändern

    Drücken Sie die Taste oder um “Programm” auszuwählen, und drücken Sie dann die Taste ENTER. Mit den Tasten oder können Sie nun den Sender auswählen, der im Nebenbild wiedergegeben werden soll. Drücken Sie die Taste ENTER. “Programm” kann auch aktiv sein, wenn das PIP-Bild auf “TV” eingestellt ist. Zum Beenden drücken Sie die Taste EXIT.
  • Seite 70: Einstellen Von Trusurround Xt (Srs Tsxt)

    Einstellen von TruSurround XT (SRS TSXT) TruSurround XT ist eine patentierte SRSTechnologie, die das Problem des Betreibens von 5.1-Mehrkanalinhalten über zwei Lautsprecher löst. TruSurround bietet ein beeindruckendes Virtual-Surround-Klangerlebnis über Wiedergabesysteme mit zwei Lautsprechern, z. B. internen Fernsehlautsprechern. Es ist vollständig kompatibel mit allen Mehrkanalformaten. Drücken Sie die Taste MENU, um das Menü...
  • Seite 71: Ton Des Nebenbildes Wiedergeben

    Ton des Nebenbildes wiedergeben Wenn die PIP-Funktion aktiviert ist, können Sie den Ton des PIP-Bildes wiedergeben. Drücken Sie die Taste MENU, um das Menü anzuzeigen. Drücken Sie die Taste oder , um “Ton” auszuwählen, und drücken Sie dann die Taste ENTER. Drücken Sie die Taste oder , um “Ton wählen”...
  • Seite 72: Stellen Der Einschlafschaltuhr

    Stellen der Einschlafschaltuhr Sie können ein Intervall zwischen 30 und 180 Minuten auswählen, nach dessen Ablauf der Fernseher automatisch in den Standby-Modus geschaltet wird. Drücken Sie die Taste MENU, um das Menü anzuzeigen. Drücken Sie die Taste oder , um “Einstellungen” auszuwählen, und drücken Sie dann die Taste ENTER.
  • Seite 73: Sprache Der Bedienerführung Wählen

    Sprache der Bedienerführung wählen Wenn Sie das Gerät das erste Mal verwenden, müssen Sie die Sprache auswählen, die für die Menüs und Hinweise verwendet wird. Drücken Sie die Taste MENU, um das Bildschirmmenü anzuzeigen. Drücken Sie die Taste oder , um “Einstellungen” auszuwählen, und drücken Sie dann die Taste ENTER.
  • Seite 74: Verwenden Der Energiesparfunktion

    Verwenden der Energiesparfunktion Mit dieser Funktion stellen Sie die Helligkeit des Fernsehgeräts ein, um den Stromverbrauch zu senken. Wenn Sie nachts fernsehen, stellen Sie “Energiesparmod.” auf “Hoch” ein, um sowohl den Blendeffekt als auch den Stromverbrauch zu senken. Drücken Sie die Taste MENU, um das Bildschirmmenü anzuzeigen. Drücken Sie die Taste oder , um “Einstellungen”...
  • Seite 75: Videotextdecoder

    Videotextdecoder Zusammen mit den meisten Fernsehprogrammen werden Videotextseiten ausgestrahlt. Diese Seiten enthalten unter anderem die folgenden Informationen: Sendezeiten. Nachrichten und Wetterberichte. Sportergebnisse. Untertitel für Hörgeschädigte. Die Videotextseiten sind in sechs Kategorien unterteilt: Teil Inhalt Gewählte Seitennummer Aktuelle Seitennummer oder Suchstatus Senderkürzel Datum und Uhrzeit Text...
  • Seite 76: Auswählen Einer Bestimmten Videotextseite

    Auswählen einer bestimmten Videotextseite Sie können Seitenzahlen direkt über die Nummerntasten auf der Fernbedienung eingeben. Geben Sie die dreistellige Seitennummer der gewünschten Seite mitden entsprechenden Nummerntasten ein. Falls die ausgewählte Seite mit weiteren Unterseiten verknüpft ist, werden diese nachein- ander angezeigt. Drücken Sie die Taste PIP( ) um das Blättern zu unterbrechen.
  • Seite 77: Installation Der Pc-Software (Unter Windows Xp)

    Computer angezeigten Fenster variieren je nach Version von Windows und der jeweiligen Videokarte. Selbst wenn das angezeigte Fenster abweicht, gelten in den meisten Fällen die gleichen Grundinformationen für die Einstellung. (Wenden Sie sich andernfalls an den Computerhersteller oder Samsung-Händler.) Klicken Sie im Startmenü von Windows auf “Control Pane”.
  • Seite 78: Pc Auswählen

    PC auswählen Grob-und Feinabstimmung des Bildes vornehmen (Bildjustierung): Mithilfe der Anpassung der Bildqualität sollen Bildstörungen beseitigt oder verringert werden. Sollte sich das Bildrauschen durch die Feinabstimmung allein nicht beheben lassen, stellen Sie zunächst die Frequenz möglichst genau ein (Grob), und führen Sie dann erneut eine Feinabstimmung durch. Nachdem die Störungen reduziert worden sind, richten Sie das Bild erneut aus, so dass es auf dem Bildschirm zentriert ist.
  • Seite 79: Kensington-Schloss Als Diebstahlsicherung

    Kensington-Schloss als Diebstahlsicherung Das Kensington-Schloss dient zur sicheren Befestigung des Geräts an einem öffentlichen Ort. Das Schloss muss separat erworben werden. Je nach Hersteller können Aussehen und Verriegelungsverfahren von der Abbildung abweichen. Informationen zur richtigen Anwendung entnehmen Sie bitte der Bedienungsanleitung des Kensington-Schlosses. 1.
  • Seite 80: Technische Daten Und Umgebungsbedingungen

    Technische Daten und Umgebungsbedingungen Modell LE32R3 Bildgröße (Diagonal) Zoll Stromversorgung AC 220-240 V, 50 Hz Leistungsaufnahme 152W Auflösung (PC) 1360 x 768 @ 60 Hz Ausgang 10 W X 2 Abmessungen (B x T x H) Gehäuse 797 x 99 x 592 mm Mit Fuß...
  • Seite 81 Inhoud UWTV/MONITOR AANSLUITEN EN GEBRUIKSKLAAR MAKEN TIJD INSTELLEN Lijst met onderdelen ..............2 De huidige tijd instellen en weergeven....... 17 De standaard installeren ............. 2 Standby-klok instellen .............. 18 De muurbevestigingsbeugel installeren ......2 De televisie automatisch aan uitschakelen ......18 Overzicht van het bedieningspaneel ........
  • Seite 82: Lijst Met Onderdelen

    Neem contact op met een technicus alvorens de wand- steunen te bevestigen. Samsung Electronics is niet verantwoordelijk voor schade aan het product of voor verwondingen die u zelf of anderen oplopen wanneer u besluit de TV zelfstandig te installeren.
  • Seite 83: Overzicht Van Het Bedieningspaneel

    Overzicht van het bedieningspaneel De kleur en vormgeving van het product kunnen afhankelijk van het model variëren. SOURCE Schakelen tussen alle beschikbare ingangsbronnen. Druk op de afstandsbediening om van kanaal te veran- (TV, Ext.1, Ext.2, AV, S-Video, Component, PC, HDMI). deren.
  • Seite 84: Overzicht Van Het Aansluitpaneel

    Overzicht van het aansluitpaneel [Aansluitingen op chterpaneel] Netvoeding Wanneer u een extern apparaat aansluit op de tv moet het toestel zijn uitgeschakeld. Zorg bij het aansluiten van een externe aansluiting dat de kleuren van de aansluiting en de kabel overeenkomen. Nederlands-4...
  • Seite 85 Aansluiten op antenne of kabeltelevisienetwerk Voor de juiste weergave van tv-kanalen moet het toestel een signaal ontvangen via een van de volgende bronnen: - Een buitenantenne / Een kabeltelevisienetwerk / Een satellietnetwerk Het aansluiten van HDMI/DVI - Ondersteunt verbindingen met audiovisuele apparatuur die met HDMI verbonden kan worden (set top boxes, DVD-spelers, audiovisuele ontvangers en digitale tv’s).
  • Seite 86: Overzicht Van De Afstandsbediening

    Overzicht van de afstandsbediening Standby-toets voor de televisie Selecteer direct de PC-modus Nummertoetsen voor directe Automatisch uitschakelen kanaalkeuze : Volgend kanaal Kanaal kiezen met één/twee cijfers : Vorig kanaal Selecteer direct de TV-modus Het schermmenu afsluiten Muisaanwijzer in het menu bedienen Hiermee komt “Kanaalbeheer”...
  • Seite 87: In - En Uitschakelen

    In - en uitschakelen Het netsnoer is bevestigd aan de achterzijde van de TV. Steek de stekker in een geschikt stopcontact. De stand-by-indicator op het voorpaneel gaat branden. Druk op de AAN/UIT-knop aan de voorzijde van de set. POWER U kunt ook op de toets of de toets TV op de afstandsbediening drukken om de tv aan te zetten.
  • Seite 88: Kanalen Automatisch Opslaan

    Als u deze functie wilt herstellen... Druk op de toets MENU voor weergave van het menu. Druk op de toets om “Instellingen” te selecteren en druk vervolgens op ENTER. Druk nogmaals op de toets ENTER om “Plug & Play” te selecteren. Het bericht om Start Plug &...
  • Seite 89: De Kanaalbeheer Instellen

    Druk op de toets om “Geluidssysteem” te selecteren en druk vervolgens op ENTER. Selecteer het gewenste standaardgeluid door op de toets te blijven drukken en vervolgens op ENTER te drukken. Als er geen geluid is of als het geluid vervormd is, selecteert u nogmaals de gewenste geluidsstandaard. Als u het nummer weet van het kanaal dat u wilt opslaan, drukt u op de toets om “Kanaal”...
  • Seite 90: Het Kinderslot Activeren

    Het kinderslot activeren Met deze functie kunt u voorkomen dat bijvoorbeeld kinderen naar programma’s kijken die niet geschikt zijn voor hen, door het beeld en het geluid uit te schakelen. Het kinderslot kan niet uitgezet worden door de toetsen op het zijpa- neel te gebruiken.
  • Seite 91: Kanaalnamen Vastleggen

    Kanaalnamen vastleggen Kanalen krijgen automatisch een naam toegewezen wanneer kanaalinformatie wordt uitgezonden. U kunt deze naam wijzigen en nieuwe Naam toewijzen. Druk op de toets MENU voor weergave van het menu. Druk op de toets om “Kanaal” te selecteren en druk vervolgens op ENTER. Druk op de toets om “Naam”...
  • Seite 92: De Beeldstandaard Aanpassen

    De beeldstandaard aanpassen U kunt het beeld selecteren dat het best overeenkomt met uw wensen. Druk op de toets MENU voor weergave van het menu. Druk op de toets om “Beeld” te selecteren en druk vervolgens op ENTER. Druk nogmaals op de toets ENTER om “Modus” te selecteren. Druk nogmaals op de toets ENTER om “Modus”...
  • Seite 93: De Beeldinstellingen Terugstellen Naar De Standaard Fabrieksinstellingen

    De beeldinstellingen terugstellen naar de standaard fabrieksinstellingen U kunt terugkeren naar de beeldinstellingen zoals deze standaard in de fabriek zijn ingesteld. Om het gewenste beeldeffect te selecteren, volgt u de instructies 1 t/m 3 op pagina 12 van “De beeldstandaard aanpassen”. Druk op de toets om “Reset”...
  • Seite 94: Dnie-Demo (Digital Natural Image Engine)

    DNIe-demo (Digital Natural Image engine) Met de nieuwe technologie biedt Samsung u nog betere beeldkwaliteit met scherper contrast en versterking van de wittonen. Dit nieuwe systeem voor beeldsamenstelling biedt de kijkers een helderder en duidelijker beeld. De DNIe-technologie garandeert een perfecte beeldkwaliteit. Als u de DNIe demo-modus inschakelt, zult u zien hoe de beeldkwaliteit verbetert.
  • Seite 95: De Geluidsstandaard Wijzigen

    Druk op om “Prog. ” te selecteren druk op ENTER. U kunt het kanaal dat u via het subbeeld wilt bekijken selecteren door op te drukken. Druk op ENTER. De functie “Prog. ” kan actief zijn als het subbeeld is ingesteld op tv. Druk op de toets EXIT om af te sluiten.
  • Seite 96: De Trusurround Xt (Srs Tsxt) Instellen

    De TruSurround XT (SRS TSXT) instellen TruSurround XT is een gepatenteerde SRS-technologie die er voor zorgt dat het afspelen van 5.1 inhoud van meerdere kanalen via twee speakers verloopt. TruSurround biedt een fascinerende virtuele surround geluidservaring via elk twee-speaker playbacksysteem, waaronder ook inge- bouwde televisiespeakers.
  • Seite 97: Het Geluid Van Het Subbeeld Weergeven

    Het geluid van het subbeeld weergeven Zolang de PIP-functie is geactiveerd, kunt u naar het geluid bij het subbeeld luisteren. Druk op de toets MENU voor weergave van het menu. Druk op de toets om “Geluid” te selecteren en druk vervolgens op ENTER. Druk op de toets om “Geluidskeuze”...
  • Seite 98: Standby-Klok Instellen

    Standby-klok instellen TruSurround XT is een gepatenteerde SRS-technologie die er voor zorgt dat het afspelen van 5.1 inhoud van meerdere kanalen via twee speakers verloopt. TruSurround biedt een fascinerende virtuele surround geluidservaring via elk twee-speaker playbacksysteem, waaronder ook ingebou- wde televisiespeakers. Het is volledig compatibel met alle apparatuur voor meerdere kanalen.
  • Seite 99: Taal Kiezen

    Taal kiezen Wanneer u de TV voor het eerst gebruikt, moet u de taal selecteren voor het weergeven van menu’s en aanwijzingen. Druk op de toets MENU voor weergave van het menu. Druk op de toets om “Instellingen” te selecteren en druk vervolgens op ENTER. Druk op de toets om “Taalkeuze”...
  • Seite 100: De Functie Spaarstand Gebruiken

    De functie spaarstand gebruiken Met deze functie kunt u de helderheid van de tv aanpassen om het energiever- bruik te verminderen. Als u ’s avonds tv kijkt, kunt u de modus “Spaarstand” in de stand “Hoog” zetten. Zo kunt u de glinstering in uw ogen tegengaan en tevens besparen op het energieverbruik.
  • Seite 101: Teletekstdecoder

    Teletekstdecoder De meeste TV-kanalen bieden “teletekst” aan, ofwel pagina’s met schriftelijke informatie over zaken als: Tijden van tv-programma’s. Nieuws- en weerberichten. Sportuitslagen. Ondertiteling voor slechthorenden. Deze informatie is onderverdeeld in genummerde pagina’s (zie schema). Onderdeel Inhoud Geselecteerd paginanummer. Aanduiding kanaal/zendstation. Huidig paginanummer of zoekstatus.
  • Seite 102: Specifieke Teletekstpagina Selecteren

    Specifieke teletekstpagina selecteren Druk op de cijfertoetsen op de afstandsbediening om het paginanummer direct op te vragen: Voer het op de inhoudspagina vermelde driecijferig paginanummer in door op de desbetreffende cijfertoetsen te drukken. Als de geselecteerde pagina koppelingen naar subpagina’s bevat, worden de subpagina’s na elkaar weergegeven.
  • Seite 103: Uw Software Installeren (Gebaseerd Op Windows Xp)

    PC kunnen anders zijn, afhankelijk van uw Windows-versie en uw videokaart. Ook als uw weer- gaven anders zijn, kloppen de instellingsgegevens in grote lijnen in bijna alle gevallen. Als dit niet het geval is, kunt u contact opnemen met uw computerfabrikant of uw Samsung-dealer. Klik op “Configuratiescherm” in het menu Start van Windows.
  • Seite 104: De Pc Selecteren

    De PC selecteren Grovere of fijnere afstelling van het beeld (Beeld vergrendelen): U past de beeldkwaliteit aan om beeldruis te verwijderen of te verminderen. Als de ruis niet verdwijnt door het kanaal nauwkeurig (fine) in te stellen, stel dan de frequentie zo goed mogelijk in (coarse)en voer opnieuw een nauwkeurige instelling uit.
  • Seite 105: De Anti-Diefstal Vergrendeling Gebruiken

    De anti-diefstal vergrendeling gebruiken Het Kensington-slot is een apparaat om het systeem fysiek te vergrendelen bij gebruik in een openbare ruimte. Het slot dient apart te worden aangeschaft. Het ontwerp en gebruik kan iets afwijken, afhankelijk van de fabri- kant. Gebruik de bijgeleverde handleiding voor juist gebruik. 1.
  • Seite 106: Technische Specificaties En Milieu

    Technische specificaties en milieu Type LE32R3 Schermgrootte (diagonaal) 32 inch Stroomtoevoer AC 220-240 V, 50 Hz Energieverbruik 152W PC Resolutie 1360 x 768 @ 60 Hz Geluid Uitgang 10 W X 2 Afmetingen (B X D X H) Kast 797 x 99 x 592 mm...
  • Seite 107 Indice CONEXIÓN Y CONFIGURACIÓN DEL TELEVISOR AJUSTE DE LA HORA Lista de componentes ..............2 Configuración y visualización de hora actual ....17 Instalación del soporte ..............2 Ajuste del temporizador de desconexión ....... 18 Instalación del equipo de montaje en la pared .... 2 Encendido y apagado de la Visualización del Panel de control ..........
  • Seite 108: Lista De Componentes

    Para la instalación del soporte mural, póngase en con- tacto con un técnico. Samsung Electronics no se hace responsable de los daños causados al producto o a los usuarios si éstos han efectuado personalmente la instalación del televisor.
  • Seite 109: Visualización Del Panel De Control

    Visualización del Panel de control El color y la forma del producto pueden variar según el modelo. SOURCE Cambia entre todas las fuentes de entrada Púlselos para cambiar de canal. En el menú de la pantalla, use estos botones disponibles. (TV, Ext., AV, S-Vídeo, Componente, del mismo modo que los botones PC, HDMI).
  • Seite 110: Visualización Del Panel De Conexión

    Visualización del Panel de conexión [Tomas del panel posterior] Entrada de alimentación Cada vez que conecte un dispositivo externo al televisor, compruebe que la unidad esté desconectada de la alimentación. Cuando conecte un terminal externo, debe hacer coincidir los colores del terminal de conexión y del cable. Español-4...
  • Seite 111 Conexión a la antena o a la red de televisión por cable Para ver los canales de televisión correctamente, la unidad debe recibir una señal de una de las fuentes siguientes: - Una antena exterior / Una red de televisión por cable / Una red por satélite Conexión de HDMI/DVI - Admite conexiones entre dispositivos de AV con conexión HDMI (receptores de televisión digital, reproductores de DVD, receptores de AV y televisores digitales).
  • Seite 112: Visualización Del Mando A Distancia

    Visualización del mando a distancia Botón de suspensión del televisor Apagado automático Botón numéricos para elegir un canal : Canal siguiente directamente : Canal anterior Selección de canal de uno/dos dígitos Sale del menú en pantalla Selecciona el modo TV directamente Controla el cursor en el menú...
  • Seite 113: Encendido Y Apagado

    Encendido y apagado El cable de alimentación se encuentra en la parte posterior de la unidad. Conecte el cordón eléctrico en un enchufe adecuado. Se enciende el indicador de modo en espera de la parte frontal del equipo. Pulse el botón de la parte frontal del aparato.
  • Seite 114: Memorización Automática De Canales

    Si quiere volver a ajustar esta característica... Pulse el botón MENU para ver el menú. Pulse los botones para seleccionar “Configuración” y pulse el botón ENTER. Pulse de nuevo el botón ENTER para seleccionar “Plug & Play”. Aparece el mensaje para iniciar “Start Plug & Play” - Memorización automática de canales - Memorización manual de canales Memorización automática de canales...
  • Seite 115: Configuración Del Gestor De Canales

    Pulse los botones para seleccionar “Sistema de color” y pulse el botón ENTER. Seleccione el estándar de color deseado pulsando varias veces los botones y, a continuación, pulse el botón ENTER. Pulse los botones para seleccionar “Sistema de sonido” y pulse el botón ENTER. Seleccione el estándar de sonido deseado pulsando varias veces los botones y, a continuación, pulse el botón ENTER.
  • Seite 116: Activación Del Bloqueo Para Niños

    Activación del bloqueo para niños Esta función permite evitar que usuarios no autorizados, como niños, puedan ver programas poco recomendables desactivando el vídeo y el audio. El bloqueo infantil no se puede desactivar mediante los botones del panel lateral. Únicamente con el mando a distancia es posible desactivar el ajuste del bloqueo infantil;...
  • Seite 117: Asignación De Nombres De Canales

    Asignación de nombres de canales Los nombres de los canales se asignarán automáticamente si se emite la información del canal. Estos nombres se pueden cambiar y puede asignar nombres nuevos. Pulse el botón MENU para ver el menú. Pulse los botones para seleccionar “Canal”...
  • Seite 118: Cambio Del Formato De La Imagen

    Cambio del formato de la imagen Se puede seleccionar el tipo de imagen que mejor se corresponda a los requisi- tos de visualización. Pulse el botón MENU para ver el menú. Pulse los botones para seleccionar “Imagen” y pulse el botón ENTER. Pulse de nuevo el botón ENTER para seleccionar “Modo”.
  • Seite 119: Reajuste De Los Valores De La Imagen A Los Valores Predefinidos De Fábrica

    Reajuste de los valores de la imagen a los valores predefinidos de fábrica Puede volver a los ajustes de imagen predefinidos de fábrica. Para seleccionar el efecto de imagen deseado, siga las instrucciones 1 a 3 de “Cambio de la imagen estándar” de la página 12. Pulse los botones para seleccionar “Restablecer”...
  • Seite 120: Dnie (Motor Digital De Imágenes Naturales)

    DNIe Demo (motor digital de imágenes naturales) La nueva tecnología de Samsung le ofrece imágenes más detalladas con mejoras en contraste y blancos. Un nuevo algoritmo de compensación de imagen proporciona a los usuarios una imagen más brillante y más clara.
  • Seite 121: Cambio Del Estándar De Sonido

    Pulse el botón para seleccionar “Programa” y pulse el botón ENTER. Puede seleccionar el canal que desee ver en la imagen secundaria pulsando el botón Pulse el botón ENTER. “Programa” puede estar activo cuando la imagen secundaria esté configurada como TV. Pulse el botón EXIT para salir.
  • Seite 122: Configuración De Trusurround Xt (Srs Tsxt)

    Configuración de TruSurround XT (SRS TSXT) TruSurround XT es una tecnología patentada de SRS que resuelve el problema de la reproducción de contenidos multicanal 5.1 con dos altavoces. TruSurround XT proporciona una convincente experiencia de sonido surround virtual a través de cualquier sistema de reproducción con dos altavoces, como los propios altavoces internos del televisor.
  • Seite 123: Cómo Escuchar El Sonido De La Imagen Secundaria

    Cómo escuchar el sonido de la imagen secundaria Mientras esté activada la función PIP se puede escuchar el sonido de la imagen secundaria. Pulse el botón MENU para ver el menú. Pulse los botones para seleccionar “Sonido” y pulse el botón ENTER. Pulse los botones para seleccionar “Selección de sonido”...
  • Seite 124: Ajuste Del Temporizador De Desconexión

    Ajuste del temporizador de desconexión Puede seleccionar un período de tiempo entre 30 y 180 mins para que, una vez transcurridos, el televisor pase automáticamente al modo de espera. Pulse el botón MENU para ver el menú. Pulse los botones para seleccionar “Configuración”...
  • Seite 125: Selección Del Idioma

    Selección del idioma Cuando utilice la unidad por primera vez, debe seleccionar el idioma que se utili- zará para visualizar menús e indicaciones. Pulse el botón MENU para ver el menú en pantalla. Pulse los botones para seleccionar “Configuración” y pulse el botón ENTER.
  • Seite 126: Uso De La Función De Ahorro De Energía

    Uso de la función de ahorro de energía Esta función ajusta el brillo del televisor, lo cual reduce el consumo de energía. Si desea ver la televisión por la noche, ajuste la opción del modo “Ahorro energía” en “Alto” sus ojos se lo agradecerán y, además, reducirá el consumo de energía. Pulse el botón MENU para ver el menú...
  • Seite 127: Decodificador De Teletexto

    Decodificador de teletexto Muchos canales de Televisor incluyen “teletexto”, páginas de información escrita que proporciona datos como: Horas de los programas de televisión Boletines de noticias y partes meteorológicos Resultados deportivos Subtítulos para sordos Las páginas de teletexto se organizan en seis categorías : Parte Contenido Número de página seleccionado.
  • Seite 128: Selección De Una Página De Teletexto Específica

    Selección de una página de teletexto específica Pulse los botón numéricos en el mando a distancia para introducir los números de página directamente: Introduzca los tres dígitos del número de la página que se enumera en el índice pulsando los botón numéricos correspondientes. Si la página seleccionada está...
  • Seite 129: Configuración Del Software Del Pc (Basado En Windows Xp)

    (En caso contrario, póngase en contacto con el fabricante del ordenador o con el distribuidor de Samsung.) Primero, haga clic en “Control Panel” dentro del menú Inicio de Windows.
  • Seite 130: Selección Del Pc

    Selección del PC Sintonización gruesa y fina de la imagen (Bloqueo de Imagen): El propósito del ajuste de imagen calidad es remitir o reducir el ruido de la imagen. Si no se eliminan mediante la sintonización Fina, ajuste la frecuencia lo mejor que pueda (grueso) y vuelva a realizar la sintonización fina.
  • Seite 131: Especificaciones Técnicas Y Medioambientales

    Especificaciones técnicas y medioambientales El anclaje Kensington es un dispositivo utilizado para asegurar un aparato cuando se utiliza en un sitio público. Este dispositivo de bloqueo se adquiere por separado. El aspecto y método de bloqueo puede diferir del que se muestra en la ilustración dependiendo del fabricante.
  • Seite 132: Especificaciones Técnicas Y Medioambientales

    Especificaciones técnicas y medioambientales Nombre del modelo LE32R3 Tamaño de pantalla (diagonal) pulg. Fuente de alimentación 220-240 V CA 50 Hz Consumo de energía 152 W PC Resolución 1360 x 768 @ 60 Hz Sonido Salida 10 W X 2...
  • Seite 133 Índice LIGAÇÃO E PREPARAÇÃO DO TELEVISOR ACERTO DA HORA Lista de acessórios ................ 2 Acertar e ver a hora actual ............ 17 Instalar a Base ................. 2 Programar o temporizador ........... 18 Instalar o kit de montagem na parede ......2 Ligar e desligar o televisor automaticamente ....
  • Seite 134: Lista De Acessórios

    A instalação do suporte para montagem na parede tem de ser feita por um técnico. Se a instalação for feita pelo cliente, a Samsung Electronics não se responsabiliza por quaisquer danos no produto nem por ferimentos sofridos pelo cliente ou por outras pessoas.
  • Seite 135: Funções Do Painel De Controlo

    Funções do painel de controlo A forma e a cor do produto podem variar consoante o modelo. SOURCE Alterna entre todas as fontes de entrada Move o selector para a esquerda ou para a direita disponíveis. (TV, Ext.1, Ext.2, AV, S-Vídeo, nos ecrãs.
  • Seite 136: Apresentar O Painel De Ligação

    Apresentar o painel de ligação [Tomadas do painel posterior] Potência de entrada Sempre que ligar um dispositivo externo ao televisor, verifique se a unidade está desligada. Quando ligar um terminal exterior, faça a correspondências de cores entre o terminal e o respectivo cabo. Português-4...
  • Seite 137 Ligar uma antena ou uma rede de televisão por cabo Para ver os canais de televisão correctamente, o aparelho tem de receber um sinal de uma das seguintes fontes: - Uma antena externa / Uma rede de televisão por cabo / Uma rede por satélite Ligar HDMI/DVI - Suporta ligações entre os dispositivos AV compatíveis com ligação HDMI (set top boxes, leitores de DVD, receptores de AV e tele visores digitais).
  • Seite 138: Funções Do Telecomando

    Funções do telecomando Botão de televisor em espera Desligar o televisor automaticamente Botões numéricos para acesso : Canal seguinte directo aos canais : Canal anterior Selecção de canais com um/ Sair do menu no ecrã dois dígitos Controlar o cursor no menu Entra directamente no modo (TV) Apresentação das informações Aparece “Gestor Canais”...
  • Seite 139: Ligar/Desligar O Aparelho

    Ligar/desligar o aparelho O cabo de alimentação está ligado à parte traseira do aparelho. Ligue o cabo principal a uma tomada adequada. Os indicadores luminosos do modo de suspensão acendem-se na parte frontal do televisor. Carregue no botão na parte da frente do televisor. ou no botão TV ( ) do telecomando para ligar o televisor.
  • Seite 140: Memorizar Canais Automaticamente

    Se desejar repor esta função... Carregue no botão MENU para ver o menu. Carregue no botão para seleccionar “Configurar” e depois carregue no botão ENTER. Carregue novamente no botão ENTER para seleccionar “Plug & Play”. Aparece a mensagem “Iniciar Plug & Play” - Memorizar canais automaticamente - Memorizar canais manualmente Memorizar canais automaticamente...
  • Seite 141: Definir Gestor Canais

    Carregue no botão para seleccionar “Sistema cores” e depois carregue no botão ENTER. Seleccione a cor padrão necessária carregando repetidamente no botão e depois carregue no botão ENTER. Carregue no botão para seleccionar “Sistema som” e depois carregue no botão ENTER. Seleccione o som padrão necessário premindo repetidamente o botão e em seguida prima o botão ENTER.
  • Seite 142: Activar Bloqueio Crianças

    Activar Bloqueio crianças Esta função permite-lhe evitar que utilizadores não autorizados, como as crianças, vejam programas não apropriados, cortando o som e a imagem. Não é possível desactivar a opção Bloqueio crianças com os botões laterais. Como só o telecomando consegue desbloquear a definição Bloqueio crianças, mantenha o telecomando longe do alcance de crianças.
  • Seite 143: Atribuir Nomes A Canais

    Atribuir nomes a canais Os nomes dos canais serão atribuídos automaticamente quando a informação do canal é transmitida. Estes nomes podem ser alterados o que lhe permite atribuir nomes novos. Carregue no botão MENU para ver o menu. Carregue no botão para seleccionar “Canal”...
  • Seite 144: Escolher O Tipo De Imagem

    Escolher o tipo de imagem Pode seleccionar o tipo de imagem que melhor corresponda aos requisitos de visualização. Carregue no botão MENU para ver o menu. Carregue no botão para seleccionar “Imagem” e depois carregue no botão ENTER. Carregue novamente no botão ENTER, para seleccionar “Modo”. Volte a carregar no botão ENTER.
  • Seite 145: Repor Os Valores De Fábrica Das Definições De Imagem

    Repor os valores de fábrica das definições de imagem Pode voltar aos valores de fábrica das definições de imagem. Para seleccionar o efeito de imagem pretendido, siga as instruções 1 a 3 de “Alterar o tipo de imagem” na página 12. Carregue no botão para seleccionar “Reiniciar”...
  • Seite 146: Demonstração Dnie (Digital Natural Image Engine)

    Demonstração DNIe (Digital Natural Image Engine) A nova tecnologia da Samsung permite obter imagens mais detalhadas, com melhorias no contraste e no equilíbrio do branco. Um novo algoritmo de compensação de imagem proporciona imagens mais nítidas. A tecnologia DNIe adapta todos os sinais à sua visão. Pode ver de que maneira a tecnologia DNIe melhora a imagem, programando o modo DNIe Demo para On.
  • Seite 147: Escolher O Som Padrão

    Carregue no botão para seleccionar “Programa” e depois car regue no botão ENTER. Pode seleccionar o canal que pretende ver na imagem secundária, carregando no botão Prima o botão ENTER. Pode activar “Programme” se a imagem secundária estiver definida para TV. Prima o botão EXIT para sair.
  • Seite 148: Definir Trusurround Xt (Srs Tsxt)

    Definir TruSurround XT (SRS TSXT) TruSurround XT é uma tecnologia SRS patenteada que resolve o problema da reprodução de conteúdos multi-canais 5.1 através de dois altifalantes. A tecnologia TruSurround oferece uma experiência de som surround virtual envolvente através de qualquer sistema de reprodução de duas colunas, incluindo as colunas internas do televisor.
  • Seite 149: Ouvir O Som Da Imagem Secundária

    Ouvir o som da imagem secundária Durante a activação das funções PIP, pode ouvir o som da imagem secundária. Carregue no botão MENU para ver o menu. Carregue no botão para seleccionar “Som” e depois carregue no botão ENTER. Carregue no botão para seleccionar “Selecção do som”...
  • Seite 150: Programar O Temporizador

    Programar o temporizador Pode seleccionar um intervalo de tempo entre 30 e 180 mins, após o qual o televisor muda automaticamente para o modo de espera. Carregue no botão MENU para ver o menu. Carregue no botão para seleccionar “Configurar” e depois carregue no botão ENTER. Carregue no botão para seleccionar “Tempo”...
  • Seite 151: Seleccionar O Idioma

    Seleccionar o idioma Quando utilizar o aparelho pela primeira vez, tem de seleccionar o idioma dos menus e indicações apresentados no ecrã. Carregue no botão MENU para ver o menu no ecrã. Carregue no botão para seleccionar “Configurar” e depois carregue no botão ENTER.
  • Seite 152: Utilizar A Função Poupar Energia

    Utilizar a função Poupar energia Esta função ajusta a luminosidade da televisão de maneira a reduzir o consumo de energia. Quando estiver a ver televisão à noite, defina a opção do modo “Poupança energ.” para “Alto” de maneira a reduzir o reflexo e o consumo de energia.
  • Seite 153: Descodificador De Teletexto

    Descodificador de teletexto Amaioria dos canais de televisão têm páginas de “teletexto”, com informações escritas sobre o seguinte: Horários dos programas de televisão. Serviços informativos e boletins meteorológicos. Resultados desportivos. Legendas para os deficientes auditivos. As páginas do teletexto estão divididas em seis categorias: Secção Conteúdo Número da página seleccionada.
  • Seite 154: Seleccionar Uma Página De Teletexto Específica

    Seleccionar uma página de teletexto específica Carregue nos botões numéricos do telecomando para introduzir directamente o número da página: Introduza o número de página de três dígitos, fornecido no conteúdo, premindo os botões numéricos correspondentes. Se a página seleccionada estiver ligada a várias páginas secundárias, as páginas secundárias são apresentadas em sequência.
  • Seite 155: Configurar O Software Do Pc (Baseado No Windows Xp)

    Windows e da placa de vídeo. Em quase todos os casos, mesmo que os ecrãs reais tenham um aspecto diferente, aplica-se a mesma informação de configuração básica. (Caso contrário, contacte o fabricante do computador ou o distribuidor da Samsung.) Primeiro, clique em “Control Panel” no menu Iniciar do Windows.
  • Seite 156: Seleccionar O Pc

    Seleccionar o PC Sintonização básica e fina da imagem (Bloq. imagem): O objectivo da regulação da qualidade da imagem é reduzir o ruído da imagem. Se não conseguir retirar o ruído fazendo apenas a sintonização fina, regule a frequência o melhor possível e volte a fazer a sintonização fina. Depois de ter reduzido o ruído, volte a regular a imagem de forma a ficar alinhada no centro do ecrã.
  • Seite 157: Utilizar O Sistema De Bloqueio Kensington Anti-Roubo

    Utilizar o sistema de bloqueio Kensington anti-roubo O mecanismo de fixação Kensington refere-se a um dispositivo utilizado para fixar fisicamente o sistema quando o utilizar num local público. O dispositivo de fixação tem de ser adquirido em separado. O aspecto e mé todo de fixação podem diferir da ilustração dependendo do fabricante.
  • Seite 158: Características Técnicas E Ambientais

    Características técnicas e ambientais Nome do modelo LE32R3 Tamanho do ecrã (Diagonal) polegadas Fonte de alimentação AC 220-240 V, 50 Hz Consumo de energia 152 W PC Resolução 1360 x 768 @ 60 Hz Saída 10 W X 2 Dimensões (L x P x A)
  • Seite 159 Sommario COLLEGAMENTO E PREPARAZIONE DEL TELEVISORE IMPOSTAZIONE DELL’ORA Elenco dei componenti ............... 2 Configurazione e visualizzazione dell’ora attuale ..... 17 Installazione del supporto ............2 Impostazione del timer ............18 Installazione del Kit di montaggio a parete ....2 Spegnimento e accensione Vista del pannello di controllo..........
  • Seite 160: Elenco Dei Componenti

    Contattare un tecnico per richiedere assistenza quando si monta la staffa a parete. Samsung Electronics non può essere ritenuta responsabile per qualsiasi danno al prodotto, lesioni personali o altri problemi causati da una installazione autonoma del televisore da parte dell’utente.
  • Seite 161: Vista Del Pannello Di Controllo

    Vista del pannello di controllo La forma e il colore del prodotto possono variare in base al modello. SOURCE Passa tra tutte le sorgenti di ingresso disponibili Premere per cambiare canale. (TV, Est.1, Est.2, AV, S-Video, Comp., PC, HDMI). Nel menu a video, utilizzare i tasti così...
  • Seite 162: Vista Del Pannello Dei Collegamenti

    Vista del pannello dei collegamenti [Jack pannello posteriore] Ingresso alimentazione Quando si collega un dispositivo esterno al televisore, assicurarsi che l’alimentazione dell’unità sia scollegata. Quando si collega un terminale esterno, far corrispondere il colore del terminale di collegamento a quello del cavo. Italiano-4...
  • Seite 163 Collegamento di un’antenna o di una rete televisiva via cavo Per vedere correttamente i canale televisivi, il monitor TV deve ricevere un segnale da una delle seguenti fonti: - Un’antenna all’esterno / Una rete televisiva via cavo / Una rete satellitare Collegamento di HDMI/DVI - Supporta le connessioni tra periferiche AV con connessione HDMI (set top box, lettori DVD, ricevitori AV e televisori digitali).
  • Seite 164: Illustrazione Del Telecomando

    Illustrazione del telecomando Pulsante di standby del televisore Seleziona direttamente la modalità PC Tasti numerici per l’accesso diretto ai canale Spegnimento automatico Selezione dei canali memorizzati con : Canale successivo una/due cifre : Canale precedente Selezione diretta della modalità TV Esci dal menu a video Controllo del cursore nel menu Visualizza “Gestore Canale”...
  • Seite 165: Accensione E Spegnimento

    Accensione e spegnimento Il conduttore isolato di corrente è collegato al retro del monitor. Inserire il conduttore isolato di corrente nell’apposita presa. L’indicatore di standby sul pannello anteriore del dispositivo si accende. Premere il pulsante sul pannello anteriore del dispositivo.. o il tasto TV ( ) sul telecomando.
  • Seite 166: Memorizzazione Automatica Dei Canali

    Per reimpostare questa funzione… Premere il tasto MENU per visualizzare il menu. Premere il pulsante per selezionare “Impostazione” e premere ENTER. Premere nuovamente il tasto ENTER per selezionare la funzione “Plug & Play”. Viene visualizzato il messaggio “Avvio Plug & Play” - Memorizzazione automatica dei canali - Memorizzazione manuale dei canali Memorizzazione automatica dei canali...
  • Seite 167: Impostazione Del Gestore Canale

    Premere il pulsante per selezionare “Sistema colore” e premere ENTER . Per selezionare i colori standard desiderati, premere il pulsante più volte, quindi premere ENTER. Premere il pulsante per selezionare “Sistema audio” e premere ENTER. Per selezionare lo standard audio desiderato, premere il pulsante più...
  • Seite 168: Attivazione Di Blocco Canali

    Attivazione di Blocco canali Tramite questa funzione è possibile impedire a utenti non autorizzati, ad esempio i bambini, di guardare programmi non adatti annullando il video e azzerando l’audio. La funzione Blocca canali non può essere disattivata utilizzando i tasti sul pannello laterale.
  • Seite 169: Assegnazione Dei Nomi Ai Canali

    Assegnazione dei nomi ai canali I nomi dei canali vengono attribuiti automaticamente al ricevimento del segnale di broadcasting del canale. Tali nomi possono essere modificati in seguito, consentendone una personalizzazione. Premere il tasto MENU per visualizzare il menu. Premere il pulsante per selezionare “Canale”...
  • Seite 170: Impostazione Dell'immagine

    Modifica dello standard dell’immagine È possibile selezionare il tipo di ‘immagine che si adatta meglio alle proprie esi- genze di visualizzazione. Premere il tasto MENU per visualizzare il menu. Premere il pulsante per selezionare “Immagine” e premere ENTER. Premere nuovamente il tasto ENTER per selezionare “Modalità”. Premere nuovamente ENTER.
  • Seite 171: Azzeramento Delle Impostazioni Di Visualizzazione Dell'immagine Ai Valori Preimpostati In Fabbrica

    Azzeramento delle impostazioni di visualizzazione dell’immagine ai valori preimpostati in fabbrica E’ possibile ripristinare le impostazioni di visualizzazione dell’immagine preimpostate in fabbrica. Per selezionare l’effetto dell’immagine desiderato, seguire le istruzioni “Modifica dello standard dell’immagine” dal punto 1 al punto 3 a pagina 12. Premere il pulsante per selezionare ““Reset”...
  • Seite 172: Dnie Demo (Digital Natural Image Engine)

    DNIe Demo (Digital Natural Image engine) La nuova tecnologia Samsung offre immagini più dettagliate e un miglioramento del contrasto e del bianco. Un nuovo algoritmo di compensazione dell’immagine offre immagini più chiare e brillanti. La tecnologia DNIe adatta ogni segnale per offrire un’immagine perfetta. E’ possibile vedere come la funzione DNIe migliori la qualità...
  • Seite 173: Modifica Dello Standard Audio

    Premere il tasto per selezionare “Programma” e poi ENTER. E’ possibile selezionare il canale da vedere nell’immagine secondaria premendo il tasto . Premere il tasto ENTER. La funzione “Programma” può essere attivata quando l’immagine secondaria è impostata su TV. Premere il tasto EXIT per uscire. L’immagine nella finestra PIP può...
  • Seite 174: Impostazione Di Trusurround Xt (Srs Tsxt)

    Impostazione di TruSurround XT (SRS TSXT) TruSurround XT è una tecnologia SRS brevettata che risolve il problema della riproduzione di contenuti multicanale 5.1 su due altoparlanti. TruSurround offre una straordinaria esperienza Surround Sound virtuale attraverso un sistema di riproduzione a due altoparlanti, inclusi gli altoparlanti interni del televisore.
  • Seite 175: Ascolto Dell'audio Dell'immagine Secondaria

    Ascolto dell’audio dell’immagine secondaria Durante l’uso della funzione PIP, è possibile ascoltare l’audio dell’immagine secondaria. Premere il tasto MENU per visualizzare il menu. Premere il pulsante per selezionare “Suono” e premere ENTER. Premere il pulsante per selezionare “Selezione audio” e premere ENTER. Premere il tasto per selezionare “Secondario”.
  • Seite 176: Impostazione Del Timer

    Impostazione del timer È possibile impostare un periodo di tempo compreso tra 30 e 180 minuti, scaduto il quale il monitor TV si spegne automaticamente. Premere il tasto MENU per visualizzare il menu. Premere il pulsante per selezionare “Impostazione” e premere ENTER. Premere il pulsante per selezionare “Ora”...
  • Seite 177: Scelta Della Lingua

    Scelta della lingua Quando si utilizza il monitor TV per la prima volta, è necessario selezionare la lingua di visualizzazione dei menu e delle indicazioni. Premere il tasto MENU per visualizzare il menu a video. Premere il pulsante per selezionare “Impostazione” e premere ENTER.
  • Seite 178: Utilizzo Della Funzione Risparmio Energia

    Utilizzo della funzione Risparmio energia Questa funzione regola la luminosità del televisore oltre a ridurre il consumo di energia. Quando si guarda il televisore di notte, impostare la modalità “Risp. energia” su “Alto” in modo da ridurre l’affaticamento della vista e il consumo di corrente.
  • Seite 179: Teletext Decoder

    Teletext Decoder La maggior parte dei canale del TV è dotata di “teletext”, ovvero di pagine di informazioni scritte, quali: Orari dei programmi televisivi. Notiziari e previsioni del tempo. Risultati sportivi. Sottotitoli per non udenti. Le pagine del teletext sono suddivise in sei categorie: Part Sommario Numero della pagina selezionata.
  • Seite 180: Selezione Di Una Pagina Teletext Specifica

    Selezione di una pagina Teletext specifica Premere i tasti numerici sul telecomando per immettere il numero di pagina direttamente: Immettere il numero della pagina a tre cifre indicato nel sommario utilizzando i tasti numerici corrispondenti. Se la pagina selezionata è collegata a diverse pagine secondarie, le pagine secondarie vengono mostrate in sequenza.
  • Seite 181: Configurazione Del Software Per Pc (Basato Su Windows Xp)

    Nel caso le schermate risultassero differenti, le stesse informazioni di base per la configurazione sono applicabili praticamente in ogni caso. (In caso contrario, contattare la casa costruttrice del proprio computer oppure un rivenditore Samsung). Fare clic su “Control Panel” nel menu di Start di Windows.
  • Seite 182: Selezione Del Pc

    Selezione del PC Regolazione della qualità dell’immagine (Blocco immagine): Lo scopo della regolazione della qualità dell’immagine è di rimuovere o ridurre i disturbi. Se il disturbo non viene eliminato mediante la semplice sintonizzazione fine, è necessario regolare al meglio la frequenza (sintonizzazione grossa) ed eseguire nuovamente la sintonizzazione fine.
  • Seite 183: Specifiche Tecniche E Ambientali

    Specifiche tecniche e ambientali Il catenaccio Kensington è utilizzato per fissare il sistema durante l’impiego in ambienti pubblici e deve essere acquistato separatamente. L’aspetto e il metodo di bloccaggio potrebbero differire dall’illustrazione a seconda del produttore. Per ulteriori informazioni relative all’uso corretto del catenaccio Kensington, fare riferimento al rispettivo manuale.
  • Seite 184: Specifiche Tecniche E Ambientali

    Specifiche tecniche e ambientali Nome del modello LE32R3 Dimensione schermo (Diagonale) poll. Alimentazione AC 220-240 V, 50 Hz Consumo di energia 152 W PC Risoluzione 1360 x 768 @ 60 Hz Audio Uscita 10 W X 2 Dimensioni (Lar. x Pro. x Alt.) Corpo.
  • Seite 185: Diagrammi A Blocchi

    Diagrammi a blocchi Italiano-27...
  • Seite 186 Questa pagina è stata lasciata inten- zionalmente vuota.
  • Seite 187 Correct Disposal of This Product (Waste Electrical & Electronic Equipment) (Applicable in the European Union and other European countries with separate collection systems) This marking shown on the product or its literature, indicates that it should not be disposed with other household wastes at the end of its working life.

Inhaltsverzeichnis