Inhaltsverzeichnis
Werbung
Verfügbare Sprachen
Verfügbare Sprachen
Quicklinks
CLEARANCES
AND INSTALLATION
MANUAL
Please read these instructions completely before
installing or operating the EcoSmart™ Fire.
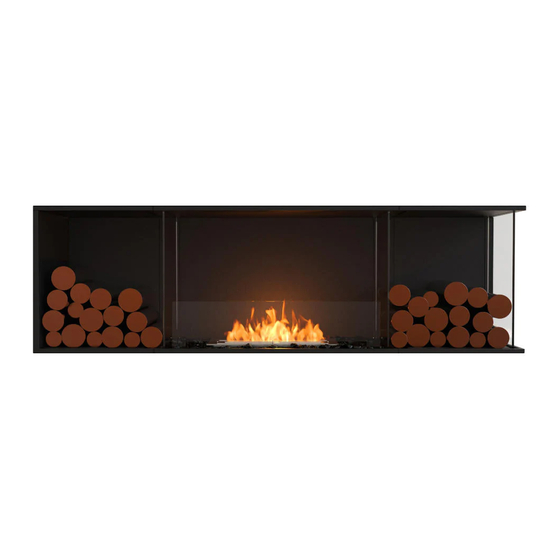
FLEX FIREPLACES
Single Sided
Double Sided
! WARNINGS:
IF THE INFORMATION IN THIS MANUAL IS NOT FOLLOWED EXACTLY, A FIRE OR EXPLOSION
MAY RESULT CAUSING PROPERTY DAMAGE, PERSONAL INJURY OR LOSS OF LIFE.
Left Corner
Peninsula
Right Corner
Island
Bay
Bench
e-NRG bioethanol is the
ONLY fuel to be used in
this appliance.
Werbung
Kapitel
Inhaltsverzeichnis

Verwandte Anleitungen für EcoSmart Fire FLEX serie


Inhaltszusammenfassung für EcoSmart Fire FLEX serie
- Seite 1 CLEARANCES AND INSTALLATION MANUAL Please read these instructions completely before installing or operating the EcoSmart™ Fire. FLEX FIREPLACES Single Sided Left Corner Right Corner Double Sided Peninsula Island Bench e-NRG bioethanol is the ONLY fuel to be used in this appliance. ! WARNINGS: IF THE INFORMATION IN THIS MANUAL IS NOT FOLLOWED EXACTLY, A FIRE OR EXPLOSION MAY RESULT CAUSING PROPERTY DAMAGE, PERSONAL INJURY OR LOSS OF LIFE.
- Seite 2 EcoSmart™ Fire. FRANÇAIS Manuel d’installation et de dégagements minimaux Veuillez lire ces instructions dans leur intégralité avant d’utiliser votre produit EcoSmart™ Fire. 中文 预留间隙与安装指示 请在安装使用EcoSmart Fire 的产品前,仔细阅读说明书 ® 以确保产品在最安全的状态下使用。 ITALIANO Distanze e manuale di installazione Leggere attentamente queste istruzioni prima di installare o utilizzare Ecosmart ™...
-
Seite 3: Inhaltsverzeichnis
ENGLISH Table of Contents Appliance Clearances SELECTING APPLIANCE LOCATION VENTILATION MINIMUM ROOM SIZE Appliance Installation FRAMING BEFORE GETTING STARTED SINGLE SIDED INSTALLATION 5 - 6 LEFT CORNER INSTALLATION 7 - 8 RIGHT CORNER INSTALLATION 7 - 8 BAY INSTALLATION 9 - 10 DOUBLE SIDED INSTALLATION 11 -1 2 PENINSULA INSTALLATION... -
Seite 4: Appliance Clearances
They are engineered are built or installed within the chosen installation area. specifically to accept compatible EcoSmart Fire Burners. When selecting a location for the appliance it is important to consider the To ensure adequate ventilation, make sure to follow the guidelines in required minimum room sizes and clearances to walls and combustible the table shown. -
Seite 5: Appliance Installation
ENGLISH Appliance Installation DEFINITIONS These appliances must be installed into a fixed secure position before being operated. Combustible materials - Materials made of or surfaced with wood, NOTICE: DO NOT INSTALL DIRECTLY BESIDE OR NEAR compressed paper, plant fibers, plastics, or other material that can WALLPAPER, LAMINATE, VENEER OR ANY SURFACE THAT IS NOT ignite and burn, whether flame produced or not, or plastered or un- DESIGNED TO WITHSTAND HEAT AND HIGH TEMPERATURES... -
Seite 6: Before Getting Started
ENGLISH Appliance Installation BEFORE GETTING STARTED 1. Carefully remove the appliance and components from the packaging 2. Inspect and report any parts damaged in shipment, particularly the condition of the glass windscreen. 3. Read all of the instructions before starting the installation. Follow these instructions carefully during the installation to ensure maximum safety and benefit. -
Seite 7: Single Sided Installation
ENGLISH Single Sided Installation Equipment required: Power Drill, Screwdriver, Level, Hand Trowel for Plaster, Silicone Gun, Caulk Gun 1. Construct the main wall framework with the opening size shown in 2. Slide the appliance inside the framing cavity (the base of the Table A. -
Seite 8: Bench Installation 15
ENGLISH Single Sided Installation 5. Complete the construction by finishing the wall paneling around the 9. Install the windscreen by inserting the two ends into the appropriate appliance. (See section on FINISHING INSTRUCTIONS and ensure that slots in the appliance. Use a small amount of pressure to push the you fully understand where non combustible materials must be used.) windscreen in place until it bottoms out into the hidden glass clips. -
Seite 9: Left Corner Installation
ENGLISH Left Corner & Right Corner Installation Equipment required: Power Drill, Screwdriver, Level, Hand Trowel for Plaster, Silicone Gun, Caulk Gun 1. Construct a main wall framework leaving an opening as shown in 2. Slide the appliance inside the framing cavity (the base of the appliance can sit directly on top of the 2 x 4 framing material). - Seite 10 ENGLISH Left Corner & Right Corner Installation 5. Complete the construction by finishing the wall paneling around the 9. Insert the full height glass panel into one of the open end side by appliance. (See section on FINISHING INSTRUCTIONS and ensure that inserting the glass into the opening at the top of the appliance, and you fully understand where non combustible materials must be used.) lowering it into the slots in the base until it bottoms out into place.
-
Seite 11: Bay Installation
ENGLISH Installation Equipment required: Power Drill, Screwdriver, Level, Hand Trowel for Plaster, Silicone Gun, Caulk Gun 1. Construct a main wall framework leaving an opening as shown in 2. Slide the appliance inside the framing cavity (the base of the Table C. - Seite 12 ENGLISH Installation 6. Complete the construction by finishing the wall paneling around the 10. Insert the full height glass panel into one of the open end side by appliance. (See section on FINISHING INSTRUCTIONS and ensure that inserting the glass into the opening at the top of the appliance, and you fully understand where non combustible materials must be used.) lowering it into the slots in the base until it bottoms out into place.
-
Seite 13: Double Sided Installation 11
ENGLISH Double Sided Installation Equipment required: Power Drill, Screwdriver, Level, Hand Trowel for Plaster, Silicone Gun, Caulk Gun 1. Construct a main wall framework with the opening size shown in 2. Remove the extension flange from the firebox so that both sides are Table D. - Seite 14 ENGLISH Double Sided Installation 6. Remove the red stability bracket(s). 10. If your appliance includes a decorative box on the left / right or both, insert the internal glass panel by feeding the glass upwards into the slot then pushing down into the positioned clips. *Decorative logs must NOT be placed directly over an open flame.
-
Seite 15: Peninsula Installation
ENGLISH Peninsula Installation Equipment required: Power Drill, Screwdriver, Level, Hand Trowel for Plaster, Silicone Gun, Caulk Gun 1. Construct a main wall framework with the opening size shown in 2. Remove the extension flange from the firebox so that both sides are Table E. - Seite 16 ENGLISH Peninsula Installation 6. Fix the appliance to the framework with screws using the existing 11. If your appliance includes a decorative box on the left / right or both, mounting holes on the appliance flanges. Make sure that the insert the internal glass panel by feeding the glass upwards into the appliance is level before securing it in place.
- Seite 17 ENGLISH Island Installation Equipment required: Power Drill, Screwdriver, Level, Hand Trowel for Plaster, Silicone Gun, Caulk Gun 1. Construct the framework with the opening size shown in Table F. The 2. Remove the extension flange from the firebox so that both sides are base of the frame can be a solid bench/platform, which will assist in the same height.
- Seite 18 ENGLISH Island Installation 6. Remove the red stability bracket(s). 10. Install the windscreen by inserting the two ends into appropriate slots in the appliance. Use a small amount of pressure to push the windscreen in place until it bottoms out into the hidden glass clips. Repeat the same for the back side windscreen and if your appliance includes a decorative box on the left / right or both.
-
Seite 19: Island Installation
ENGLISH Bench Installation Equipment required: Power Drill, Screwdriver, Level, Hand Trowel for Plaster, Silicone Gun, Caulk Gun 1. Construct the main framework using the dimensions shown on Table 2. Remove the extension flange from the firebox so that both sides are G. - Seite 20 ENGLISH Bench Installation 6. Complete the construction by finishing the wall paneling around the 9. Install the windscreen by inserting the two ends into appropriate appliance. (See section on FINISHING INSTRUCTIONS and ensure that slots in the appliance. Use a small amount of pressure to push the you fully understand where non combustible materials must be used.) windscreen in place until it bottoms out into the hidden glass clips.
-
Seite 21: Finishing
ENGLISH Finishing 1. Apply surrounding wall panels. Acceptable materials include fibre 3. Plaster all seams and beads. cement board, fire-rated medium density fibreboard (FR MDF), stone, tiles, steel, and fire-rated (FR) plasterboard. All joints between the finished wall sheathing and the front of the appliance must be sealed with non-combustible materials. -
Seite 22: Mantel Surrounds
ENGLISH Mantel Surrounds Decorative Box Infill Plate Minimum Clearances For appliances with a decorative side box, an infill plate is provided to lift the material to align with the bottom edge of the appliance. Decorative If the setting incorporates a mantel the minimum vertical and maximum boxes must only be used to hold non-combustible accessories/materials. - Seite 23 DEUTSCH Inhaltsverzeichnis Abstände zur Feuerstelle AUSWAHL DES INSTALLATIONSORTES BELÜFTUNG MINDESTRAUMGRÖSSE INSTALLATIONSANLEITUNG EINBAURAHMEN BEVOR DER INSTALLATION EINSEITIG GEÖFFNETE INSTALLATION 25 - 26 LINKSSEITIG GEÖFFNETE INSTALLATION 27 - 28 RECHTSSEITIG GEÖFFNETE INSTALLATION 27 - 28 BAY INSTALLATION 29 - 30 BEIDSEITIG GEÖFFNETE INSTALLATION 31 -32 PENINSULA INSTALLATION 33 - 34...
-
Seite 24: Abstände Zur Feuerstelle
Decken Sie keine vorhandenen Lüftungssysteme oder -strukturen Rahmenkomponenten.Sie sind speziell für die Aufnahme kompatibler ab, die innerhalb des ausgewählten Installationsbereichs verbaut EcoSmart Fire Brenner ausgelegt. oder installiert wurden. Bei der Auswahl eines Aufstellungsortes für das Gerät ist es wichtig, die erforderlichen Mindestraumgrößen und -abstände zu Wänden und Um eine ausreichende Belüftung sicherzustellen, beachten Sie die... -
Seite 25: Installationsanleitung
DEUTSCH Installationsanleitung DEFINITIONEN Diese Geräte müssen vor Inbetriebnahme in einer sicheren Position fest installiert werden. Brennbare Materialien - Materialien, die aus Holz, komprimiertem HINWEIS: NICHT DIREKT ZWISCHEN ODER IN DER NÄHE Papier, Pflanzenfasern, Kunststoffen oder anderen Materialien VON TAPETEN, LAMINATEN, FURNIEREN ODER JEGLICHER hergestellt oder damit beschichtet wurden. -
Seite 26: Vor Dem Einbau
DEUTSCH Installationsanleitung VOR DEM EINBAU 1. Nehmen Sie die Firebox und die Komponenten vorsichtig aus der Verpackung. 2. Überprüfen Sie alle Teile, ob diese während des Transports beschädigt wurden, und prüfen Sie sie, insbesondere den Zustand der Glasscheibe. 3. Lesen Sie alle Anweisungen, bevor Sie mit der Installation beginnen. Befolgen Sie diese Anweisungen während der Installation sorgfältig, um ein Höchstmaß... -
Seite 27: Einseitig Geöffnete Installation
DEUTSCH Einseitig geöffnete Installation Erforderliche Ausrüstung: Bohrmaschine, Schraubendreher, Wasserwaage, Handspachtel für Gips, Silikonpistole 1. Konstruieren Sie den Hauptwandrahmen mit der in Tabelle A 2. Schieben Sie die Firebox in den Rahmen (die Unterseite des Geräts angegebenen Öffnungsgröße. Die Basis des Rahmens kann aus einer kann direkt auf dem Rahmenmaterial sitzen). - Seite 28 DEUTSCH Einseitig geöffnete Installation 5. Schließen Sie die Konstruktion ab, indem Sie die Wandverkleidung um das Gerät herum fertigstellen. (Siehe Abschnitt “EINBAU ANWEISUNGEN”) und vergewissern Sie sich, dass Sie genau wissen, wo nicht brennbare Materialien verwendet werden müssen. 9. Installieren Sie die Windschutzscheibe, indem Sie die beiden Enden in die entsprechenden Schlitze des Geräts einführen.
-
Seite 29: Linksseitig Geöffnete Installation
DEUTSCH Linksseitig geöffnete & Rechtsseitig geöffnete Installation Erforderliche Ausrüstung: Bohrmaschine, Schraubendreher, Wasserwaage, Handspachtel für Gips, Silikonpistole 1. Konstruieren Sie den Hauptwandrahmen mit der in Tabelle B 2. Schieben Sie die Firebox in den Rahmen (die Unterseite des Geräts angegebenen Öffnungsgröße. Die Basis des Rahmens kann aus einer kann direkt auf dem Rahmenmaterial sitzen). - Seite 30 DEUTSCH Linksseitig geöffnete & Rechtsseitig geöffnete Installation 5. Schließen Sie die Konstruktion ab, indem Sie die Wandverkleidung 9. Setzen Sie die Glasscheibe mit voller Höhe in eine der offenen Enden um das Gerät herum fertigstellen. (Siehe Abschnitt “EINBAU ein, indem Sie das Glas in die Öffnung oben am Gerät einsetzen und ANWEISUNGEN”) und vergewissern Sie sich, dass Sie genau wissen, es in die Schlitze in der Basis absenken, bis es einrastet.
-
Seite 31: Bay Installation
DEUTSCH Installation Erforderliche Ausrüstung: Bohrmaschine, Schraubendreher, Wasserwaage, Handspachtel für Gips, Silikonpistole 1. Konstruieren Sie den Hauptwandrahmen mit der in Tabelle C 2. Schieben Sie die Firebox in den Rahmen (die Unterseite des Geräts angegebenen Öffnungsgröße. Die Basis des Rahmens kann aus einer kann direkt auf dem Rahmenmaterial sitzen). - Seite 32 DEUTSCH Installation 6. Schließen Sie die Konstruktion ab, indem Sie die Wandverkleidung 10. Setzen Sie die Glasscheibe mit voller Höhe in eine der offenen um das Gerät herum fertigstellen. (Siehe Abschnitt “EINBAU Enden ein, indem Sie das Glas in die Öffnung oben am Gerät ANWEISUNGEN”) und vergewissern Sie sich, dass Sie genau wissen, einsetzen und es in die Schlitze in der Basis absenken, bis es wo nicht brennbare Materialien verwendet werden müssen.
-
Seite 33: Beidseitig Geöffnete Installation
DEUTSCH Beidseitig geöffnete Installation Erforderliche Ausrüstung: Bohrmaschine, Schraubendreher, Wasserwaage, Handspachtel für Gips, Silikonpistole 1. Konstruieren Sie den Hauptwandrahmen mit der in Tabelle D angegebenen 2. Entfernen Sie den Verlängerungsflansch von der Firebox, so dass beide Seiten die gleiche Höhe haben. Dies erleichtert das Öffnungsgröße. - Seite 34 DEUTSCH Beidseitig geöffnete Installation 6. Entfernen Sie die roten Stabilisierungsbügel. 11.Installieren Sie die Windschutzscheibe, indem Sie die beiden Enden 7. Schließen Sie die Konstruktion ab, indem Sie die Wandverkleidung in die entsprechenden Schlitze des Geräts einführen. Drücken Sie um das Gerät herum fertigstellen. (Siehe Abschnitt “EINBAU die Windschutzscheibe mit etwas Druck in Position, bis sie in die ANWEISUNGEN”) und vergewissern Sie sich, dass Sie genau wissen, verborgenen Glasclips einrastet.
-
Seite 35: Peninsula Installation
DEUTSCH Peninsula Installation Erforderliche Ausrüstung: Bohrmaschine, Schraubendreher, Wasserwaage, Handspachtel für Gips, Silikonpistole 1. Konstruieren Sie den Hauptwandrahmen mit der in Tabelle E angegebenen 2. Entfernen Sie den Verlängerungsflansch von der Firebox, so Öffnungsgröße. Die Basis des Rahmens kann aus einer festen Bank / dass beide Seiten die gleiche Höhe haben. - Seite 36 DEUTSCH Peninsula Installation 6. Befestigen Sie das Gerät mit den vorhandenen Montagelöchern an 11. Wenn Ihr Gerät links / rechts oder in beiden Fällen mit einer den Geräteflanschen mit Schrauben am Rahmen. Stellen Sie sicher, dekorativen Box ausgestattet ist, setzen Sie die Glasscheibe/n ein, dass das Gerät waagerecht steht, bevor Sie es befestigen.
-
Seite 37: Island Installation
DEUTSCH Island Installation Erforderliche Ausrüstung: Bohrmaschine, Schraubendreher, Wasserwaage, Handspachtel für Gips, Silikonpistole 1. Konstruieren Sie das Gestell mit der Öffnungsgröße wie in Abbildung 2. Entfernen Sie den Verlängerungsflansch von der Firebox, so F dargestellt.. Die Basis des Rahmens kann aus einer festen Bank / dass beide Seiten die gleiche Höhe haben. - Seite 38 DEUTSCH Island Installation 6. Entfernen Sie die roten Stabilisierungsbügel. 10. Installieren Sie die Windschutzscheibe, indem Sie die beiden Enden in die entsprechenden Schlitze des Geräts einführen. Drücken Sie die Windschutzscheibe mit etwas Druck in Position, bis sie in die verborgenen Glasclips einrastet. Wiederholen Sie dasselbe Prozedere für die Hinterseite und sollte Ihr Gerät über eine dekorative Box verfügen, auch links/rechts oder beidseitig.
-
Seite 39: Bench Installation
DEUTSCH Bench Installation Erforderliche Ausrüstung: Bohrmaschine, Schraubendreher, Wasserwaage, Handspachtel für Gips, Silikonpistole 1. Konstruieren Sie das Hauptgestell mit den Abmessungen wie in 2. Entfernen Sie den Verlängerungsflansch von der Firebox, so Abbildung G angegeben. Die Basis des Rahmens kann aus einer festen dass beide Seiten die gleiche Höhe haben. - Seite 40 DEUTSCH Bench Installation 6. Schließen Sie die Konstruktion ab, indem Sie die Wandverkleidung 9. Installieren Sie die Windschutzscheibe, indem Sie die beiden Enden um das Gerät herum fertigstellen. (Siehe Abschnitt “EINBAU in die entsprechenden Schlitze des Geräts einführen. Drücken ANWEISUNGEN”) und vergewissern Sie sich, dass Sie genau wissen, Sie die Windschutzscheibe mit etwas Druck in Position, bis sie wo nicht brennbare Materialien verwendet werden müssen.
-
Seite 41: Einbauanweisung
DEUTSCH Einbauanweisung 1. Installieren sie die umgebenden Wandpaneele. Geeignete Materialien 3. Verputzen Sie alle Fugen und Nahtstellen. hierfür sind Faserzementplatten, brandsichere Faserplatten mittlerer Dichte (FR MDF), Stein, Fliesen, Stahl und brandsicherer (FR) Alle Verbindungen zwischen dem fertigen Wandmantel und der Gipskarton. -
Seite 42: Kaminsims
DEUTSCH Kaminsims Dekorative Füllplatte Mindestabstände Bei Geräten mit dekorativer Seitenkiste wird eine Füllplatte bereitgestellt, Wenn die Installation einen Kaminsims oder eine andere Einfassung enthält, um das Material an der Unterkante des Geräts auszurichten. Dekorationsboxen dürfen nur für nicht brennbare Zubehörteile / müssen die vertikalen und maximalen horizontalen Abstände für brennbare Materialien verwendet werden. - Seite 43 FRANÇAIS Sommaire Dégagements de l’insert CHOISIR L’EMPLACEMENT’ DE L’APPLICATION VENTILATION TAILLE MINIMALE DE LA PIECE Installation de l’insert ENCADREMENT AVANT DE COMMENCER INSTALLATION SIMPLE FACE 45 - 46 INSTALLATION CÔTÉ GAUCHE 47 - 48 INSTALLATION CÔTÉ DROIT 47 - 48 INSTALLATION BAIE 49 - 50 INSTALLATION DOUBLE FACE...
-
Seite 44: Dégagements De L'insert
à une source d’alimentation en combustible. Les foyers sont préfabriqués zéro-dégagement et peuvent être encadrés par des matériaux combustibles. Ils sont conçus pour accueillir uniquement des brûleurs EcoSmart Fire. Ne pas couvrir les systèmes ou structures de ventilation préexistants dans l’espace sélectionné pour l’installation. -
Seite 45: Installation De L'insert
FRANÇAIS Installation de l’insert DEFINITIONS Ces inserts doivent être installés dans une position sécurisée avant d’être utilisés. Matériaux combustibles - Les matériaux constitués de bois, de REMARQUE: NE PAS INSTALLER DIRECTEMENT CONTRE OU À papier compressé, de fibres végétales, de plastique ou de tout autre PROXIMITÉ... -
Seite 46: Avant De Commencer
FRANÇAIS Installation de l’insert AVANT DE COMMENCER 1. Retirez avec précaution l’insert de les composants de l’emballage 2. Inspectez et rapporter les pièces endommagées pendant le transport, en particulier l’état de la vitre de protection en verre. 3. Lisez toutes les instructions avant de commencer l’installation. Suivez attentivement ces précautions d’emploi pendant l’installation pour assurer votre sécurité... -
Seite 47: Installation Simple Face
FRANÇAIS Installation Simple Face Matériel nécessaire: Perceuse, Tournevis, Truelle pour le plâtre, Pistolet à silicone, Pistolet à calfeutrer. 1. Construisez le cadre du mur principale avec la taille d’ouverture 2. Faites glisser l’insert dans la cavité de l’ossature (la base de l’insert indiquée dans le tableau A. - Seite 48 FRANÇAIS Installation Simple Face 5. Terminez la construction en finissant les panneaux muraux autour de l’insert. 9. Installez la vitre de protection en insérant les deux extrémités dans (Voir la section INSTRUCTIONS SUR FINITIONS et assurez-vous de bien les fentes appropriées de l’insert. Utilisez un peu de pression pour pousser la vitre de protection en place jusqu’à...
-
Seite 49: Installation Côté Gauche
FRANÇAIS Installations Côté Gauche et Côté Droit Matériel nécessaire: Perceuse, Tournevis, Truelle pour le plâtre, Pistolet à silicone, Pistolet à calfeutrer. 1. Construisez le cadre du mur principale avec la taille d’ouverture indiquée 2. Faites glisser l’insert dans la cavité de l’ossature (la base de l’insert peut dans le tableau B. - Seite 50 FRANÇAIS Installations Côté Gauche et Côté Droit 6. Placez le brûleur en position. 9. Insérez le panneau de verre dans l’un des côtés ouverts en insérant le verre dans l’ouverture située dans la partie supérieure de l’insert et en le rabaissant dans les fentes de la base jusqu’à ce qu’il soit complètement en place.
-
Seite 51: Installation Baie
FRANÇAIS Installation Baie Matériel nécessaire: Perceuse, Tournevis, Truelle pour le plâtre, Pistolet à silicone, Pistolet à calfeutrer. 1. Construisez le cadre du mur principale avec la taille d’ouverture 2. Faites glisser l’insert dans la cavité de l’ossature (la base de l’insert indiquée dans le tableau C. - Seite 52 FRANÇAIS Installation Baie 6. Terminez la construction en finissant les panneaux muraux autour de l’insert. 10. Insérez le panneau de verre dans l’un des côtés ouverts en insérant le (Voir la section INSTRUCTIONS SUR FINITIONS et assurez-vous de bien verre dans l’ouverture située dans la partie supérieure de l’insert et en le comprendre où...
-
Seite 53: Installation Double Face
FRANÇAIS Installation Double Face Matériel nécessaire: Perceuse, Tournevis, Truelle pour le plâtre, Pistolet à silicone, Pistolet à calfeutrer. 1. Construisez le cadre du mur principale avec la taille d’ouverture 2. Retirez le rebord d’extension du foyer de manière à ce que les deux indiquée dans le tableau D. - Seite 54 FRANÇAIS Installation Double Face 6. Retirez les supports de stabilité rouges. * Les bûches décoratives ne doivent PAS être mises directement sur une flamme nue. Elles sont conçues pour être placées près de la chaleur mais pas sur la flamme elle-même. 7.
-
Seite 55: Installation Peninsule
FRANÇAIS Installation Peninsule Matériel nécessaire: Perceuse, Tournevis, Truelle pour le plâtre, Pistolet à silicone, Pistolet à calfeutrer. 1. Construisez le cadre du mur principale avec la taille d’ouverture 2. Remove the extension flange from the firebox so that both sides are indiquée dans le tableau E. - Seite 56 FRANÇAIS Installation Peninsule 6. Fix the appliance to the framework with screws using the existing 11. Si votre produit contient une boîte décorative à gauche / à droite, ou les deux, insérez-le ou les panneaux de verre internes en mounting holes on the appliance flanges. Make sure that the introduisant le verre vers le haut dans la fente, puis en le poussant appliance is level before securing it in place.
-
Seite 57: Installation Ile
FRANÇAIS Installation Matériel nécessaire: Perceuse, Tournevis, Truelle pour le plâtre, Pistolet à silicone, Pistolet à calfeutrer. 1. Construisez la structure avec les dimensions d’ouverture indiquées 2. Retirez le rebord d’extension du foyer de manière à ce que les deux dans le tableau F. La base du cadre peut être un solide banc / plate- côtés aient la même hauteur. - Seite 58 FRANÇAIS Installation 6. Retirez les supports de stabilité rouges. 10.Installez la vitre de protection en insérant les deux extrémités dans les fentes appropriées de l’insert. Utilisez un peu de pression pour pousser la vitre de protection en place jusqu’à ce qu’elle glisse dans les clips de verre.
-
Seite 59: Installation Banc
FRANÇAIS Banc Installation Matériel nécessaire: Perceuse, Tournevis, Truelle pour le plâtre, Pistolet à silicone, Pistolet à calfeutrer. 1. Construisez la structure principale en utilisant les dimensions indiquées au tableau G. La base du cadre peut être un solide banc 2. Retirez le rebord d’extension du foyer de manière à ce que les deux / plate-forme, ce qui facilitera la mise à... - Seite 60 FRANÇAIS Banc Installation 6. Terminez la construction en finissant les panneaux muraux autour de l’insert. 9. Installez la vitre de protection en insérant les deux extrémités dans (Voir la section INSTRUCTIONS SUR FINITIONS et assurez-vous de bien les fentes appropriées de l’insert. Utilisez un peu de pression pour pousser la vitre de protection en place jusqu’à...
-
Seite 61: Finitions
FRANÇAIS FINITIONS 1. Appliquez panneaux muraux. Les matériaux acceptables 3. Plâtrer tous les joints et bordures. comprennent les panneaux de fibrociment, les panneaux de fibres à densité moyenne à indice de résistance au feu (FR MDF), la pierre, Tout les joints entre le revêtement de la finition murale et le devant le carrelage, l’acier et les plaques de plâtre à... -
Seite 62: Tablette De Cheminee
FRANÇAIS TABLETTE DE CHEMINEE PLAQUE DE REMPLISSAGE DE BOITE DECORATIVE Dégagements minimaux Pour le produit avec une boîte décorative sur un côté, une plaque de remplissage est prévu pour soulever le matériau afin de l’aligner avec le Si le décor contient une tablette de cheminée, les dimensions verticales bord inférieur de l’insert. - Seite 63 中文 目录 壁炉预留间隙 选择壁炉安装位置 通风注意事项 最小室内面积要求 壁炉安装 外框 准备工作 Single Sided 单面壁炉安装 65 - 66 Left Corner 左面壁炉安装 67 - 68 Right Corner 右面壁炉安装 67 - 68 BAY 前环绕型壁炉安装 69 - 70 DOUBLE Sided 双面壁炉安装 71 - 72 PENINSULA 侧环绕型壁炉安装 73 - 74 75 - 76 ISLAND 悬浮式壁炉安装...
-
Seite 64: 选择壁炉安装位置
中文 壁炉预留间隙 通风注意事项 请在安装使用EcoSmart Fire ® 的产品前,仔细阅读说明书以确保产品在 最安全的状态下使用。 EcoSmart Fires 无需任何固定夹具或配件用于通风,以及燃料供 ® 给。 选择壁炉安装的位置 请勿覆盖现有的通风系统设计或预留的壁炉安装空间。 壁炉为外墙体无间隙设计,以及预留了足够的安全空间以隔离房屋内 以建好的可燃外框架等材质。壁炉是特别针对EcoSmart 燃烧器所设 请勿覆盖现有的通风系统设计或预留的壁炉安装空间。 计研发。 为确保足够的通风环境,请参照以下表格的标准。 在选取安装壁炉位置时,请了解清楚最小室内面积要求以及与墙壁, 可燃物的安全距离。(请参照以下安全距离指示图与最小安全间距表 美国保险商试验所 (UL) 根据以下计算方式判定是否有足够的通风环 格)。 境: 注意:Flex壁炉是采用黑色高温塑粉上色至镀锌板材质上起到最佳防锈 传统的房屋结构,不含高密封,密集型房屋设计结构的,足够的空气 效果。燃烧器是使用304不锈钢材质制作。为了更好的保养与长久使用 流通需要能与户外接通。不过,如果壁炉在小于5.7立方米 【200ft 燃烧器,请及时清理表面的污渍与污垢。 】的环境内使用的话,在燃烧器最大功率状态下,每小时最大热量值 需在1000BTU内,需保持门与对接房间保持空气通畅,或是预留窗户 如果壁炉安装至户外环境,请确保壁炉的正上方有防护屋檐以防止雨 缝隙至少25.4mm [1in]以防止室内缺氧等空气问题发生。请勿在狭 水侵泡侵蚀导致产品彻底无法使用。如果产品在曝露的环境下使用将... - Seite 65 中文 壁炉安装 壁炉应在安全安装固定牢固的位置操作使用。 注释 可燃材质 - 木制或表面木制,压缩纸,纤维,塑料,或是其他易燃 注意:请勿安装靠近壁画,壁纸,贴纸或是任何不能耐热耐高温的 物质,涵盖任何会因加热而损坏或着火的材质,石膏或非石膏,非 表面(因为热量会导致材质变质,或是特定情况下溶解材质内的胶 自燃等都需考虑为可燃材质。 水导致脱胶)。壁炉周边的环境会变热,所以对于温度敏感的材质 请勿在壁炉周围使用。请勿将可燃材质放置壁炉周围。 材料不可烧的定义为合金,铁,红砖,瓷砖,水泥,石板,玻璃与 壁炉不可用作隔门,或是活动隔间的用途。 石膏,或任何混合材料。例如HardieBacker , WonderBoard ® ® Durock 或是通过ASTM E 136 认证的材质,以及立体方形壁炉内 ® 任何时候壁炉必须保持通风。壁炉不可用作烤箱,或是类似保温箱 750度下测试通过的材质均为非可燃性材质。 的用途。壁炉在使用时火焰必须有足够空气流通达到最佳的燃烧效 注意:示意图为常规安装方法仅用作设计参考用途。示意图未按比 果。 例绘画。实际安装情况也请根据个人设计方案考量与达到我们要求 的安全标准。 请勿在壁炉与框架预留的位置内(壁炉与隔离柱之间)塞入隔热板 材或是其他材质。预留空间是用于维持产品正常散热与使用。 在任何安装的情况下,请勿私自修改产品。不允许切割产品的金属 板。 产品在使用时或使用后因为升温或降温产生的轻微异响属于正常现 象。 注意:请勿在无玻璃的情况下使用。 请在使用前确保壁炉完整组装好。如果未能按照要求安装玻璃(或移...
-
Seite 66: 准备工作
中文 壁炉安装 使用前须知 1. 请小心拆开包装与挪动壁炉与配件。 2. 仔细检查包装内的任何零件是否有受损,请特别注意挡风玻璃。 3. 仔细阅读说明书与安装要求。按照指示的步骤仔细安装检查以确保 产品在最佳与安全的状态下使用。 警告:火灾与爆炸的安全隐患!配件损坏会影响产品的安全性。如发 现,请勿继续安装损坏配件或替换未认证配件。 燃烧器 防漏液酒精桶 火焰稳定挡板 点火器 说明书 点火杆 FLEX说明书 安全知识手册 红色支撑支架* 壁炉 酒精桶 挡风玻璃 黑色玻璃石 壁炉包装 燃烧器包装 *不适用于Flex Bench型号产品。 ©版权所有2004–2020 MAD Design Group有限公司保留所有权利。V1119... -
Seite 67: Single Sided 单面壁炉安装
中文 Single Sided 单面壁炉安装 准备工具:电钻,螺丝刀,石膏瓦刀,硅胶,填缝枪。 1. 1. 根据表格A的开口尺寸搭建框架。底座可以为实心平整的平台以 2. 将壁炉滑进框架的腔体内 (壁炉可以直接架在2x4板材的框架上) 方便校正壁炉的水平线。 。壁炉内以预先安装了红色支撑支架在壁炉的开口处以保护在运输 与安装过程中不会变形。请将保留红色支撑支架直到框架安装结束 为止。 表格A:框架开口尺寸。 请实际测量壁炉规格先以确保制作框架前考量足够公差。 3. 请用螺丝透过壁炉预留的组装口固定壁炉至框架上。锁紧前请确保 壁炉处于水平状态。 宽 深 高 重量* 壁炉 mm [in] mm [in] mm [in] kg [lbs] FLEX18SS 488 [19.2] [14.4] 730 [28.7] 25.7 [56.5] FLEX32SS 922 [36.3] [14.4]... - Seite 68 中文 Single Sided 单面壁炉安装 5. 请使用防火墙板包裹住壁炉墙体内的表面。(请参照表面完工指示 9. 对准预留的两端玻璃孔洞安装挡风玻璃。请使用适当的力度将挡风 确保完全理解与使用非可燃性材质安装。) 玻璃推入玻璃夹处固定。 注意:挡风玻璃为钢化玻璃,比常规玻璃在耐温与结构上要强硬。 但是钢化玻璃也有脆弱的位置,特别在角落与边缘处如果不小心照 料,在特定压力下受损或受压会导致玻璃破裂。我们推荐您在安装 时请配套手套以防止玻璃破裂时细小的碎片刮伤。 6. 将燃烧器放入壁炉内。 10. 均匀摊开摆放玻璃石进壁炉内。注意:确保燃烧器的炉盖是关闭 的。请避免摆放在燃烧器靠近炉芯口的地方以预防掉入。摆放时请 注意不要刮伤燃烧器表面。 7. 移除玻璃安装孔的防尘贴纸。 8. 如果壁炉附带了左/右侧装饰盒,请将内玻璃往上插入顶端洞口然后 在摆正放低进预留的玻璃孔位。 *装饰铁管请勿直接放置在火焰燃烧的位置。装饰铁盒仅用于美观用 途。 ©版权所有2004–2020 MAD Design Group有限公司保留所有权利。V1119...
-
Seite 69: Left Corner 左面壁炉安装
中文 Left Corner & Right Corner 左/右面壁炉安装 准备工具:电钻,螺丝刀,石膏瓦刀,硅胶,填缝枪。 2. 将壁炉滑进框架的腔体内 (壁炉可以直接架在2x4板材的框架上)。壁 1. 根据表格B的开口尺寸搭建框架。底座可以为实心平整的平台以方便校 炉内以预先安装了红色支撑支架在壁炉的开口处以保护在运输与安装过 正壁炉的水平线。 程中不会变形。请将保留红色支撑支架直到框架安装结束为止。 示意图为左面壁炉安装。 使用附带的螺丝对准顶部的角落延长板锁紧壁炉顶板。 表格B:框架开口尺寸。 请实际测量壁炉规格先以确保制作框架前考量足够公差。 3. 请用螺丝透过壁炉预留的组装口固定壁炉至框架上。锁紧前请确保壁炉 壁炉 宽 深 高 重量* 处于水平状态。 mm [in] mm [in] mm [in] kg [lbs] (LC & RC) FLEX18LC [14.4] 33 [72.6] 470 [18.5]... - Seite 70 中文 Left Corner & Right Corner 左/右面壁炉安装 10. 对准预留的两端玻璃孔洞安装挡风玻璃。请使用适当的力度将挡风玻 6. 将燃烧器放入壁炉内。 璃推入玻璃夹处固定。 注意:挡风玻璃为钢化玻璃,比常规玻璃在耐温与结构上要强硬。但是 钢化玻璃也有脆弱的位置,特别在角落与边缘处如果不小心照料,在特 定压力下受损或受压会导致玻璃破裂。我们推荐您在安装时请配套手套 以防止玻璃破裂时细小的碎片刮伤。 7. 移除玻璃安装孔的防尘贴纸。 11. 均匀摊开摆放玻璃石进壁炉内。注意:确保燃烧器的炉盖是关闭 的。请避免摆放在燃烧器靠近炉芯口的地方以预防掉入。摆放时请 注意不要刮伤燃烧器表面。 8. 如果壁炉附带了左/右侧装饰盒,请将内玻璃往上插入顶端洞口然后在 摆正放低进预留的玻璃孔位。 *装饰铁管请勿直接放置在火焰燃烧的位置。装饰铁盒仅用于美观用途。 9. 将侧边玻璃透过顶部开口插入然后摆正并将玻璃脚的位置放低安装进底 座预留的玻璃夹固定紧。 ©版权所有2004–2020 MAD Design Group有限公司保留所有权利。V1119...
-
Seite 71: Bay 前环绕型壁炉安装
中文 前环绕型壁炉安装 准备工具:电钻,螺丝刀,石膏瓦刀,硅胶,填缝枪。 2. 将壁炉滑进框架的腔体内 (壁炉可以直接架在2x4板材的框架上)。壁 1. 根据表格C的开口尺寸搭建框架。底座可以为实心平整的平台以方便校 炉内以预先安装了红色支撑支架在壁炉的开口处以保护在运输与安装过 正壁炉的水平线。 程中不会变形。请将保留红色支撑支架直到框架安装结束为止。 表格C:框架开口尺寸。 3. 确保左右边缘与框架持平。 请实际测量壁炉规格先以确保制作框架前考量足够公差。 宽 深 高 重量* 壁炉 mm [in] mm [in] mm [in] kg [lbs] FLEX18BY 460 [18.1] [14.4] 730 [28.7] 40.7 [89.5] FLEX32BY 892 [35.1] [14.4] 730 [28.7] 51.9 [114.2] FLEX42BY... - Seite 72 中文 前环绕型壁炉安装 6. 请使用防火墙板包裹住壁炉墙体内的表面。(请参照表面完工指示确保 10. 将侧边玻璃透过顶部开口插入然后摆正并将玻璃脚的位置放低安装进 完全理解与使用非可燃性材质安装。) 底座预留的玻璃夹固定紧。 7. 将燃烧器放入壁炉内。 11. 对准预留的两端玻璃孔洞安装挡风玻璃。请使用适当的力度将挡风玻 璃推入玻璃夹处固定。 注意:挡风玻璃为钢化玻璃,比常规玻璃在耐温与结构上要强硬。但是 钢化玻璃也有脆弱的位置,特别在角落与边缘处如果不小心照料,在特 定压力下受损或受压会导致玻璃破裂。我们推荐您在安装时请配套手套 以防止玻璃破裂时细小的碎片刮伤。 8. 移除玻璃安装孔的防尘贴纸。 12. 均匀摊开摆放玻璃石进壁炉内。注意:确保燃烧器的炉盖是关闭 的。请避免摆放在燃烧器靠近炉芯口的地方以预防掉入。摆放时请 注意不要刮伤燃烧器表面。 9. 如果壁炉附带了左/右侧装饰盒,请将内玻璃往上插入顶端洞口然后在 摆正放低进预留的玻璃孔位。 *装饰铁管请勿直接放置在火焰燃烧的位置。装饰铁盒仅用于美观用途。 ©版权所有2004–2020 MAD Design Group有限公司保留所有权利。V1119...
-
Seite 73: Double Sided 双面壁炉安装
中文 Double Sided 双面壁炉安装 准备工具:电钻,螺丝刀,石膏瓦刀,硅胶,填缝枪。 2. 移除背面的延长板背板与侧板持平以方便将壁炉滑进框架内。请保管卸 1. 根据表格D的开口尺寸搭建框架。底座可以为实心平整的平台以方便校 下后的螺丝。 正壁炉的水平线。 注意:双面壁炉不能装入单面腔体内。安装框架必须为双向的,前后玻 璃均无任何物体遮挡。请勿施加任何压力在材料与玻璃上。双向壁炉为 空间分隔用途。如果不谨慎参考安装指示,墙体或因过热而着火。 3. 将壁炉滑进框架的腔体内 (托盘的底部可以直接架在框架上安装)。 壁炉内以预先安装了红色支撑支架在壁炉的开口处以保护在运输与安装 过程中不会变形。请将保留红色支撑支架直到框架安装结束为止。 表格D:框架开口尺寸。 请实际测量壁炉规格先以确保制作框架前考量足够公差。 宽 深 高 重量* 壁炉 mm [in] mm [in] mm [in] kg [lbs] FLEX18DB 488 [19.2] 349 [13.6] 730 [28.7] 26.5 [58.3] FLEX32DB 922 [36.3]... - Seite 74 中文 Double Sided 双面壁炉安装 10. 如果壁炉附带了左/右侧装饰盒,请将内玻璃往上插入顶端洞口然后在 6. 移除红色支撑支架。 摆正放低进预留的玻璃孔位。 *装饰铁管请勿直接放置在火焰燃烧的位置。装饰铁盒仅用于美观用途。 7. 请使用防火墙板包裹住壁炉墙体内的表面。(请参照表面完工指示确保 完全理解与使用非可燃性材质安装。) 11. 对准预留的两端玻璃孔洞安装挡风玻璃。请使用适当的力度将挡风玻 璃推入玻璃夹处固定。 注意:挡风玻璃为钢化玻璃,比常规玻璃在耐温与结构上要强硬。但是 钢化玻璃也有脆弱的位置,特别在角落与边缘处如果不小心照料,在特 定压力下受损或受压会导致玻璃破裂。我们推荐您在安装时请配套手套 以防止玻璃破裂时细小的碎片刮伤。 8. 将燃烧器放入壁炉内。 12. 均匀摊开摆放玻璃石进壁炉内。注意:确保燃烧器的炉盖是关闭 的。请避免摆放在燃烧器靠近炉芯口的地方以预防掉入。摆放时请 注意不要刮伤燃烧器表面。 9. 移除玻璃安装孔的防尘贴纸。 ©版权所有2004–2020 MAD Design Group有限公司保留所有权利。V1119...
-
Seite 75: Peninsula 侧环绕型壁炉安装
中文 Peninsula 侧环绕型壁炉安装 准备工具:电钻,螺丝刀,石膏瓦刀,硅胶,填缝枪。 2. 移除背面的延长板背板与侧板持平以方便将壁炉滑进框架内。请保管卸 1. 根据表格E的开口尺寸搭建框架。底座可以为实心平整的平台以方便校 下后的螺丝。 正壁炉的水平线。 注意:三面敞开壁炉不能装入单面腔体内。安装框架必须为三面通畅 的,前后玻璃均无任何物体遮挡。请勿施加任何压力在材料与玻璃上。 三面敞开壁炉为空间分隔用途。如果不谨慎参考安装指示,墙体或因过 热而着火。 3. 将壁炉滑进框架的腔体内 (托盘的底部可以直接架在框架上安装)。 壁炉内以预先安装了红色支撑支架在壁炉的开口处以保护在运输与安装 过程中不会变形。请将保留红色支撑支架直到框架安装结束为止。 表格E:框架开口尺寸。 请实际测量壁炉规格先以确保制作框架前考量足够公差。 宽 深 高 重量* 壁炉 mm [in] mm [in] mm [in] kg [lbs] FLEX18PN 34.2 [75.2] 470 [18.5] 349 [13.6] 730 [28.7] FLEX32PN 49.8 [109.6]... - Seite 76 中文 Peninsula 侧环绕型壁炉安装 6. 请用螺丝透过壁炉预留的组装口固定壁炉至框架上。锁紧前请确保壁炉 11. 如果壁炉附带了左/右侧装饰盒,请将内玻璃往上插入顶端洞口然后在 处于水平状态。 摆正放低进预留的玻璃孔位。 *装饰铁管请勿直接放置在火焰燃烧的位置。装饰铁盒仅用于美观用途。 7. 移除红色支撑支架。 12. 将侧边玻璃透过顶部开口插入然后摆正并将玻璃脚的位置放低安装进 底座预留的玻璃夹固定紧。 8. 请使用防火墙板包裹住壁炉墙体内的表面。(请参照表面完工指示确保 完全理解与使用非可燃性材质安装。) 13. 对准预留的两端玻璃孔洞安装挡风玻璃。请使用适当的力度将挡风玻 璃推入玻璃夹处固定。 注意:挡风玻璃为钢化玻璃,比常规玻璃在耐温与结构上要强硬。但是 钢化玻璃也有脆弱的位置,特别在角落与边缘处如果不小心照料,在特 定压力下受损或受压会导致玻璃破裂。我们推荐您在安装时请配套手套 以防止玻璃破裂时细小的碎片刮伤。 9. 将燃烧器放入壁炉内。 14. 均匀摊开摆放玻璃石进壁炉内。注意:确保燃烧器的炉盖是关闭 的。请避免摆放在燃烧器靠近炉芯口的地方以预防掉入。摆放时请 10. 移除玻璃安装孔的防尘贴纸。 注意不要刮伤燃烧器表面。 ©版权所有2004–2020 MAD Design Group有限公司保留所有权利。V1119...
-
Seite 77: Island 悬浮式壁炉安装
中文 Island 悬浮式壁炉安装 准备工具:电钻,螺丝刀,石膏瓦刀,硅胶,填缝枪。 2. 移除背面的延长板背板与侧板持平以方便将壁炉滑进框架内。请保管卸 1. 根据表格F所示的开口尺寸搭建框架。底座可以为实心平整的平台以方 下后的螺丝。 便校正壁炉的水平线。 注意: 不得将本产品插入墙体结构中,必须将其安装在一个单独的框架 上,且框架要安全固定到地板上。也不要将本产品安装在可移动或不稳 定结构上。产品顶部应安装在固定在天花板上的框架上,并与底部框架 对齐。四边式产品是作为隔墙嵌入物设计的。 如果不谨慎参考安装指 示,墙体或因过热而着火。 3. 将壁炉滑进框架的腔体内 (托盘的底部可以直接架在框架上安装)。 壁炉内以预先安装了红色支撑支架在壁炉的开口处以保护在运输与安装 过程中不会变形。请将保留红色支撑支架直到框架安装结束为止。 表格F:框架开口尺寸。 请实际测量壁炉规格先以确保制作框架前考量足够公差。 宽 深 高 重量* 壁炉 mm [in] mm [in] mm [in] kg [lbs] FLEX18IL 455 [17.9] 349 [13.6] 730 [28.7] 22.2 [48.9]... - Seite 78 中文 Island 悬浮式壁炉安装 10. 对准预留的两端玻璃孔洞安装挡风玻璃。请使用适当的力度将挡风玻 6. 移除红色支撑支架。 璃推入玻璃夹处固定。对后侧风挡重复同样的操作,如果你的设备在 左/右单边或两边都有装饰盒,也可以重复同样的操作。 *装饰铁管请勿直接放置在火焰燃烧的位置。装饰铁盒仅用于美观用途。 这种型号产品只需添加一套装饰木。 注意:挡风玻璃为钢化玻璃,比常规玻璃在耐温与结构上要强硬。但是 钢化玻璃也有脆弱的位置,特别在角落与边缘处如果不小心照料,在特 定压力下受损或受压会导致玻璃破裂。我们推荐您在安装时请配套手套 以防止玻璃破裂时细小的碎片刮伤。 7. 请使用防火墙板包裹住壁炉墙体内的表面。(请参照表面完工指示确保 完全理解与使用非可燃性材质安装。) 11. 均匀摊开摆放玻璃石进壁炉内。注意:确保燃烧器的炉盖是关闭 的。请避免摆放在燃烧器靠近炉芯口的地方以预防掉入。摆放时请 注意不要刮伤燃烧器表面。 8. 将燃烧器放入壁炉内。 9. 移除玻璃安装孔的防尘贴纸。 ©版权所有2004–2020 MAD Design Group有限公司保留所有权利。V1119...
-
Seite 79: Bench 中岛型壁炉安装
中文 Bench 中岛型壁炉安装 准备工具:电钻,螺丝刀,石膏瓦刀,硅胶,填缝枪。 1. 根据表格G的尺寸数据搭建主框架。底座可以为实心平整的平台以方便 2. 移除背面的延长板背板与侧板持平以方便将壁炉滑进框架内。请保管卸 校正壁炉的水平线。 开始安装之前,请确保燃烧器开口与天花板之间 下后的螺丝。 至少有1500mm(59.1”)的顶部间隙。 注意: 不得将本产品插入墙体结构中,必须将其安装在一个单独的框 架上,且框架要安全固定到地板上。产品顶部应安装在固定在天花板上 的框架上,并与底部框架对齐。四边式产品是作为隔墙嵌入物设计的。 3. 将壁炉滑进框架的腔体内 (托盘的底部可以直接架在框架上安装)。 表格G:框架尺寸 请实际测量壁炉规格先以确保制作框架前考量足够公差。 宽 深 重量* 壁炉 mm [in] mm [in] kg [lbs] FLEX18BN 18.3 [40.2] 455 [17.9] 349 [13.6] FLEX32BN 27.5 [60.6] 887 [34.9] 349 [13.6] FLEX42BN... - Seite 80 中文 Bench 中岛型壁炉安装 6. 请使用防火墙板包裹住壁炉墙体内的表面。(请参照表面完工指示确保 9. 对准预留的两端玻璃孔洞安装挡风玻璃。请使用适当的力度将挡风玻璃 完全理解与使用非可燃性材质安装。) 推入玻璃夹处固定。对后侧风挡重复同样的操作,如果你的设备在左/ 右单边或两边都有装饰盒,也可以重复同样的操作。 *装饰铁管请勿直接放置在火焰燃烧的位置。装饰铁盒仅用于美观用途。 这种型号产品只需添加一套装饰木。 注意:挡风玻璃为钢化玻璃,比常规玻璃在耐温与结构上要强硬。但是 钢化玻璃也有脆弱的位置,特别在角落与边缘处如果不小心照料,在特 定压力下受损或受压会导致玻璃破裂。我们推荐您在安装时请配套手套 以防止玻璃破裂时细小的碎片刮伤。 7. 将燃烧器放入壁炉内。 10. 均匀摊开摆放玻璃石进壁炉内。注意:确保燃烧器的炉盖是关闭 的。请避免摆放在燃烧器靠近炉芯口的地方以预防掉入。摆放时请 注意不要刮伤燃烧器表面。 8. 移除玻璃安装孔的防尘贴纸。 ©版权所有2004–2020 MAD Design Group有限公司保留所有权利。V1119...
-
Seite 81: 墙体安装
中文 表面完工 1. 墙体安装前,可采用的材料包括纤维水泥板、耐火中密度纤维板(FR 3. 所有金属包角需用石膏填补装饰。 MDF)、石材、瓷砖、钢材和耐火石膏板。 所有拼接处与壁炉正前方均需要使用非可燃性材质填补缝隙。所有 外墙必须不能悬挂于壁炉开口处遮挡。 用于填补墙壁与壁炉之间的密封胶,例如填缝胶或是乳胶,最低持 续性耐温评级必须在150ºC (122ºF)以上。 注意!火灾隐患!请勿在安全间距内放置任何可燃物质。请仔细阅 读说明书内列举的可燃物质类别确保安装符合安全要求。 须知:155mm[6’’] 非可燃板材必须在壁炉开口处的上方安装。 请参照以下示意图: 4. 如果墙壁设计里需要上漆,请确保使用100% 丙烯酸乳胶或油性漆或 常规亚克力漆。请参照油漆厂商指示说明使用上漆。 示意图:单面设计壁炉 请根据燃烧器内附带说明书正确使用产品 。 示意图:半开设计壁炉 2. 金属包角必须在各个边角上安装(边缘斜接)。(请勿使用比板材 厚度还长的螺丝固定以防止戳穿壁炉本身)。 e-NRG生物燃料是此类产品唯一燃料 www.ecosmartfire.com... -
Seite 82: 壁炉面饰
中文 壁炉框架 装饰盒内托盘 壁炉内带侧边装饰盒会附带一片内板用于摆放装饰物件。装饰盒必须 最小间隙 只可搭配非可燃材质的配件/物件。 如果设置里包含了壁炉架请确保参照以下示意图设计最小竖向间距以 及最大横向间距。 可燃外墙预留间隙 12.7mm [0.5’’] 石膏板 381mm [15’’] 最大 914.4mm [36’’ ] 12.7mm [0.5’’] 非可燃板 330mm [13’’] 最小 152.4mm [6’’] 高 50.8mm [2’’ ] 最小 12.7mm [0.5’’] 石膏板 最小竖向与最大横向尺寸可燃框架。 非可燃外墙预留间隙 12.7mm [0.5’’] 石膏板 381mm [15’’] 最大 914.4mm [36’’... - Seite 83 ITALIANO Sommario Sicurezza degli apparecchi SELEZIONARE LA POSIZIONE DELL’APPARECCHIO VENTILAZIONE DIMENSIONE MINIMA DELLA STANZA Installazione dell’apparecchio INQUADRATURA PRIMA DI INIZIARE INSTALLAZIONE LATO SINGOLO 85 - 86 INSTALLAZIONE ANGOLO SINISTRO 87 - 88 INSTALLAZIONE ANGOLO DESTRO 87 - 88 INSTALLAZIONE BAY 89 - 90 INSTALLAZIONE A DUE LATI 91 - 92...
-
Seite 84: Sicurezza Degli Apparecchi
Lo spazio zero è stato progettato per l ‘apparecchio e ha le l’alimentazione di carburante. autorizzazioni necessarie per componenti del telaio combustibili già integrati. Sono progettati specificamente per accettare EcoSmart Fire Non coprire i sistemi di ventilazione esistenti o le strutture bruciatori compatibili. -
Seite 85: Installazione Dell'apparecchio
ITALIANO Installazione dell’apparecchio INQUADRATURA Questi apparecchi devono essere installati in una posizione di sicurezza fissa prima di essere utilizzati. Considerazioni importanti per l’inquadratura AVVISO: NON INSTALLARE DIRETTAMENTE ALL’ESTERNO O VICINO A WALLPAPER, LAMINATO, IMPIALLACCIATO O 1. L’apparecchio deve essere installato su una superficie piana in QUALSIASI SUPERFICIE CHE NON È... -
Seite 86: Prima Di Iniziare
ITALIANO Installazione dell’apparecchio PRIMA DI INIZIARE 1. Rimuovere con attenzione l’apparecchio e i componenti dalla confezione 2. Ispezionare e segnalare eventuali parti danneggiate durante la spedizione, in particolare le condizioni del parabrezza in vetro. 3. Leggere tutte le istruzioni prima di iniziare l’installazione. Seguire attentamente queste istruzioni durante l’installazione per garantire la massima sicurezza e benefici. -
Seite 87: Installazione Lato Singolo
ITALIANO Installazione Lato Singolo Attrezzatura necessaria: trapano elettrico, cacciavite, livella, cazzuola, pistola siliconica, pistola per calafataggio 1. Costruire la struttura della parete principale con le dimensioni di 2. Far scorrere l’apparecchio all’interno della cavità di incorniciatura (la apertura mostrate nella Tabella A. La base del telaio può essere base dell’apparecchio può... - Seite 88 ITALIANO Installazione Lato Singolo 5. Completare la costruzione rifinendo i pannelli a muro attorno 9. Installare il parabrezza inserendo le due estremità nelle apposite all’apparecchio. (Vedere la sezione sulle ISTRUZIONI PER LA fessure nell’apparecchio. Utilizzare una piccola quantità di pressione FINITURA e assicurarsi di comprendere appieno dove devono essere per spingere il parabrezza in posizione fino a quando raggiunge il usati materiali non combustibili.)
-
Seite 89: Installazione Angolo Sinistro
ITALIANO Installazione Angolo Sinistro e Angolo Destro Attrezzatura necessaria: trapano elettrico, cacciavite, livella, cazzuola, pistola siliconica, pistola per calafataggio 1. Costruire la struttura della parete principale con le dimensioni di apertura mostrate nella Tabella B. La base del telaio può essere 2. - Seite 90 ITALIANO Installazione Angolo Sinistro e Angolo Destro 6. Mettere il bruciatore in posizione. 10. Installare il parabrezza inserendo le due estremità nelle apposite fessure nell’apparecchio. Utilizzare una piccola quantità di pressione per spingere il parabrezza in posizione fino a quando raggiunge il fondo nelle clip di vetro nascoste.
-
Seite 91: Installazione Bay
ITALIANO Installazione Attrezzatura necessaria: trapano elettrico, cacciavite, livella, cazzuola, pistola siliconica, pistola per calafataggio 1. Costruire la struttura della parete principale con le dimensioni di 2. Far scorrere l’apparecchio all’interno della cavità di incorniciatura (la base dell’apparecchio può essere posizionata direttamente sopra apertura mostrate nella Tabella C. - Seite 92 ITALIANO Installazione 6. Completare la costruzione rifinendo i pannelli a muro attorno 10. Inserire il pannello di vetro a tutta altezza in uno dei lati all’apparecchio. (Vedere la sezione sulle ISTRUZIONI PER LA dell’estremità aperta inserendo il vetro nell’apertura nella parte FINITURA e assicurarsi di comprendere appieno dove devono essere superiore dell’apparecchio e abbassandolo nelle fessure nella base usati materiali non combustibili.)
-
Seite 93: Installazione A Due Lati
ITALIANO Installazione a Due Lati Attrezzatura necessaria: trapano elettrico, cacciavite, livella, cazzuola, pistola siliconica, pistola per calafataggio 1. Costruire la struttura della parete principale con le dimensioni di 2. Rimuovere la flangia di estensione dal caminetto in modo che apertura mostrate nella Tabella D. La base del telaio può essere entrambi i lati abbiano la stessa altezza. - Seite 94 ITALIANO Installazione a Due Lati 6. Rimuovere le staffe di stabilità rosse. 10. Se l’elettrodomestico include un riquadro decorativo a sinistra / a destra o entrambi, inserire il pannello di vetro interno / i alimentando il vetro verso l’alto nello slot, quindi spingendolo verso il basso nelle clip posizionate.
-
Seite 95: Installazione Penisola
ITALIANO Installazione Penisola Attrezzatura necessaria: trapano elettrico, cacciavite, livella, cazzuola, pistola siliconica, pistola per calafataggio 1. Costruire la struttura della parete principale con le dimensioni di 2. Rimuovere la flangia di estensione dal caminetto in modo che entrambi i lati abbiano la stessa altezza. Ciò contribuirà a rendere più apertura mostrate nella Tabella E. - Seite 96 ITALIANO Installazione Penisola 6. Fissare l’apparecchio alla struttura con le viti utilizzando i fori di 11.Se l’elettrodomestico include un riquadro decorativo a sinistra / a montaggio esistenti sulle flange dell’apparecchio. Assicurarsi che destra o entrambi, inserire il pannello di vetro interno / i alimentando l’apparecchio sia a livello prima di fissarlo in posizione.
-
Seite 97: Installazione Isola
ITALIANO Installazione a Isola Attrezzatura necessaria: trapano elettrico, cacciavite, livella, cazzuola, pistola siliconica, pistola per calafataggio 1. Costruire la struttura con le dimensioni di apertura mostrate nella 2. Rimuovere la flangia di estensione dal caminetto in modo che Tavola F. La base del telaio può essere una panca / piattaforma entrambi i lati abbiano la stessa altezza. - Seite 98 ITALIANO Installazione a Isola 6. Rimuovere le staffe di stabilità rosse. 10. Installare il parabrezza inserendo le due estremità nelle apposite fessure nell’apparecchio. Utilizzare una piccola quantità di pressione per spingere il parabrezza in posizione fino a quando raggiunge il fondo nelle clip di vetro nascoste. Ripetere lo stesso per il parabrezza del retro e se il tuo dispositivo comprende una scatola decorativa e sinistra / a destra o entrambe.
-
Seite 99: Installazione A Banco
ITALIANO Installazione a Banco Attrezzatura necessaria: trapano elettrico, cacciavite, livella, cazzuola, pistola siliconica, pistola per calafataggio 1. Costruire la struttura principale usando le dimensioni mostrate nella 2. Rimuovere la flangia di estensione dal caminetto in modo che Tavola G. La base del telaio può essere una panca / piattaforma entrambi i lati abbiano la stessa altezza. - Seite 100 ITALIANO Installazione a Banco 6. Completare la costruzione rifinendo i pannelli a muro attorno 9. Installare il parabrezza inserendo le due estremità nelle apposite all’apparecchio. (Vedere la sezione sulle ISTRUZIONI PER LA fessure nell’apparecchio. Utilizzare una piccola quantità di pressione FINITURA e assicurarsi di comprendere appieno dove devono essere per spingere il parabrezza in posizione fino a quando raggiunge usati materiali non combustibili.)
-
Seite 101: Finitura
ITALIANO Finitura 1. Applicare i pannelli delle pareti circostanti. Si possono usare materiali 3. Intonare tutte le cuciture e le perline. come pannello in fibra-cemento, pannello antincendio di media densità con indicazione del livello di resistenza del fuoco (FR MDF), Tutti i giunti tra il rivestimento della parete finita e la parte anteriore pietra, mattonelle, acciao, e cartongesso con indicazione del livello di dell’apparecchio devono essere sigillati con materiali non... -
Seite 102: Bordo Del Camino
ITALIANO Bordo Piattaforma per del Camino Box Decorativa Distanze minime Per gli apparecchi con una scatola laterale decorativa, viene fornita una piastra di riempimento per sollevare il materiale per allinearlo con il bordo Se l’impostazione incorpora un mantello, devono essere seguite inferiore dell’apparecchio. - Seite 103 ESPAÑOL Tabla de contenidos Distancias mínimas del inserto SELECCIÓN DE LA LOCALIZACIÓN DEL APARATO VENTILACION TAMAÑO MÍNIMO DE LA HABITACIÓN Instalación del inserto ENMARCACIONES ANTES DE EMPEZAR INSTALACIÓN DE UNA CARA 105 - 106 INSTALACIÓN DE ESQUINA IZQUIERDA 107 - 108 INSTALACIÓN DE ESQUINA DERECHA 107 - 108 INSTALACIÓN DE BAHÍA...
-
Seite 104: Distancias Mínimas Del Inserto
Por favor, lea las instrucciones completamente antes de utilizar el VENTILACION EcoSmart™ Fire. Los modelos de ecoSmart fire no requieren ningún tipo de instalación ni elemento permanente, como un tiro para ventilación, una conexión SELECCIÓN DE LA LOCALIZACIÓN DEL APARATO permanente ni ninguna clase de enganche a redes externas para el suministro de combustible. -
Seite 105: Instalación Del Inserto
ESPAÑOL Instalación del inserto DEFINICIONES Las chimeneas deben de ser fijadas en posición antes de utilizarlas. NO INSTALE DIRECTAMENTE CERCA DE PAPEL PINTADO, Materiales combustibles: los materiales hechos de o con superficie LAMINADO O CUALQUIERA SUPERFICIE QUE NO ESTÉ de madera, papel comprimido, fibras vegetales, plásticos u otro CERTIFICADA PARA RESISTIR AL CALOR E ALTAS TEMPERATURAS. -
Seite 106: Antes De Empezar
ESPAÑOL Instalación del inserto ANTES DE EMPEZAR 1. Retire con cuidado la chimenea de los componentes del paquete. 2. Inspecciona e informe las piezas dañadas durante el transporte, especialmente el estado del vidrio protector. 3. Lea todas las instrucciones antes de comenzar la instalación. Siga estas precauciones cuidadosamente durante la instalación para garantizar su seguridad y la de quienes le rodean. -
Seite 107: Instalación De Una Cara
ESPAÑOL Instalación de una cara Equipo requerido: taladro eléctrico, destornillador, nivel, llana de mano para yeso, pistola de silicona, pistola de calafatear. 1. Construya el marco de la pared principal con las enmarcaciones ilustradas 2. Deslice el inserto dentro de la cavidad del marco (la base del en la Tabla A. - Seite 108 ESPAÑOL Instalación de una cara 5. Complete la construcción terminando con los paneles de pared 9. Instale el vidrio protector insertando los dos extremos en las ranuras alrededor del inserto. (Consulte la sección sobre INSTRUCCIONES apropiadas del inserto. Use una pequeña cantidad de presión para DE MATERIALES DE ACABADO y asegúrese de que entiende empujar el vidrio protector en su lugar hasta que toque el fondo de perfectamente dónde se deben usar materiales no combustibles).
-
Seite 109: Instalación De Esquina Izquierda
ESPAÑOL Instalación de Esquina izquierda & Esquina derecha Equipo requerido: taladro eléctrico, destornillador, nivel, llana de mano para yeso, pistola de silicona, pistola de calafatear. 1. Construya el marco de la pared principal con las enmarcaciones ilustradas 2. Deslice el inserto dentro de la cavidad del marco (la base del en la Tabla B. - Seite 110 ESPAÑOL Instalación de Esquina izquierda & Esquina derecha 5. Complete la construcción terminando con los paneles de pared 9. Inserte el panel de vidrio de altura completa en uno de los lados alrededor del inserto. (Consulte la sección sobre INSTRUCCIONES del extremo abierto insertando el vidrio en la abertura en la parte DE MATERIALES DE ACABADO y asegúrese de que entiende superior del inserto, y bajándolo en las ranuras de la base hasta que...
-
Seite 111: Instalación De Bahía
ESPAÑOL Instalación de bahía Equipo requerido: taladro eléctrico, destornillador, nivel, llana de mano para yeso, pistola de silicona, pistola de calafatear. 1. Construya el marco de la pared principal con las enmarcaciones ilustradas 2. Deslice el inserto dentro de la cavidad del marco (la base del en la Tabla C. - Seite 112 ESPAÑOL Instalación de bahía 6. Complete la construcción terminando con los paneles de pared 10. Inserte el panel de vidrio de altura completa en uno de los lados del alrededor del inserto. (Consulte la sección sobre INSTRUCCIONES extremo abierto insertando el vidrio en la abertura en la parte superior DE MATERIALES DE ACABADO y asegúrese de que entiende del aparato, y bajándolo en las ranuras de la base hasta que se asiente perfectamente dónde se deben usar materiales no combustibles).
-
Seite 113: Instalación De Doble Cara
ESPAÑOL Instalación de doble cara Equipo requerido: taladro eléctrico, destornillador, nivel, llana de mano para yeso, pistola de silicona, pistola de calafatear. 1. Construya el marco de la pared principal con las enmarcaciones ilustradas 2. Retire la brida de extensión de la chimenea para que ambos lados tengan la misma altura. - Seite 114 ESPAÑOL Instalación de doble cara 6. Retire los soportes de estabilidad rojos. 7. Complete la construcción terminando con los paneles de pared 11. Instale el vidrio protector insertando los dos extremos en las ranuras alrededor del inserto. (Consulte la sección sobre INSTRUCCIONES apropiadas del inserto.
-
Seite 115: Instalación De Península
ESPAÑOL Instalación de península Equipo requerido: taladro eléctrico, destornillador, nivel, llana de mano para yeso, pistola de silicona, pistola de calafatear. 1. Construya el marco de la pared principal con las enmarcaciones ilustradas 2. Retire la brida de extensión de la chimenea para que ambos lados tengan la misma altura. - Seite 116 ESPAÑOL Instalación de península 6. Fije el inserto al marco con tornillos utilizando los orificios de montaje 11. Si su inserto incluye una caja decorativa a la izquierda / derecha o ambas, existentes en sus bridas. Asegúrese de que el inserto esté nivelado inserte el / los panel (es) de vidrio interno (s) introduciendo el vidrio hacia antes de instalarlo en su lugar.
-
Seite 117: Instalación De Isla
ESPAÑOL Instalación de Isla Equipo requerido: taladro eléctrico, destornillador, nivel, llana de mano para yeso, pistola de silicona, pistola de calafatear. 1. Construya el marco con el tamaño de apertura que se muestra en la 2. Retire la brida de extensión de la chimenea para que ambos lados Tabla F. - Seite 118 ESPAÑOL Instalación de Isla 6. Retire los soportes de estabilidad rojos. 10. Instale el vidrio protector insertando los dos extremos en las ranuras apropiadas del inserto. Use una pequeña cantidad de presión para empujar el vidrio protector en su lugar hasta que toque el fondo de los clips de vidrio ocultos.
-
Seite 119: Instalación De Banco
ESPAÑOL Instalación de Banco Equipo requerido: taladro eléctrico, destornillador, nivel, llana de mano para yeso, pistola de silicona, pistola de calafatear. 1. Construya el marco principal utilizando las dimensiones que se 2. Retire la brida de extensión de la chimenea para que ambos lados muestran en la Tabla G. - Seite 120 ESPAÑOL Instalación de Banco 6. Complete la construcción terminando con los paneles de pared 9. 11. Instale el vidrio protector insertando los dos extremos en las alrededor del inserto. (Consulte la sección sobre INSTRUCCIONES ranuras apropiadas del inserto. Use una pequeña cantidad de DE MATERIALES DE ACABADO y asegúrese de que entiende presión para empujar el vidrio protector en su lugar hasta que toque perfectamente dónde se deben usar materiales no combustibles).
-
Seite 121: Materiales De Acabado
ESPAÑOL Materiales De acabado 1. Aplique paneles de pared circundantes. Los materiales aceptables 3. Enyesa todas las costuras y abalorios. incluyen tableros de fibrocemento, tableros de fibra de densidad media resistentes al fuego (FR MDF), piedra, azulejos, acero y Todas las juntas entre el revestimiento de la pared terminada y la paneles de yeso resistentes al fuego (FR). -
Seite 122: Mantos De Chimeneas
ESPAÑOL Mantos de Plato relleno de chimeneas caja decorativa Distancias mínimas Para insertos con una caja decorativa lateral, se proporciona una placa de relleno para levantar el material y alinearlo con el borde inferior del Si la configuración incorpora un manto, se deben respetar las inserto. - Seite 123 MAD Design Group Showrooms 3 & 4, 40-42 O’Riordan Street Alexandria NSW 2015 Australia Tel: +61 2 9997 3050 Email: info@maddesigngroup.com REV1119...