Herunterladen Inhalt Inhalt Diese Seite drucken
Philips Cucina HD2415 Bedienungsanleitung
Vorschau ausblenden Andere Handbücher für Cucina HD2415:

Werbung

Verfügbare Sprachen
  • DE

Verfügbare Sprachen

  • DEUTSCH, seite 10
HD2415

Werbung

Inhaltsverzeichnis
loading

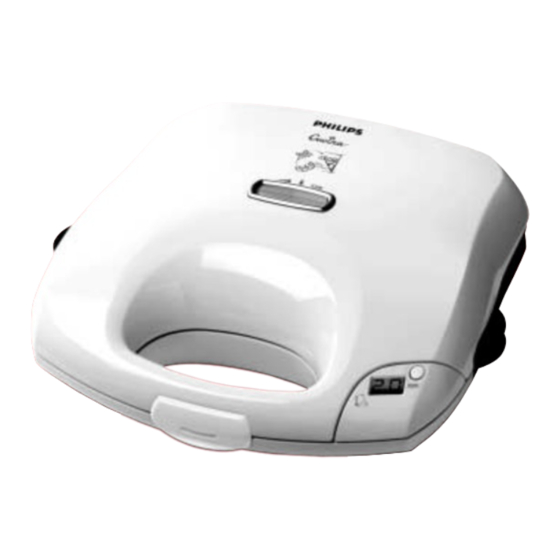
Inhaltszusammenfassung für Philips Cucina HD2415

  • Seite 1 HD2415...
  • Seite 5: Inhaltsverzeichnis

    ENGLISH 6 DEUTSCH 10 FRANÇAIS 14 NEDERLANDS 18 ESPAÑOL 22 ITALIANO 26 PORTUGUÊS 30 NORSK 34 SVENSKA 38 SUOMI 42 DANSK 46 TÜRKÇE 54...
  • Seite 6: English

    Check if the voltage indicated on the bottom of the appliance corresponds to the local mains voltage before you connect the appliance. If the mains cord is damaged, it must be replaced by Philips, a service centre authorised by Philips or similarly qualified persons in order to avoid a hazard.
  • Seite 7: Using The Appliance

    ENGLISH Dry the plates. Reassemble the plates by placing the rear edge of the plates in the appliance (1), lowering them onto the appliance and pressing them down (2) (fig. 4). The appliance may give off some smoke when you use it for the first time.This is normal. Using the appliance Making toasted sandwiches For a more even, golden browning result you can lightly butter the sides of the bread that come into...
  • Seite 8: Setting The Timer

    ENGLISH Timer The timer indicates the end of the cooking time, but does NOT switch the appliance off. Setting the timer Press the timer button to set the cooking time in minutes (fig. 10). The set time will become visible on the display. Keep the button pressed to set the minutes forward quickly.
  • Seite 9: Guarantee & Service

    If you need information or if you have a problem, please visit the Philips website at www.philips.com or contact the Philips Customer Care Centre in your country (you will find its phone number in the worldwide guarantee leaflet). If there is no Customer Care Centre in your country, turn to your local Philips dealer or contact the Service Department of Philips Domestic Appliances and Personal Care BV.
  • Seite 10: Deutsch

    Prüfen Sie vor dem Anschließen des Gerätes, ob die Spannungsangabe auf der Unterseite des Gerätes mit der örtlichen Netzspannung übereinstimmt. Wenn das Netzkabel defekt oder beschädigt ist, darf es nur von einem Philips Service-Center oder einer von Philips autorisierten Werkstatt ausgetauscht werden, um Gefährdungen zu vermeiden.
  • Seite 11: Der Gebrauch Des Geräts

    DEUTSCH Nehmen Sie die Platten aus dem Gerät (Abbildung 2). Heben Sie die Platten an den Griffen aus dem Gerät. Reinigen Sie alle Platten mit einem weichen Tuch oder Schwamm in heißem Spülwasser oder im Geschirrspüler (Abbildung 3). Trocknen Sie die Platten. Setzen Sie die Platten mit dem hinteren Rand in das Gerät (1), senken Sie die Platten auf das Gerät und drücken Sie sie nach unten (2) (Abbildung 4).
  • Seite 12: Einstellen Des Timers

    DEUTSCH Die Zubereitungszeit hängt von der Brotsorte und dem Belag ab und davon, wie knusprig und braun Sie Ihre Sandwiches bevorzugen. Nehmen Sie die Sandwiches heraus (Abbildung 9). Nehmen Sie die fertigen Sandwiches mit einem Heber aus Holz oder Kunststoff aus dem Gerät. Benutzen Sie keine metallnen, spitzen oder scheuernden Küchenutensilien.
  • Seite 13: Aufbewahrung

    Garantie und Kundendienst Benötigen Sie weitere Informationen oder treten Probleme auf, wenden Sie sich bitte an Ihren Philips-Händler oder setzen Sie sich mit einem Philips Service-Center in Ihrem Land in Verbindung (Tel. Nr. 0180/5356767). Besuchen Sie auch die Philips Website (www.philips.com).
  • Seite 14: Français

    Avant de brancher votre appareil, vérifiez que la tension indiquée sur le fond de l'appareil correspond bien à la tension de votre secteur. Si le cordon d'alimentation est endommagé, il doit être remplacé par Philips ou par un Centre Service Agréé, pour éviter tout accident.
  • Seite 15: Utilisation De L'appareil

    FRANÇAIS Nettoyez les plaques avec un chiffon humide ou une éponge et de l'eau chaude savonneuse ou lavez-les au lave-vaisselle (fig. 3). Essuyez les plaques. Remontez les plaques sur l'appareil (1), abaissez-les et poussez-les pour les fixer (2) (fig. 4). Lors de la première utilisation, l'appareil peut dégager un peu de fumée.
  • Seite 16: Réglage Du Minuteur

    FRANÇAIS N'utilisez pas d'ustensiles métalliques, pointus ou abrasifs. Pour continuer de préparer des sandwiches, attendez que le témoin rouge s'éteigne et le témoin vert s'allume avant de mettre d'autres tranches de pain sur les plaques. Débranchez le croque-monsieur après chaque utilisation. Minuteur Le minuteur indique la fin de la période de cuisson mais n'arrête pas l'appareil.
  • Seite 17: Garantie Et Service

    Pour plus d'informations, visitez notre site Internet : www.philips.com ou veuillez contacter le Service Consommateurs Philips de votre pays (vous trouverez le numéro de téléphone dans le dépliant sur la garantie internationale). S'il n'y a aucun Service Consommateurs Philips dans votre pays, contactez votre distributeur ou le Service Department of Philips Domestic Appliances and Personal Care BV.
  • Seite 18: Nederlands

    NEDERLANDS Inleiding Gefeliciteerd met de aanschaf van uw nieuwe Philips tosti-apparaat. Met dit tosti-apparaat maakt u heel gemakkelijk allerlei soorten tosti's. Algemene beschrijving Verwijderbare bakplaten (vaatwasmachinebestendig) Handvatten van bakplaten Koelblijvende handgrepen Automatisch vergrendelingssysteem Opwarmlampje 'Klaar voor gebruik' lampje Snoerhaspel Timerknop...
  • Seite 19: Voor Het Eerste Gebruik

    NEDERLANDS Voor het eerste gebruik Verwijder stickers, indien aanwezig, en wrijf de behuizing van het apparaat schoon met een vochtige doek. Open het tosti-apparaat (fig. 1). Verwijder de bakplaten (fig. 2). Til ze aan de handvatten uit het apparaat. Reinig beide bakplaten met een zachte doek of spons in heet water met een beetje afwasmiddel of in de vaatwasmachine (fig.
  • Seite 20 NEDERLANDS Open het tosti-apparaat na 3 tot 5 minuten om te controleren of de tosti's al goudbruin zijn. De baktijd hangt af van het soort brood, de vulling en hoe knapperig u de tosti's wilt hebben. Verwijder de tosti's (fig. 9). Gebruik houten of kunststof keukengerei (bijv.
  • Seite 21: Garantie & Service

    'worldwide guarantee' vouwblad). Als er geen Customer Care Centre in uw land is, ga dan naar uw Philips dealer of neem contact op met de afdeling Service van Philips Domestic Appliances and Personal Care BV (u vindt het adres en het faxnummer van deze afdeling in het 'worldwide guarantee' vouwblad).
  • Seite 22: Español

    Antes de conectar el aparato, compruebe si el voltaje indicado en la parte inferior del mismo se corresponde con el voltaje de la red local. Si el cable de red está deteriorado, debe ser sustituido por Philips, por un centro de asistencia técnica de Philips, o personal cualificado para evitar situaciones de peligro.
  • Seite 23 ESPAÑOL Limpie las placas con un paño suave o una esponja humedecida en agua caliente y un poco de detergente líquido o métalas en el lavavajillas (fig. 3). Seque las placas. Para volver a colocar las placas, introduzca primero el borde posterior de las placas en el aparato (1), y luego bájelas y presiónelas contra el aparato (2) (fig.
  • Seite 24: Cómo Guardar El Aparato

    ESPAÑOL No utilice utensilios de cocina metálicos, punzantes o abrasivos. Si desea continuar haciendo sándwiches, espere a que el piloto rojo de calentamiento se apague y el piloto verde de "listo para cocinar" se encienda, antes de colocar más sándwiches en la sandwichera.
  • Seite 25: Medio Ambiente

    (hallará el número de teléfono en el folleto de la Garantía Mundial). Si en su país no hay Servicio Philips de Atención al Cliente, diríjase a su distribuidor local Philips o póngase en contacto con el Service Department of Philips Domestic Appliances and Personal Care BV.
  • Seite 26: Italiano

    ITALIANO Introduzione Complimenti per aver acquistato la nuova tostiera Philips, con la quale potrete preparare facilmente qualsiasi tipo di toast e panini. Descrizione generale Piastre di cottura asportabili (lavabili in lavastoviglie) Impugnature piastra Maniglie fredde al tatto Sistema di blocco automatico Spia di riscaldamento Spia "apparecchio pronto"...
  • Seite 27: Come Usare L'apparecchio

    ITALIANO Asciugate con cura le piastre. Rimontate le piastre inserendo il bordo posteriore delle piastre nell'apparecchio (1), per poi premerle in basso (2) (fig. 4). La prima volta che userete l'apparecchio potrete notare un po' di fumo: si tratta di un fenomeno del tutto normale.
  • Seite 28: Come Impostare Il Timer

    ITALIANO Togliete la spina dalla presa dopo l'uso. Timer Il timer indica la fine del tempo di cottura ma NON spegne l'apparecchio. Come impostare il timer Premete il pulsante del timer per impostare il tempo di cottura in minuti (fig. 10). Il tempo impostato appare sul display.
  • Seite 29: Garanzia E Assistenza

    Garanzia e Assistenza Per ulteriori informazioni o in caso di problemi, vi preghiamo di visitare il sito Philips su www.philips.com oppure contattare il Centro Assistenza Clienti Philips del vostro paese (troverete il numero di telefono sull'opuscolo della garanzia). Qualora nel vostro paese non ci siano Centri Assistenza Philips, rivolgetevi al rivenditore autorizzato Philips oppure contattate il Service Department of Philips Domestic Appliances and Personal Care BV.
  • Seite 30: Português

    Antes de ligar à eletricidade, verifique se a voltagem indicada na base do aparelho corresponde à corrente local. Se o fio estiver estragado, só deverá ser substituído pela Philips, por um concessionário autorizado pela Philips ou por pessoal igualmente qualificado para se evitarem situações de perigo para o utilizador.
  • Seite 31 PORTUGUÊS Remova as placas para fora do aparelho (fig. 2). Levante-as para fora segurando pelas pegas. Lave cada placa com um pano ou uma escova macios em água quente com um pouco de detergente líquido ou na máquina da loiça (fig. 3). Seque as placas.
  • Seite 32: Programação Do Temporizador

    PORTUGUÊS Se quiser continuar a preparar mais tostas, aguarde que a luz encarnada do aquecimento s4e apague e a luz verde de 'pronto a usar' se acenda antes de colocar mais tostas na sanduicheira. Quando terminar, desligue da corrente. Temporizador O temporizador indica que o tempo de cozedura chegou ao fim, mas NÃO desliga a sanduicheira.
  • Seite 33: Meio Ambiente

    Garantia e assistência Se necessitar de informações ou se tiver algum problema, por favor visite a página da Philips em www.philips.pt ou contacte o Centro de Informação ao Consumidor Philips do seu país (encontrará os números de telefone no folheto da garantia mundial). Se não existir um Centro de Informação ao Consumidor Philips no seu país, por favor dirija-se ao seu agente Philips local ou...
  • Seite 34: Norsk

    NORSK Innledning Gratulerer med anskaffelsen av din nye Philips smørbrødgrill. Med denne smørbrødgrillen kan du raskt og enkelt lage alle mulige typer stekte smørbrød. Generell beskrivelse Avtakbare stekeplater (kan vaskes i oppvaskmaskin) Platehåndtak Isolerte håndtak Automatisk låsesystem Oppvarmingsindikator Klar til steking-indikator...
  • Seite 35: Bruke Apparatet

    NORSK Tørk platene. Monter platene ved å plassere den bakerste delen av platene i apparatet (1). Senk deretter platene mot apparatet og press dem ned (2) (fig. 4). Det kan komme litt røyk fra apparatet når det brukes for første gang. Dette er normalt. Bruke apparatet Lage toast-smørbrød Hvis du vil ha en jevnere, gyllenbrun farge, kan du ha litt smør på...
  • Seite 36 NORSK Tidsbryter Tidtakeren angir når steketiden er over, men slår IKKE av apparatet. Stille inn tidtakeren Trykk på tidtakerknappen for å stille inn steketiden i minutter (fig. 10). Angitt tid vises i displayet. Hold knappen nede for å fremskynde minuttvisningen. Slipp knappen når tidtakeren viser den ønskede steketiden.
  • Seite 37: Garanti Og Service

    Garanti og service Hvis du trenger informasjon eller har et problem, kan du besøke Philips' webområde på www.philips.com eller kontakte Philips' kundesenter i ditt land (De finner telefonnummeret i det globale garantiheftet). Hvis det ikke er noe kundesenter i ditt land, kan du henvende deg til din lokale Philips-forhandler eller kontakte serviceavdelingen ved Philips Domestic Appliances and Personal Care BV.
  • Seite 38: Svenska

    SVENSKA Introduktion Gratulerar till köpet av din nya Philips smörgåsgrill. Med den här smörgåsgrillen kan du mycket enkelt göra alla sorters varma smörgåsar. Allmän beskrivning Löstagbara grillaggar Lagghandtag Värmeisolerade handtag Automatiskt låssystem Uppvärmningslampa Klar-för-tillagningslampa Sladdförvaring Timerknapp Digital timer Viktigt Läs bruksanvisningen och titta på bilderna innan du använder fritösen.
  • Seite 39: Använda Apparaten

    SVENSKA Torka laggarna. Sätt samman laggarna igen genom att placera den bakre kanten på laggarna i apparaten (1), sänka ner dem på apparaten och trycka ner dem (2) (fig. 4). Apparaten kan ryka något när du använder den för första gången. Det är helt normalt. Använda apparaten Laga varma smörgåsar För att få...
  • Seite 40: Ställa In Timern

    SVENSKA Timer Timern indikerar slutet på tillagningstiden men stänger INTE av apparaten. Ställa in timern Tryck på timerknappen för att ställa in tillagningstiden i minuter (fig. 10). Den inställda tiden visas på displayen. Håll knappen intryckt för att ställa in minuterna framåt snabbt. Släpp knappen när önskad tillagningstid har nåtts.
  • Seite 41: Garanti Och Service

    Garanti och service Om du behöver information eller har något problem kan du söka upp Philips webbsida på adressen www.philips.com eller kontakta Philips kundtjänst i ditt land (rätt telefonnummer finner du i världsgarantibroschyren). Om det inte finns någon kundtjänst i ditt land ska du vända dig till din lokala återförsäljare, eller kontakta serviceavdelningen på...
  • Seite 42: Suomi

    Lue tämä käyttöohje huolellisesti, ennen kuin alat käyttää laitetta. Säilytä ohje vastaisen varalle. Tarkasta, että laitteen pohjassa oleva jännitemerkintä vastaa paikallista verkkojännitettä, ennen kuin liität laitteen sähköverkkoon. Jos laitteen liitosjohto on vahingoittunut, se on turvallisinta vaihdattaa Philips Kodinkoneiden valtuuttamassa huoltoliikkeessä tai muuten ammattitaitoisella korjaajalla. Yhdistä laite vain maadoitettuun pistorasiaan.
  • Seite 43 SUOMI Kuivaa levyt. Asenna levyt paikalleen asettamalla levyjen takareuna laitteeseen (1), laskemalla levyt laitteen päälle ja painamalla niitä alaspäin (2) (kuva 4). Laitteesta saattaa ensimmäisellä käyttökerralla nousta hieman käryä.Tämä on normaalia. Käyttö Voileipien pariloiminen Saat tasaisen, kullanruskean paahtotuloksen voitelemalla kevyesti leivän paistolevyä vasten tulevia puolia.
  • Seite 44 SUOMI Aikakytkin Aikakytkin ilmaisee paistoajan päättymisen, mutta EI sammuta laitetta. Aikakytkimen asetus Aseta parilointiaika minuutteina painamalla aikakytkimen painiketta (kuva 10). Asetettu aika tulee näkyviin näyttöön. Voit muuttaa minuuttimäärää nopeasti pitämällä painiketta alhaalla.Vapauta painike, kun haluttu parilointiaika on saavutettu. Aikakytkimen enimmäisaika on 14 minuuttia. Muutaman sekunnin kuluttua parilointiajan asettamisesta aikakytkin alkaa laskea aikaa taaksepäin.
  • Seite 45: Takuu & Huolto

    Jos haluat lisätietoja tai jos laitteen suhteen tulee ongelmia, katso Philipsin www-sivuja osoitteesta www.philips.com tai ota yhteys Philipsin asiakaspalveluun (puhelinnumero löytyy takuulehtisestä). Voit myös kääntyä lähimmän Philips-kauppiaan puoleen tai ottaa suoraan yhteyden Hollantiin Philips Domestic Appliances and Personal Care BV:n Service-osastoon.
  • Seite 46: Dansk

    DANSK Introduktion Til lykke med din nye Philips sandwichtoaster. Du kan nu tilberede alle typer ristede sandwiches - hurtigt og nemt. Generel beskrivelse Aftagelige varmeplader (tåler opvaskemaskine) Håndgreb på pladerne Cool-touch håndtag (bliver ikke varme) Automatisk låsesystem Opvarmnings-indikator med lys...
  • Seite 47 DANSK Tør pladerne. Læg pladerne på plads ved først at sætte pladens bageste kant ned (1), og derefter sænke dem ned og trykke dem på plads (2) (fig. 4). Det er helt normalt og uden betydning, hvis der kommer lidt røg fra apparatet, når det bruges første gang.
  • Seite 48: Indstilling Af Timeren

    DANSK Timer Timeren indikerer, når den indstillede tilberedningstid er gået, men slukker IKKE for sandwichtoasteren. Indstilling af timeren Tryk på timer-tasten for at indstille tilberedningstiden i minutter (fig. 10). Det valgte minuttal ses i displayet. Når tasten holdes nede, går indstillingen hurtigere. Slip tasten, så snart det ønskede minuttal er nået.
  • Seite 49: Reklamationsret Og Service

    Reklamationsret og service For alle yderligere oplysninger eller ved eventuelle problemer med apparatet henvises venligst til Philips hjemmeside: www.philips.com eller det lokale Philips Kundecenter (telefonnumre findes i vedlagte "World-Wide Guarantee"-folder). Hvis der ikke findes et kundecenter i dit land, bedes du venligst kontakte din lokale Philips-forhandler eller serviceafdelingen i Philips Domestic Appliances and Personal Care BV.
  • Seite 50 Philips. Philips, Philips ( . . . 1). . 2).
  • Seite 51 . 3). (1), (2) ( . 4). . 5). . 6). . 7). . 8). . 9). ( . .
  • Seite 52 . 10). '00' . 6). . 11).
  • Seite 53 . 12). . 13). Philips www.philips.com Philips Philips Philips.
  • Seite 54: Türkçe

    TÜRKÇE Giriş Değerli Müşterimiz yeni Philips Sandviç makinesini satın aldığınız için teşekkür ederiz. Bu cihaz ile istediğiniz lezzette bir birinden değişik tostlar hazırlayabileceksiniz. Genel tanım Ayrılabilen pişirme yüzeyleri Pişirme yüzeyi tutacakları Şık ve el yakmaz tutacaklar Otomatik kilit sistemi "Cihaz ısınıyor" pilot ışık Pişirmeye hazır ışığı...
  • Seite 55 TÜRKÇE Pişirme yüzeylerini kurulayın. Pişirme yüzeylerini, öncelikle arka kenar kısımlarını (1) yerleştirerek geri kalan yüzeyide cihaz üzerine aşağı bastırarak (2) yerleştirin (şek. 4). Cihazınızı ilk kullandığınızda biraz duman çıkabilir. Bu normaldir. Cihazın kullanımı Tost yapmak için Kızarmış tostlar yapmak için tost ekmeklerinin pişirme yüzeyleri ile tems eden yüzlerini az miktarda tereyağı...
  • Seite 56 TÜRKÇE Zamanlayıcı Zamanlayıcı pişirme süresini belirtir, fakat cihazı kapatmaz. Zamanlayıcının ayarlanması Zamanlayıcı düğmesini kullanarak pişirme süresini dakika şeklinde ayarlayabilirsiniz (şek. 10). Ayarladığınız süre, ekranda görünecektir. Süreyi çabuk ayarlamak için düğmeyi basılı tutun. İstediğiniz süreye ulaştığınızda düğmeyi serbest bırakın. Maksimum ayarlanabilecek süre 14 dakikadır. Süreyi ayarladıktan bir kaç...
  • Seite 57 (dünya genelindeki telefon numaralarını verilen garanti belgeleri içerisinde bulabilirsiniz). Eğer ülkenizde Müşteri Danışma Merkezi yoksa, yerel Philips yetkilinize başvurun veya Philips Ev Aletleri ve Kişisel Bakım BV Servis Departmanı ile iletişime geçin. 0 800 261 33 02 Tarifler Jambon, beyaz peynir ve ananaslı...
  • Seite 60 4222 002 61811...

Inhaltsverzeichnis