Inhaltsverzeichnis
Werbung
Verfügbare Sprachen
Verfügbare Sprachen
Quicklinks
ERONE - RICEVITORE 4 CH
433/868
ERONE - 4 CH RECEIVER 433/868
ERONE - RECEPTEUR 4 CANAUX 433/868
ERONE - 4 KANAL EMPFANGER 433/868
SEL2641R433C4, SEL2641R433V4 SEL2681R868V4
SEL2641F433C4, SEL2641F433V4, SEL2681R868V4
Manuale d'installazione ed uso - Italiano .....................Pag. 4
Use and installation Manual - English .......................Pag. 11
Notices d'installation et utilisation - Français ..............Pag. 18
Bedienungsanleitung - Deutsch ..................................
Pag. 26
Pag. 1
T H E S M A R T L I V I N G
Werbung
Inhaltsverzeichnis

Verwandte Anleitungen für Erone SEL2641R433C4


Inhaltszusammenfassung für Erone SEL2641R433C4
- Seite 1 ERONE - RICEVITORE 4 CH 433/868 ERONE - 4 CH RECEIVER 433/868 ERONE - RECEPTEUR 4 CANAUX 433/868 ERONE - 4 KANAL EMPFANGER 433/868 SEL2641R433C4, SEL2641R433V4 SEL2681R868V4 SEL2641F433C4, SEL2641F433V4, SEL2681R868V4 Manuale d’installazione ed uso - Italiano .....Pag. 4 Use and installation Manual - English .......Pag. 11 Notices d’installation et utilisation - Français ....Pag.
- Seite 2 Misure di sicurezza Dichiarazione di Conformità: Per un perfetto funzionamento dell’apparecchio, si prega di Il costruttore Elpro Innotek Spa dichiara che il leggere interamente questo manuale e seguire attentamente radioprogrammatore mod. SEL2641R433-P4, SEL39R433- le indicazioni ivi descritte, in quanto l’uso improprio può P4, SEL39R30-P4 è...
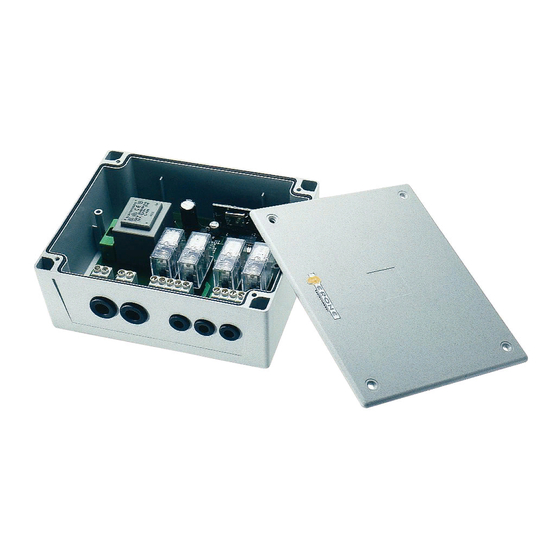
- Seite 3 Interassi / Drilling distances Dimensioni d’ingombro / Overall dimensions Distances de perçage / Spurweiten Dimensions d’encombrement / Abmessung Fig. 2 Fig. 3 Layout Trasformatore di alimentazione Transformer Transformateur Pulsanti, Push-buttons, Pulsanti, Push-buttons, Trasformator Touches, Touches, Tasten Tasten Modulo radio, RF Card, Fiche radio, Boutons Steckerempfänger...
- Seite 4 La memorizzazione dei trasmettitori si effettua sia mediante i tasti del ricevitore sia a distanza, per autoapprendimento, per mezzo dei tasti del trasmettitori. Tutti i ricevitori della serie Erone 433 / 868 sono in grado di apprendere e conservare in EEPROM il codice di serie e l’algoritmo di sincronizzazione di più trasmettitori.
-
Seite 5: Caratteristiche
2 - CARATTERISTICHE Modelli Tab.1 Caratteristiche SEL 2641R433V4 SEL 2641R433C4 SEL2681R868C4 SEL 2641F433V4 SEL 2641F433C4 SEL2681R868V4 Tipo ricevitore: Supereterodina Supereterodina Supereterodina Frequenza portante: 433.92 MHz 433.92MHz 868,30 MHz Frequenza oscillatore locale: 6,6128 MHz 6,6128 MHz 13,399 MHz Modulazione: ASK / FSK ASK / FSK Impedenza d'ingresso: 50 Ohm... - Seite 6 2 -Fusibile (fig. 6) Connessioni Il fusibile F1 da 315 mA serve a protezione della scheda elettronica. 1 - Alimentazione (fig.5) ATTENZIONE: Le connessioni dell’alimentazione differiscono a econda del modello. Mod. SEL 2641 R433 V4 Fig. 6 Collegare l'alimentazione 230 Vac ai morsetti 3 - Uscite dei relè...
-
Seite 7: Memorizzazione Dei Trasmettitori
5 - LEGENDA RICEVITORE DL1(Led rosso): Indica il funzionamento impulsivo ( del relè selezionato ); DL2(Led verde): Indica il funzionamento bistabile ( del relè selezionato ); DL3(Led rosso): Indica il funzionamento temporizzato ( del relè selezionato ); DL4(Led rosso): Indica il funzionamento con riduzione di portata (del relè selezionato);... - Seite 8 6B) : Memorizzazione dei trasmettitori a distanza, mediante i tasti del trasmettitore stesso. La memorizzazione si effettua con i soli tasti del trasmettitore; Ci sono 2 casi : 1) Il ricevitore è vergine e si deve memorizzare il primo trasmettitore; 2) Nel ricevitore è...
- Seite 9 7 - PROGRAMMAZIONE FUNZIONAMENTO DEI RELE’ I relè possono essere configurati in 3 modi differenti : Impulsivo ( pre-impostato , Bistabile ( o passo-passo) o - Ritardato.Per ciascuna di queste possibilità è possibile inoltre impostare la funzione di riduzione di portata, che diminuisce la sensibilità...
-
Seite 10: Gestione Della Memoria
7E ) Programmazione del tempo di ritardo al rilascio Il tempo di ritardo dopo il quale il relè configurato come ritardato si diseccita è programmabile. Il valore della temporizzazione può essere introdotto facendo uso dei pulsanti P1 e P2. Attraverso 8 pressioni sui tasti P1 e P2, a cui corrispondono altrettante accensioni dei led DL1(Rosso) ed DL2 (verde), è... - Seite 11 1 - INTRODUCTION ERONE 433 mod. SEL2641 Rxx X4 is a supeheterodyne receiver of the series ERONE 433/ 868. It has been designed for the control of automatic closing systems and anti-burglar systems, thanks to its very high security coding system (KeeLoq ®...
-
Seite 12: Technical Specifications
2 - TECHNICAL SPECIFICATIONS Types Characteristics SEL 2641R433V4 SEL 2641R433C4 SEL 2641F433V4 SEL2641F433C4 Receiver type: Superheterodyne Superheterodyne Carrier frequency: 433.92 MHz 433.92MHz Local oscillator frequency: 433.42 MHz 433.42MHz Demodulation: AM/ASK AM/ASK Input load: 50 Ohm 50 Ohm Channel width: > 25 KHz >... - Seite 13 Connections 2 -Fuse (fig. 6) The fuse F1 of 315 mA it is used for the electronic card protection. 1 - Power supply (fig.5) ATTENTION: The connections differ upon the type. Mod. SEL 2641 R433 V4 Connect the Mains 230 Vac to the following terminals Fig.
- Seite 14 5 - RECEIVER LAYOUT DL1(Red Led ): Displays the Pulse mode (of the selected relay ); DL2(Green Led ): Displays the Step mode (of the selected relay ); Dl3(Red Led ): Displays the Timered mode (of the selected relay ); DL4(Red Led ): Displays the operating mode in Reduced range (of the selected relay );...
- Seite 15 6B) : Memorisation of transmitters without accessing to the receiver The memorization effects using only the transmitter keys There are 2 cases: 1) the receiver is virgin and you need to memorise the first transmitter; 2) in the receiver it is already present in memory a transmitter and you have to memorise the following transmitters. First transmitter memorisation 1 - Keep pressed down the keys A+B simultaneously until the buzzer sounds a Beep and the 4 leds remain lit, 2 - Choose the relay to activate pressing the button of the transmitter according the following table:...
- Seite 16 7 - RELAYS OPERATING MODE SETTING The relays can be programmed in 3 different modes: Impulsive (pre-planned), Bistabile (or step), Delayed. For each of these possibilities it is possible besides to plan the range reduction function that decreases the sensitivity of the receiver, preventing the receipt from great distance.
-
Seite 17: Memory Management
8E ) Relay release time programming The release time after which the relay programmed as delayed releases is programmable. The value of the time can be introduced making use of the buttons P1 and P2. Through 8 pressures on P1 and P2, to which correspond as many lightings of the leds DL1(Red) and DL2 (Green), it is possible to introduce a number in binary coding that gives the value of the delay. - Seite 18 Les codes d'utilisateurs peuvent être mémorisés aussi bien avec les boutons du récepteur que via la radio en auto- apprentissage, en utilisant les boutons de l'émetteur. Tous les récepteurs de la série ERONE peuvent gérer le numéro de série et la synchronisation de l'algorithme avec plusieurs émetteurs.
-
Seite 19: Caracteristiques Principales
Modeles Caractéristiques SEL 2641R433V4 SEL 2641R433C4 SEL2681R868C4 SEL 2641F433V4 SEL 2641F433C4 SEL2681R868V4 Type de récepteur Supereterodine Supereterodine Supereterodine Support de fréquence: 433.92 MHz 433.92 MHz 868,30 MHz Fréquence de l'oscillateur local: 6,6128 MHz 6,6128 MHz 13,399 MHz Démodulation: ASK / FSK ASK / FSK Impédance: 50 Ohm... - Seite 20 Connexions 3- Sortie des contacts (Fig.6) Borne 6 = contact 1 C Borne 7 = contact 1 NO 1 - Alimentation (fig.4) Borne 8 = contact 2 C ATTENTION : les raccordements sont différents selon le modèle Borne 9 = contact 2 NO Borne 10 = contact 3 C Borne 11 = contact 3 NO Types : RR4C4xP230...
- Seite 21 6 - SCHEMA DU RECEPTEUR DL1 (led rouge) : Affiche le mode Impulsionnel (du relais sélectionné) DL2 (led verte) : Affiche le mode Bi-stable (du relais sélectionné) DL3 (led rouge) : Affiche le mode Temporisé (du relais sélectionné) DL4 (led rouge) : Affiche le mode de fonctionnement en portée réduite (du relais sélectionné) P1, P2, P3, P4 :...
-
Seite 22: Mémorisation Du Premier Émetteur
7B) : Mémorisation des émetteurs en utilisant les touches des émetteurs, sans intervenir sur le récepteur La mémorisation d'effectue uniquement avec les touches de l'émetteur. Deux configurations sont possibles : Le récepteur est vierge et il faut mémoriser un premier émetteur 1 émetteur est déjà... -
Seite 23: Affichage Du Mode De Fonctionnement
8- REGLAGE DE LA CONFIGURATION DES RELAIS Les relais peuvent être programmés dans 3 modes différents : Impulsionnel (configuration de base), Bi-stable, Temporisé. Dans chacune de ces configurations, il est possible en outre de paramétrer la fonction de réduction de portée qui diminue la sensibilité... - Seite 24 8D ) Suppression de la portée reduite Répéter la procédure et vérifier que la led DL4 s'éteint. 8E ) Programmation de la temporisation du relais Le temps de relâchement, après lequel le relais, programmé en mode temporisé, relâche, est programmable. La valeur de ce temps peut être paramétrée en utilisant les boutons P1 et P .
- Seite 25 9B) - Affichage du temps de programmation du chaque relais Il est possible d'afficher le temps paramétré de chaque relais programmé en Temporisé. Procédure : Appuyez durant 4 secondes sur le bouton correspondant au relais vérifié. Ensuite appuyer en séquence sur : P4 pendant 1 sec, P3 brièvement. Une séquence de 8 clignotements des leds DL1 et DL2 démarre.
-
Seite 26: Einleitung
DEUTSCH 1 - EINLEITUNG Der Universal Empfänger Plus ist eine Komponente unseres Funksystems 433, um Automationen und elektrische sowie elektronische Systeme fern zu steuern. Dank der hochsicheren Codierung, „Rolling Code“, können wir einen manipulationssicheren Betrieb gewährleisten. Der vom Handsender gesendete Code ändert sich bei jeder Aktivierung und der Mikrocontroller im Empfänger syncronisiert alle eingelesenen Sender im System. -
Seite 27: Funktionen
3 - FUNKTIONEN - Funkfernprogrammierung über Handsender (Einlernen und Löschen der Codes); - 255 Codes speicherbar; - Anzeige der gespeicherten Codes;Anzeige der Speicherposition des letzten empfangenen Codes; - Überschreiben von gespeicherten Codes; - Vollständige Löschung des Codespeichers am Empfänger oder über Handsender; - Programmierbare Relais : monostabil, bistabil und Zeitverzögert, mit Möglichkeit der Reduzierung der Funkreichweite für jedes Relais;... -
Seite 28: Empfängertasten Und Led
EMPFÄNGERTASTEN UND LED DL 1 LED rot : zeigt die Schaltfunktion von Relais 1 und Impulsprogrammierung der Relais 1-4 DL 2 LED grün : zeigt die Schaltfunktion von Relais 2 und Bistabilprogrammierung der Relais 1-4 DL 3 LED rot : zeigt die Schaltfunktion von Relais 3 und Zeitprogrammierung der Relais 1- 4 DL 4 LED rot : zeigt die Schaltfunktion von Relais 4 und die Programmierung der... -
Seite 29: Ferbspeicherung Er Sendercodes Im Empfanger Vom Handsender
7 - FERBSPEICHERUNG ER SENDERCODES IM EMPFANGER VOM HANDSENDER 7.1 Einlernen des 1. Handsenders in einem neuen Empfänger 1. Betätigen Sie die Handsendertasten A und B gleichzeitig, die LED DL1 4 leuchten kurz auf und Summer piept kurz. 2. Wählen Sie das Relais aus nach folgender Tabelle, durch Betätigung der Handsendertaste bis der Summer piept, Signal unterschiedlich für die 4 Relais (LED des gewählten Relais leuchtet auf) Taste A -- Relais 1 Taste B-- Relais 2... -
Seite 30: Reduzierung Der Funkreichweite
8.3 Reduzierung der Funkreichweite Drücken Sie die Taste P (1-4) des gewünschten Relais für 4 Sek. die LED leuchtet und der Summer piept. Innerhalb 2 Sek. Taste P1 drücken und dann P4. Die LED's signalisieren Relaisfunktion und Reichweitereduktion Die Eingabe der beschriebenen Programmierung an einem reichweitereduziertem Relais bewirkt die Löschung der Reduzierung. -
Seite 31: Anzeige Der Eingestellten Zeitverzögerung
9.2 Anzeige der eingestellten Zeitverzögerung Es ist möglich die eingestellte Zeit der einzelnen Relais (1 4) separat anzuzeigen. Programmierbeispiel: Drücken Sie für 4 Sek. die Taste P( 1-4) des gewünschten Relais, Die LED leuchtet und der Summer piept. Drücken Sie P4 kurz und danach P3 kurz. - Seite 32 Manufactured by Elpro Innotek SpA Via Piave, 23 I-31020 S.Pietro di Feletto (TV) Italy Tel. +39-0438-450860 - Fax . +39-0438-455628 Web : www.erone.com - email: info@erone.com T H E S M A R T L I V I N G...