Herunterladen Inhalt Inhalt Diese Seite drucken
Inhaltsverzeichnis

Werbung

Verfügbare Sprachen

Verfügbare Sprachen

Tower fan
User Manual
EFW7000W
EN

Werbung

Inhaltsverzeichnis
loading

Inhaltszusammenfassung für Beko EFW7000W

  • Seite 1 Tower fan User Manual EFW7000W...
  • Seite 2: Please Read This User Manual First

    Please read this user manual first! Dear Customer, Thank you for preferring a Beko product. We hope that you get the best results from your product which has been manufactured with high quality and state-of- the-art technology. Therefore, please read this entire user manual and all other accompanying documents carefully before using the product and keep it as a reference for future use.
  • Seite 3: Inhaltsverzeichnis

    CONTENTS 1 Safety instructions 2 Installation instructions 2.1 Name of components ................6 2.2 Align the column in middle of pedestal with the hole and revolve for fitting.
  • Seite 4: Safety Instructions

    Safety instructions Warning Read rules for safe operation and instructions carefully. •If the supply cord is damaged, it must be replaced by manufacturer or its service agent or a similarly qualified person in order to avoid a hazard. •Indoor use only. •To protect against the risk of electrical shock, do not immerse the unit, cord or plug in water or other liquid.
  • Seite 5 Safety instructions please use the return and collection systems or contact the retailer where the product was purchased. They can take this product for environmental safe recycling. Rules for safe operation •Never insert fingers, pencils, or any other object through the grille when fan is running.
  • Seite 6: Installation Instructions

    Installation instructions 2.1 Name of components 1. Control panel 3. Body 2. Display window 4. Base 2.2 Align the column in middle of pedestal with the hole and revolve for fitting 6 / 12 EN Tower fan / User Manual...
  • Seite 7: Revolve The Arrows Of Two Rotary Knobs About 90

    Installation instructions 2.3 Revolve the arrows of two rotary knobs about 90° 2.4 Assemble the pedestal and body Align three screws with corresponding hole locations and screw tightly. 7 / 12 EN Tower fan / User Manual...
  • Seite 8: Instructions For Operation Of Body

    Installation instructions 2.5 Instructions for operation of body Press a key on the unit to activate a corresponding function. For instance: • P ress “+”, “-” key to adjust 6 speeds of air flow. Note: Sleeping winds and nautral winds function only can adjust 3 speeds of air flow. • P ress “...
  • Seite 9 Installation instructions 2.6 Instructions for operation of body 1. On/Off 4. OSC 2. Mode 5. Drive plate 3. PRO/timer Battery installation Rear cover Push Open Considerate hint: 1. Install the battery with positive side facing up. 2. Effective range of remote control: within 5 m distance and 30-degree deflection in front of product.
  • Seite 10: Other

    Other 3.1 Maintenance instruction The fan requires little maintenance. Do not try to fix it by yourself. Refer it to qualified service personnel if service is needed. 1. Before cleaning and assembling, fan must be unplugged. 2. To ensure adequate air circulation to the motor, keep vents at the rear of the motor free of dust. Do not disassemble the fan to remove dust.
  • Seite 11: Disposal

    Disposal Note: Do not dispose of electrical appliances as unsorted municipal waste, use separate collection facilities. Contact your local government for information regarding the collection systems available. If electrical appliances are disposed of in landfills or dumps, hazardous substances can leak into the groundwater and get into the food chain, damaging your health and well-being.
  • Seite 12 www.beko.com...
  • Seite 13 Ventilateur colonne Manuel de l’utilisateur EFW7000W...
  • Seite 14: Signification Des Symboles

    ! Cher client, Nous vous remercions d’avoir choisi un produit Beko. Nous espérons que notre produit, fabriqué avec une technologie de qualité supérieure et de dernière génération, satisfera vos attentes. Par conséquent, veuillez lire attentivement ce manuel ainsi que tous les autres documents y afférents avant l’utilisation du produit.
  • Seite 15 Tables des matières 1 Consignes de sécurité 2 Instructions d’installation 2.1 Noms des composants ................6 2.2 Positionner la colonne dans le trou central du support, puis tourner pour enclencher.
  • Seite 16: Consignes De Sécurité

    Consignes de sécurité Avertissement Veuillez lire attentivement les instructions et consignes de sécurité. •Si le cordon d’alimentation est endommagé, il doit être remplacé par le constructeur, une personne mandatée pour faire le SAV ou toute autre personne qualifiée afin d’éviter toute mise en danger. •Ce produit est conçu pour un usage en intérieur uniquement.
  • Seite 17 Consignes de sécurité appareil de façon responsable afin de promouvoir la réutilisation durable des ressources matérielles. Pour rendre votre appareil usagé, veuillez utiliser les systèmes de collecte et de récupération ou contactez le détaillant chez qui le produit a été acheté. Le magasin peut reprendre votre produit en vue de son recyclage en toute sécurité.
  • Seite 18: Instructions D'installation

    Instructions d’installation 2.1 Noms des composants 1. Tableau de commande 3. Colonne 2. Fenêtre d’affichage 4. Socle 2.2 Positionner la colonne dans le trou central du support, puis tourner pour enclencher 6 / 12 FR Ventilateur colonne/Manuel de l’utilisateur...
  • Seite 19: Tourner Les Deux Boutons Rotatifs D'environ 90° Dans Le Sens Des Flèches

    Instructions d’installation 2.3 Tourner les deux boutons rotatifs d’environ 90° dans le sens des flèches 2.4 Monter le support et la colonne Positionnez trois vis dans les trous correspondants et vissez fermement. 7 / 12 FR Ventilateur colonne/Manuel de l’utilisateur...
  • Seite 20: Instructions Relatives Au Fonctionnement Du Rafraîchisseur D'air

    Instructions d’installation 2.5 Instructions relatives au fonctionnement du rafraîchisseur d’air Appuyez sur une touche située sur l’unité pour activer la fonction correspondante. Par exemple : • A ppuyez sur la touche « + »/« - » pour régler le flux d’air sur l’une des 6 vitesses disponibles. Remarque : Les fonctions Souffle Nocturne et Souffle Naturel ne disposent que de 3 vitesses de flux d’air.
  • Seite 21 Instructions d’installation 2.6 Instructions relatives au fonctionnement du rafraîchisseur d’air 1. Touche Marche/Arrêt 4. Touche Oscillation 2. Touche Mode 5. Molette de réglage 3. Touche Programmation/Minuterie Installation de la pile Couvercle arrière Pousser Ouvrir Remarque bienveillante : 1. Installez la pile en veillant à orienter le côté positif vers le haut. 2.
  • Seite 22: Autres Instructions

    Autres instructions 3.1 Consignes d’entretien Ce ventilateur exige peu d’entretien. N’essayez pas de le réparer par vous-même. Si une réparation est nécessaire, veuillez contacter un technicien qualifié. 1. Débranchez le ventilateur avant son nettoyage et/ou son montage. 2. Empêchez la poussière de s’accumuler à l’arrière de l’appareil, afin de garantir une bonne circulation de l’air vers le moteur.
  • Seite 23: Mise Au Rebut

    Mise au rebut Remarque : Ne jetez pas les appareils électriques avec les déchets ménagers non triés. Déposez-les dans des infrastructures dédiées à la collecte sélective. Contactez votre administration locale pour obtenir des renseignements concernant les systèmes de collecte disponibles. Lorsque des appareils électriques sont jetés dans des décharges, des substances dangereuses peuvent s’infiltrer jusqu’aux eaux souterraines et contaminer la chaîne alimentaire, constituant ainsi un risque pour votre santé...
  • Seite 24 www.beko.com...
  • Seite 25 Ventilatore a colonna Manuale dell'utente EFW7000W...
  • Seite 26: Significato Dei Simboli

    Leggere prima il presente manuale. Gentile Cliente, grazie per aver scelto un prodotto Beko. Ci auguriamo che lei ottenga i migliori risultati dal suo prodotto, realizzato secondo elevati standard di qualità e con una tecnologia all' a vanguardia. Pertanto, prima di utilizzare il prodotto, legga attentamente tutto il manuale e tutti i documenti di accompagnamento e li conservi per riferimento futuro.
  • Seite 27 SOMMARIO 1 Istruzioni per la sicurezza 2 Istruzioni per l'installazione 2.1 Nome dei componenti ................6 2.2 Allineare la colonna nel mezzo del piedistallo mediante il foro, quindi ruotare per il montaggio .
  • Seite 28: Istruzioni Per La Sicurezza

    Istruzioni per la sicurezza Attenzione Leggere attentamente le regole e le istruzioni per il funzionamento sicuro. •Se il cavo di alimentazione è danneggiato, deve essere sostituito dal produttore, dal servizio di assistenza o da personale qualificato al fine di evitare rischi. •Solo per uso in interni.
  • Seite 29 Istruzioni per la sicurezza di rifiuti, riciclare il dispositivo in maniera responsabile per promuovere un riutilizzo sostenibile delle risorse. Per restituire il dispositivo usato, utilizzare i sistemi di raccolta e recupero o rivolgersi al rivenditore dove è stato acquistato il prodotto. In questo modo è...
  • Seite 30: Istruzioni Per L'installazione

    Istruzioni per l'installazione 2.1 Nome dei componenti 1. Pannello di controllo 3. Corpo 2. Display 4. Base 2.2 Allineare la colonna nel mezzo del piedistallo mediante il foro, quindi ruotare per il montaggio 6 / 12 IT Ventilatore a colonna/Manuale dell' u tente...
  • Seite 31: Ruotare Le Frecce Delle Due Manopole Girevoli Di Circa 90

    Istruzioni per l'installazione 2.3 Ruotare le frecce delle due manopole girevoli di circa 90° 2.4 Montare il piedistallo e il ventilatore Allineare le tre viti ai fori corrispondenti e avvitarle saldamente. 7 / 12 IT Ventilatore a colonna/Manuale dell'utente...
  • Seite 32: Istruzioni Per Il Funzionamento Del Ventilatore

    Istruzioni per l'installazione 2.5 Istruzioni per il funzionamento del ventilatore Premere un tasto sull'unità per attivare la funzione corrispondente. Ad esempio: • P remere il tasto “+”, “-” per regolare le 6 velocità del flusso dell' a ria. Nota: Nelle modalità notturna e naturale, è possibile regolare solo 3 velocità del flusso dell’aria.
  • Seite 33 Istruzioni per l'installazione 2.6 Istruzioni per il funzionamento del ventilatore 1. On/Off (Accensione/Spegnimento) 4. OSC 2. Mode (Modalità) 5. Ghiera 3. PRO/Timer Installazione della batteria Coperchio posteriore Premere Aprire Suggerimenti: 1. Installare la batteria con il polo positivo rivolto verso l' a lto. 2.
  • Seite 34: Istruzioni Supplementari

    Istruzioni supplementari 3.1 Istruzioni per la manutenzione Il ventilatore non richiede particolari attenzioni. Non tentare di riparare il ventilatore da soli. Rivolgersi a personale qualificato se occorre eseguire delle riparazioni. 1. Prima di eseguire pulizia e assemblaggio, il ventilatore deve essere scollegato dall' a limentazione. 2.
  • Seite 35: Smaltimento

    Smaltimento Nota: Non smaltire apparecchiature elettriche come rifiuti indifferenziati, ma servirsi di impianti per la raccolta appositi. Contattare l' e nte territoriale preposto per informazioni concernenti i sistemi di raccolta disponibili. Se le apparecchiature elettriche sono smaltite in discariche, le sostanze pericolose possono penetrare nelle falde acquifere ed entrare nella catena alimentare, diventando un pericolo per la salute.
  • Seite 36 www.beko.com...
  • Seite 37 Turmventilator Bedienungsanleitung EFW7000W...
  • Seite 38: Erläuterung Der Symbole

    Lesen Sie zunächst diese Bedienungsanleitung durch! Sehr geehrte Kunden und Kundinnen! Vielen Dank, dass Sie sich für ein Produkt von Beko entschieden haben. Wir hoffen, dass Ihnen dieses Produkt optimalen Nutzen bringen wird. Dieses hochwertige Produkt wurde mit modernster Technologie hergestellt. Lesen Sie die gesamte Bedienungsanleitung und alle anderen Begleitdokumente sorgfältig durch, bevor Sie...
  • Seite 39 INHALTSVERZEICHNIS 1 Sicherheitshinweise 2 Installationsanleitungen 2.1 Teileübersicht..................6 2.2 Richten Sie die Säule in der Mitte des Sockels mit dem Loch aus und drehen Sie die Säule zum Befestigen..
  • Seite 40: Sicherheitshinweise

    Sicherheitshinweise Warnung Lesen Sie die Hinweise für einen sicheren Gebrauch sowie alle Anleitungen sorgfältig durch. •Ein beschädigtes Netzkabel muss vom Hersteller, dessen Kundendienst oder einer ähnlich qualifizierten Fachkraft ersetzt werden, um Gefahrensituationen zu vermeiden. •Nur für den Innengebrauch. •Um Stromschläge zu vermeiden, dürfen weder das Produkt noch das Kabel oder der Stecker in Wasser oder andere Flüssigkeiten eingetaucht werden.
  • Seite 41 Sicherheitshinweise werden darf. Um Umwelt- und Gesundheitsschäden durch unkontrollierte Müllentsorgung zu vermeiden, recyceln Sie verantwortungsbewusst, um die nachhaltige Wiederverwertung von Rohstoffen zu unterstützen. Geben Sie Ihr gebrauchtes Gerät an entsprechenden Sammelstellen ab oder wenden Sie sich an Ihren Händler, bei dem Sie das Produkt erworben haben. Dort kann das Produkt für das umweltgerechte Recycling entgegengenommen werden.
  • Seite 42: Installationsanleitungen

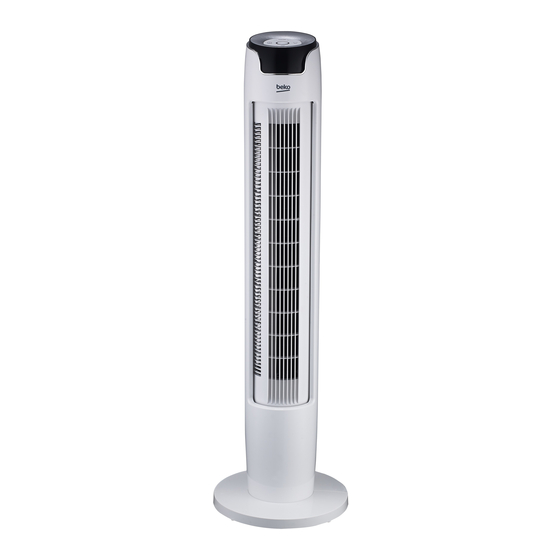
    Installationsanleitungen 2.1 Teileübersicht 1. Bedienfeld 3. Hauptgerät 2. Display 4. Sockel 2.2 Richten Sie die Säule in der Mitte des Sockels mit dem Loch aus und drehen Sie die Säule zum Befestigen. 6 / 12 DE Turmventilator/Bedienungsanleitung...
  • Seite 43: Drehen Sie Die Pfeile Der Zwei Knöpfe Um 90

    Installationsanleitungen 2.3 Drehen Sie die Pfeile der zwei Knöpfe um 90°. 2.4 Sockel und Hauptgerät installieren Richten Sie die drei Schrauben mit den entsprechenden Lochpositionen aus; gut festziehen. 7 / 12 DE Turmventilator/Bedienungsanleitung...
  • Seite 44: Gebrauchsanleitungen Für Das Gerät

    Installationsanleitungen 2.5 Gebrauchsanleitungen für das Gerät Drücken Sie eine Taste am Gerät, um die jeweilige Funktion zu aktivieren. Beispiel: • D rücken Sie die Tasten „+“ und „-“, um eine der 6 Leistungsstufen einzustellen. Hinweis: Für den Schlafmodus und den natürlichen Modus sind nur 3 Leistungseinstellungen verfügbar.
  • Seite 45 Installationsanleitungen 2.6 Gebrauchsanleitungen für das Gerät 1. On/Off (Ein/Aus) 4. OSZILLATION 2. Mode (Modus) 5. Leistungsregler 3. PRO-/Timer-Taste Installation der Batterie Hinteres Schutzgitter Drücken Öffnen Hinweis: 1. Installieren Sie die Batterie mit der positiven Seite nach oben gerichtet. 2. Effektive Reichweite der Fernbedienung: 5 m und 30 Grad an der Vorderseite des Geräts.
  • Seite 46: Andere Funktionen

    Andere Funktionen 3.1 Wartung Der Ventilator muss nur geringfügig gewartet werden. Reparieren Sie den Ventilator nicht eigenständig. Sofern erforderlich, lassen Sie das Gerät nur von qualifizierten Wartungstechnikern reparieren. 1. Trennen Sie das Gerät vor der Reinigung und Installation vom Netzstrom. 2.
  • Seite 47: Entsorgung

    Entsorgung Hinweis: Entsorgen Sie elektrische Geräte nicht über den normalen Hausmüll, sondern getrennt an entsprechenden Sammelstellen. Wenden Sie sich an Ihre Behörde vor Ort, um nähere Informationen über verfügbare Sammelstellen zu erhalten. Falls elektrische Geräte auf Müllhalden oder Deponien entsorgt werden, können gefährliche Substanzen in das Grundwasser und in die Nahrungskette gelangen und dadurch Risiken für die Gesundheit und das Wohlbefinden verursachen.
  • Seite 48 www.beko.com...

Inhaltsverzeichnis