Genius FALCON 14 Gebrauchsanleitung
Inhaltsverzeichnis
Quicklinks
Inhaltsverzeichnis

Verwandte Anleitungen für Genius FALCON 14


Inhaltszusammenfassung für Genius FALCON 14
- Seite 1 Falcon...
- Seite 2 Il est toutefois nécessaire d'en vérifier le seuil 6) GENIUS declines all liability caused by improper use or use other than that for d'intervention suivant les prescriptions des Normes indiquées au point 10. which the automated system was intended.
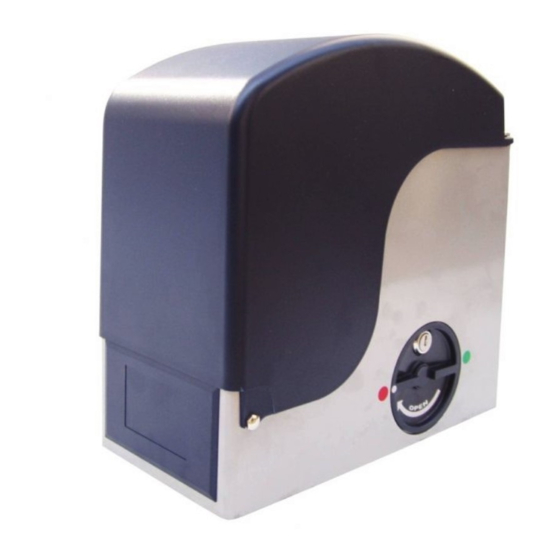
- Seite 3 2. DIMENSIONI Le presenti istruzioni sono valide per i seguenti modelli: FALCON 14 - FALCON 14C - FALCON 20- FALCON 20C - FALCON 15 - FALCON 15 C - FALCON 20 3PH Il motoriduttore FALCON per cancelli scorrevoli è un operatore elettromeccanico che trasmette il movimento all’anta scorrevole tramite...
- Seite 4 ITALIANO 5. INSTALLAZIONE DELL’AUTOMAZIONE 5.3. INSTALLAZIONE MECCANICA 1) Togliere il coperchio motore svitando completamente le 2 viti di 5.1. VERIFICHE PRELIMINARI fissaggio superiori (Fig.8 rif.A), ruotare il coperchio di circa 30° ed Per la sicurezza e per un corretto funzionamento dell’automazione, estrarlo verticalmente.
- Seite 5 ITALIANO 5.4. MONTAGGIO DELLA CREMAGLIERA Note sull'installazione della cremagliera • Verificare che durante la corsa del 5.4.1. CREMAGLIERA DI ACCIAIO A SALDARE (Fig.12) cancello tutti gli elementi della crema- 1) Montare i tre nottolini filettati sul- gliera non vadano fuori dal pignone. l’elemento della cremagliera po- •...
-
Seite 6: Manutenzione
ITALIANO 4) Fissaggio del finecorsa di apertura : portare manualmente il cancello in posizione d’apertura lasciando 2 cm dall’arresto meccanico di finecorsa. 5) Fare scorrere il lamierino sulla cremagliera nel senso d’apertura (Fig.19). Appena il led del finecorsa di apertura presente sull’apparecchiatura elettronica si spegne, fare avanzare il lamierino di circa 20÷30 mm e fissarlo provvisoriamente sulla cremagliera con le viti in dotazione. - Seite 7 2. DIMENSIONS These instructions apply to the following models: FALCON 14 - FALCON 14C - FALCON 20- FALCON 20C - FALCON 15 - FALCON 15 C - FALCON 20 3PH The FALCON automated system for sliding gates is an electro-mechanical operator transmitting motion to the sliding leaf via a rack and pinion or chain appropriately coupled to the gate.
- Seite 8 ENGLISH 5. INSTALLATION OF THE AUTOMATED SYSTEM 5.3. MECHANICAL INSTALLATION 1) Remove the motor cover, fully unscrewing the 2 upper securing screws 5.1. PRELIMINARY CHECKS (Fig.8 ref.A), turn the cover by about 30° and extract it vertically. To ensure safety and an efficiently operating automated system, make sure Withdraw the 2 side guards (Fig.8 ref.B).
- Seite 9 ENGLISH 5.4. INSTALLING THE RACK Notes on rack installation • Make sure that, during the gate travel, 5.4.1. STEEL RACK TO WELD (Fig. l2) all the rack elements do not exit the 1) Place the three threaded pawls on pinion. the rack element, positioning them •...
-
Seite 10: Maintenance
ENGLISH 4) Securing the opening limit stop: manually take the gate to opening position, leaving 2 cm from the mechanical stop limit. 5) Allow the plate to slide over the rack in opening direction (Fig.19). As soon as the opening limit stop LED on the control board goes off, take the plate forward by about 20÷30 cm and secure it provisionally on the rack, using the supplied screws. - Seite 11 2. DIMENSIONS Ces instructions sont valables pour les modèles suivants: FALCON 14 - FALCON 14C - FALCON 20- FALCON 20C - FALCON 15 - FALCON 15 C - FALCON 20 3PH L'automatisme FALCON pour portails coulissants est un opérateur électro- mécanique qui transmet le mouvement au vantail coulissant par...
- Seite 12 FRANÇAIS 5. INSTALLATION DE L'AUTOMATISME 5.3. INSTALLATION MECANIQUE 1) Enlever le couvercle du moteur en desserrant complètement les deux 5.1. VERIFICATIONS PRELIMINAIRES vis de fixation supérieures (Fig.8 réf.A), tourner le couvercle d'environ Pour la sécurité et un fonctionnement correct de l'automatisme, vérifier la 30°...
-
Seite 13: Funzionamento Manuale
Falcon Istruzioni per l'uso - Instructions for use - Instructions pour l'usager - Instrucciones para el uso - Gebrauchsanleitung Fig. 1 Fig. 2 apparecchiatura elettronica di comando alloggiata all'interno ITALIANO dell'operatore o in un contenitore da esterno a tenuta stagna. AUTOMAZIONE FALCON Quando l'apparecchiatura, a cancello chiuso, riceve un comando di apertura tramite radiocomando o qualsiasi altro... -
Seite 14: Manual Operation
RIPRISTINO DEL FUNZIONAMENTO NORMALE. sensitive edges) that prevent the gate from closing when there is an obstacle in the area they protect. Per evitare che un impulso involontario possa azionare il The system ensures mechanical locking when the motor is not cancello durante la manovra , prima di ribloccare l’operatore, operating and, therefore, installing another lock is unnecessary. - Seite 15 note - notes - note - notas - anmerkung - opmerkingen...
- Seite 16 note - notes - note - notas - anmerkung - opmerkingen...
- Seite 17 note - notes - note - notas - anmerkung - opmerkingen...
- Seite 18 note - notes - note - notas - anmerkung - opmerkingen...
-
Seite 19: Fonctionnement Manuel
DESCRIPTION NORMAS GENERALES DE SEGURIDAD L'automatisme FALCON est l'idéal pour le contrôle des zones La automación FALCON, si se instala y utiliza correctamente, d'accès de véhicules à fréquence moyenne de transit. garantiza un elevado grado de seguridad. L'automatisme FALCON pour portails coulissants est un Algunas simples normas de comportamiento pueden evitar opérateur électro-mécanique qui transmet le mouvement au inconvenientes o accidentes:... -
Seite 20: Funcionamiento Manual
antiaplastamiento si el equipo está completado con los Funktionstüchtigkeit Automation, • correspondientes dispositivos para el control de la seguridad. Sicherheitsvorrichtungen und des Erdungsanschlusses sollte Un cómodo desbloqueo manual de llave personalizada hace mindestens halbjährlich durch qualifiziertes Fachpersonal que pueda maniobrarse la cancela en caso de corte de überprüft werden. - Seite 21 FRANÇAIS 5.4. MONTAGE DE LA CRÉMAILLÈRE Notes sur l'installation de la crémaillère • Vérifier que, durant la course du portail, 5.4.1. CRÉMAILLÈRE A SOUDER EN ACIER (Fig.12) aucun élément de la crémaillère ne 1) Monter les trois cliquets taraudés sorte du pignon. sur l'élément de la crémaillère en •...
- Seite 22 FRANÇAIS 4) Fixation du fin de course d'ouverture: amener manuellement le portail en position d'ouverture en laissant 2 cm à partir de l'arrêt mécanique de fin de course. 5) Faire glisser la plaquette sur la crémaillère dans le sens d'ouverture (Fig.19).
- Seite 23 2. DIMENSIONES Las presentes instrucciones son válidas para los siguientes modelos: FALCON 14 - FALCON 14C - FALCON 20- FALCON 20C - FALCON 15 - FALCON 15 C - FALCON 20 3PH La automación FALCON para cancelas correderas es un operador electromecánico que transmite el movimiento a la hoja corredera...
- Seite 24 ESPAÑOL 5. INSTALACIÓN DE LA AUTOMACIÓN 5.3. INSTALACIÓN MECÁNICA 1) Quite la tapa motor destornillando completamente los 2 tornillos de 5.1. COMPROBACIONES PRELIMINARES fijación superiores (Fig.8 ref.A), gire la tapa unos 30° y extráigala Para la seguridad y para un correcto funcionamiento de la automación, verticalmente.
- Seite 25 ESPAÑOL 5.4. MONTAJE DE LA CREMALLERA Notas sobre la instalación de la cremallera • Compruebe que durante la carrera de 5.4.1. CREMALLERA DE ACERO PARA SOLDAR (Fig.12) la cancela todos los elementos de la 1) Monte los tres trinquetes roscados cremallera no vayan fuera del piñón.
-
Seite 26: Mantenimiento
ESPAÑOL 4) Fijación del fin de carrera de apertura: coloque manualmente la cancela en posición de apertura dejando 2 cm desde el tope mecánico de fin de carrera. 5) Haga deslizar la lámina sobre la cremallera en el sentido de apertura (Fig.19). - Seite 27 2. ABMESSUNGEN Die vorliegenden Anleitungen sind für die folgenden Modelle gültig: FALCON 14 - FALCON 14C - FALCON 20- FALCON 20C - FALCON 15 - FALCON 15 C - FALCON 20 3PH Bei der Automation FALCON für Schiebetore handelt es sich um einen elektromechanischen Antrieb, der die Bewegung je nach Tor über ein...
- Seite 28 DEUTSCH 5. INSTALLATION DER AUTOMATION 5.3. MECHANISCHE INSTALLATION 1) Die Motorabdeckung abnehmen, indem die beiden oberen 5.1. ÜBERPRÜFUNGEN VOR DER INSTALLATION Befestigungsschrauben (Abb.8 Bez. A) vollständig abgeschraubt Um die erforderliche Sicherheit und einen störungsfreien Betrieb zu werden, die Abdeckung um ca. 30° drehen und nach oben abnehmen. gewährleisten, ist das Vorhandensein folgender Anforderungen zu Die beiden Teile des Seitenschutzes (Abb.
- Seite 29 DEUTSCH 5.4. MONTAGE DER ZAHNSTANGE Hinweise für die Installation der Zahnstange • Überprüfen, ob während des Laufs des Tors alle 5.4.1. ZAHNSTANGE AUS STAHL ZUM ANSCHWEISSEN (Abb.12) Elemente der Zahnstange auf dem Ritzel bleiben. 1) Die drei Gewindesperrzähne auf • Die Elemente der Zahnstange dürfen keinesfalls dem Element der Zahnstange mit den Abstandstücken oder untereinander...
- Seite 30 DEUTSCH 4) Befestigung des Endanschlags für den Öffnungsvorgang: das Tor von Hand in die Öffnungsposition schieben und dabei einen Abstand von 2 cm zum mechanischen Endanschlags belassen. 5) Das Feinblech auf der Zahnstange in die Öffnungsrichtung schieben (Abb.19). Sobald sich die LED-Diode des Endanschlags für den Öffnungsvorgang auf dem elektronischen Steuergerät ausschaltet, das Feinblech um weitere ca.
- Seite 31 “16”. 25) El usuario no debe por ningún motivo intentar reparar o modificar el producto, 18) GENIUS décline toute responsabilité quant à la sécurité et au bon debe siempre dirigirse a personal cualificado.
- Seite 32 Les descriptions et les illustrations du présent manuel sont sucesivas modificaciones 91/368 CEE, 93/44 CEE y 93/68 CEE. vorgesehen ist. fournies à titre indicatif. GENIUS se réserve le droit d’apporter à tout moment les modifications qu’elle jugera utiles sur ce ïCumple los requisitos esenciales de seguridad establecidos •den wesentlichen Sicherheitsbestimmungen folgender...